The Shed Logo
Search
Close this search box.

Create this outdoor table using a chainsaw

This design for a macrocarpa slab table is a general design. There are variations and you could do the legs of the table differently, but the general rule is to keep it simple. My old man used macrocarpa for fence posts years ago and they’re still in good condition. When I was cross-cutting, it didn’t take much to find out I liked macrocarpa. It has a lovely grain and I like working with softwood. It’s a softwood until it’s been sitting around for a year – that hardens it up.

Using a slab of macrocarpa and a chainsaw, you can make a striking piece of outdoor furniture
By Bryce Mcintosh 

This design for a macrocarpa slab table is a general design. There are variations and you could do the legs of the table differently, but the general rule is to keep it simple.
I mill my own timber and use a Winch Production Frame (WPF) Petersons sawmill with a 10-inch
(250mm) blade and five-foot (1500mm) slabber kit. There are automated versions but I prefer
the hands-on touch. I got the mill because timber merchants were always trying to sell me rubbish and sizes I didn’t want. I worked a logging contract on my own but it’s tough. I get my own timber and that’s why my business slogan is “where the story starts at the stump.”
There are one or two timber yards that sell the macrocarpa slabs if you want to source this timber. The qualities I like about macrocarpa are that it’s long-lasting, and I can work it really well. Macrocarpa is the only thing you get with big enough logs for outdoor single-slab furniture like tables.
My old man used macrocarpa for fence posts years ago and they’re still in good condition. When I was cross-cutting, it didn’t take much to find out I liked macrocarpa. It has a lovely grain and I like working
with softwood. It’s a softwood until it’s been sitting around for a year – that hardens it up.
I did my apprenticeship as a carpenter-joiner. I got bored, then someone said that cross-cutting was the way to go. I went into the bush and didn’t come out for 22 years. Then they stopped all the native timber milling and I was out of a job.
I decided to go and do something for myself. I was tired of making the other guy rich. I have been making furniture at my Lazy Creek Furniture business for eight years, in the yard of my King Country home. I put my experience to use every day, as every day there’s a bit of history I can use. There’s a fair bit packed into my head, all learned the hard way. You’ve got to make mistakes to learn. Now I’m 46.
Why a chainsaw? I use a chainsaw to make furniture because the slab is too big and heavy to move onto the circular saw bench, and it’s too hard for a Skil saw. Anything else is too small and too slow. But in using a chainsaw, you can take too much off very easily. You need a very light touch, as silly as it sounds because a chainsaw is a brutal tool. I use my small Oleo-Mac 940 chainsaw every day, for everything from limbing on smaller trees to making tables. It saves my back as it’s half the weight of any other saw I have, and I’ve got a few.

Macrocarpa slab
Trimming the table top

The table and forms
I have a macrocarpa slab that is 12 months old which I will use for this table. I make the forms out
of Lawson’s cypress – 70-year-old trees that were milled three days ago, and which I cut slabs from using my sawmill I make the table 1.8 metres long and around 800mm wide, a small banquet table that will seat eight people.
The table will sit on 750mm tall legs. Set the table legs at 300mm from the end of the table. The forms are the same length as the table, and the plank for each form seat is 350mm wide. It will sit
on 500mm legs. From experience, I’ve found that 12in (300mm) is not wide enough for the seat; 12inplus is better to sit on and looks better.
I usually use 3in-thick (75mm) slabs for my furniture-making, or sometimes 2in-thick (50mm) slabs. I’ve never been asked to cut anything else. It’s heavy enough to stay where you put it. The guy at the Waitomo store wanted picnic tables that wouldn’t blow over and couldn’t be stolen. They’re still in place after four years. One of my biggest sellers is the half-tonne picnic table.

Sanding the top
Reveal cut-out in bottom of table Stripping bark off legs. legs
Stripping bark off legs

The table
I move the slab to sit on two rests so I can work it. Working in sawmills, you learn how to handle the heavy stuff without killing yourself.
You can work out ingenious systems for the yard – different sized stools for supporting the slabs, and so on. Cut the table top off at 1.8m long. The width will be the width of the log slab. You have no control of the log slab that comes off the tree for the table top. Sometimes the customers don’t like the knots and look of the wood but that’s life.
Cut the table legs from the same slab of timber. Their dimensions will be the same width as the table and 750mm tall. I trim around the ends of the table top with a chainsaw. Round the corners with the chainsaw – you have to make it boozer-proof. I know what it’s like to bump into the sharp corners of furniture.
Strip off the bark from the side in strips with a screwdriver. If you sell the table with the bark on the edges, it will fall off and people will complain. I have been asked to leave the bark on but I won’t. There’s no room for error. The timber exposed under the bark may be partly yellow from the cambium, the fluid between bark and tree.
Now I sand off the surface and the edges. The eye is the most important thing to tell you about
the width you use and what to trim. Always trust the eye-ometer.
Cut the legs out of the macrocarpa slab at the table width and more than 750mm high to allow for trimming. In measuring for cuts, remember to make allowance for the width of the chainsaw cut.
At the bottom of each leg, measure 75mm in and 75mm up to mark an arch 150mm wide with edges approximately 45 degrees to the top line. It doesn’t have to be perfect.
Cut the arch out. Then I sand the legs in my cabin in my shed with the dust extractor on. To square up the top of the legs on which the table will sit, clamp the legs together, check with a square and use a planer.
The table support legs will be placed at 300mm from each end of the table. Turn the tabletop upside down. Take 600mm centres from the centre of the table to the outside of each table support and with a square draw a line across the table bottom. This is where I glue and screw a fillet stop for each table leg. Cut an 8x2in (200mmx50mm) slot in the centre bottom of each leg for the I-beam.
Now I glue the fillet stoppers on and then screw them in. Then I put glue on the top of the legs and
on the stoppers where they butt up against the legs. Check when you are putting the legs on that they are facing the same way as you cut them together, so the slots for the I-beam rail line up. I place the legs firmly on the bottom of the table, then screw through into them, to make sure they stay put. Drill at an angle from inside the leg through the stopper and then put in 4in (100mm) screws. I must use 1000s of these screws in my work. Skewing screws in at an angle is not best practice but when the leg is screwed into the fillet it won’t move.
The glue is a contact adhesive. I use Fuller Max Bond, as it has to be a glue compatible with the oil. Glue’s cheap and I use plenty of it.

Sanding table legs
Slot measured and leg layout
Wearing slot away
Cutting slot
Square and plane legs

I-beam
To brace the table, I make a wooden I-beam from a 1500mm long piece of 6x2in (150mmx50mm) macrocarpa, with 1200mm macrocarpa planks screwed flat side to either edge of the longer plank. The 1500mm piece sits in the slot in the legs. The I-beam must overhang each leg by at least 150mm to allow for a hole for a wedge 70mm long. Cut the wedge at 45 degrees. If the wedge doesn’t fit at first that’s the trouble with chainsaws. They are not dead accurate, but near enough. Screw the I-beam rail into the leg just in case and screw the wedge into the leg. Without screws, in theory, it should be held in by the tight fit of the rail in the slot and the wedge jamming it in.

Support fillet and leg screwed together
I-beam
Drilling slot for wedge
Sawing wedge slot
I-beam screwed to leg

The form seats 
The forms are out of Lawson’s cypress, a close relative of macrocarpa – I use it because I
like it. It has a very distinct smell.
Chainsaw two planks 1.8m long. I have a 350mm-wide plank I milled from the log, so it still has bark which I strip off. The green bark comes off easily from logs felled three days before and milled today.
Shape the plank by rounding the corners with the chainsaw and sanding. The legs for the forms are
500mm tall. I use a jig and have lots of jigs for forms – sooner or later you’re going to get something wrong if you don’t use a jig. I work out the taper of the leg edges by eye. If your eye doesn’t work nothing does. You use what I call the eye-ometer all the time.
When cutting out the bottom of the form legs “think of chainsaw as a rasp”. Apply a bit of artistic
licence. You take the bit out of the centre of the form feet so that it’s on tip-toes; otherwise the form could tip over.
Give the legs of the form and the form seat a good smoothing and sanding. I’ve only had a buzzer
since before Christmas – I used to hand plane before and sometimes it was not square. Now it’s square and faster. Set the form legs 250mm from the end. If they were too much further in, say 300mm, the form might flip up when you sit on it.
Splay the legs at about 45 degrees to the form seat and trim the top accordingly. Glue the legs onto the form and put 4inch screws in. Because the legs are splayed, put a wedge as bracing because the legs tend to press outwards. I’ve never had any give way on me, but you do get big guys sitting on these forms.
Glue the wedge onto the form leg and put in 2 x 4in screws on one side, and 2 x 4in screws from the inside of the form leg into the wedge. To finish, I put wooden plugs on the screws in my furniture. All the filler I’ve seen put in outdoor furniture eventually dries and falls out. Wood can do it better.

Jig for form legs
Wedge hammered in
Cutting out form legs
Cutting reveal in form leg

Oil
Oil’s cheap so use plenty of it.
The oil I’m using is CD50 liquid art. I recommend that oil is put on pretty well straightaway to preserve the timber. The most important spot of all is on the feet of the table. Don’t use linseed oil, because it’s vegetable oil and promotes black fungus growth.
Macrocarpa is prone to surface cracks and this is true of green timber. If the look is bugging you, you can fill the cracks with beeswax and scrape the excess off. People worry about food going into the cracks and so on. The cracks are only on the surface.
The oil will take a week to dry on green timber, but if the timber has already dried for several months, then only a few hours. This oil doesn’t stain clothing which is one of the reasons I use it. If you leave a saw scratch on rather than sanding it off to give the table character, most people like it.
People may not have considered building such big timber outdoor tables themselves. Have a go. Don’t be afraid to get it wrong. People get afraid of having their work pooh-poohed. There have been a number of things I’ve got wrong. But you’ve got to do it. You don’t know until you’ve made mistakes. That’s
how you learn.
* Lazy Creek Furniture, 39 Waitete Road, Te Kuiti 3910. Ph (07) 878 6424

Leg support
Oiling
Bryce McIntosh, here with his dog Whero, is one Nature’s tough diamonds who can tell tales of the bush, pig-hunting and hard times, and still crack a joke. He knows a tree hurts when it falls on you. “I was folded over like a sandwich. I carried on and didn’t realise I had three crushed vertebrae.”

Share:

More Posts

A toddler’s table and chairs

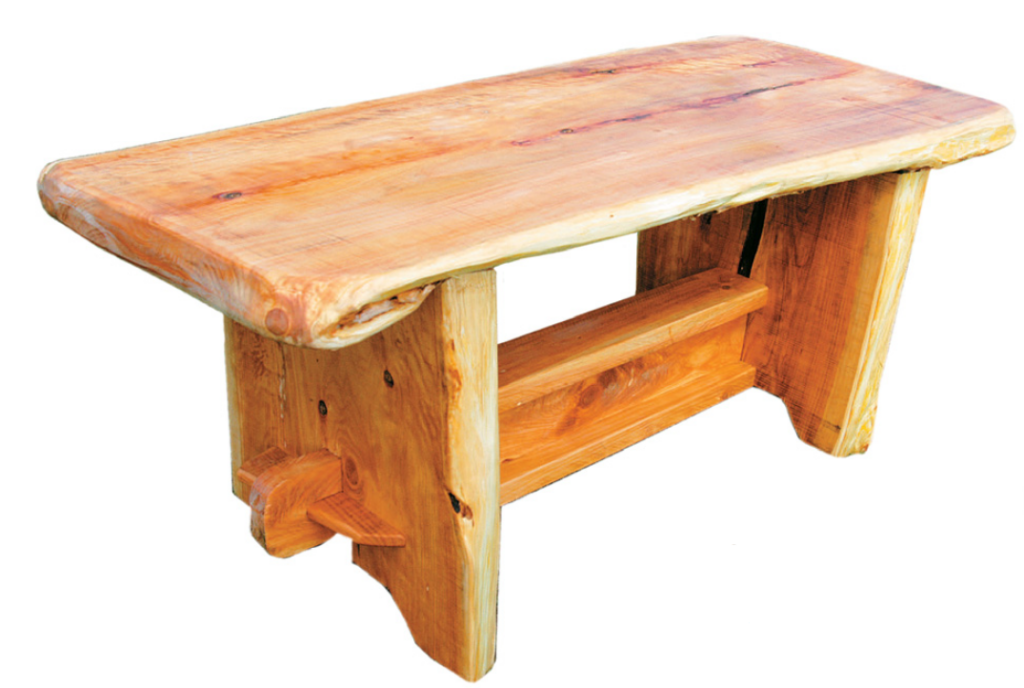
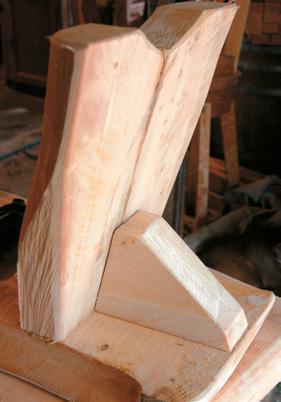
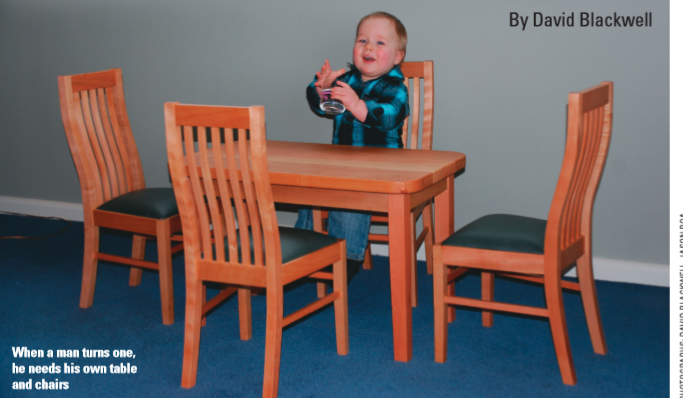
You can follow the basic design in this article or design your own version. Once you have absorbed some of the basics of furniture-making, there is a great sense of satisfaction in designing and making your own. As an amateur hobbyist, I find the process is just as important as the finished product itself, so to check this I decided I would try to make a scaled-down version of an adult chair with a curved back.

Maintain that chainsaw

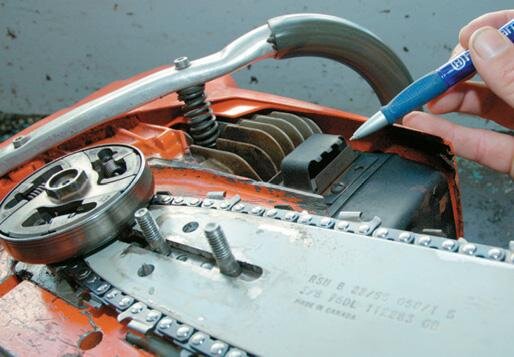
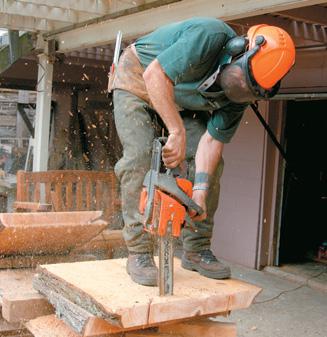
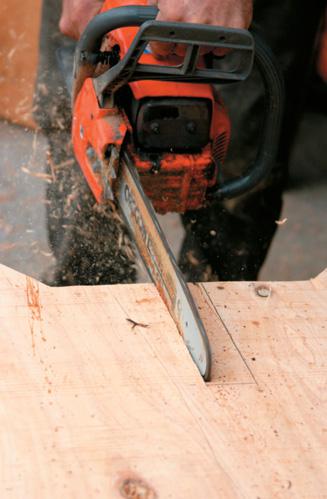
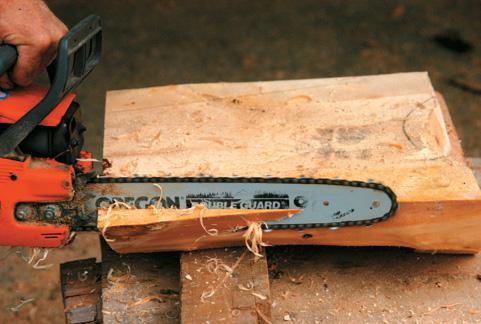
It’s just like another tool. Your chainsaw should have a basic service by a professional shop six-monthly or yearly. But you can do several things to keep your chainsaw up to scratch at home. To show how to dismantle and check a chainsaw, we are using one of the big, forest 95cc machines. A home machine would usually around 30-60cc, but the principle of maintenance is the same.

Build these honeyed Macrocarpa bar stools

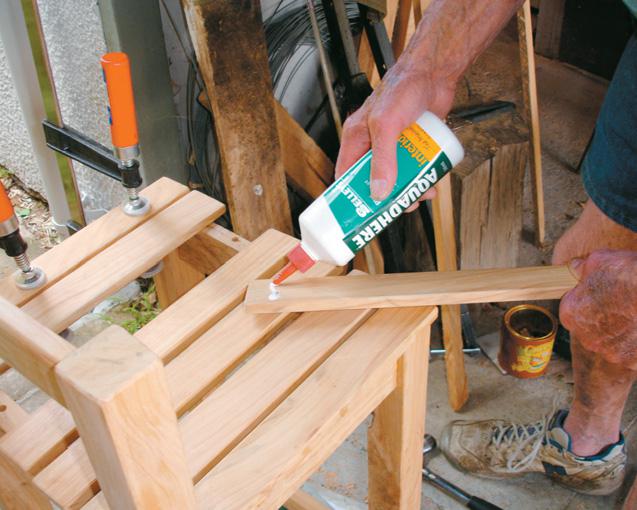
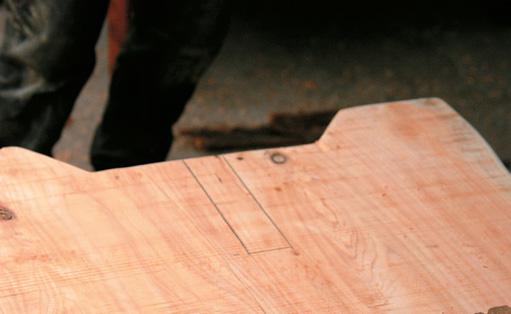
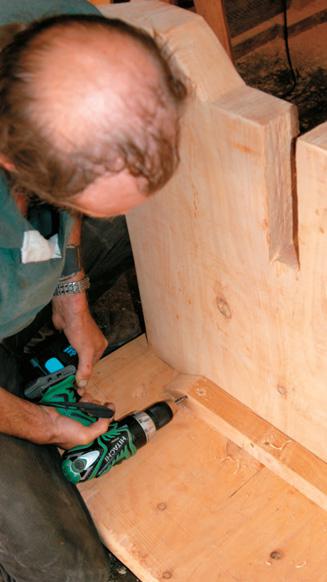
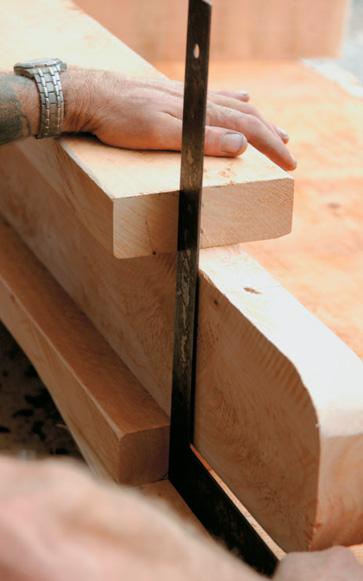
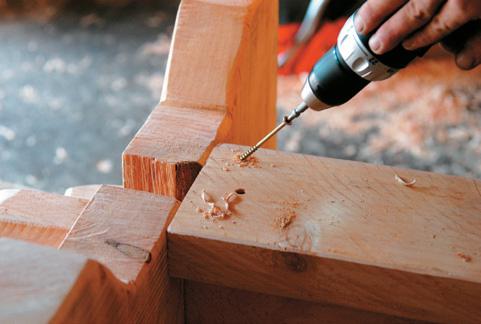
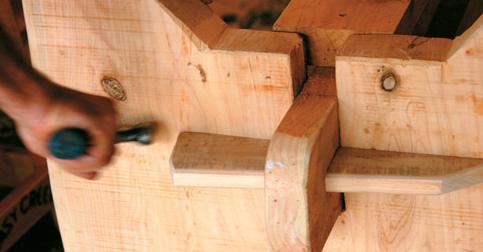
I use dowelling for ease of construction, measuring and cutting as I go, and joining them to the stool with PVA glue. Place the dowels off-centre on the end of the rails, to avoid hitting the dowels coming into the legs at right angles.
The front and rear sections of the stool are put together separately then joined.