The Shed Logo
Search
Close this search box.

Out of the box

The modern incarnation of the chest is the blanket box which sometimes doubles as a seat so it needs to be strong enough to support weight as well. This project is no more than a box with a lid and base. Dowels are the primary jointing method throughout and the top and base use a floating panel within a frame. There is also a small sliding drawer which is also dowelled together.

The chest is a traditional piece of furniture which can be used as storage, seat, or table surface.
Here’s how to make a basic box construction with an inner drawer
By Raf Nathan
Photographs: Raf Nathan 

The modern incarnation of the chest is the blanket box which sometimes doubles as a seat so it needs to be strong enough to support weight as well. This project is no more than a box with a lid and base. Dowels are the primary jointing method throughout and the top and base use a floating panel within a frame. There is also a small sliding drawer which is also dowelled together.
Actually I’ve made hundreds of blanket boxes. Years ago I used to make Baltic pine versions for a large retailer and I had a pretty good system set up to make quality work. I had to give it away in the end though, because there started to be too many other makers undercutting prices. The wholesale price kept dropping to the point where the only way to make them priced low enough would have been to nail the beasts together and forget any sanding. If it gets to that level you have to ask yourself, what’s the point? Ironically, once we stopped making the boxes the retailer came back and asked us to do their custom orders, at a top price.

Cutting list (mm)

Sides 
2390 x 410 x 20
2780 x 410 x 20

Top frame 
2900 x 60 x 20
2350 x 70 x 20

Base frame 
2854 x 60 x 20
2350 x 50 x 20

Panels 
2772 x 362 x 18

Drawer 
2450 x 90 x 12
2365 x 90 x 12

Plywood base (approx)
434 x 372 x 4

THE BOX
Photo 1
Glue up the four box panels and then dimension the panels to size. I plane one edge, saw it to width with the planed edge against the saw fence, and then plane the freshly sawn edge. The panel is then sawn to length.
Photo 2
The dowel locations are marked out on the end grain of the side panels. Here I used 10mm diameter dowels, 50mm long.

Photo 1
Photo 2

Photo 3
Use a jig to drill the holes in the end grain. I drilled deep enough for the dowels to protrude around 15mm as this is the amount of dowel that goes into the holes in the long panels. The masking tape on the drill bit was my depth stop.

Photo 4
The dowel positions are transferred to the mating panel. I used a drill press to drill the panel, however you could use a dowel jig for this. Chamfering the dowel holes with a countersinking drill bit made inserting the dowels easier.

Photo 3
Photo 4

Photo 5
Now is the time to sand the inside faces of the panels – the outside is easy to sand later. Glue and tap the dowels into the short panels.

Photo 6
Do a dry test fit to ensure everything aligns and if okay apply glue to the joint and tap everything home.

Photo 5
Photo 6

Photo 7
I used three clamps on each joint with sticks to spread the pressure. Make sure the box is square and none of the sides are bowed. I placed some spacers inside to keep everything parallel.

Photo 8
The frames use dowels: the top one has three dowels and the base uses two at each joint.

Photo 7
Photo 8

Photo 9
The panel sits within a groove in the frame made with a straight cutter in the router table. The groove is 10mm wide and 8mm deep (the size of the cutter in the router table) and runs the length of the short pieces but is stopped on the longer pieces.

Photo 10
The top and base panels are 18mm thick and have a tongue machined in all edges. The final size of the panel depends on the depth of the groove in the frame and the size of the tongue. I used a 12mm rebating cutter on the panel and made the tongue to be a neat fit in the groove. This fit will be determined to an extent by the weather conditions at assembly time. For instance in very wet weather wood will swell giving a firmer fit.

Photo 9
Photo 10

Photo 11
Sand the panels before gluing the whole frame assembly. It’s important to centre the panels with an even gap all around. Measuring and making line-up marks on the panel and short pieces will ensure this.
The panels need to be without twist when they are glued. The outside of the main box can be sanded now.
The top and lower frame are also final sanded. I use a belt sander and plane to flatten the frame. There will be some variation in alignment at the joint line.

Photo 12
The base is now glued and screwed to the main box.

Photo 11
Photo 12

Photos 13 & 14
Two hinges are used to attach the lid to the box. Fit the hinge in the box first by laying it in position and using a knife to outline it. A small cutter in a laminate trimmer will remove most of the waste. The depth of routing is equal to just under half of the thickness of the hinge knuckle. 
Insert the hinges and fit the screws neatly. Expect variations in individual hinge manufacture and mark each hinge on the inside so that it always returns to its same position. 
The top was then laid in position and a knife used to mark the hinge positions on it. I could not trace all the hinges with the top in the way so each hinge was removed and laid in place on the top to get the location right. Once again the laminate trimmer removed most of the waste with a chisel cleaning up. The hinge can be dropped in place and the holes drilled.

Photo 15
A small chain is fitted inside to prevent the top leaning back too far and ripping the hinges out.

Photo 13
Photo 14
Photo 15

Inner drawer
The drawer was made from pine and fits neatly within the sides. Once the box was made I measured for the drawer and left a 1mm clearance so that the drawer was 480mm long x 389mm wide overall. The sides are 90mm high and 12mm thick. A veneered plywood panel sits in grooves which were sawn into the sides.
My drawer is dowelled together but you can use through dovetails at the corners if you want a more decorative touch.
The drawer slides from end to end on two 20mmx20mm cleats of pine which are screwed along the sides about 120mm down from the top edge of the box.

Finishing off
To soften all the sharp edges I ran the laminate trimmer with a small rounding-over bit along all the top and base edges. The outside edge of the box was relieved with a small stopped chamfer.
The finish chosen was an oil and wax combination. Two coats of oil were liberally applied a few days apart.
Then the box was given two coats of wax and buffed. This box is a simple construction which can be varied by using exposed corner joints or by adding any number of details. As storage, seat or a table surface, the chest is a multi-function furniture item that’s sure to find a purpose in every home.

Share:

More Posts

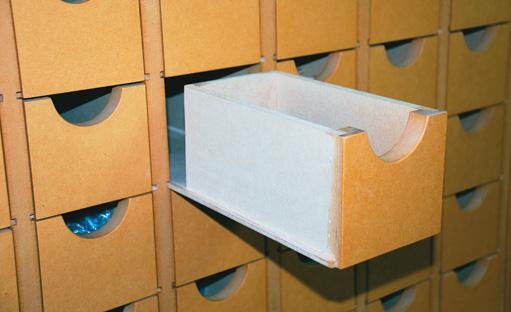
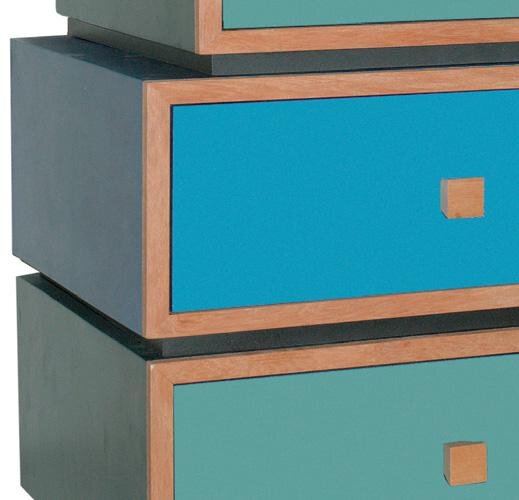
A versatile set of drawers

I have constructed this project to demonstrate the concept of modular design for a set of drawers.
A modular concept allows you to design drawer space to fit your needs. You can add on or change the layout to suit, or you could mix them with shelves to make up modules to fit an awkward space or just to express your creativity.

A toddler’s table and chairs

You can follow the basic design in this article or design your own version. Once you have absorbed some of the basics of furniture-making, there is a great sense of satisfaction in designing and making your own. As an amateur hobbyist, I find the process is just as important as the finished product itself, so to check this I decided I would try to make a scaled-down version of an adult chair with a curved back.

A set of easily made drawers

This easily made set of drawers may be just the answer in your home workshop and it can be made in a day. I have seen many versions of this set over the years and, because of its simplicity, it is easy to make the size and number of drawers to suit your particular requirements.