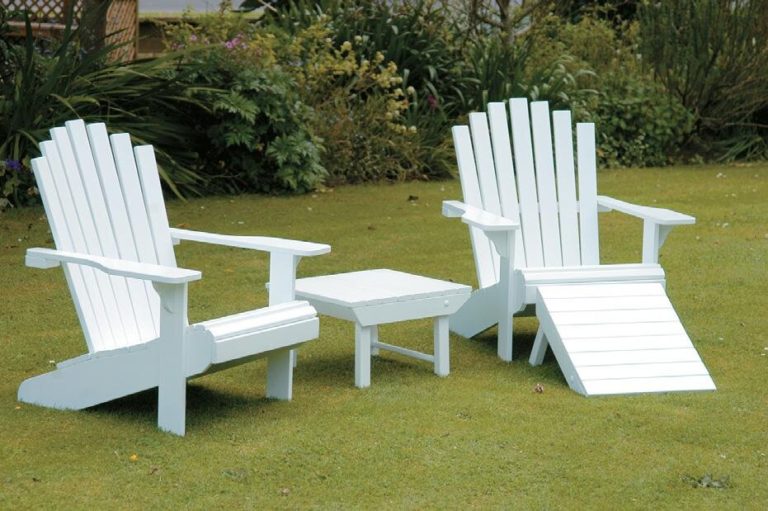
Peter Scott has been making chairs for over 30 years. His straightforward technique and design make for an easily built chair capable of multiple variations.
Peter is an Auckland-based professional furniture maker, specialising in dining chairs and stools.
The one furniture item that even many experienced woodworkers prefer to avoid is the chair. All those compound angles, skewed mortises and tenons and curved joinery tend to bring them out in a sweat. But they need not be the bogey they seem. Like everything, proper planning, the right jigs and some forethought make it far less terrifying.
Getting started
Start by drawing a full-size plan of side elevation and seat plan. You will probably want to make at least four chairs so it is easier to measure angles and sizes and maintain consistency in measuring from a full-size plan. Make a template from 12 or 16 mm MDF or plywood for forming chair back legs directly from the plan shape. I have found the easiest and most accurate method is to punch holes with an awl or sharp point and simply connect up the dots.
The full-size drawing clamped to a sheet of mdf is used to transfer the profile of the legs directly
Here & above:
Transfer key points of the drawing directly to the template with an awl including the positions of all rails and mortises.
Roughing it out
Mark out and cut back legs from rough stock.
Cut the legs a little oversize to allow for machining and shaping. I generally leave stock (especially long pieces) to settle overnight in order to allow any twist or bow to become apparent. Once the timber is cut, various stresses and tensions within it tend to relax and settle means it can be corrected before the final dressing.
Cut stock to rough sizes. Dress the front, rear, and side rails. Allowing for 20mm tenons at either end, leave them a little over-length. Mark all pieces paying particular attention to the face sides and which edge is up. it can distort. Leaving it to In the case of the rails, it is important to mark on these both the face and the upper outside edge.
This is especially important as the side rails are mirror images of each other. It is very easy to get their orientation confused in the forthcoming operations and end up with two left-hand rails.
Marking out the rear leg shape from the template
Back legs
The back legs can be finished with the aid of the template and a bearing-guided flush cutter.
Mark the legs right and left. From the full-size plan, transfer the foot angle (where the leg meets the floor) and cut affect all other joints in the chair.
Mark the template with the positions of the mortises directly from the plan and use this to transfer the marks to the legs. this. It is important that this angle is accurate, as it will affect all other joints in the chair. Mark the template with the positions of the mortises directly from the plan and use this to transfer the marks to the legs.
Side rail angle jig
Set up a jig for cutting side rail tenon angle.
This will also be used later to mortise the legs, so make it sturdy. With a sliding bevel take the slope angle of the jig from the inner angle of the seat plan, where the rail intersects with the back rail.
Use this angle to set the slope of the jig. This jig could be built for use on the tablesaw, cut-off saw, or radial arm. In my case, I simply attach it to the radial arm bench with nails for registration. But it should be possible to clamp this to a tablesaw sled or fi x it to a drop saw.
Make the jig self-contained so it can be repositioned on the drill press later. At this point, left and right assume critical importance. Set up the first rail in position, check again the orientation of the angle and mark this on the top edge of the rail.
Cut the front angle first, with both side rails face down. Check the angle against the seat plan. With the rail in position on the plan, add 40 mm to one end to allow for mortise length at each end (20mm x 2) and mark the orientation of the rear leg angle on the piece.
Place each rail in the jig face up and cut again. Now you have both ends of the side rails cut flush to the legs at the correct angle.
Cutting tendons
Tenons for the front and rear rails are fairly straightforward.
I tend to offset the tenon a little to allow for a larger mating area on one side, and thus more glue area. I cut the tenons on the shaper using a saw or slotting cutter. These could as easily be done on a tablesaw, router table, or by hand.
The first pass is set to take 3mm all round and then the saw is raised to leave a 10 mm thick tenon on one face, be sure to cut the corresponding end on the same face. The side rails present a different challenge and will require a sacrificial fence for the top and bottom edges to ensure the right angle, and to avoid tearout.
The second pass with the cutter raised to 15mm removes most of the waste leaving only a small portion to be cleaned up on the bandsaw.
Matched rail pairs are easier to orientate with visible marks that clearly show the outside edges
Shaping the legs with the template, this could be done on a router table too
Marking the positions of the rails
Setting the slope of the jig from the seat angle
Front legs
With all the rails cut, it is time to finish the legs.
First, dress the legs to their finished size and square them.
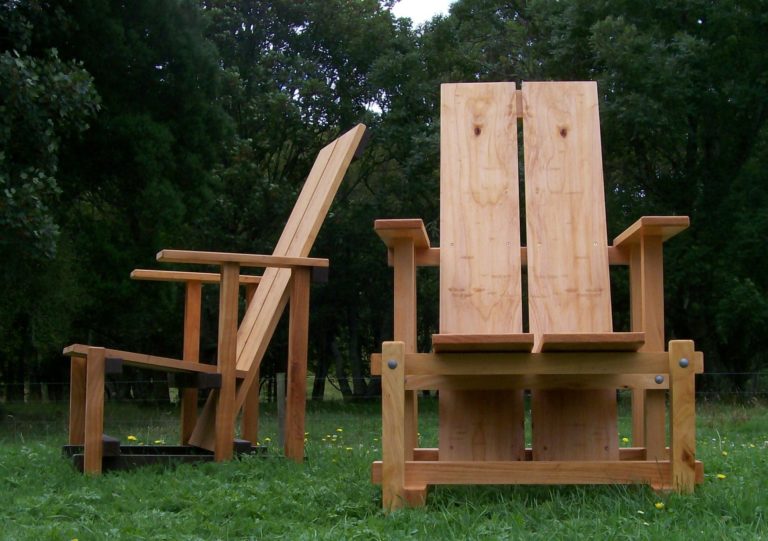
The pattern for the front legs is transferred with a cardboard pattern drawn from the full-size plan. Cut the leg shape on the bandsaw but keep the off-cuts. This chair could also be made with a simple tapered leg if preferred, but the slightly bulbous feet give it a good sense of being grounded and help to balance the design.
Clean up the legs by sanding the bandsaw marks out. Mark the legs to show the left and right and the face sides. I usually do it with a simple mark on the outside corner of the leg. Now mark the position of the mortises on the inner faces of the legs directly from the tenons of the two intersecting rails (side and front). Mark the mortise of the side rails in a different colour on both the front and rear legs, as these mortises will have to be cut to the same angle as the tenon cheeks on both these rails. This is where that jig we made earlier comes into its own again.
This side is face down in the jig
Cutting the side rail tenon shoulders. Note the fence used to maintain the angle of the rail
Ready for the second pass with the waste marked
Cutting mortises
I usually use a 10mm dowelling drill on the horizontal borer, but these mortises could all be drilled out on the drill press or with a router set-up.
The side rail mortises are laid on the jig crosswise so the mortise angle will match the angle of the rail tenon. It pays to be cautious at this point and re-check the orientation against the matching tenon. Remember that the opposite leg will be reversed in the jig. Set the drill’s depth gauge to about 22mm to allow for the extra depth of the tenon at that angle.
Drill the mortises out and clean up with a sharp chisel. The stretchers (lower rails) will also have to be housed in the front and rear legs at the same angle as the side rails.
Cut these at the same time as the side rail mortises. The off-cuts from forming the front legs could come in handy here to level the formed leg and ensure the mortise is square.
Waste trimmed to mitre angle
The side rail showing the angle of the tenon
Cutting the leg pattern on the bandsaw
Back leg mortises
The profile of the back leg is square at the junction with the end and side rails.
This makes set-up easier and gives a fi xed angle for reference. The back seat rail mortise is fairly straightforward to position and cut as it is square to the rail.
The edge of the seat rail coincides with the edge of the leg here (there is no set back). The side rail mortises are cut in the same manner as the front rail on the jig. Again pay particular attention to the angle that the rail intersects the leg.
The rear legs present a further challenge where the two tenons intersect. Once the mortises are cut and cleaned up, test-fit the rails in each socket. Mark the position of the side rail where it projects into the back rail mortise and similarly where the back rail encroaches on the side rail mortise. Cut the waste away, leaving the lock projection on each rail, test-fit both together.
The front leg mortises should not meet so this is not necessary there. Once all mortises for the seat area are cut, dry-assemble to determine the lengths and positions of the stretchers. Cut these to their final size, allowing for the mortise depth
Marking the position of the front rail on the left leg
Cutting the mortise for the front rail
Checking the angle of the side rail mortises in the right front leg. The left leg will be reversed in the jig (ie. facing away)
Top rail lumbar rail and centrepiece
The top back rail can be shaped on the bandsaw and sanded.
It’s best to make up a template to transfer the pattern. The fretwork can be cut on a jigsaw or fretsaw. The two outside rails are cut from the same piece to preserve the grain pattern.
Once the mortises are cut for the upper and lower back rails, lay these out to determine the best arrangement.
Mark the position of the mortises in the lumbar rail and the crest rail and cut them. I don’t usually tenon the top of the fretwork. It should house neatly into the top rail. If the joint is a good fit, it isn’t necessary to glue this either.
Drilling out the front leg mortise for the side rails
Cutting the mortise for the lower stretchers. Bandsawn off-cuts level the leg
Marking out the back rail mortise in the rear legs
Final fit and glue up
Finish sand all parts now. You don’t want to do that after assembly.
Now dry-fit the whole assembly and check for stability and out-of-square. Cut the rebates for the seat in the front legs.
I usually glue up the back of the chair first and check that that is flat and free from twist. Lay the completed back leg assembly on a flat surface and check that it does not have excessive rocking, which indicates twist or something out of square.
Now glue and clamp the seat section, again checking for warp and stability. It is helpful to have a caul (clamping block), shaped to the profile of the rear leg, for clamping the seat assembly. Once the glue is dry we can lightly clamp the seat blank in position and place the corner blocks.
Cut their angles from the seat plan, and check them in position. Glue and screw them into position. The seat blank is cut 2-2.5mm loose all round to allow for the upholstery material. How much to leave will be determined by the thickness of the material used. It would be wise to check with a sample of material first. The upholstered seat should be a good fit with-out being fixed in. All that remains is the finish. This chair has been oiled in an oil-varnish mix.
The centre rails test-fitted.
The chair clamped. Note the angle of the side rails