By Louise Fuller
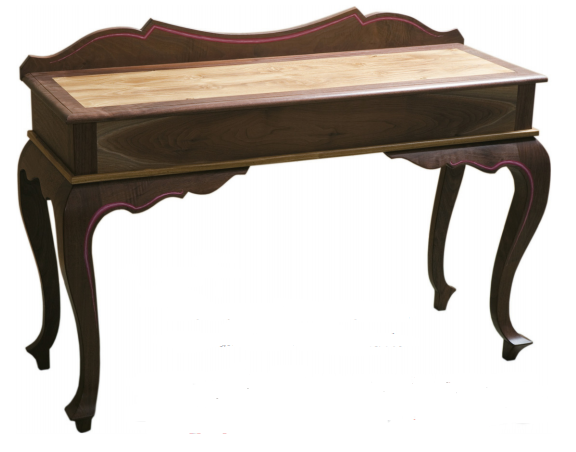
Curves in veneer add a flourish to a simple cabinet
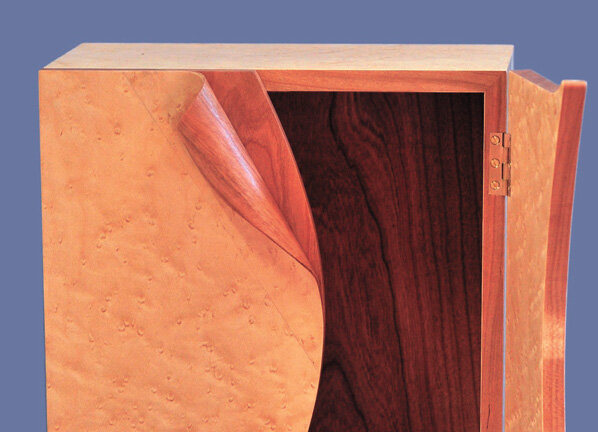
This cabinet pictured above demonstrates how some creative veneering techniques can transform a simple wall cabinet.
This piece was originally designed as a bit of fun: a simple carcase construction with a handle detail that would provide me with a challenge while satisfying my passion for curvy, organic forms. I made the original version of this cabinet, named Islay Wall after my grandmother, in maple with a bloodwood veneer. The contrast in timber and the handle detail made for a striking piece and I was commissioned to make another in cherry with birdseye maple veneer. This allowed me to refine the techniques for making the handles. For an otherwise simple project, the handles really are the crux, so the carcase is a great place to become familiar with veneering on a simple level before taking it to a higher level on the handles.
Lay out the veneer, the platens and the substrate in order. Keep the veneers face down.
The beauty of veneering Veneering offers the ability to create free flowing forms with ease. It provides great strength when layered as a ply and allows us to make shapes such as these handles that are not suited to solid timber construction. I experimented with carving the handles but couldn’t overcome the weakness posed by short grain. Veneer offered more integrity; I could create thin curves, only 4 mm thick, that were stronger than a 10 mm thick carved equivalent.
Preparing stock
For this project, I used cherry and birdseye maple veneer.
Machine and dimension all your stock slightly oversize and leave to settle for a few days to allow for any movement. Machine all your stock to final thickness but leave them over-length and over-width to allow for tidying up after veneering.
Use a roller for even glue coverage. Apply glue only to the substrate.
Placing the veneer: note the tape ready to hold the sandwich together.
Preparing the veneer
Layout your veneer and select the pieces to be used, considering the grain orientation and selecting the best pieces for the face side of the doors and carcase components.
Prepared veneers have a face side and a back side. Hold the veneer up to the light and flex it slightly. You will see that where it has been sliced, the face side has a raised grain and the other has a pitted grain. If you are book-matching the doors, you can use the back side as the face but be careful not to catch the grain when cleaning up. When you have selected your veneer pieces, lay your oversize components onto the veneer and mark around them. Label your ve-neer on the face side lightly with a coloured pencil and cut out pieces with a sharp knife or veneer saw. Cut the veneer to exactly the size of your oversize components. If your veneer is any bigger, it will be prone to flexing and may be damaged during pressing or may not take effectively.
An even pressure on the components helps the veneer form strong bonds. We make card and MDF platens to sandwich the components. The card prevents the veneer from sticking to the MDF and the MDF spreads even pressure. The card and MDF are cut to allow a 1 mm overhang all-around – any big-ger than that and the platens may flex under pressure and not press the veneer effectively. Once your MDF platens are dimensioned, soften the top edges of each platen and dull the corners to eliminate any risk of perforating or damaging the bag press.
Components in the press
Pressing the veneer
To press the veneer, I used the vacuum press we have at the Centre for Fine Woodworking. The bag press also allows you to press curved or shaped components, such as the handles for this project. You could go the more traditional route and use clamps and weights or a press but the vacuum/bag press offers great versatility, allowing you to press components of varying thicknesses at the same time.
Set up the press with a suitable baseboard and lay out your components, veneer, and platens. Be methodical with your layout as it is easy to make mistakes with orientation.
With veneering you need to ensure an even coat of glue that is not too thick, so use a roller to apply the glue. Work quickly with the glue as the veneer will begin to curl as soon as it contacts. Apply the glue to the components and not the veneer. If you use glue with a longer open time, you will be able to press all your carcase components at once. Tackle the glue application one component at a time, apply the glue, and then sandwich the veneered component with card and MDF, taping over each edge to hold the veneer flat while you tackle the next one. Leave in the press for eight hours.
The mitre with biscuits cut to help with alignment and strength.
Dry fit the carcase.
Dimensioning veneered components
Cover the veneered components you are not working on with a board to keep the moisture gain or loss equal to avoid warping.
If the veneer has slipped and is overhanging, you may need tflush your face edges carefully by hand before dimensioning but, if all is well, re-run your face edges on the buzzer. Most veneers will cope well on the buzzer without chipping, provided it is set to a very fine cut. If in doubt, use new blades.
When cutting veneered components, use a baseboard and top board to prevent breakout of the veneer. Dimension your components and cut the mitres. Take care to ensure that they finish square, parallel and of equal length. In this case, I cut biscuits into the mi-tres to locate and add strength but grooves and loose tongues would do the same job.
Inside faces
Take care with the veneer when cleaning up the inside faces. You can use a sharp scraper or just go straight to sandpaper. Cut to 320 grit. Be sure not to round the edges of the mitres as this will leave a shadow line when glued.
Band cramps with V blocks are the best way to clamp small carcase.
Cutting grooves for the shelves.
Gluing up
Gluing up mitres can be nerve-wracking. To prevent any unpleasant surprises, do a dry fit first and check for any trouble spots. The addition of biscuits will eliminate any sliding and help keep things square.
When gluing mitres I prefer band cramps and well-made glue blocks to distribute the pressure. As we are dealing with veneer it is a good idea to put masking tape on the glue blocks to prevent them from sticking to the carcase.
When the joints are pulled up, check for square using diagonal sticks or a rule. Clean off excess glue, especially on the inside corners. Check the mitres are closed and that the face edge of the car-case is flush all round. Use wind-ing sticks to check that the cabinet has no twist.
Mark your rebate for the back panel with a cutting gauge. Make the gauge line really positive to minimise the risk of your veneer breaking from the router. Then, with a bearing-guided cutter, cut a rebate into the inside back edge of the cabinet for the back panel. Fin-ish the corners of the rebate using a sharp chisel. For my back panel, I pressed prepared cherry veneer on to 6 mm MDF.
Back panel rebate.
Jig making for the router
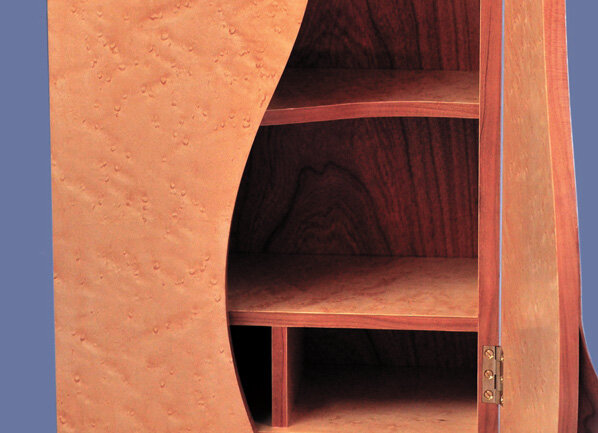
Once the carcase is glued up, rout the grooves to house the shelves and divide. To ensure accuracy it is wise to make MDF jigs and use a small router – because it needs to fit inside the cabinet now it is glued – with a ring guide.
Make MDF templates for shaping the doors and shelf if you don’t wish to shape them by hand. En-sure that your templates are a good 50 mm over-length on either end, allowing you to run in and run out of your curve without risking any damage as the router can have a tendency to bite into end grain. Once shaped, the shelves and di-vide should be fitted before running the grooves. Set the table router with a fence to cut the stopped grooves in the shelves and divide, and then machine the loose tongues to fit.
Gluing up, stage 2
Do the final clean up of shelves, di-vide and inside the carcase, sand-ing through to 320 grit and soften-ing any sharp edges. Then glue in the shelves and divide, ensuring that they are flush with the rebate in the back of the carcase. Clean off excess glue with a clean wet rag to avoid having to go anywhere near the veneer with a chisel.
Now the back panel can be fitted and finish-sanded, ready for polishing.
Doors marked out.
Fitting the doors
With the doors still over-width and over-length, use your template to mark out the curves.
Check that the curves on both doors will marry up evenly; this may require adjusting the vertical alignment of the doors to close any gaps. Then, using a baseboard, bandsaw the curves leaving on 2 mm for flushing with the router. Set a flush cutter in the table router with the bearing on top and copy rout the doors using your template and a baseboard.
Lay them on the cabinet, mark out and fit your doors. Given the curves and overhanging detail, this can be a lengthy process that requires a fair amount of hand shaping.
To shape the protruding curve on one end of the doors, I made simple guide blocks to protect the ve-neer from breakout and allow the use of a file. Fit the doors allowing a 1 mm gap between them. I recommend fitting your hinges and hanging the doors before fitting your handles.
Cutting the doors.
Flush cutting the doors with a bearing guided cutter.
Fitting your hinges
For this project I used the heavier, solid brass butt hinges; these are great because you can square them up and polish them for a superior quality finish. Determine the position of the hinges on the carcase and then lay out by scribing around them with a knife. If any less than half the knuckle is protruding from the side of the cabinet, it is likely the doors will bind.
Making the handles
Now for the fun part. The handles are certainly the crux of this project; the first one may not go to plan, but this is an opportunity to experiment.
The handles are made first and then glued into a rebate in the doors. Set out and cut your handle veneers. They should be of square dimension and well oversize to allow for shaping. For maximum strength, the handles are layered with opposing grain directions. Choose your top and bottom veneers and orientate, considering the grain. I used four layers of veneer for my cabinet; you may wish to use more, but any fewer will lack strength. Every species of veneer is differ-ent, as are their tolerances. Because we are pulling them around such a tight curve, it is wise to experiment.
For the original cabinet, I used bloodwood veneer and maple veneer and found them to be brittle, partly due to their age. I had issues with cracking and splitting as they were rolled into the curve; I over-came this in three ways. Firstly, I settled for a larger radius; secondly, I slightly thinned the glue to soften the veneer and, thirdly, I covered the bottom veneer with masking tape to prevent it from cracking. I found that the birdseye maple and cherry veneer were more forgiving, allowing me to form a much tighter curve.
Below, I explain how I created the handles. This technique is not set in stone, but I suggest you use it as a guide.
First, decide on the diameter of the curve and find or make a rod to suit; I used a large-section dowel. Next, you will need cramping blocks that will fit tightly around the veneer and rod to apply pressure where the bag cannot reach. For the cramping blocks, I drilled holes, equal to the diameter required, through some 50 mm hardwood off-cuts, then split them in half. I also made an MDF platen to hold the rest of the handle flat to the press. Be sure to really soften the edges of the blocks to get good contact with the bag.
Pressing the handles
Handle ready for clean up after the press
Gluing up the handles
Lay out and orientate your veneers. Finish-sand the inside and outside veneers as they are difficult to get to once pressed. Cover the back of the bottom veneer in veneer tape or masking tape to help prevent splitting. Stack up the veneers and apply masking tape along the edge to be rolled from, to limit sliding. Apply glue to each layer and slowly roll the veneers around the rod. I recommend rolling and unrolling it once to loosen the fibres before placing in the press.
Once in the press, use cramping blocks to support the veneer against the dowel, and the MDF platen to hold the flat section down to the press. It helps to have an extra pair of hands to assist with gluing up the handles. If possible, leave the handle overnight to ensure the glue has gone off.
Once pressed, you can shape and clean up the handles. Tidy up the curves and carefully shape with files or paper. Make any cuts necessary with a fine piercing saw. Once the curves are cleaned up, lay the handle onto the door, determine the angle and cut it on the bandsaw using a baseboard. Shoot the joint edge then lay the handle onto the door and mark its position carefully with a scalpel before tidying the handle and finish-sanding as necessary.
Gluing the handle in place
Routing the rebate in the doors
Next, rout a rebate into the doors to house the handle.
The scalpel line should eliminate any risk of breakout with the veneer. Set the router with a straight cutter and cramp a straight edge onto the door as a guide. The depth of cut is de-termined by your veneer; ensure that the top surface of the handle finishes dead flush with the top ve-neer on the door. As we are dealing with 0.6 mm veneers, there is no room for flushing from the top sur-face though you can remove a little waste from the bottom surface of the handle, if necessary. Once the rebates are routed, fit the handles to the rebates and clean up the joint edge.
Gluing on the handles
Dry-fit the handles and experiment with cramping options. The cramp-ing blocks that supported the handles in the press are useful for this glue-up. Apply pressure crossways as well as downwards to minimise the glue line. With this handle technique, you will never eliminate the glue line but you can limit it.
Cutting the rebate in the door
Door ready for finishing
Fitting the magnets
I used concealed magnets to close the cabinets. The magnets are glued into holes in the carcase and the door plugs placed over them. Make sure the magnets in the carcase match those in the doors, and that you have the polarity correct.
Adding the magnets.
Clean up
When cleaning up the remaining parts, go carefully through the finer grits, softening any sharp edges. Apply a blonde shellac and wax, but leave a strip at the top on the outside of the back panel to allow for the cleat to be glued and screwed in. Once polished, the back panel can be glued into the rebate. Cleaning off any squeeze-out will be much easier now the surfaces are polished.
Now make the cleats for hanging the cabinet. The cleat on the carcase should be a snug fit with a 45º angle along the bottom edge and glued to the back panel with the longest face out, so the 45º angle is not visible. The cleat for the wall should be slightly shorter for ease of hanging, with an opposing 45º angle along the top edge and screw holes for fixing to the wall.
With the cleat in, the doors can be hung. Stand back and admire your creation.