Keep at the cutting edge with plane blades for fine woodworking
By John Shaw
Diamond honing complete. Shiny from edge to edge
At the Centre for Fine Woodworking, the first area we tackle with our students is sharpening.
To the observer or beginner, this subject appears complex and laden with conflicting advice. Yet it is important to get tools sharp without much fuss and in a manner that is easily repeatable. We have developed and teach initially a standardised approach which enables us to equip students so that they will very quickly be able to make wafer-thin shavings with their planes and clean-controlled cuts with their chisels.
With this fundamental understanding in place, they can explore steel types, refine cutting edges more easily and be better informed in making expensive tool purchases. With the sterling help of my son Digby Shaw as photographer, I’ve endeavoured to set this process out below. Hopefully, it will be helpful to you.
Stones and grits
When honing a cutting edge on a steel blade, you are progressively over three or four stages reducing the size of the scratches on the two faces which meet up to make the sharp point.
The much-vaunted “mirror” edge simply refers to the stage where we cannot easily see the scratches with the naked eye and hence it looks smooth and shiny. This process, therefore, requires several sharpening stones with finer and finer surfaces (325 grit, then 1200 grit, then 6000 grit). Sometimes these follow on from the use of an extremely coarse (often around 60 grit) grindstone. At the Centre students like the modern water-cooled sandstone grinders now available.
Several members of the local woodworkers guild here in Nelson have put a particular type of washing-machine motor to good use when building their own version of these. The first actual stone or hone we use is a diamond hone. This must be of good quality and guaranteed flat.
Generally, either a coarse (325 grit) or fine (600 grit) work well. The second is a Japanese water stone in the 1000 to 1200 grit range. The third is also a Japanese water stone of 6000 grit known as a finish stone. There are finer stones which are great to play with if you’ve got the dosh but initially this is all that’s required to make your cutting tools work well.
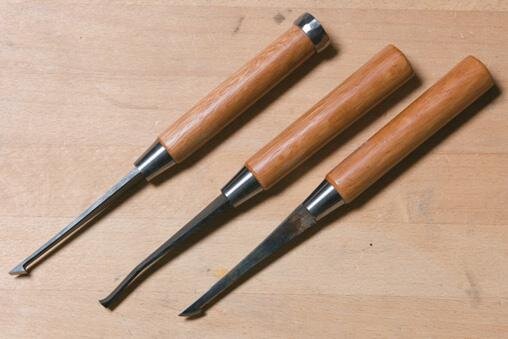
Sharpening stones (left to right) diamond, 6000 and 1200 grit
Flattening stones by rubbing together
Clean, flattened fine stones
Flatness
Having been woodworking now for well over 30 years, I have a collection of various stones that I have tried and retired.
But nothing has convinced me of late to give up on Japanese water stones when sharpening planes and chisels. They are clean to use, relatively cheap and, critically, are very easy to return to flat when they wear. When sharpening plane blades and chisels, flatness on the back face (the one without the bevel) is critical in a couple of areas:.
In planes, so the cap iron can contact the back of the iron effectively with no gap for shavings to jam in. In chisels so that we have a reference face to allow us to cut and pare meeting faces of a joint flat and true
Clean, flattened coarse stones
Flattening with wet and dry paper on plate glass
Grinder, stones
We, therefore, need to prepare and subsequently maintain our grinder and flatten our stones.
Firstly, following the manufacturer’s instructions make sure your grinder is true (i.e. not curved up or hollow) across the width of the stone by dressing with a stone dresser. This will also expose new grit allowing more efficient cutting. The diamond hone should be flat. Don’t use it if it isn’t.
With the Japanese stones, you have two options to ensure flatness. If you have a pair of the same grit, rub them face to face until they are clean over the whole surface. They should now be flat. Alternatively, if you have only one stone of each grit, they can be flattened on wet and dry paper of around 120-150 grit placed on plate glass around 9 mm thick, using water to lubricate the cutting.
Use different pieces of wet and dry for different grit stones and wash everything off between stones. Basically, you don’t want to contaminate any stone with larger grit particles. This stone flattening should be done often.
Before flattening
After flattening
Assessing the blade
In the photos, I am using a new plane iron manufactured by Ron Hock of California (funnily enough he’s having them made in France now). But the process described applies to any European-style plane blade, used or new, small or large.
One issue that arises with used blades is pitting. This is where rust has created craters or pin pricks on the steel of the blade. Quite simply, pits or craters on the back of the blade will prevent us from creating a sharp edge there where we want it. If this is the case, the end of the blade must be ground off very carefully until no pits are evident. (See “Too much heat” below about heat spoiling the hardness of the blade.) If it not possible to grind off the pits, the blade should be abandoned. I have a box of such pitted blades which we use to make very satisfactory marking knives.
Honing on diamond hone
Newly honed face beginning to appear
Onto coarse Japanese stone
Surface changes to matt grey
Flatting the back
‘Flatting’ is the term used to describe flattening the back of the plane iron.
Lubricate your diamond hone with a couple of sprays of water. Place the back of the iron, i.e. bevel up, so that about 20 mm of the blade is on the hone. Apply downward pressure with your fingers so that the blade does not tip or roll and begin sliding the blade up and down the stone. Start slowly at first until you are comfortable. After about ten passes, lift the iron and have a look.
The cutting of the hone should be very apparent as a shiny patch of coarse scratches. Keep going until this stretches across the whole of the blade for at least 10 mm back from the end. Do not allow the blade to roll in any way. Reverse the hone so you use the opposite edge every 30 seconds or so. Now wash off the iron and repeat the process on the 1200 grit stone.
The nature of this 1200 stone is such that it should always be soaking in water. But it will also need to be sprayed with water regularly while being used. If you have prepared the stone well and the back of the iron is well flatted from the diamond hone this should take only 30 seconds or so and result in the honed face now looking a slightly smoother matt grey all over. Remember to keep turning the stone end-for-end and re-flatten it regularly.
Any hint that the blade is only being honed on the outside edges points to a hollow stone— flatten it immediately. Once again wash off the blade and now move to the 6000 grit stone. This stone should be stored dry and be lubricated with water just prior to use. It is traditional to rub this stone with a Nagura stone prior to use in order to create a paste and expose new grit which allows the stone to cut more efficiently. This is not essential.
Use the same holding technique, keeping the blade flat on the stone as you slide it up and down. This stone naturally cuts slowly. Be patient and observe the matt grey area that you honed on the 1200 grit stone turns to a smooth shiny bright surface. Once this has spread right across the end of the blade we are ready to work on the bevel.
Using the Nagura stone to create paste on fine Japanese stone
Adjusting the grinder angle. Note the blade clamp
The resulting fine shiny surface
Grinding
The majority of the blades that are used in our hand woodworking are made from the same material—high carbon steel. Therefore we can rely on cumulative experience and be reasonably certain that the grinding angle of the blade should be an included angle of around 25º.
But don’t spend hours getting this exactly right as anywhere from 23º to 27º will be fine. Also don’t be too concerned if the grind you produce isn’t exactly 90º across the blade. Our planes generally have lateral adjusters built-in to allow us to bring the blade edge true to the bottom of the plane.
Whatever type of grindstone you are using, you will require some kind of support or clamp. Once it is set, it will enable you to return the blade to the same position against the stone. Slow water-cooled grinders will allow you to grind continuously until you have a complete, single hollow grind created by the curve of the stone. This is a great advantage.
Grinding. Note water cooling the blade
Feeling for the burr
Too much heat
If you are using an electric grinder, be careful as this is where things can rapidly go wrong.
The hardness in the steel can be swapped for an unusable softness by building up too much heat in the blade you are shaping. What’s worse, this is only obvious when it is too late, when a bluish coloring seeps into the steel, spreading from the source of the heat.
Therefore, with this type of grinder, the trick is to give a single light stroke, almost a wipe, of the blade across the stone followed by inserting it immediately in cold water. It is obvious why a guide which allows accurate replacement in the same position is critical.
Setting the heel and toe of the hollow grind onto the coarse stone
Back of the blade lifted slightly. Ready to hone the microbevel
Honing the micro-bevel
When you are happy with the grind, it’s time to return to the stones. This time we use only the 1200 and 6000 to create a thin, secondary micro-bevel at approximately 30 degrees.
The easiest way to achieve this is to grip the blade one-handed and position the toe and the heel of the hollow grind hard down on the stone. Lift the back end of the blade slightly until the heel of the grind is just clear of the stone. Now lock your wrist and hand lightly and slide the blade up and down the stone about four or five times until you have produced an even mini-bevel about 1 mm deep. Wash off the blade and repeat this on the 6000 stone. Inspect and ensure that the shiny surface of the micro-bevel extends through to the point of the blade. We now have two finely honed surfaces meeting at an angle of 30º. There is only one final task and we are ready to replace the blade in the plane.
Honing the micro-bevel on the fine stone
Micro-bevel complete
Removing the burr
The honing process pushes steel from the honed area forward beyond the point of the blade where it tries to hang on as long as possible.
To remove this last bit of steel we turn over the blade and hone the back again on the fine stone. Then feel to see if the burr is still there. If it is, we must draw the blade backwards on something soft at a low angle, alternating sides after each stroke.
Traditionally this was done carefully in the palm of the hand but a piece of leather or even cardboard will do. Note: this is not stropping the edge. Stropping is when a polishing compound is applied to the surface of the leather and is common with carving tools. But it is counter-productive with plane blades as it rounds the very ends of the honed faces and increases the included angle of the edge. In effect, it makes the edge less sharp.
Checking for the burr
Bending back the burr by flatting off the back on the fine stone
Checking sharpness
Right, if it’s gone well the blade should be sharp, but how to tell?
Well, putting it in the plane and trying it makes the most sense. But if you’re a showoff like me, then lie it bevel up on a hairy part of your arm and see if you can shave with it. Cutting hairs without effort seems to equate to a good planing edge. Enjoy.
Unfortunately, using the blade makes it blunt but re-sharpening is easy. Simply start again by honing the micro-bevel, ensuring that you produce a burr and remove it as before. It should be possible to resharpen a blade five or six times like this before you have to regrind it. The back of the blade should need very little attention and usually only on the finest stone.
Final removal of the burr by drawing blade downwards
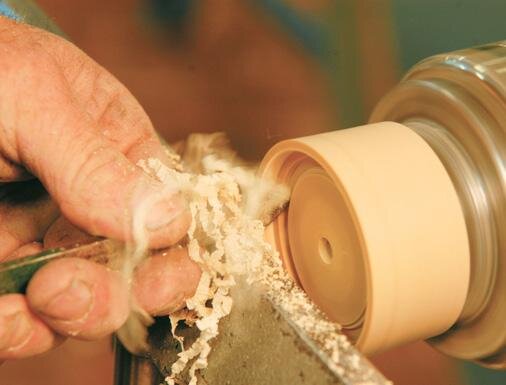
Shaving or just showing off