There’s a secret attraction to this lidded box with its elegant fitted lid, ebony button, and top-and-tail decoration
By Terry Scott
Terry Scott and his completed lidded box
Prize-winning woodturner and builder/developer Terry Scott of Papakura likes to turn out well grained wooden boxes with lids.
He has 20 at home and he keeps adding more to his store. He likes the visual appeal of the rounded boxes, but there’s another “secret” attraction. He explains that he aims for a satisfying “plop” of the lid on the box, the sound of the vacuum suck that comes with a perfect-fitting lid that is a winner.
Lidded boxes can become loose because they shrink, he says. “If I am judging work in a competition or putting work myself into a competition, the first thing that impresses me is the visual rightness of the piece. Then when I pick a box up and try the lid, open it, and hear the ‘plop’ sound – the piece in competition is immediately worth more marks.
All my boxes have this hallmark.” He also likes to introduce surprises with his boxes. They include an unexpected decoration on the bottom or inside the lid, or unanticipated contents that amuse or please – a hair set with combs, a set of four chopsticks, a game box with carved dice in it. “I aim for the ‘wow’ factor,” he says.
Square block positioned
Cylinder
My lidded box
The size and shape of the lidded box is limited only by the size of wood you have, and your imagination. Keep in mind that the size of the lid must please the design of the box as a whole. I usually strive to make the size of the lid approximately one-third of the total box size.
This “rule of thumb” can vary, depending on the design and what you feel looks best. A good starting box is 60 mm wide x 110mm high. If the diameter is too small you can’t get the tools in and see what you’re doing. For this box, I have used black maire, a very dense hardwood similar in properties to puriri. It’s hard to get a big piece that doesn’t crack. It’s slow-growing so the growth rings are close. Timber generally takes a year for every inch (25mm) to dry, but maire takes longer, five to six years.
Set the tool rest just below centre. I usually don’t plan the shape as it is more fun to start turning and see what evolves. Some may be visualisers and draw what they intend to make. For safety first, always rotate your work in the lathe by hand before switching the lathe on. That way you can discover if the wood is likely to hit the tool rest.
Check the speed of the lathe. Take it back to zero and then bring it up to speed. The speed I’m using for this piece is 1800 to 2000 revs. If you have a large piece, the lathe needs to revolve more slowly. When turning, stand in a position you’re comfortable with. Stand with two feet braced, balanced, and use the chisel steady against the body as a pivot. Start and finish if you can without moving your feet. If you change your position, change your balance. The centre of the lathe should be built to the best turning point not round about your elbow height. If it is too low, you bend and get a crook back. If it is too high, you get a crook neck.
A 6ft 4in (1.9m) bloke had to lift the lathe on blocks to a height where he was comfortable. Whenever you are cutting, there are only three rules that should be adhered to:
1. Rub the bevel;
2. Rub the bevel;
3. Rub the bevel;
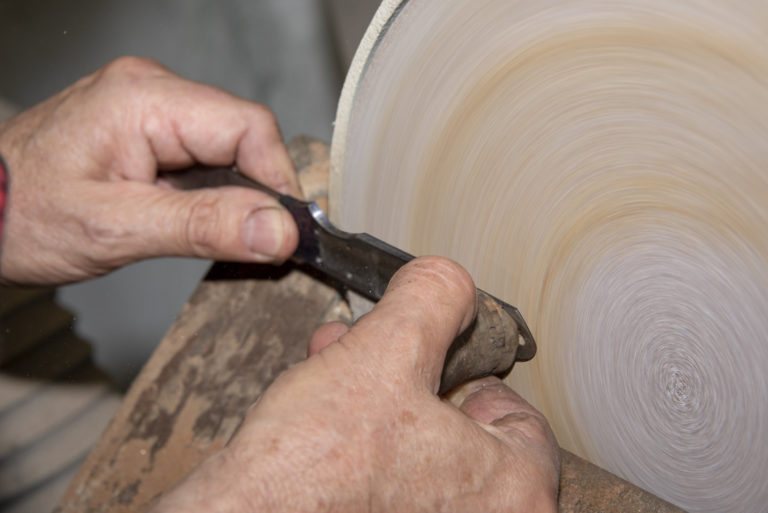
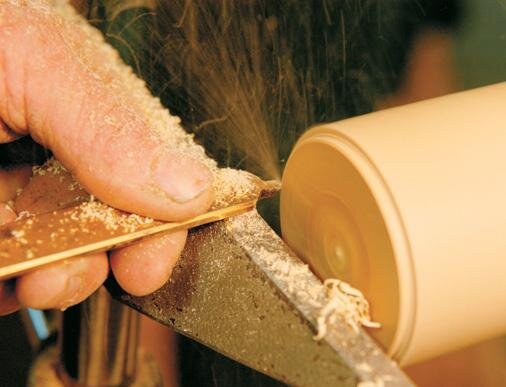
because that way you don’t tear the grain (unless you are scraping). Rubbing the bevel is bringing the bevel or sloped face of the chisel to the work, and turning it to cut. In other words, don’t hold it square. You can turn a lidded box across the grain, but it goes oval because of the length of the grain. Turn the end grain because it’s more stable. Work from the end. If you start from the middle, it can form a splinter and split off.
Grain and lid marked
Parting off with hacksaw blade tool
Cylinder
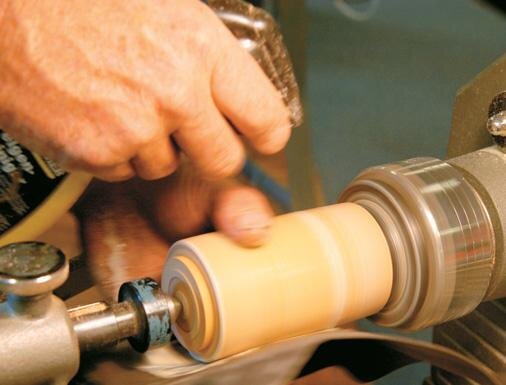
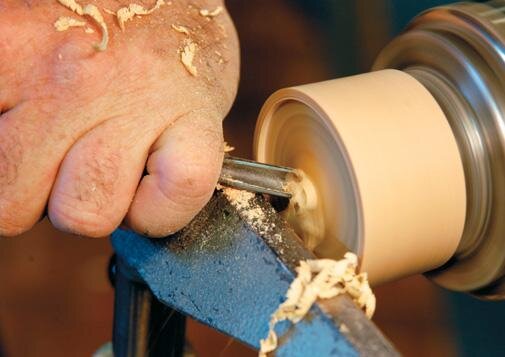
Find the centres on each end of your piece of wood and mount the wood onto your wood lathe between the drive spur and the tail centre.
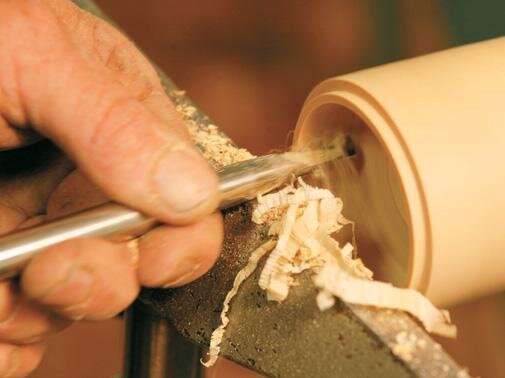
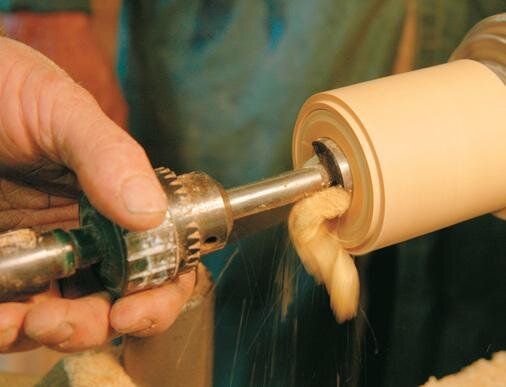
Turn the wood into a cylinder using a roughing gouge or a skew. Turn at least a 10mm-long tenon on each end of the cylinder to accommodate the later use of a chuck. A parting tool does a good job here. Be sure to keep the shoulders of the tenon nice and flat to give a good strong fit to the chuck. We will be using the Teknatool 50mm jaws.
Use calipers to measure the tenon at about 52mm, as the chuck jaws grip best when the jaws close to a tight-fitting circle. To check that the whole piece is round, lay the back of your chisel on the turning wood. If you feel any bumps, you still have more to take off. With practice, you could use a skew chisel instead of sanding, but if you sand, sand with 240 grit to start.
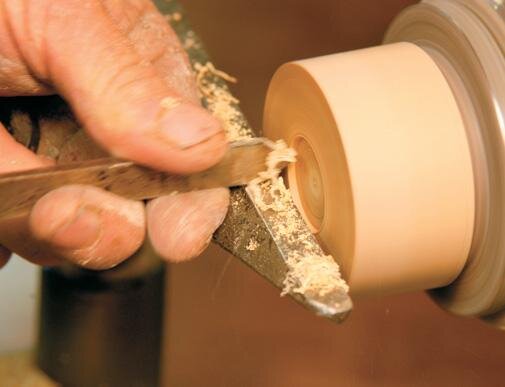
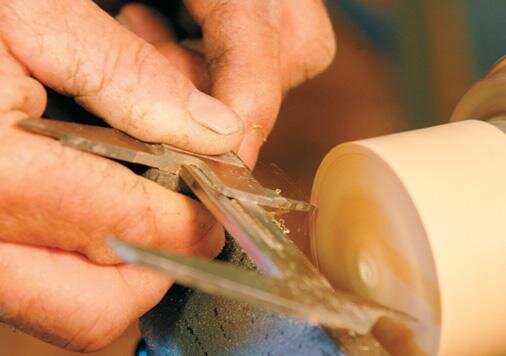
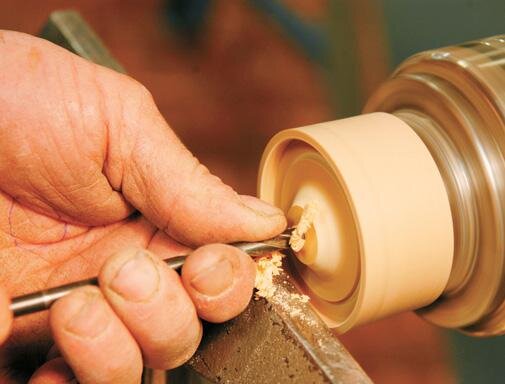
Cut a spigot with a parting tool. My parting tool is made from an engineer’s power hacksaw blade, where I ground the teeth off and put a handle on. It’s great because the steel keeps sharp. You can heat it, but it doesn’t lose tempering.
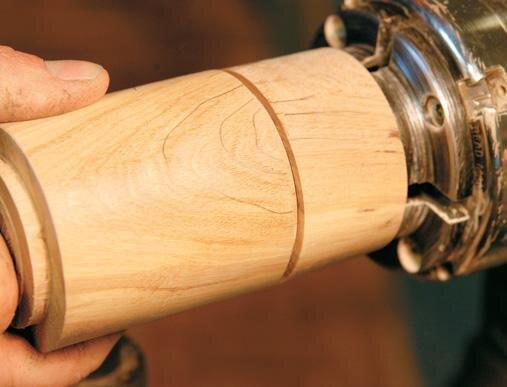
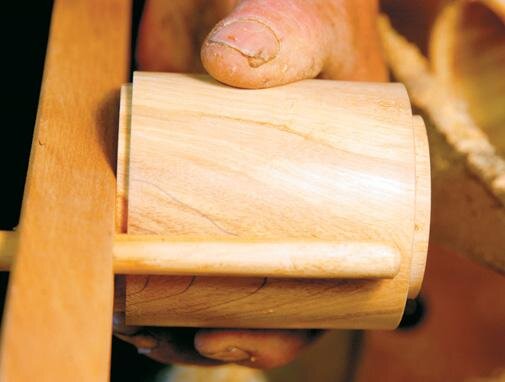
Determine the size of the lid and mark the cylinder. I prefer about one-third the length of the box. Make a fine-line parting, so that the grain lines up. Lower the tool rest, and for the parting tool cut, bring the tool in above the centre and lift the handle to the cut. If the line is up to 5mm wide, you can finish the part using a coping saw
Lid
After parting the cylinder into two pieces at the mark, mount the shorter piece of wood for the lid into a chuck by clamping the jaws around the tenon. Be sure the shoulders of the tenon are touching the edge of the jaws. This is what makes a strong grip. Use a depth gauge to determine how deep you can hollow the inside of the lid without going through the top. Be sure to leave enough wood on the top of the lid to accommodate your design.
Using a scraper, hollow out the lid, being sure to leave the sides thick enough for the later final turning on the outside of the lid. Make a ¼ inch (6mm) rebate towards the edge of the lid where you plan it to fit the body of the box. Sand and apply a finish to the inside of the lid.
Body
Mount the body of the box into the chuck in the same manner in which you mounted the lid. Make sure it runs true when you turn on the lathe. Cut about a ¼ in (6mm) tenon on the end of the box body to receive the lid.
Take your time with this, as it is an important step. You will be turning the lathe off and on many times as you remove small amounts of wood and try the lid for fit. You want the lid to fit snugly, but not tight. If it is too tight, you might split the top. If it is too loose, you will have a more difficult time later on, but it is better a little loose, than too tight. You may tighten the fit of a loose lid by putting paper or masking tape on the outside of the lip of the body. Or you could just cut off the tenon and start another. However, if you do this, be aware that the wood grain between the lid and body won’t match as well. It is also important that this tenon have sides that will be parallel to the top.
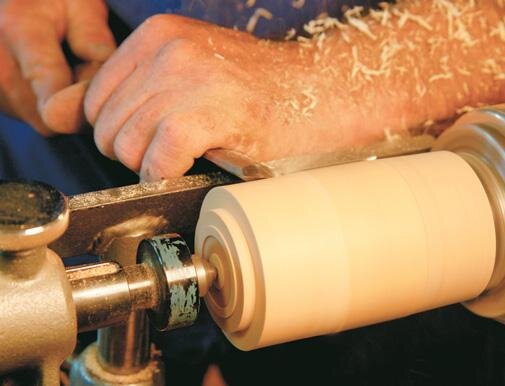
Chamfer the shoulder of the tenon just a touch. Hardly any, though. This will define where the lid meets the box. You can use a parting tool, a flat-nosed scraper, or a skew to cut this tenon. Use a Forstner bit to hollow out the box to about a 5mm base. Black maire cuts like butter but is heavy (condensed) so make the box thinner than normal. A piece made from a heavy timber should look and feel heavy. I have a box hollowing-out tool from Soren Berger which enables me to get right down square into a box.
Using your depth gauge, determine the depth to which you can hollow the body of the box. Be sure to leave about 5mm to 8mm on the bottom to allow you to finish it. Sand and apply a finish to the inside of the body.
Body and lid
Fit the lid onto the body, matching the woodgrain. The lid must have a snug fit to enable it to stay in place as you turn the shape of the box.
Move the tailstock up and put the tail centre into the centre mark on the top of the lid. This will true the box to the centres and help support the box for most of your turning. I usually leave the tailstock in position until the final shaping of the top of the lid. Turn the box (lid and body) to the desired shape as a unit. The design of the lid determines how long you can leave the tailstock in place. When you have to remove the tailstock, you will have to take lighter cuts. If the lid pops off when turning the tip, just stop the lathe and put it back on and try again with a light touch. If you can’t get it to stay on, just tape it to the body with masking tape.
Sand and apply a finish to the outside of the box. Because this work of black maire is small, sanding could give you heat checks, so I sand using water with 10 per cent dishwashing liquid added, sprayed on with a spray bottle nicked out of the boss’s cupboard along with the detergent. Amazing what the wife keeps stored away for my use. I start sanding with 180 grit wet and dry, then 220 grit, 240, 320, 400 and if the piece warrants it, such as a piece of ebony, 600, 800 and in some cases to 1200 grit. When you come to the last grit, sand with the grain to remove marks.
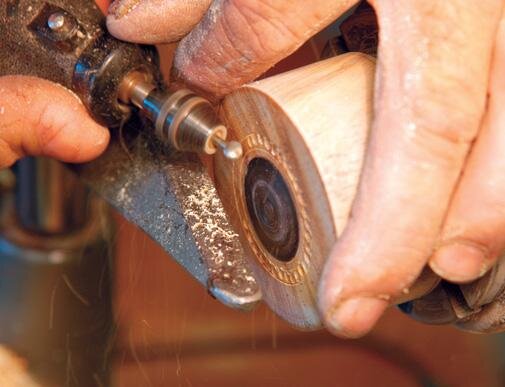
Button
Push the tailstock out of the way right to the end of the lathe bed. It hurts your elbow if you hit it.
Measure a button space of just 5mm depth in the lid with calipers. I haunt second-hand shops, looking for pieces that are almost heirlooms, like old gold buttons and in this case ebony (ebony sources are old statues, piano keys, Trade Me).
Superglue the button in and then turn it down to flush with the top. With a big black button, the box changes from a simple piece to a palatial piece with added value. On the lid, I score lines in circles so it’s like a picture frame around the button. This draws your eye to the centre of the piece, otherwise, it’s drawn to the lid.
I finish the bottom concave, score in a couple of rings, and decorate it and the lid with a Dremel rotary burr. I write my name, the wood, and not NZ but New Zealand, as it’s more professional. It’s a couple of minutes work to decorate my work, always for a surprise.
My preferred finish is Wattyl Stylwood, a nitrocellulose honey-colour lacquer for interior timber, sprayed on with an airless sprayer. Never use a rag as a polisher on the lathe as you could get the thread caught and pull your hand in — use toilet paper as a polisher.
* Thanks to Charlie Cadehead for his help with the content