The Shed Logo
Search
Close this search box.

Make yourself a decent chef’s knife

Coromandel knife-maker Lloyd Franklin forges his knives from the raw material of coil spring steel rather than cutting or grinding the blades from existing metal shapes. His high-quality knives are sought after by chefs nationwide and by those who appreciate a well-balanced hand-made tool. Coil spring steel is easily confused with spring steel that we know from a car leaf spring, says Lloyd Franklin. But, he explains, coil spring steel is a high-tech, shock-resisting tool steel from which you can happily make stone-working tools, woodworking chisels or even knives.

From supporting a car’s weight to the blade of a well-balanced knife – coil steel spring metal is transformed
By Lloyd Franklin

Lloyd Franklin hand-forges his knives

Coromandel knife-maker Lloyd Franklin forges his knives from the raw material of coil spring steel rather than cutting or grinding the blades from existing metal shapes. His high-quality. knives are sought after by chefs nationwide and by those who appreciate a well-balanced hand-made tool.

Coil spring
Coil spring steel is easily confused with spring steel that we know from a car leaf spring, says Lloyd Franklin. But, he explains, coil spring steel is a high-tech, shock-resisting tool steel from which you can happily make stoneworking tools, woodworking chisels or even knives.
There’s an extruded grain in the steel. As I work it I am interfering with that grain, altering it and refining it, building a new structure within the steel. As I hammer it from each side, it’s getting indented. The grain is building a structure that is stronger than the extruded grain, making it into a coherent piece. When you’re grinding an extruded piece of steel like a flat bar stock, you’re cutting into the grain. This actually weakens the structure it had when extruded. 
This process of knife-making starts with straightening the piece of steel. The amount of coil steel you use needs to be shorter than the length of the knife you want.

Cross pein hammer (left) and straight pein hammer
Straight pein hammer beginning to shape the coil

Drawing out
Heat the steel to a bright orange heat and straighten the coil spring. Then begin to flatten it and draw it out to a spike. I start with the metal at a bright orange-yellow heat. As the work nears its end, I allow it to heat only to a red-to-dull-red.
You have to learn to judge how long to leave it in the forge. I tend not to use air to heat the steel because of the danger of burning off some of the carbon. So I heat up the coke and turn off the air before introducing the work piece. 
I draw out the spike with a straight pein hammer. Once the spike is smoothed up (I use a 4lb (1.8kg) flat-face to finish the spike) I bend it down slightly. That forms the basis of the tip and the curve of the blade. Heat up roughly where your blade is going to be and then past that area, back into what is going to be the tang.
Then start drawing down, flattening an area of the tang as well as through the blade with a cross-pein hammer. Get the whole area flattened and drawn out to a thickness that’s a little bit thicker than the desired tang thickness (about 3-4mm), which is the thickest part of the knife.

Cleaning up the spike with a flat faced hammer
Refining the shape with the cross pein hammer

The blade
Choose where your blade will start from the tang and bolster area, then start drawing the blade from that flattened area. Depending on the style of knife, you might want to use straight pein, cross-pein, straight pein, to manipulate the shape until the blade is the dimension that you want.
Leave enough room on the handle and enough depth on the blade so you’ve got your hand up out of the way in the end product. You want that full depth so your knuckles don’t hit the bench when you are cutting.

Planishing the blade
Blade on edge showing taper

Finishing
Eliminate the lumps made by the hammers in the blade to finalise the shape. Hammer out the high points with a smaller hammer. By overlapping the blows I can feel any high spots or lumps through the hammer. Either draw the lump down with the cross pein or beat it out lengthways with the straight pein. Remember to keep the steel hot throughout this process. I use a flatter-faced planishing hammer to take out the smaller imperfections as the blade nears its final shape.
At this point, I let the heat reduce to a red-to-dull-red because I want to consolidate the grain rather than move the steel.

Heating the tang

The tang
Now turn the blade around and work the tang. Again take the tang up to a bright orange red to work the steel. This is an opportunity to remove any waste if the steel is too long.
I aim to get the same taper from the top edge of the blade to the bottom edge (about 4mm down to 2mm) and this should be the same through the tang too. Make sure that the blade is centred and the steel on both sides is even. Once it’s planished on both sides to take out any lumps, I stamp my mark with a pre-warmed stamp. The stamp needs to be warmed to avoid creating a cold spot on the blade and thus a hard spot that might preserve some brittleness. 
Check that the blade is straight and the taper is correct where necessary. Then the whole piece is placed back in the forge and heated to a bright red, held at that temperature and turned in the heat a few times.

Cutting the waste off
Applying the maker’s stamp

Normalising
This is normalising, taking all the stress and tensions out of the steel and getting the grain to an even size. Then it’s quickly into a box of wood ash to cool. Wood ash is used for the annealing process; it’s insulating and tends to hold the heat in and allow the steel to cool slowly. This is very slow cooling. It’s the opposite of quenching which is hardening. This is a softening process. It comes out of there as soft as possible for this type of steel after forging. It means you can sand it and drill holes in it without wearing your drills out. 

Tempering the blade to spring temper. Note the heat sink of the two stainless steel rulers to protect the edge
Blade with blue spring temper

Bolsters
Usually at this stage I give the piece preliminary sand on the linisher to remove the scale and even out the surface. I grind out the final shape and finish it on the linisher.
Mark out where the bolster will go (The bolster is the thick section at the handle end of the blade leading into the tang. The bolster provides weight and balance for cutting). I make bolsters from brass, aluminium or occasionally cast them from silver. I cut them on the bandsaw and do the final shaping on the linisher. I mark and drill the holes for the brass rod rivets at this point too and shape the scales (the wooden handle pieces that sit on either side of the tang).
Once the holes are drilled I sand the piece again on a 40-grit belt, initially covering the whole piece then concentrating on the blade area, polishing both sides evenly. Then it’s back to the forge for harening.

Raw blade ready for polishing
Shaping blade blank

Hardening
Heat the blade, up to the bolster area, to a bright red. The important factor is that the steel becomes non-magnetic; steel changes its molecular structure at this point. You can test when it reaches the right temperature by using a magnet. If the magnet is not attracted to the steel it’s at the right temperature.
Let the blade soak in the heat a bit. It’s important to ensure that whole blade is at the right temperature so you get a good hardness, rather than taking a punt that the blade has heated quickly and quenching it too soon. Take it out of the fire and check it with a magnet if you need to, then put it back in to bring it up to temperature again. Then quickly withdraw the blade and quench it as quickly as possible, blade edge-first (not the point). Quenching the blade edge-first ensures that the entire edge hits the quenching medium at the same time, so you don’t get distortion and movement.

The cleaned-up shape
Sanding the blade on the belt sander

Linseed oil
I use linseed oil for quenching which is traditional for fine-bladed instruments, rather than using mineral oil. If you use a mineral oil like old motor oil you can get a transfer of carbon from the high-carbon steel into the oil.
The viscosity and the heat transfer of linseed oil is really good. Move the knife in the oil for a couple of minutes. Move it backwards and forwards so you’re getting fresh oil against it and that will get rid of any oxygen build-up from the heat. The movement gives you fresh oil all the time to provide a good quench. 

Marking out the bolsters
Splitting the wood scales on the bandsaw

Oven
Once again I would recommend sanding the surface, then putting the knife in a pre-heated kitchen oven at 220-240 degrees Celsius which is a straw-to-straw-brown temper.
Pre-heating is quite important. Don’t raise the heat in the oven because you’ll go past the straw colour. Pre-heat your oven and put the blade in for 20 minutes or so, but don’t open the oven. It’s a precaution, just like baking a cake.
Leave it in there, then switch the oven off and take the blade out. It’s a useful to know that straw temper is “brittleness removed, hardness retained.” It means you’ve got rid of that brittleness but retained the strength in the edge.

Riveting the bolsters
Shaping the bolsters on the belt sander

Spring temper
Sand off the straw patina, taking care not to overheat the work, and then place the blade in a vice with a heat sink to protect the blade edge. I apply heat with a propane torch to achieve the peacock-blue spring temper. I normally go from tang to tip and work my way backwards and forwards. It’s painting with heat; so you get your blue happening and then you just coax the whole colour down the knife avoiding the edge.
Then it’s just a matter of stepping through the grits on the belt sander — 40,120, 240 and 400 grit. I usually polish the whole blade with the 40 grit and then just the blade itself with the other finer grits.

Marking out the handle pieces
Filing the bevel angle on the bolster

Grit size
I find the 120 grit will cut the 40 grit well because they are so different.  Often you can’t see whether you’ve cut all the 40 grit scratches out when you are using intermediate grits. But if you go to 120, you can definitely see the difference. It also means you’re not changing papers all the time.
After the 400 grit belt, I hand-sand again with 400 grit on the blade itself and the area from the bolster to the blade that is visible. The hand-sanding allows you take out the uniform scratches from the belt machine by working in different directions. I have lately started using the new ceramic grit belts. They don’t tend to clog as much and cut better than aluminium oxide.
The final polish is made with a sisal mop on the buffer using A80, an 80-micron cutting and polishing compound. The bolsters are polished using A80 chrome oxide or green lime compound. 

Buffing the blade
Scale pinned for reference
Cutting the handle pieces to shape
Sanding the handle to shape.

Handle
For the handle, select your piece of wood, cut it a little bit bigger than the desired result, then split the piece so you’ve got matching grain. Most knife makers don’t split their wood – few of them use New Zealand natives because they don’t want to season their own wood. I like to use timbers such as Pohutakawa for its colour and grain. Other knife makers tend to use rosewood and different exotics and then the wood is guaranteed to be dry. 
I mark the outline of the tang on the scales, cut them on the bandsaw slightly oversize and sand the handle to size once it is fitted. I first fit the bolsters and sand them to their shape using the belt sander. I put a slight bevel on the scales and a corresponding bevel on the bolster for a snug fit. I fit the scales to the tang with plenty of epoxy  and drive the pins though. 
Once it’s assembled and the epoxy had cured, I sand the handle to its final shape, running though each grit and hand-sanding the last bit till the handle is polished. I use an oil-based transparent wood protection called Woodoc to preserve the handle and bring out the colour and beauty of the timber. The benefit of this, like most oil-based finishes, is that it doesn’t have to be sprayed or painted on and it works.

Oil-based protection for the handle
Finished knife. Note the characteristic wave pattern in the grain

Share:

More Posts

The Shed September/October Issue 92 is on sale now

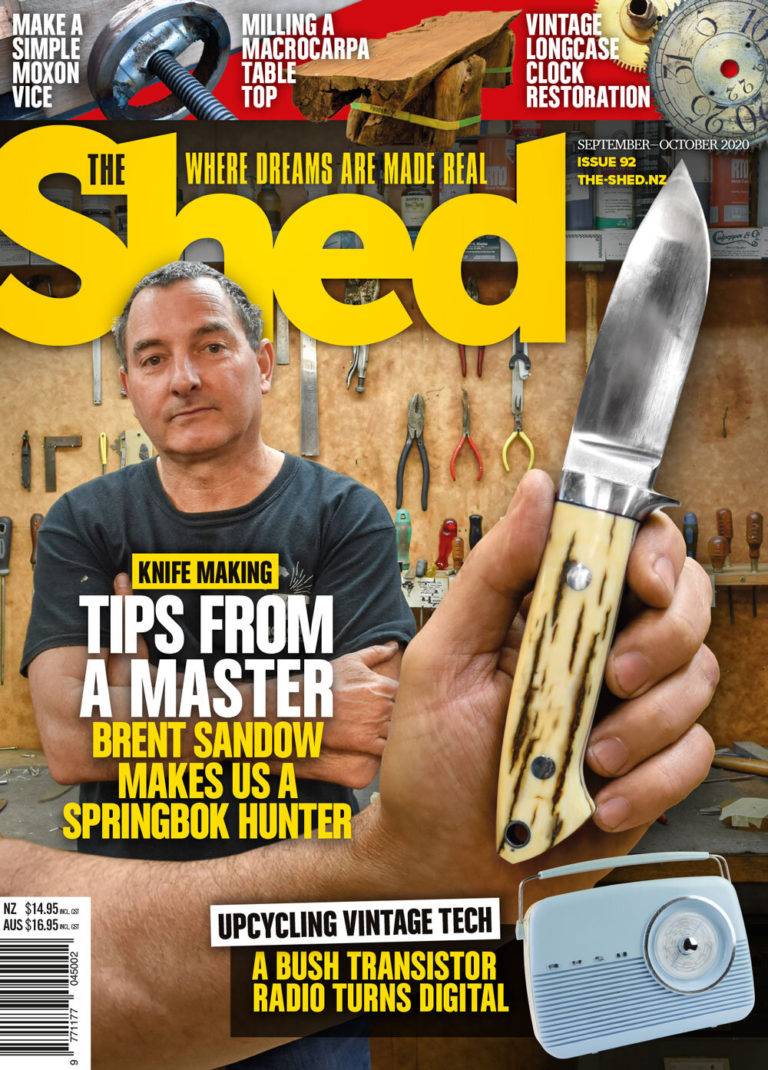
There’s a real treat for knife makers in the September/October Issue No. 92 of The Shed.
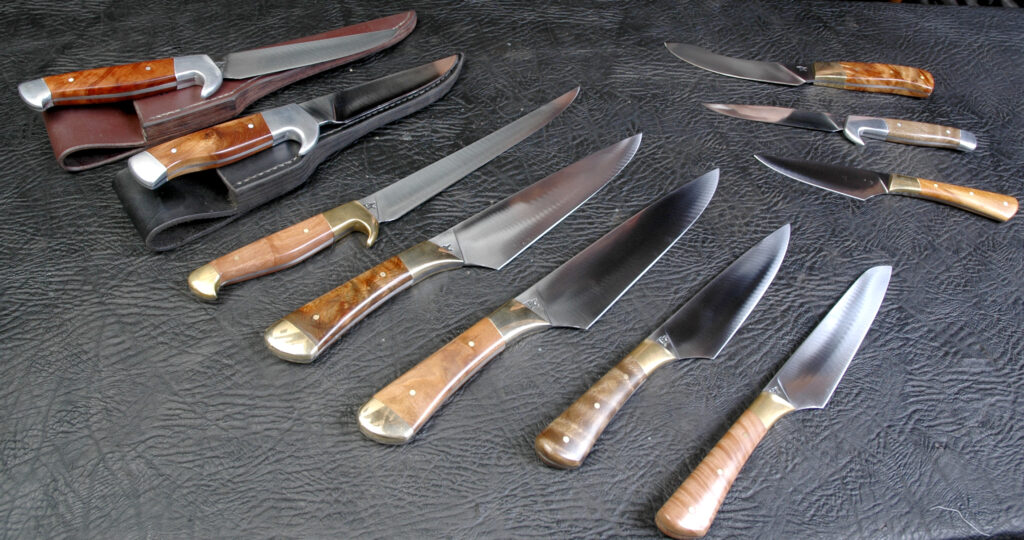
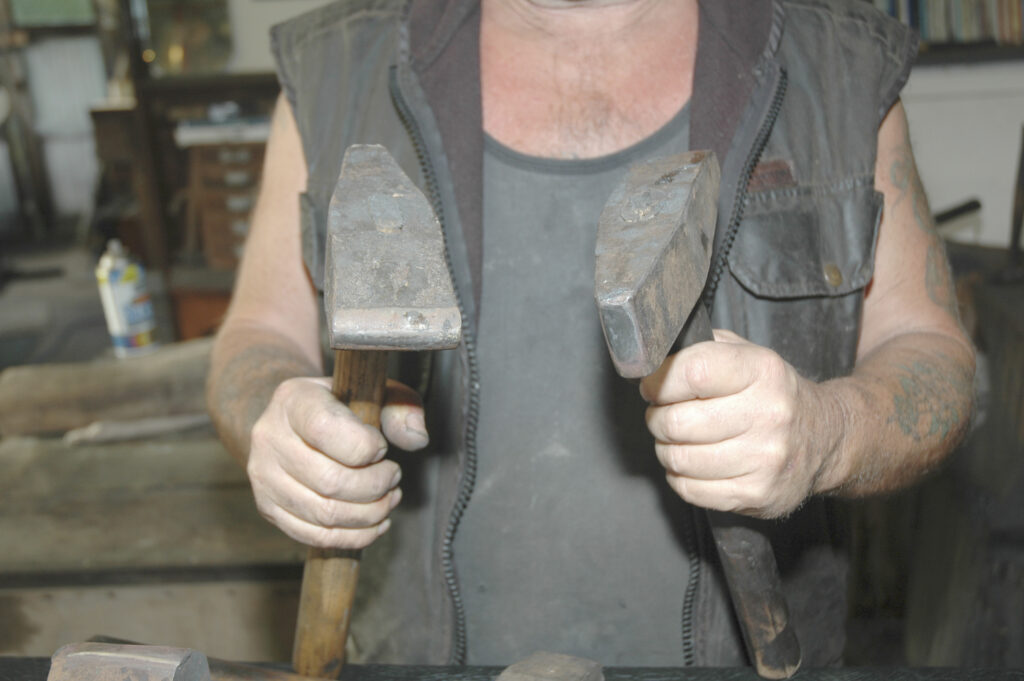
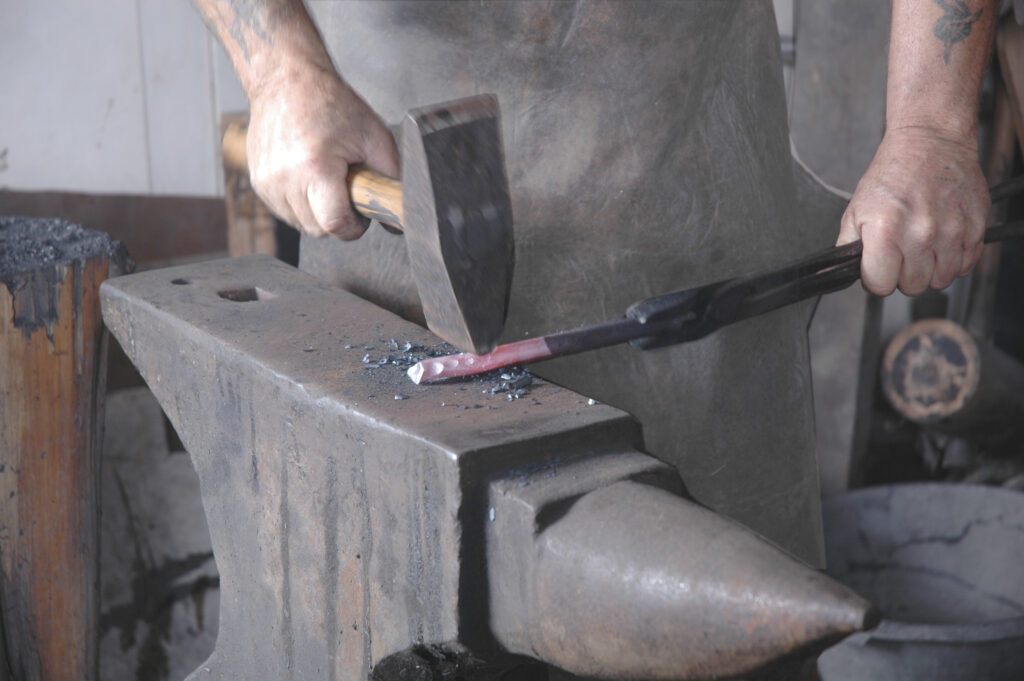
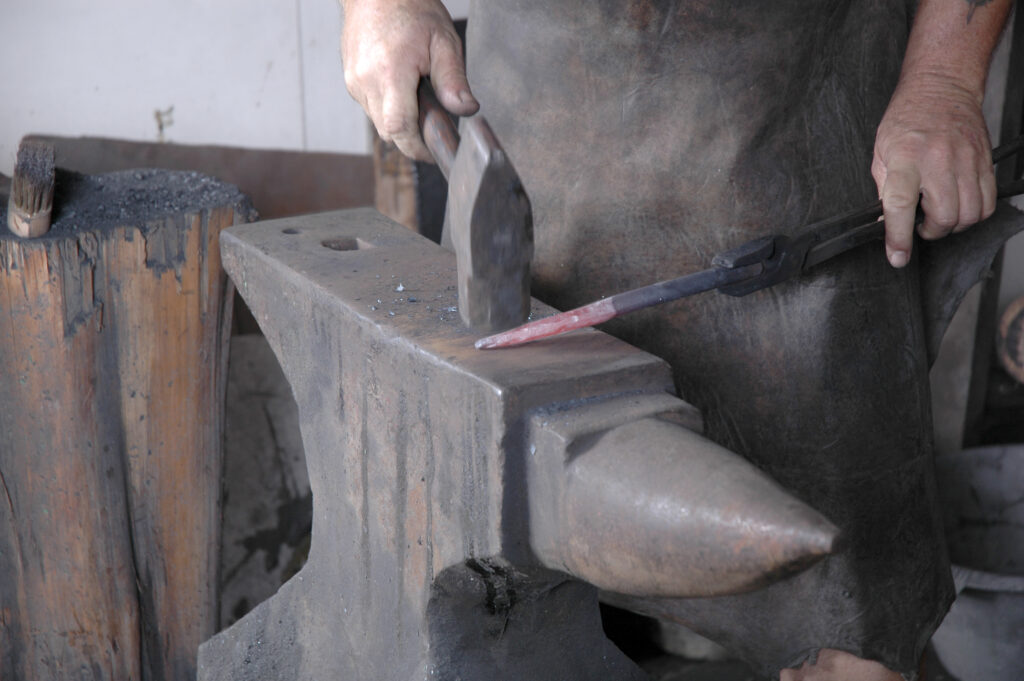
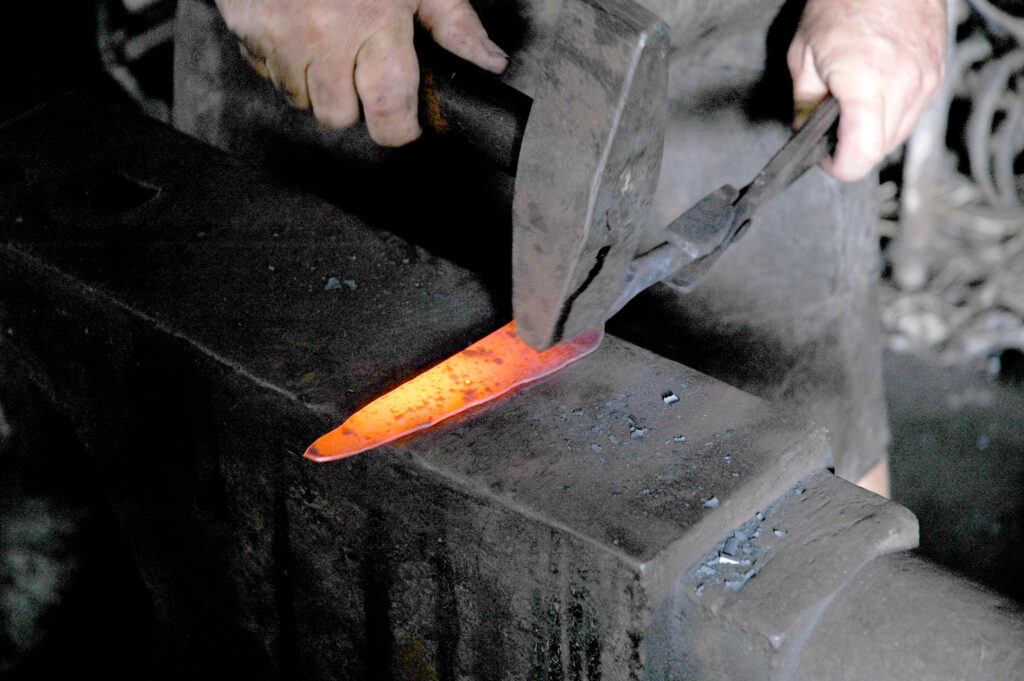
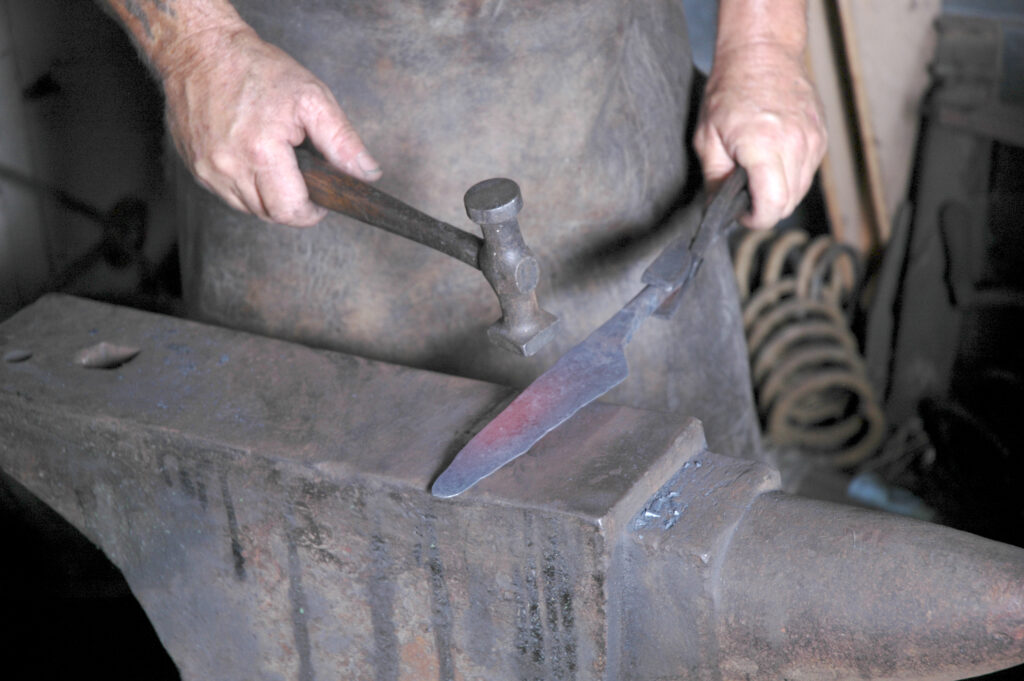
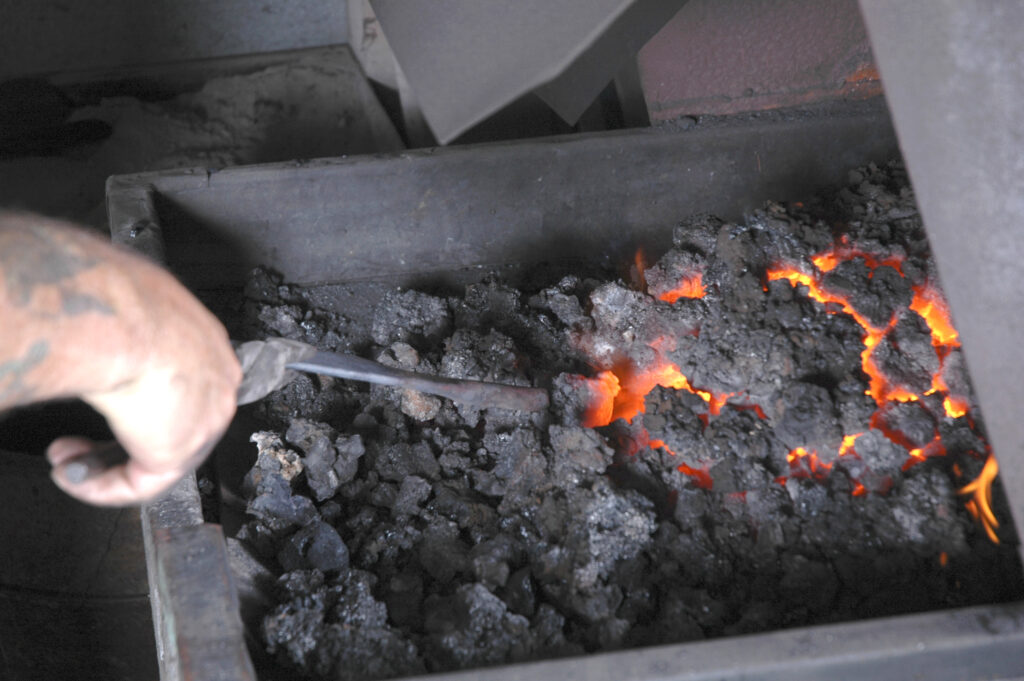
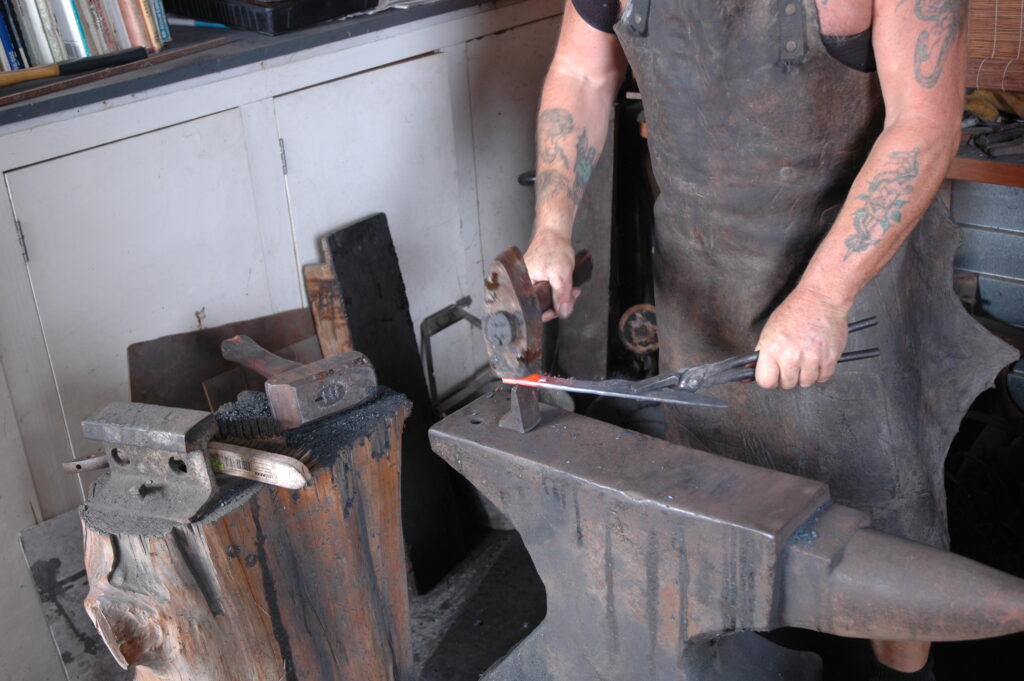
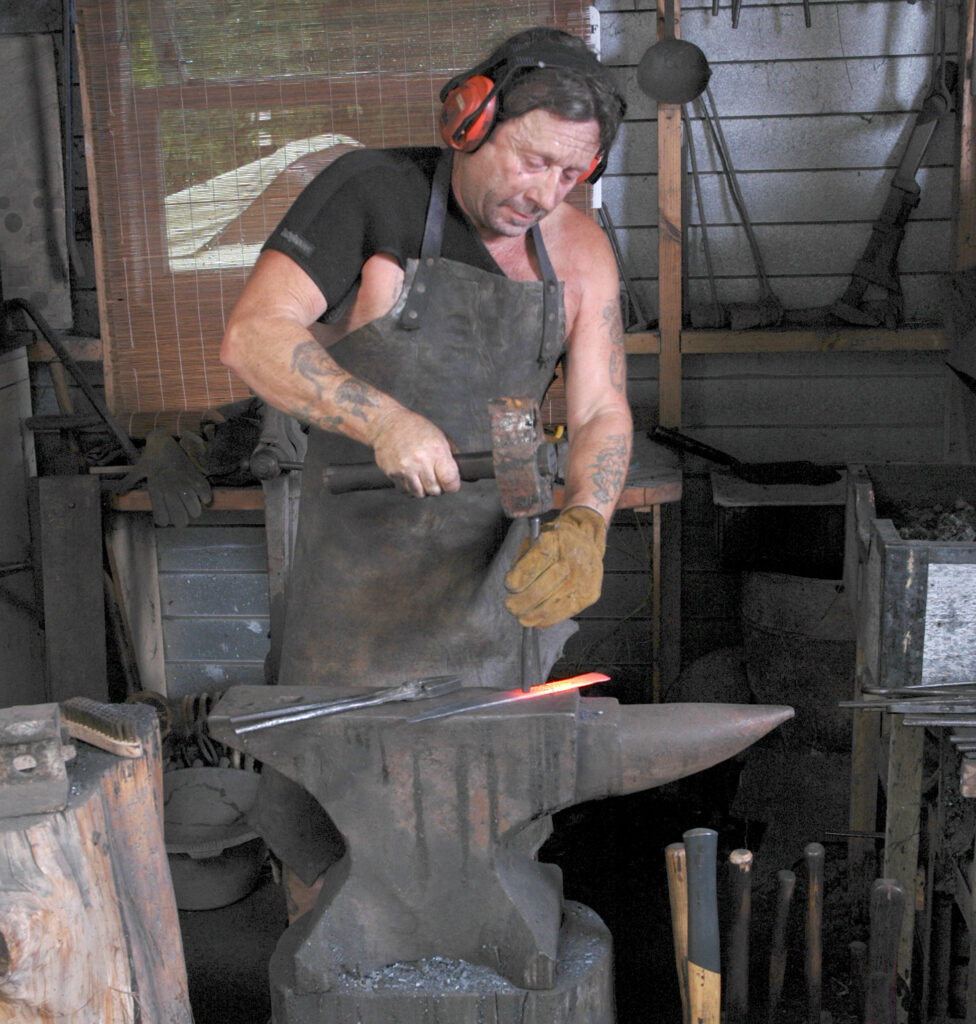
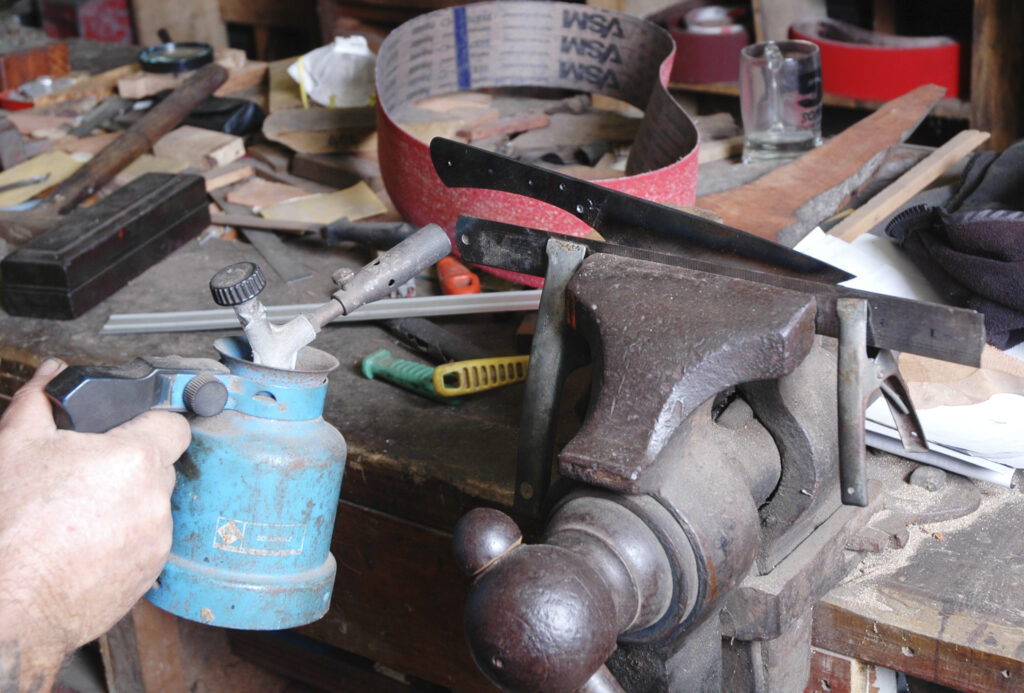
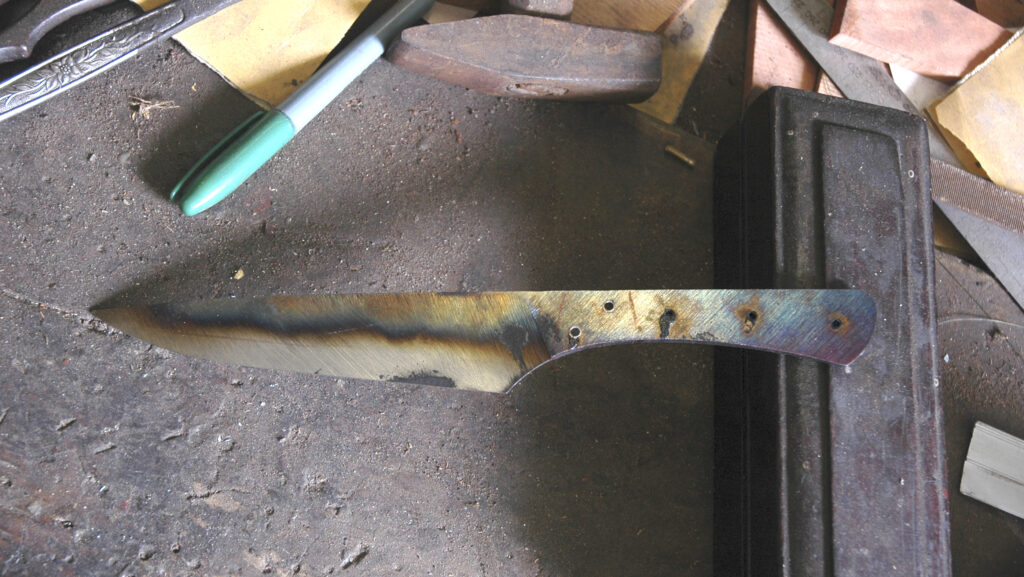
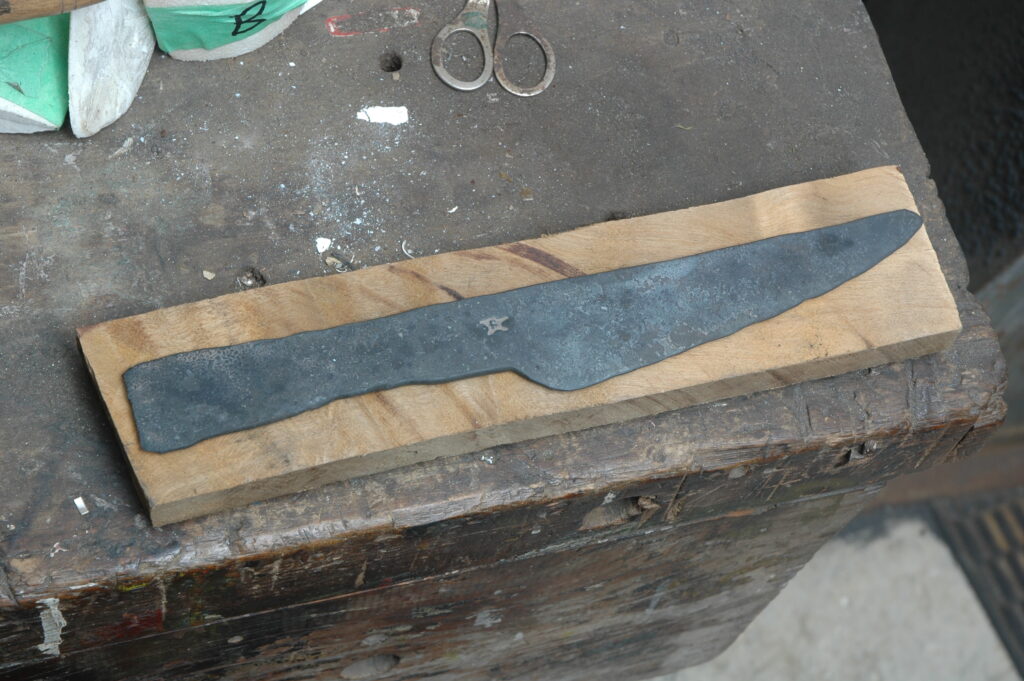
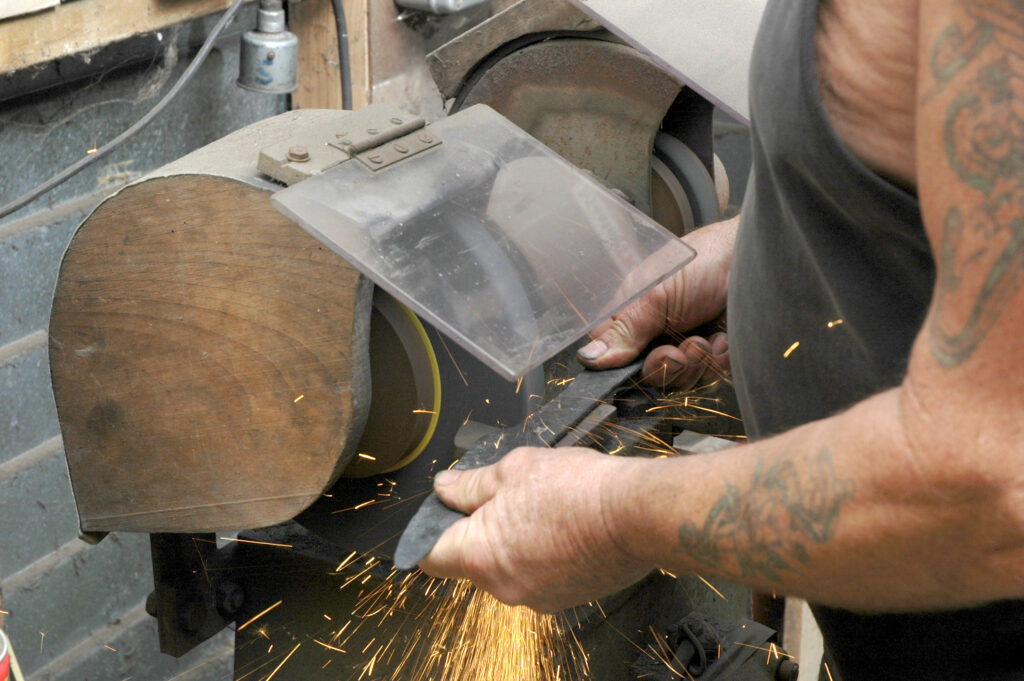
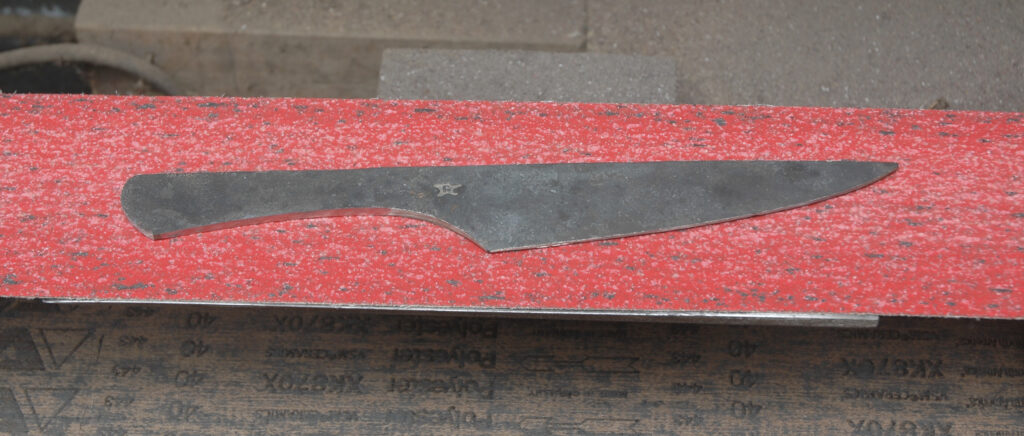
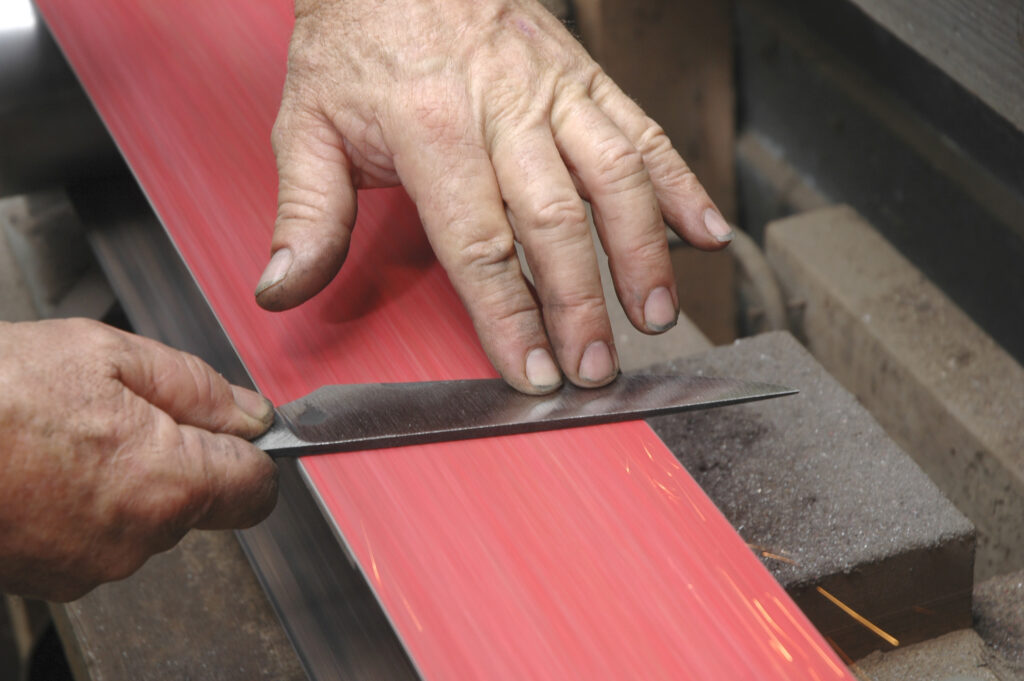
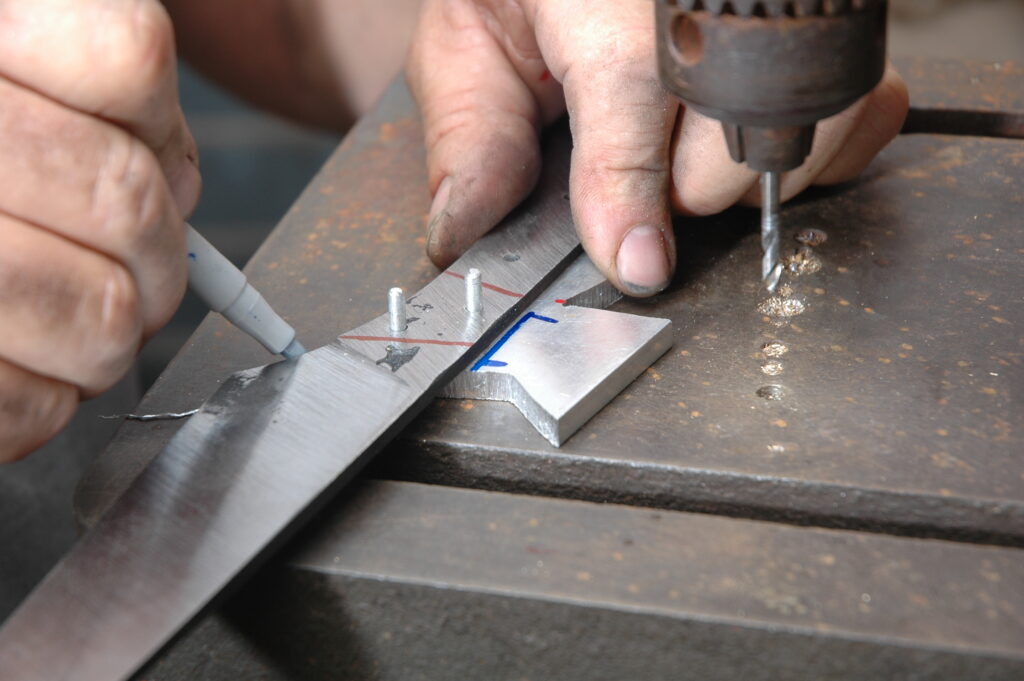
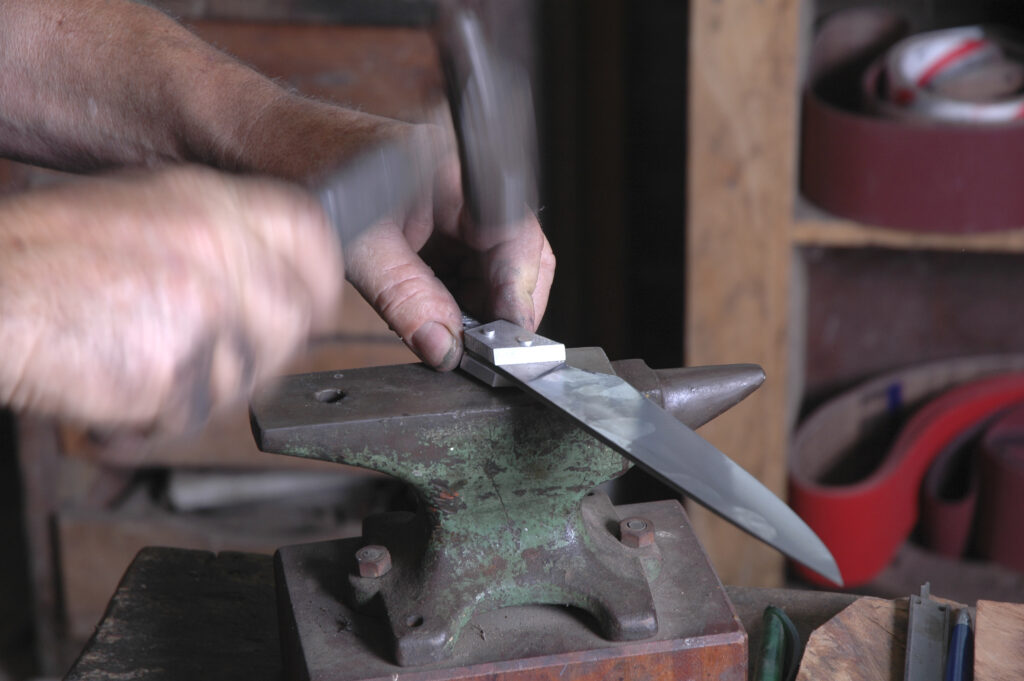
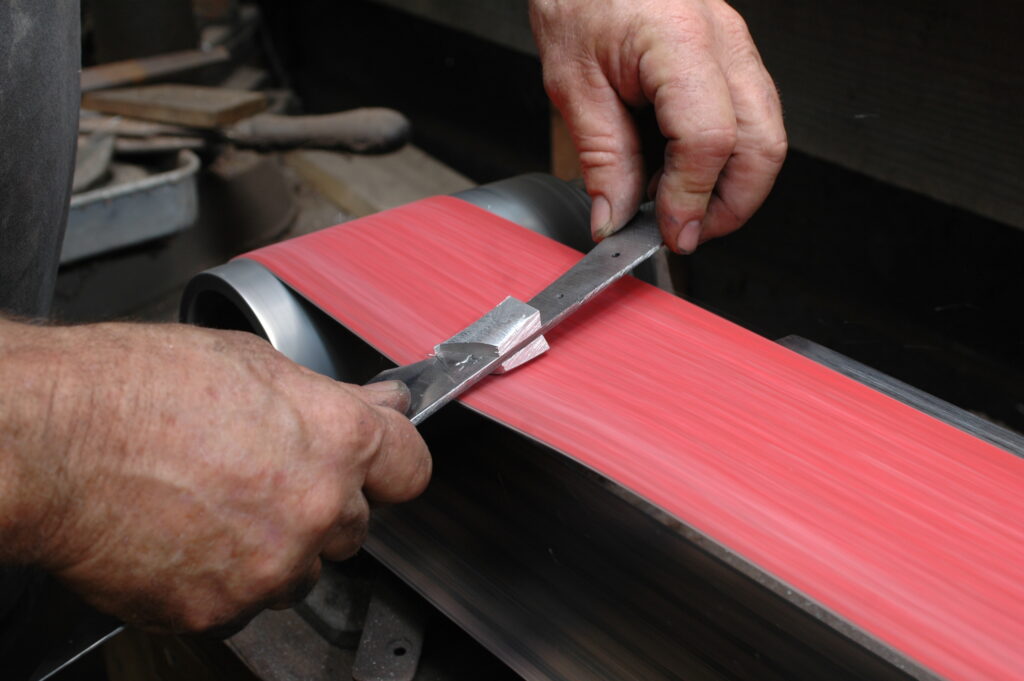
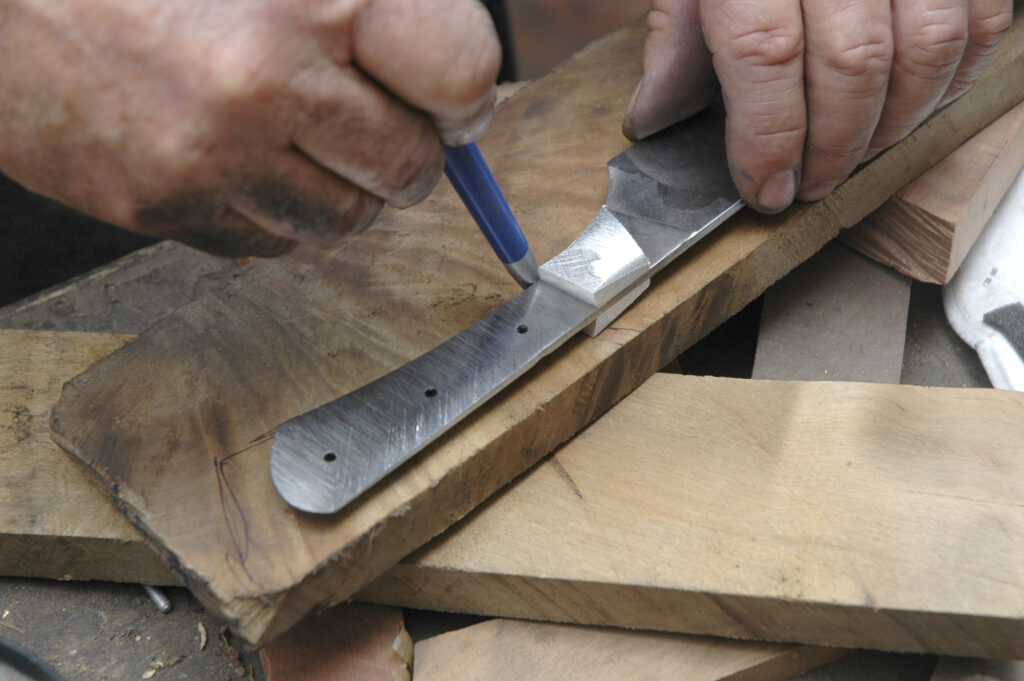
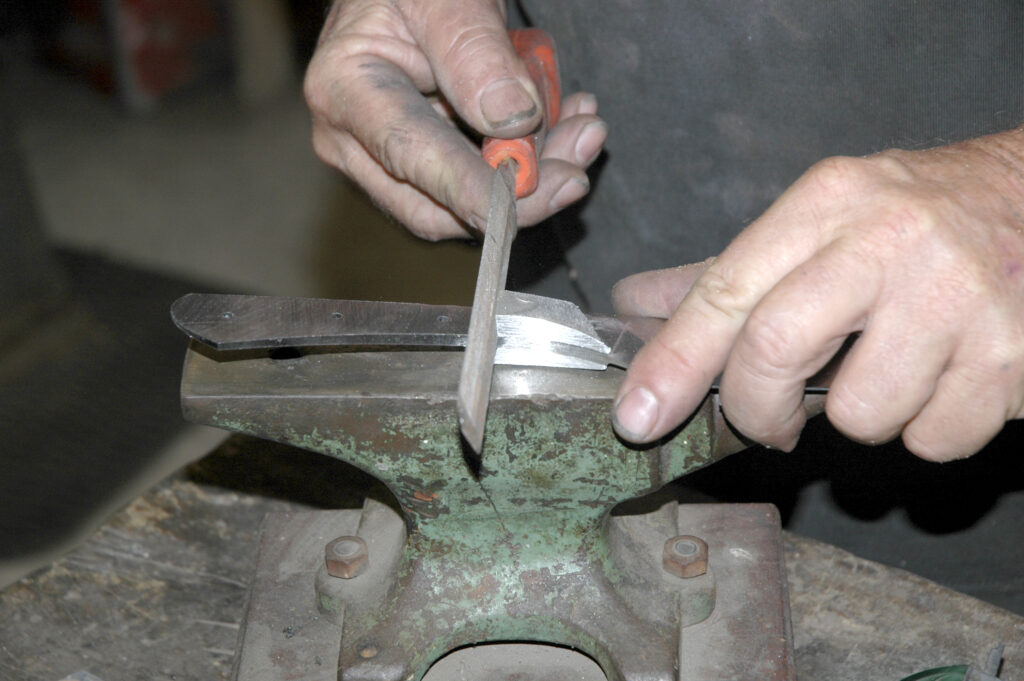
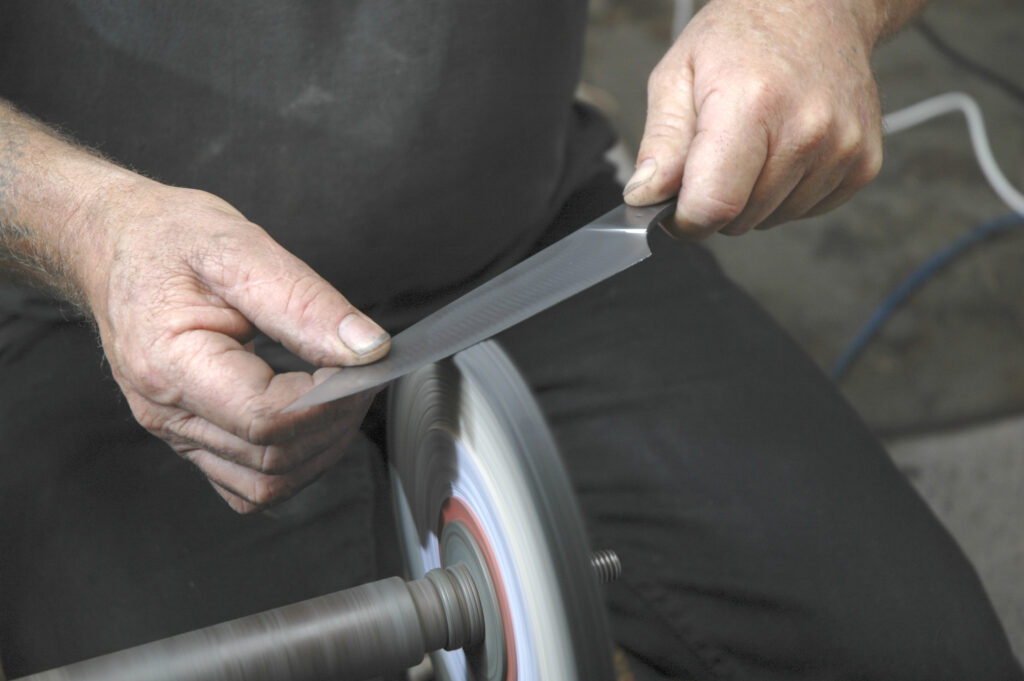
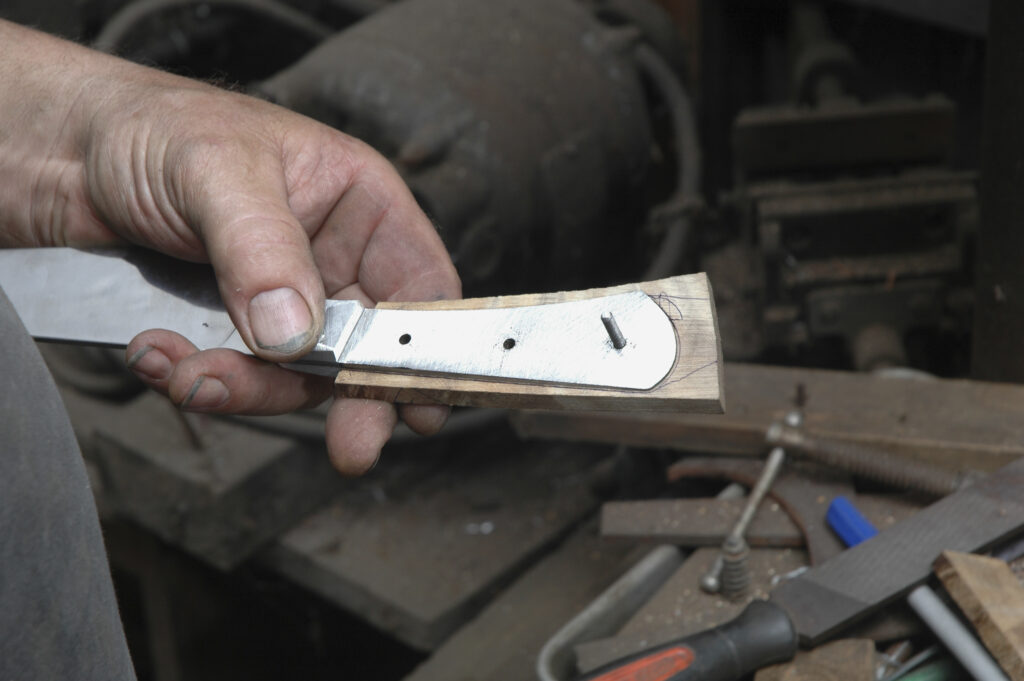
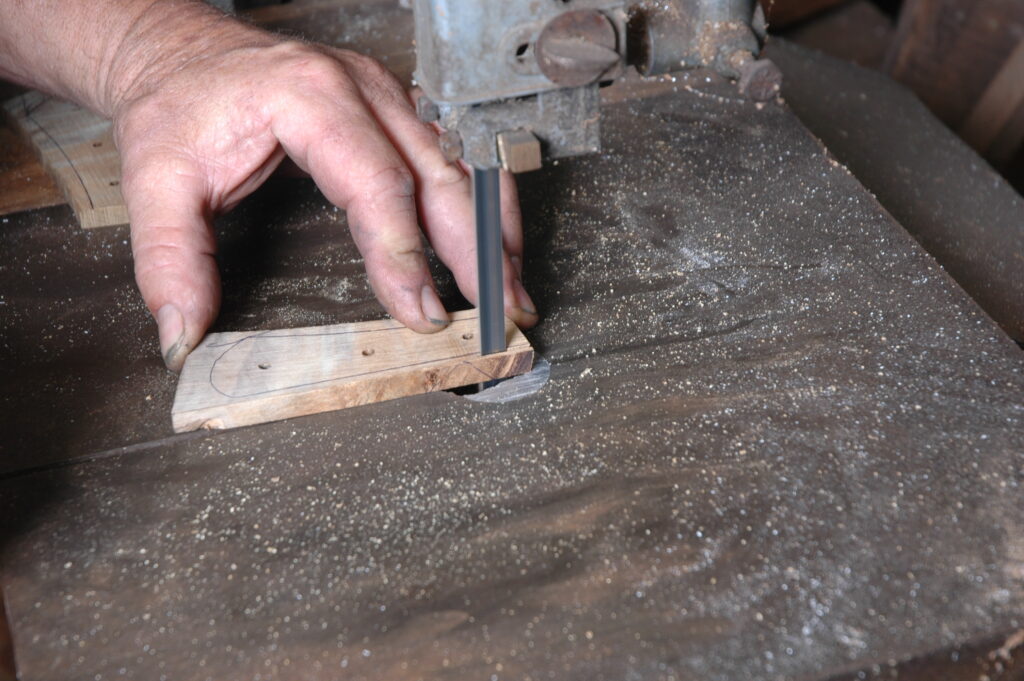
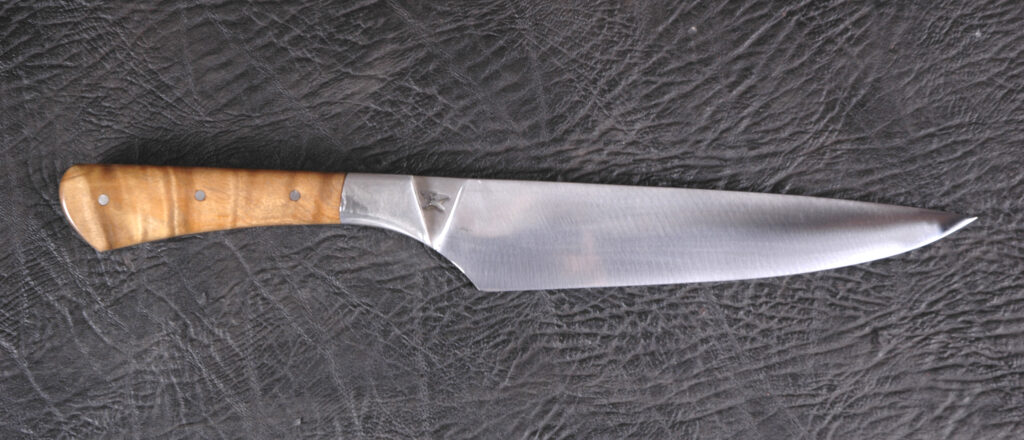
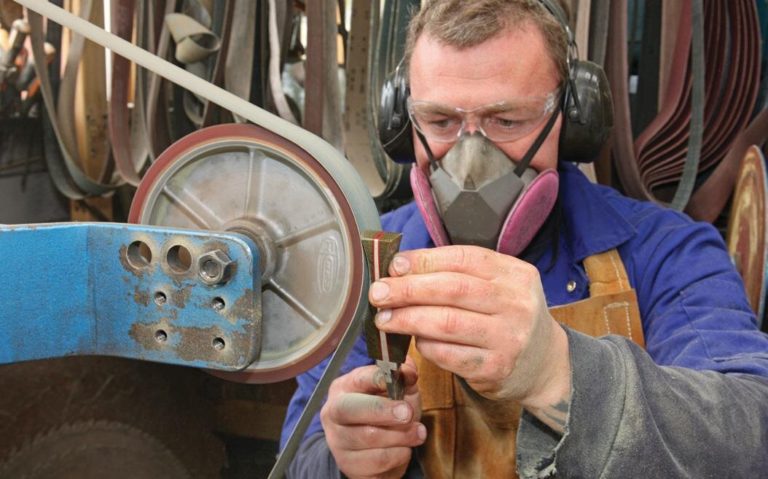
We head to the Auckland workshop of master knifemaker Brent Sandow to get insights into what makes him such a well-regarded exponent of the art. We watch and learn as he goes through the steps on how he makes a Springbok Hunter knife.
Get ready, secrets are shared.

Knifemaking by Leif Haseltine

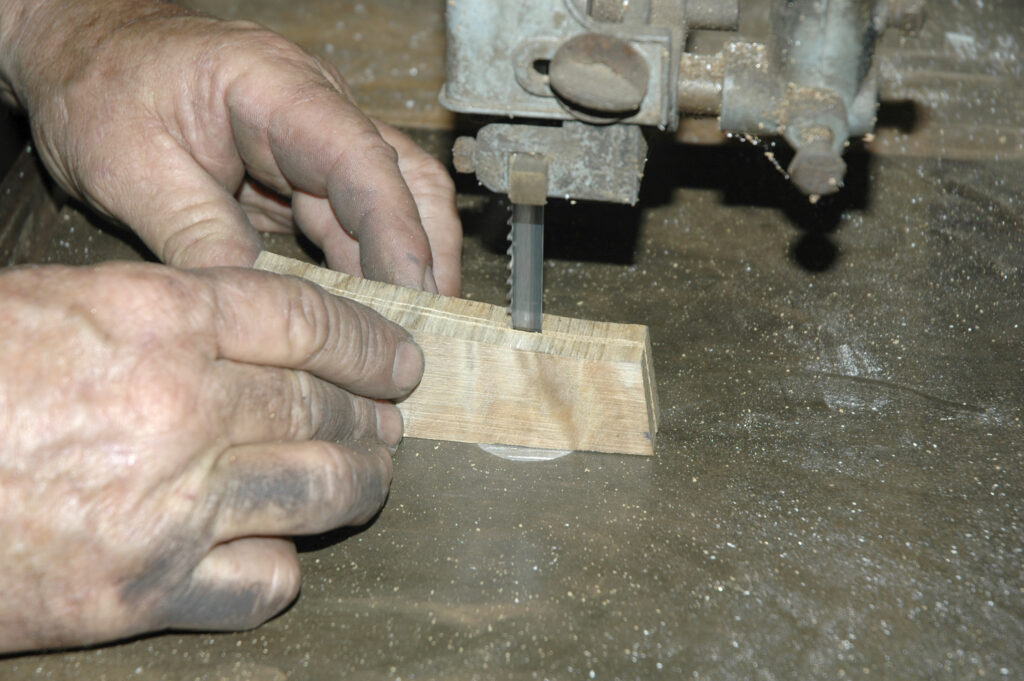
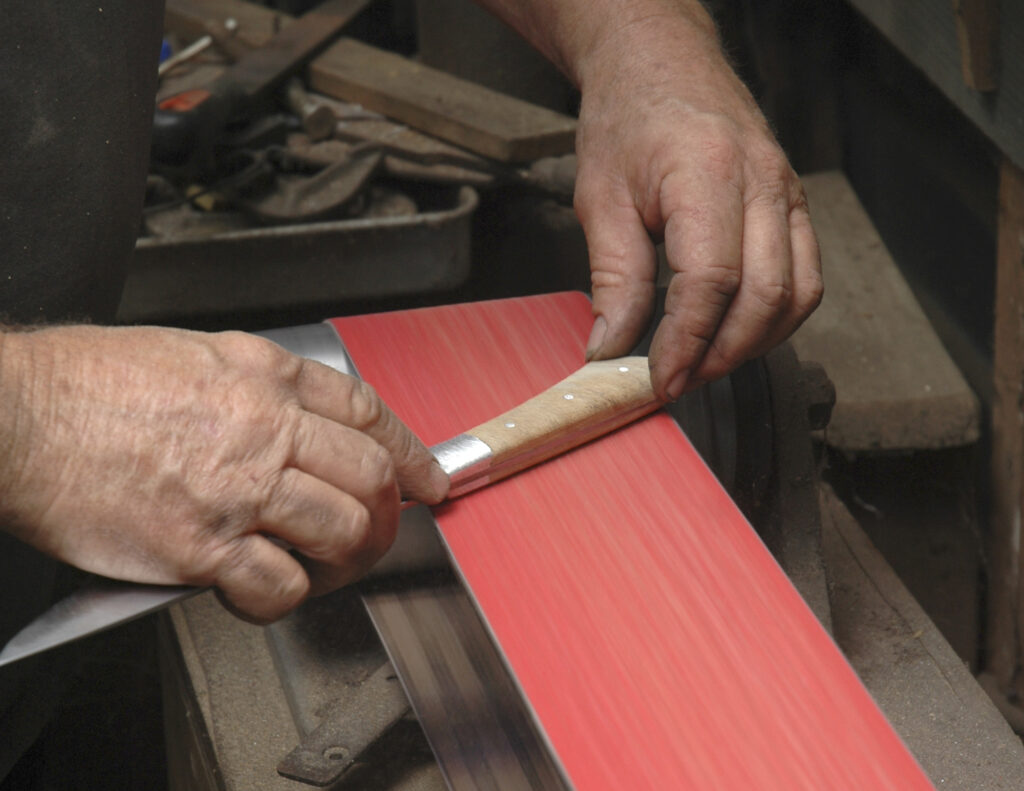
The design for this article is my everyday carry knife, a four-inch (100 mm) dropped hunter—an all-round knife whose blade is ample, large enough to skin that buck and small enough to carry all day without getting in the way.

The Auckland Blade Show is back for 2019!

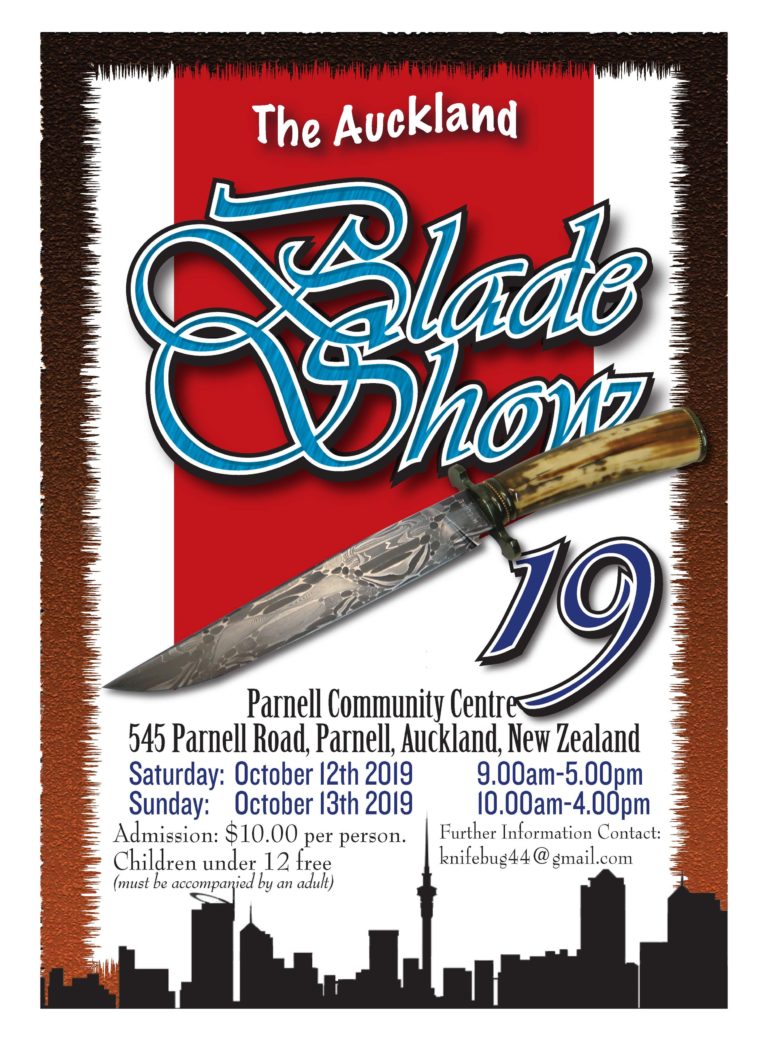
Good news, the Auckland Blade show is back on again this spring. Same location, 545 Parnell Road, Parnell, Auckland and this year it’s on the weekend on 12 & 13 October. See their poster for more info.
The Shed will see you there.