Make your own knife
Grind, shape and polish an everyday carry knife by Leif Haseltine
My goal here is to take a chunk of steel and make a cutting tool out of it—a knife that functions well, holds an edge and is somewhat pleasing to the eye.
This is not meant to be a rule for making knives as I don’t believe there is one, but merely a guide
to give you an insight or get you started on making your own.
This is my way, adapted from many hours of reading books, watching movies, making knives and making mistakes and this works for me. So have a go, use this guide and enjoy the work and the result.
Design
Think whether your knife will be for camping, hunting, for on the farm or just day-to-day use. You don’t need a knife with a ten-inch (250 mm) blade to cut the string on hay bales while feeding out.
The design for this article is my everyday carry knife, a four-inch (100 mm) dropped hunter—an all-round knife whose blade is ample, large enough to skin that buck and small enough to carry all day without getting in the way.
I choose 01 carbon steel for my design. It’s a good-wearing steel, easy to sharpen and available at your local steel depot. It is also easy to heat-treat at home with no special tools or equipment—just a heat source, a magnet and your kitchen oven (when the good woman is away).
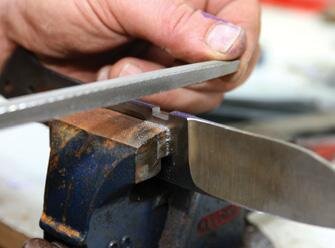
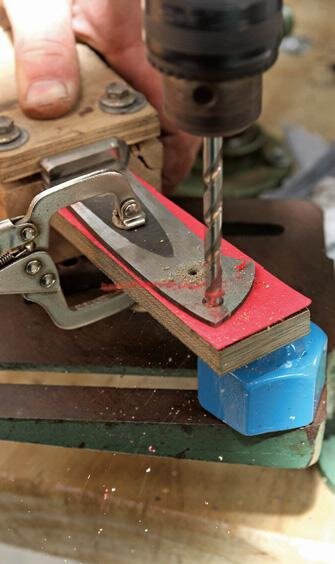
The first step is to coat the blank steel in engineers’ dye; this will enable you to mark the blade out with clear legible lines. I lamp the pattern to it, mark around the profile of the pattern with a scriber and drill the holes that the handle will bolt to. In my design, these are 4 mm for the handle fasteners and a 6.5 mm hole in the end for a thong tube. After the scribing and drilling are done, I remove the clamped pattern.
Leif drills holes…
…and produces outline
Profile
Time to profile the blade.
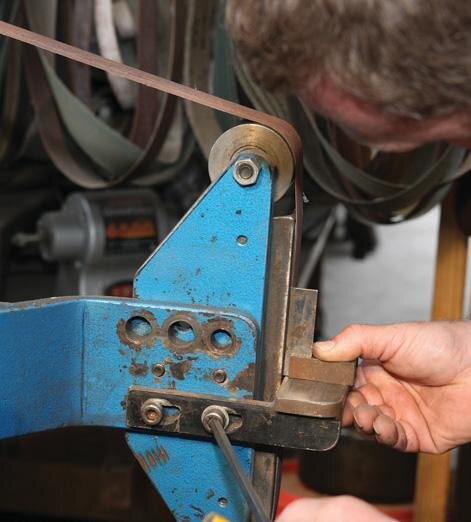
This is done on the belt grinder with a 60-grit belt on an eight-inch (200 mm) contact wheel. Carefully grind round the blade, staying about a millimetre or two off the line. For the tight curve in the butt end of the handle, you need to adjust the tracking on the grinder so that the belt will run over the outside edge on the wheel. This will give an unsupported section of belt that will happily roll over and give you a nice tight radius.
Once you have gone entirely around the blade, remove the wheel and put on the flat platen attachment from making the linisher (Making a linisher, The Shed Issue 39).
Take a square and make sure that the bench rest is square to the platen. Then go around the profile again with a 100-grit belt, grinding right up to the line.
This will smooth out the coarse grind lines and give your blade a nice square edge to it. Time for the marking-out.
Coat the whole thing in engineers’ ink, doing the edge and both sides. You will need to mark out where the stainless guard will go and then the major bevels. Mine start 10 mm off the guard which makes the knife look balanced. Any more and the blade looks short and any less it looks like there is something missing. Your call.
You will also need to mark the edge of the blade showing where the centre of the cutting edge will be. I mark mine at about 1.6 mm which is too thick for a cutting edge but I like to leave some meat to play with after heat-treating in case we get some distortion (do 25 percent of the grinding after the heat treatment). If the cutting edge is too thin, you run the risk of the blade cracking when it’s quenched in the oil.
Profiling the blade
Belt over edge of wheel grinds small corners
Grinding major bevel
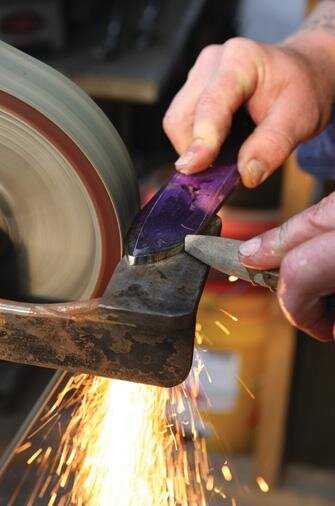
Once you’re happy with the set-out, it’s time to remove some metal to get this chunk of steel to resemble a knife.
The first step is to grind an approximately 45° bevel right down to the line on both sides, nice and straight as if this were the final bevel. Not only will this give us an indicator when we grind the major bevel but I find it a good warm-up if you haven’t been grinding for a while—it helps get the eyes and hands focused.
Now we fit the 10-inch (250 mm) contact wheel with a new 60-grit belt and the bench rest. It helps if you use a push-stick for this first rough grind.
Keep a bucket of water handy to cool the blade periodically as you can’t hold a hot blade. Now that we have coarse-ground a channel down both sides of the blade, it is time to fit a 100-grit belt and remove the bench rest as the grinding will now be done freehand.
I recommend a good-quality leather or canvas apron and you need to tuck your hands into your body, lock your elbows by your side and have a good firm grip on the blade. Take your time. Remember that once you have taken the steel off you can’t put it back on, so gently does it. Whichever side of the blade you are grinding, you will have to track the belt over the edge of the wheel by about 3-4 mm so you get that radius on the plunge-cut. This is far more pleasing to the eye that a straight line.
It’s kind of tricky but take it slowly and you will get it. Once the blade is straight and true and both sides symmetrical, use a 240-grit belt to smooth out all the 100-grit marks. Now leave it until after heat treatment.
No Gloves
You may choose to use gloves but I don’t.
I find I have far better control by holding it in my bare hands. I have NEVER had a blade slip from my hands while not wearing gloves, yet I have lost blades while wearing them. I find gloves are baggy and a hindrance and can be quite dangerous in the wrong situation.
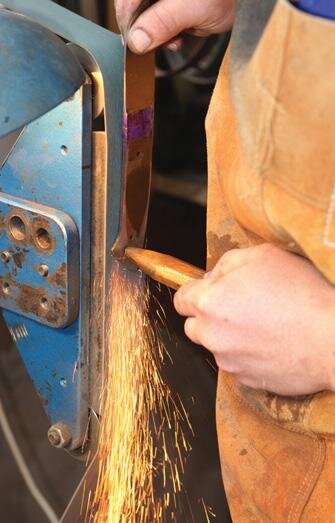
Tapering the tang
Taper the tang to remove weight from the handle and give it a pleasing look.
Using the 8-inch (200 mm) contact wheel, bench rest and a 60-grit belt, grind a channel on both sides of the handle the full width to remove excess metal. This makes it easier on you and your flat platen. With the flat platen attachment on and the 60-grit belt, holding the tip of blade and use the push stick to press the tang against the platen. Grind slightly heavier at the butt end of the handle, creating a tapered grind from behind the guard to the butt in a flat pane on both sides.
When all the bulk material is removed, smooth with 60-grit belts. Leave this section till after heat treatment.
Fitting the guard
After the previous steps, we have a blade that is finished on both ends of the knife.
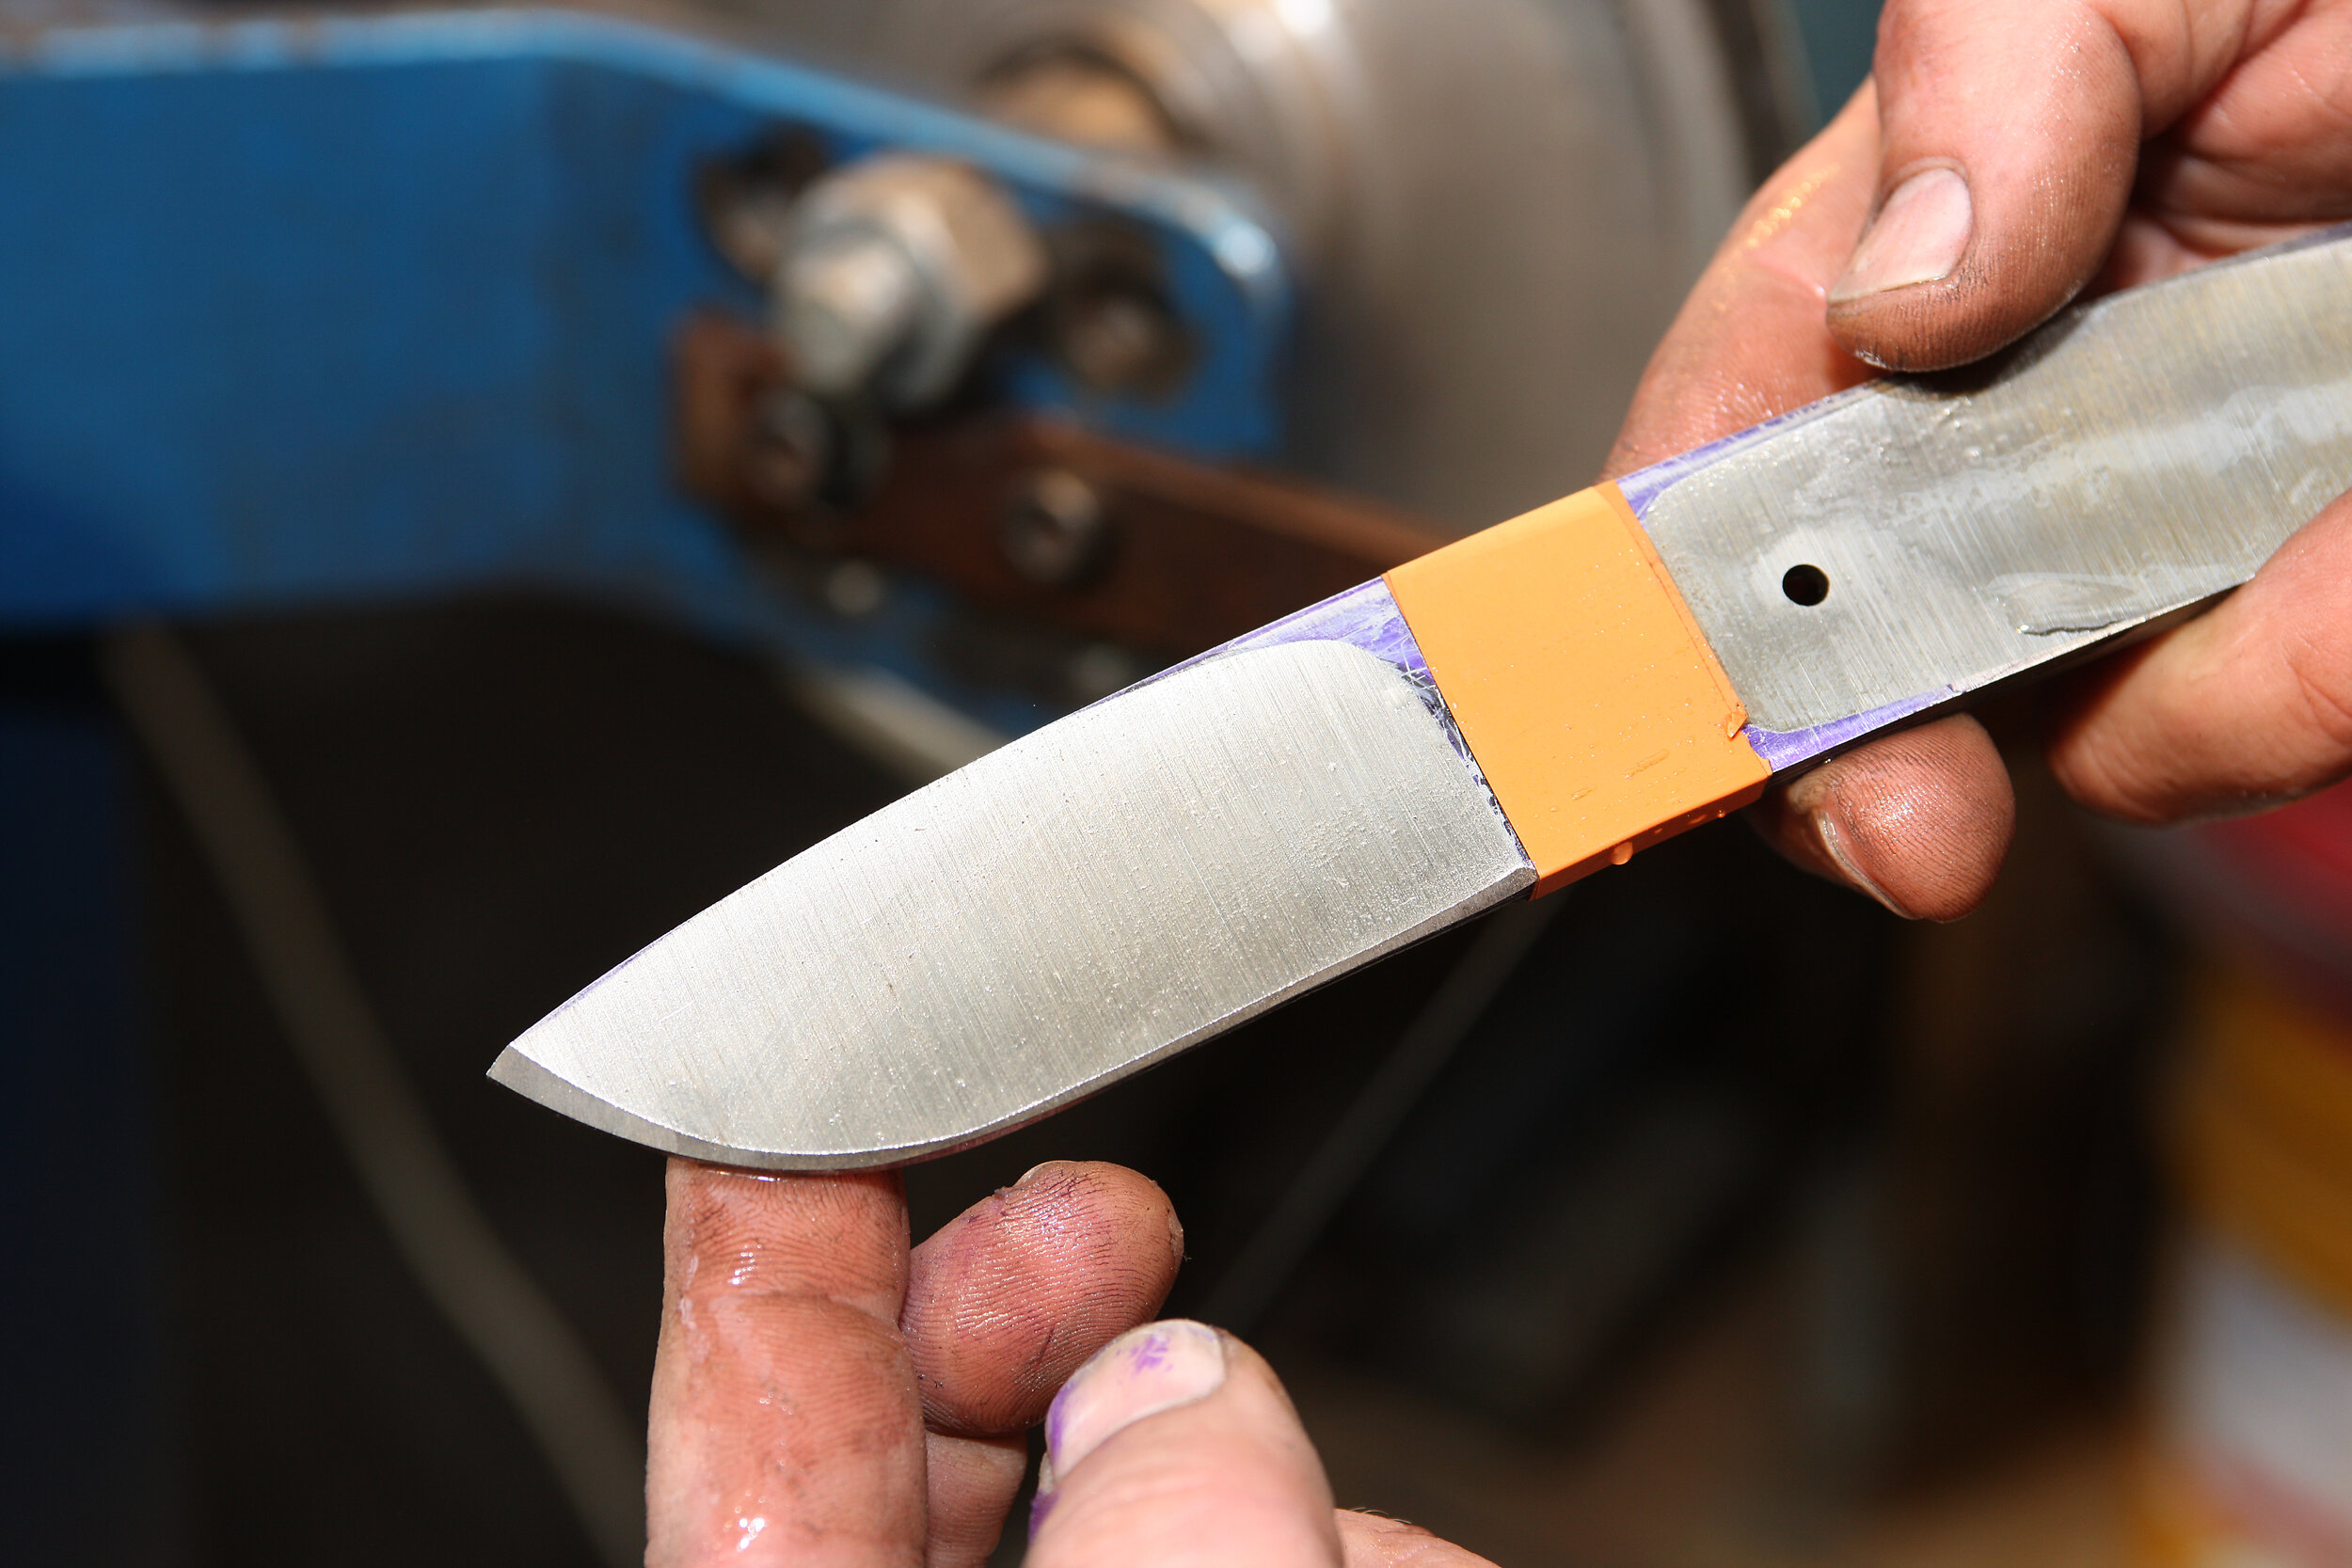
This leaves us the 20 mm section in the middle. Of this, 10 mm is where the finger-guard goes and 10mm is the ricassoo (the flat section between the plunge-cut of the hollow grind and the stainless guard).
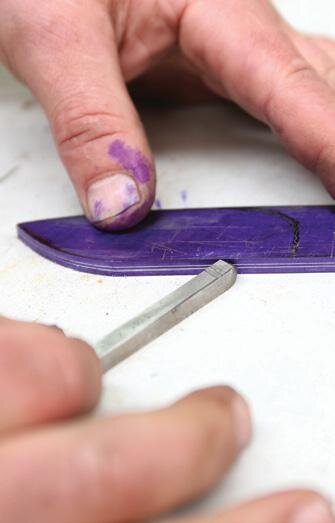
This section needs to be cleaned up to a 600-grit finish on both sides and a 10 mm wide by 5 mm deep slot is filed out for the guard to fit into.
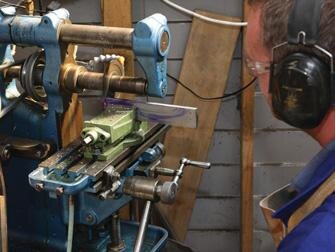
The guard is made from 316 stainless 40 x 10 mm flat bar. Cut yourself off a piece about 20 mm long, then machine a slot right in the centre to the width of the blade so it’s a nice snug fit. I use a milling machine for this now but for many years I had to cut a slot with a 5-inch (125 mm) grinder then hand file it out to fit the blade width; either method works fine.
When we are happy with the fit on the guard, we need to drill a hole right through the guard and blade so we can fit and peen a piece of 316 stainless rod to pin it in position when we’re ready.
Heat treating
To heat treat, I sue a forge made from two old 9kg gas bottles welded together end-for-end and lined with furnace wool.
My heat source is a Sievert gas burner mounted on the side of the gas bottles with a hole for the flame to go through. You could use a gas torch. Once the forge is up to temperature, clamp the blade in a secure pair of tongs, or in long-handled pliers or the like. Put the blade in and out of the flame while rotating it to make sure it is heated evenly. The idea is to bring the blade up to temperature evenly. If you just hold the blade still in the flame until it is red-hot, chances are it will bend as it will heat through from one side of the blade to the other.
How do we know when it’s ready? Use a magnet to check—steel at its upper-critical temperature (which is our aim) becomes non-magnetic. This is when we want to quench it in the oil.
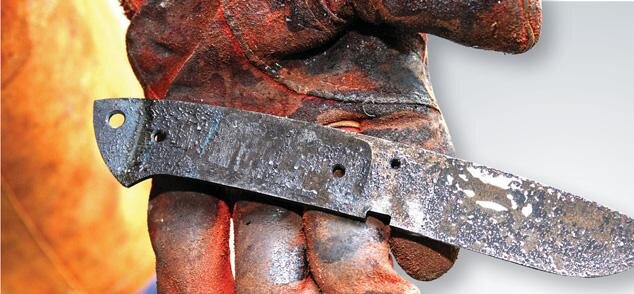
Check that a magnet doesn’t stick. As with heating up, we need to cool the blade down evenly. Quickly dip the blade tip-first into the oil. Hold it still so the oil stays at a consistent temperature around the blade. When all the smoke has gone and the flames are out (it takes around one minute) swish it around a bit and cool it right off.
IMPORTANT: the blade must stay in the oil throughout the whole process. After quenching the blade, you will see the scale breaking off the steel. Run your file down the edge and you will notice it skates right across without biting the steel. This means we have a hard blade. It’s time to temper it down to the required hardness so it can be used in the field skinning that buck.
Removing serious metal
Shaping up
Tempering
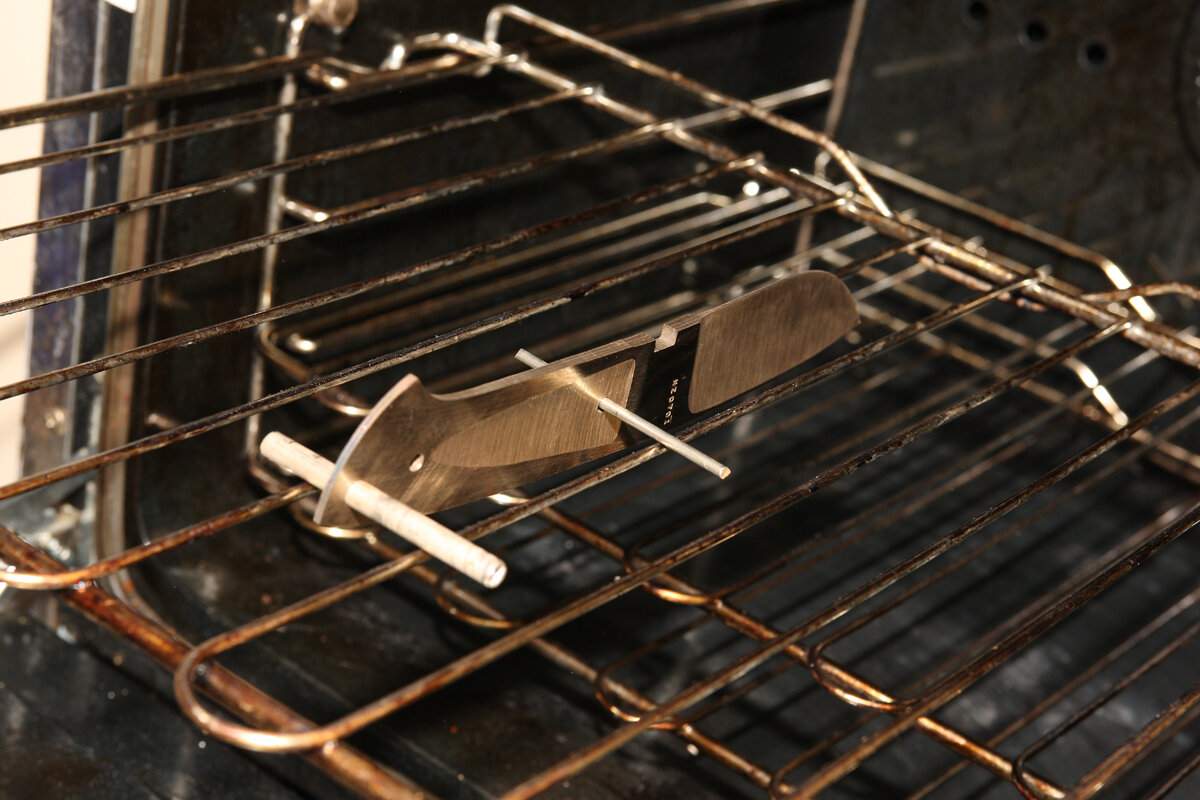
Wash off all the oil and with the 240-grit belt give the hollow grind and tang etc. a good clean to shiny steel. Prior to quenching the blade, I pre-set the kitchen oven to 220 °C to get it up to temperature. Now, the blade goes in for about 30-45 minutes, depending on how accurate the dial is. On my oven it goes in for exactly 43 minutes.
Watch for the blade to colour from silver to a nice straw-brown. You don’t want to get into the brown/ purple/ blue colours which will not hold a good edge—you will have to go back to the start and temper it again.
I would suggest checking after 30 minutes and if you’re not happy give it another five. The times and temperature from my experience are a good general guide, but once you have done a few knives you will get your own “recipe.”
Working on the tang
Final grind
Time to do the final grind on a blade that is rough-ground and heat-treated to a workable hardness.
This is the last 25 percent of grinding we talked about. Here we grind out any warping that happened during heating and take the edge down to the desired thickness.
For the major bevel, start with a new 240-grit to finish the grinding, removing any coarse grinding marks, followed by work with a new 400-grit belt and then an old (and I mean OLD) canvas belt with basically no grit left. I load up the polishing compound and give the bevel a nice going-over. On the polishing machine, give the blade a polish. That’s your blade finished. Time to do the tang.
Tang
With the flat platen fitted, use a half-worn 100-grit belt to give the tang a clean-up and it’s done. Leave the 100-grit marks on the tang as this will give the epoxy a good bond when it comes time to do the handle. Finally, give the ricasso area a good clean-up with 220 then 400 then 600-grit papers on both sides.
Finger guard
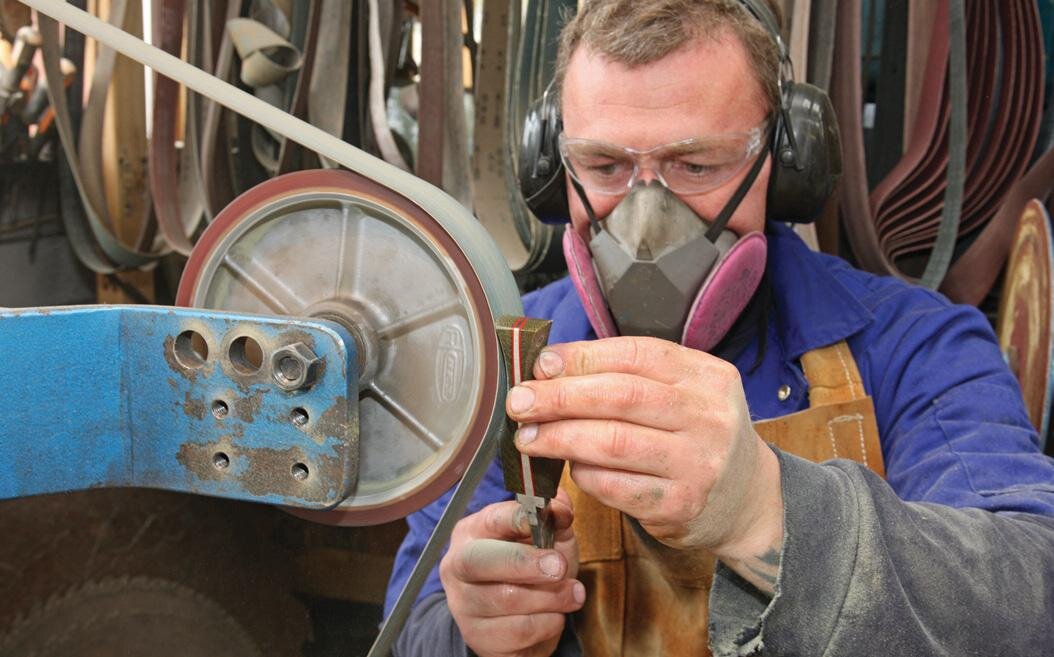
Finish the finger guard made earlier to 600-grit on one face (the one that will be visible once the handle is on) then give it a polish on the buffer.
To remove the waxes and greases left from polishing, wash down the blade and guard well with acetone. Fit the guard into position, insert the stainless pin and cut it to length, leaving about 3-4 mm proud on both sides. This will enable some meat to peen over the pin.
Peen evenly by giving a few hits on one side then the other. I start with the flat end of the ball-peen hammer and once it has a fair amount of mushrooming, use the ball end to really get into it.
If you are satisfied with the fit, grind the peening off at the belt grinder and shape the guard to about 95 percent of your finished shape. To get the finger notch in the guard, simply track the belt over the edge of the at platen about 5-6 mm and slowly chip away at it.
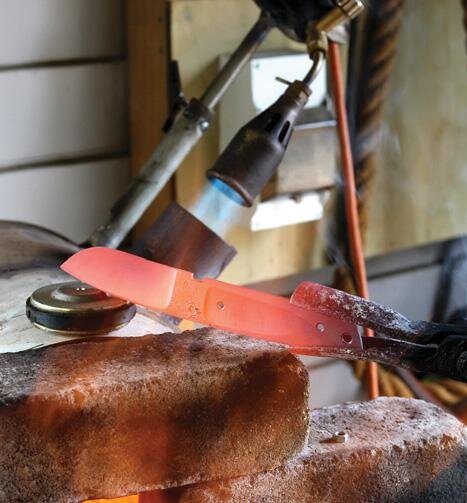
Blade heat-treated in gas forge
Drill hole through guard and blade
Soldering the guard
Place the knife in the vice with the tip pointing straight up in the air and pour some Duzal flux on the guard, making sure to get some in the tiny crack.
I use an ordinary, old paint-stripping gun to heat this to soldering temperature. You could use any heat source like a small gas torch or similar, but I find they burn the flux and tend to give you more clean-up work at the end.
For me, the heat gun is perfect. It does take slightly longer but you save time in clean-up and they are cheap. The special 430 solder I use from Weldwell is a high-silver content soft solder, giving it a low melting temperature of 220 °C, the same as in the oven for final tempering. It is also approved for the food industry so we know that it is safe to put on our knives. Because of the high silver content, it stays shiny which ordinary solders do not. DO NOT USE LEAD-FILLED ELECTRICAL SOLDER.
Once you are up to temperature on the guard and the solder is applied, dip a cotton bud in the flux and gently wipe the length of your solder join. This will smooth it out to a nice even bead. Allow it to cool and then touch up any lumps of solder with a small piece of 600-grit wet and dry paper.
Lastly, boil the blade in water in an old pot or pan with added baking soda for a good five minutes. This washes the blade well and neutralises any flux that might be on the guard or blade.
Wash the water down the sink with plenty of dishwashing liquid. This boiling process will stop any remaining flux rusting the blade in a month’s time. I like to take the blade and guard back to the buffer for a good shine up. Don’t buff the tang because the glue for the handle will not take to it.
Quenching oil
Everyone has a preference or secret recipe for quenching oil: animal fat mixed with oil, used motor oil, used transmission oil or the more costly, proper quenching oil. I use good old canola oil, the same stuff you fry chips in. It’s relatively cheap and doesn’t smell or release a lot of smoke when it flames up on contact with the red-hot blade. Used transmission oil will have you running out of the shed gasping for air from the smell and smoke.
Polishing machine danger
The polishing machine gets my vote for the most dangerous in the shop. Take care when polishing. Keep the blade below the centre line of the spindle. That way, should the machine grab the blade it will throw it away from you and not into your stomach area. Give the buffer every ounce of respect it deserves—this machine will bite if your concentration lapses.
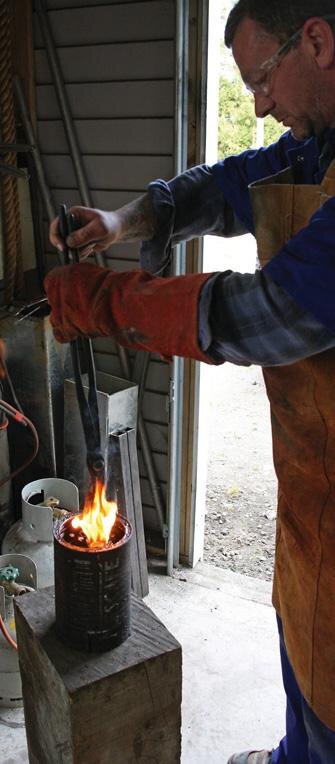
Blade quenched in canola oil
Straw colour of tempered blade
Peen pin in guard
Use high silver- content solder
Boiling in baking soda neutralises flux.
Handle
Before working on the handle, you may want to wrap the blade in masking tape to keep it from being marked.
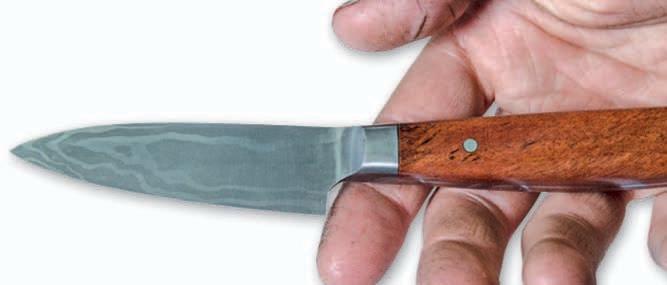
Whatever handle material you choose, you will need two pieces about 125 mm long x 40 mm wide x 10 mm thick. This is one scale per side of the knife. I use Micarta, a high-pressure laminate available in paper, cotton or canvas, and red liner material 1 mm thick between the tang and the handle scale on each side.
I get this stuff from the States as I have yet to find what I want here. Lay a piece of liner and one handle scale together on one side of the knife. You will have to file an angle on the end of the handle scale as this knife has a tapered tang and the face of the guard will NOT be at right angles to the flat plane of the tang.
Remember this when it comes time to drill the fastener holes. The knife needs to be held in a vice by the blade and NOT sit sat flat on the drill press table.
Visualise that we are working off an imaginary centre-line from the tip of the knife to the butt end. The holes need to be drilled right at angles to this so that both sides line up when the fastener is pushed through.
Clamp and position in a vice as mentioned, drill the two fastener holes (in my case 4 mm) and the thong tube hole (mine is 6.5 mm), remove from the vice with the scale still firmly clamped to the tang and push through a try-fit pin in the two fastener holes this. This keeps the scale in position when we take the clamp off.
Then cut with a band saw right up to within a couple of millimetres of the tang. If you don’t have a band saw don’t panic; use the belt grinder and just as at the start, grind the handle around the profile of the tang as close as you dare, repeat this for the other side and take your time. There is no hurry in knife-making as this will only cause mistakes. Once the handle scales are cut out, we need to cut a short piece of quarter-inch stainless tube about 25 mm long to serve as the thong tube.
Before assembling this, give the tang another good wash with acetone so the epoxy will bond to it. The main function of the glue is not to hold the handle together (the fasteners will give it a good mechanical fit-up) but to keep moisture out of any tiny gaps.
Firstly coat the tang, place the liner down and coat that, place the scale down and push the fasteners through with a dollop of glue in the hole and simply repeat for the other side. Run the nuts all the way down the shaft and give a nice firm tighten with a screwdriver (don’t over-tighten as you will press all the glue out).
At this stage, you could clean off any excess and set it aside for at least 24 hours for the glue to set up nice and hard. I use good old Araldite but the slow-set type which sets harder; the five-minute set will give you all sorts of strife. Now might be a good time to go clean up your mess in the kitchen. We did a few trips to the stove throughout this job and she might be getting a bit tight around the eyes by now.
Box on blade holds tapered tang flat for drilling vertical hole
Micarta scales and liner for handle
Counter-sunk holes in handle
Glue and screw
Final shaping
This is the best part when all our hard work comes together.
I like to put the 8-inch (200 mm) wheel on the belt grinder with and old 60-grit belt and profile right around the handle first, then start working away at the shape.
I have learned a sequence for the handle. I do 95 percent of shaping on the belt grinder, first with 60 grit then 100 grit then 240 grit. Then I do a hand-sand with 600 grit and lastly, run the finished knife over the buffer with a chrome polishing compound. The handle shape will be a personal thing so have a good think about it. You don’t have to use the grinder. Files and rasps will work fine; they are just a wee bit slower but either way is fine.
Final shaping
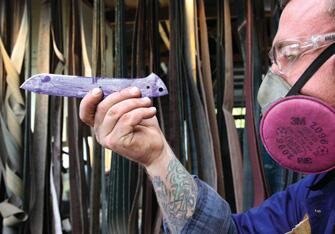
The completed knife
Leif Haseltine
Leif Haseltine is a quality manager for Fulton Hogan civil south, working mostly in the oil and gas industry. His main interest is in making knives and he spends as much time as possible in his shed, whether to create new tools or projects or just a jig to make life easier.
He thanks Vonnita—who keeps the house and three kids shipshape—for all her patience.
Knifemaker Leif Haseltine