The Shed Logo
Search
Close this search box.

Customising your plane blade

In my previous article on sharpening a plane (“Sharpen up your plane blades,” The Shed magazine, Feb/Mar 2010 – also on this website) we worked on how to consistently produce a sharp, straight edge on our plane irons. Now that we have that skill in place it’s appropriate to look at how modifying that straight edge can allow us to achieve a range of differing results in our woodworking. It is important to understand that what drives the modification of our cutting edges is what we want to achieve with them. Therefore after describing the shape of the plane blade, I’ve outlined four major tasks that we can achieve with the particular shapes our planes. Each requires progressive development of the edge “shape” so I recommend re-reading of the earlier article to get you on the starting blocks for this one.

Modify a straight-edged blade for different purposes 
By John Shaw 
Photographs: Tim Gemmell

Four blade types (From left) 1, blade with straight edge, 2, blade with deeply curved edge, 3, blade with shallow curved edge, 4, blade with fi nishing or smoothing edge
My limited set of bench planes, (from left) Stanley No 6, a small block plane, Stanley No 3

In the previous article on sharpening a plane (“Sharpen up your plane blades,” The Shed magazine, Feb/Mar 2010, you can also find it on this website {https://the-shed.nz/2020-10-19-sharpen-up-your-blades/})
we worked on how to consistently produce a sharp, straight
edge on our plane irons. Now that we have that skill in place it’s appropriate to look at how modifying that straight edge can allow us to achieve a range of differing results in our woodworking.
It is important to understand that what drives the modification of our cutting edges is what we want to achieve with them. Therefore after describing the shape of the plane blade, I’ve outlined four major tasks that we can achieve with the particular shapes our planes. Each requires progressive development of the edge “shape” so I recommend re-reading of the earlier article to get you on the starting blocks for this one.
As you tackle and become comfortable with each of these skills you are going to make your woodworking a whole lot more enjoyable—and a lot quieter—it’s time to get the most out of that annoying bit of cast iron and high-carbon steel.

For an arc shape, cut while sweeping or Sharpening on the stone. swinging the blade

More
Now one obvious issue that comes up as we start messing around with our plane irons is, “Doesn’t this mean we need more planes?” Well, yes it can do, although my set of bench planes is generally limited to three. Firstly, a Stanley No 6, then a Stanley No 3 and also a small block plane. My own approach is to have a range of blades prepared to suit the different uses each plane might be put to, but it’s up to you.
Disgruntled letters from overspending woodworkers’ Better Halves should be sent to the editor of The Shed magazine, not me.

Sharpening on the stone

Four contours
There are four contours we are going to shape on four different plane blades and each shape is designed for a different purpose.

BLADE 1
SHAPE: Blade with straight edge  
PURPOSE: To produce flat clean surfaces on endgrain or variations of endgrain-like mitres.
The best blade shape to produce these clean flat surfaces is an unmodified but well-sharpened straight one. See my previous article for details on how to achieve this. 
We usually use a blade with a straight edge to ensure well-fitted joints or a clean, finished surface on the endgrain ready for applying shellac or oil. This is easy and straightforward.
The use of a shooting board in conjunction with your well set-up plane will give best results. With this particular technique the re-emerging breed of  planes with their blades turned over and set at a lower angle (low-angle planes) are definitely improving results. Check out low-angle planes on the web.

Blade 1 for clean surfaces on endgrain

BLADE 2
SHAPE: Blade with deeply curved edge.
PURPOSE: To remove stock quickly from a surface in order to begin making that surface flat or a particular shape.
A blade with a deeply curved edge is used for rapidly flattening or changing a surface. This is also the ideal blade shape for scrub planes used to investigate rough-sawn wood. The blade is shaped into the arc of a circle with the middle of the arc between 1.5 mm and 2 mm forward of the corners.

Blade 2 removes stock quickly from a surface

BLADE 3
SHAPE: Blade with shallow curved edge.   
PURPOSE: To plane edges straight and square.
This blade shape gives us mating edges to enable two boards to be glued together either flat or at a specified angle. It’s a technique that generally requires a little practice to get good results but enables us to develop good sensitive control over our plane on the way.
The lightly curved blade allows us to take different  profile shavings depending on which part of the blade we cut with—left, right or middle—easing an out-of-true board edge gradually towards true. The tangible result is the “invisible” glue line. Once again, the blade edge is the arc of a circle but much softer so that the centre of the edge is only ahead of the corners by about 0.5 mm to 0.75mm.

Blade 3 planes edges straight and square

BLADE 4
SHAPE: Blade with finishing or smoothing edge   
PURPOSE: To produce a clean, finished surface on timber that is wider than our plane blade.
This blade edge is essentially straight, but about 5 mm from the outside of the blade  it curves back by about 1 mm. This means that as we plane across a board we get gently overlapping shavings and no “edges” on our surface.

Blade 4 curves back by about 1 mm at the edges

Shaping
Hopefully that outline of the different shapes of the plane blade makes sense. The major shaping of these edges is done on the grindstone using a flat rest that allows us to swing the iron in the specific arc required. For the curved blades, start removing steel from the corners and gradually widen the area being cut while sweeping or swinging the blade. When you have the desired arc, move onto the coarse bench stone and then finish on the fine stone.
The technique on the sharpening stones is the same as for straight edges described in the earlier article except you need to add in a slight rotating of the wrist as you move the blade up and down the stone. Once you’ve got the blades all organised pop them back into their planes and have fun investigating what can be done with them. I hope soon to be able to lead you through a small project that will clarify and take advantage of all four edge variations. Enjoy.

John Shaw is principal tutor at the Centre for Fine Woodworking, Nelson

Share:

More Posts

Making a die nut

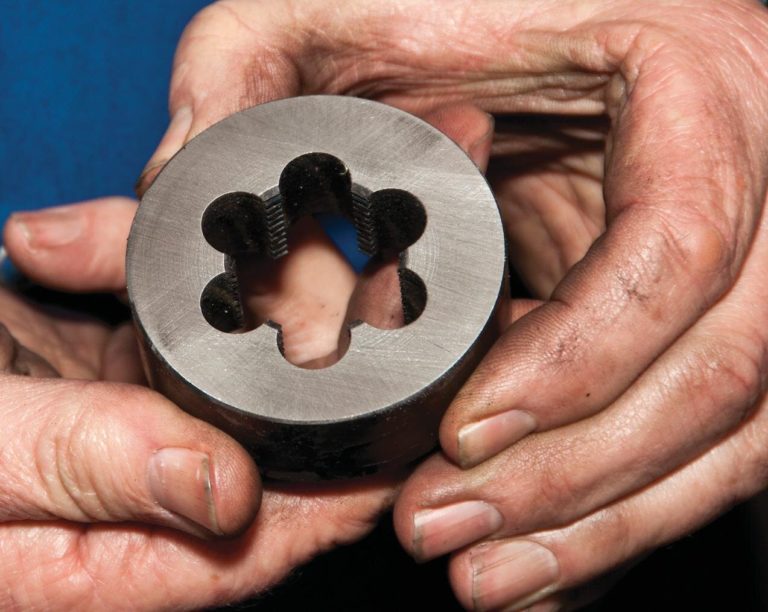
A die nut is created with interrupted sections of thread around its internal diameter. Die nuts are simply screwed onto the threaded part. As they are wound down, they cut away any of the screw thread that is bruised (bent over) or out of line. A die nut cuts irregularities and scrapes off the dirt from the thread it is being used on so needs cutting edges, which are formed by the cut-away places.

Sharpen up your blades

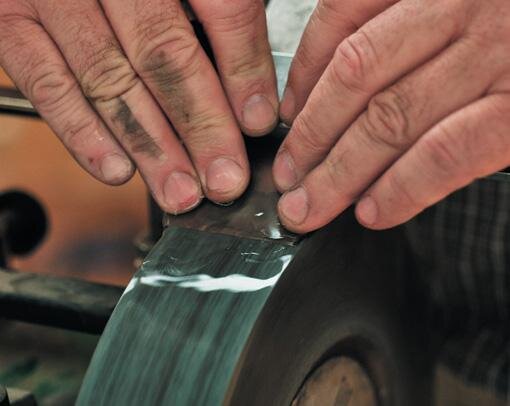
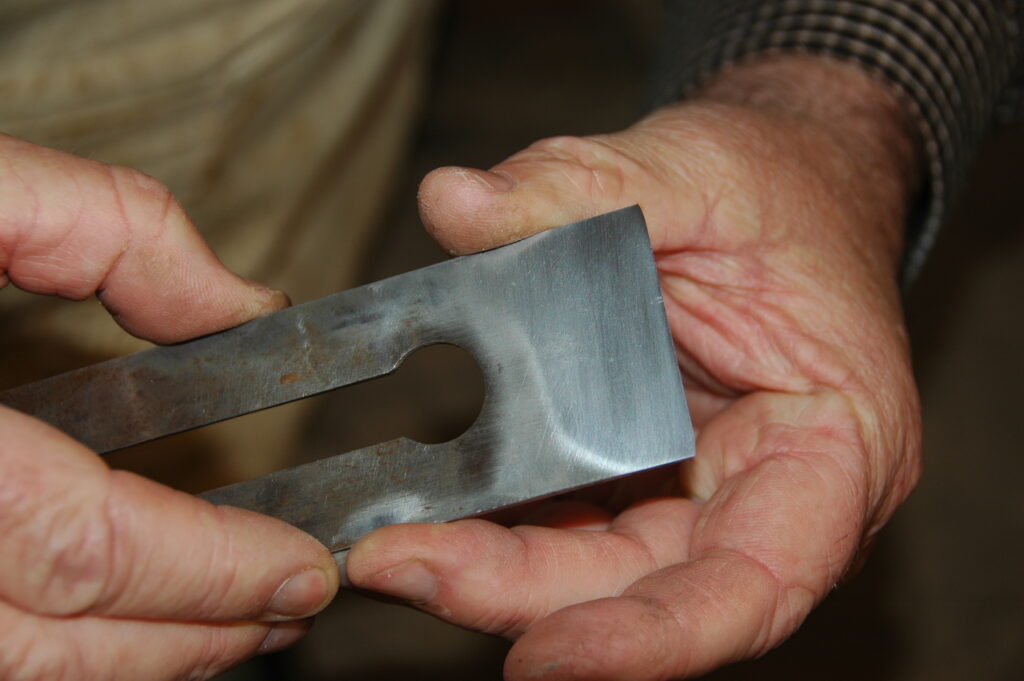
When honing a cutting edge on a steel blade, you are progressively over three or four stages reducing the size of the scratches on the two faces which meet up to make the sharp point.
The much-vaunted “mirror” edge simply refers to the stage where we cannot easily see the scratches with the naked eye and hence it looks smooth and shiny. This process, therefore, requires several sharpening stones with finer and finer surfaces (325 grit, then 1200 grit, then 6000 grit).