Designed for small boats up to 12 foot in length
By Tony Cullen
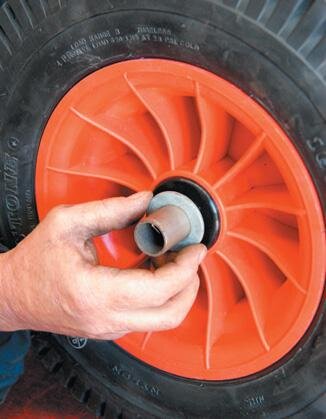
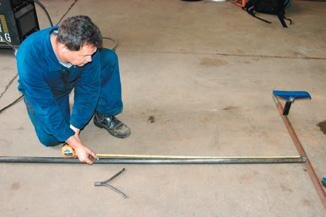
Finished sand trolley. Note uncut plastic tube on Y bracket.
A mate asked me to build this sand trolley for him. It’s just for pulling something like a 12-foot dinghy or similar-sized yacht across the beach. It could be good enough for a small surf boat as well.
I also made some of these trolleys for the local rowing/kayaking club to use for their chase boats. I happened to have the pipe for the central shaft of the trolley and bent it with a pipe bender. You could also make the trolley out of RHS steel, with an inserted angle piece at the front, all butt-welded.
I used a pipe 3200mm long, but it depends on what you have. This is 2400mm along the flat and bent up at the front. The horizontal distance, from the flat to the tip lengthwise, is 340mm. I measured from a square on the pipe, and out 340mm for the bend. The axle is usually 1200mm. I turned a little insert stub axle for putting through the one-inch (25mm) bush in the centre of the wheel and into the axle. You could also turn down the axle to fit. It’s a straight bush because bearings and saltwater don’t mix.
The balloon tyres are a little more expensive than narrower plastic tyres, but those are much harder to pull through the soft sand.
You get a better weld for the handle and axle if the pipe ends are squashed. If you have two people, you could get some help holding the pipe in the vice to crimp it. By myself, I just use a sledgehammer
Measuring the bend at 340mm
Axle
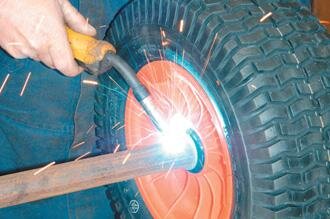
A small piece of pipe in the end of the axle holds the wheel. I cut and turned a 150mm long piece of pipe with 15mm nominal bore.
The length depends on the wheels you use. To get the 150mm length, I measured it with a washer and cotter pin on the outside and a rubbing washer inside. You need at least 50mm inside the axle. I drilled two holes in the axle top and bottom and through these spot-welded in the small axle stub.
Keep the tyre on when tack welding in the first hole in order to check the spacing. Remove the tyre and turn the axle over to spot weld the bottom hole. First, check that the axle stub is square. One of the good things about tack-welding is that you can move the stub around to ensure that it’s square before welding it on properly.
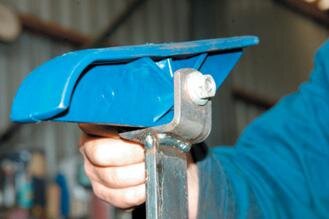
Then mark the centre of the axle and place it at the end of the main pipe shaft where you will tack-weld it. Keep the central pipe vertical at the front by clamping it to whatever you’ve got. You can square off the axle at the end of the pipe from a square line on the floor, or use a square as I did. Onto the front end of the main pipe, tack weld the 400mm handle, a comfortable size. I bought plastic skids to support the side of the hull when running the boat onto the trolley. To attach the skids, I got a trailer spring hanger and welded a piece of flat steel 40x10x130mm long to stand vertically onto the hanger flange.
I bolted the hanger and skids together.
The flat is welded vertically onto the axle. The skids appear loose on the bolts but tighten up. Weld-on the flat with the skids 150mm from the end of the axle and at a slight angle bending inwards. The skids will move up and down in an arc of 100mm like a wobble roller.


Y brackets
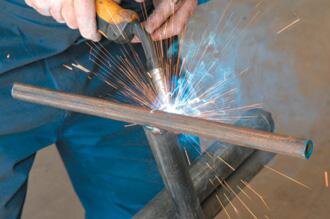
To make the Y brackets for the bow support, I took two 200mm long pieces of 12mm solid round rod.
Measure up 50mm from one end of the two rods held together. Tackweld this 50mm section of the two rods together. Once the bottom join of the two rods is welded, open out the top where the rods are together with a screwdriver. Then use a bit of pipe on each rod to bend it outwards into a Y shape.
Put another little bend on the very tip to round it out a little. Then weld up the parallel rods at the bottom. Place the keel support Y bracket at about 1200mm, halfway along the main shaft. Put the bow support Y bracket at about 500mm up the front bend of the pole.
When everything is tacked and it all fits, I go around and weld the trolley up properly. Before it goes for galvanizing, make sure you drill holes in the main pipe at the end near the axle, near the top by the handle and near the bend.
When the trolley is galvanized, put the handle grips on and plastic piping onto the Y brackets to protect the boat.
Bow support Y-bracket
CUTTING LIST
2 x 8-inch plastic wheels
2 x nylon balloon tyres 16 x 6.50-8
2 x plastic skids
2 x 40mm trailer spring hangers
2 x 10mmx70mm bolts
2 x flat steel 40x10x130mm long
25 nominal bore black pipe: 1 x 3200m main body, 1 x 1200 axle.
15mm nominal bore black pipe: 1 x 400mm handle, 2 x plastic handle grips.
800mm 12mm solid round rod, cut into 200mm pieces.