Keep sauces, tools, beer handy with this very useful barbie extra
By Stuart Lees
BBQ season seems to come around faster and faster each year—not that it is a bad thing and sometimes I wonder if it ever really ends!
Each time I head out to the barbecue, it takes multiple trips to carry the meat, the vegetables, the implements, sauces and marinades, and obligatory chef’s beverage. Then there are never enough flat surfaces in the vicinity of the barbecue to keep everything organised.
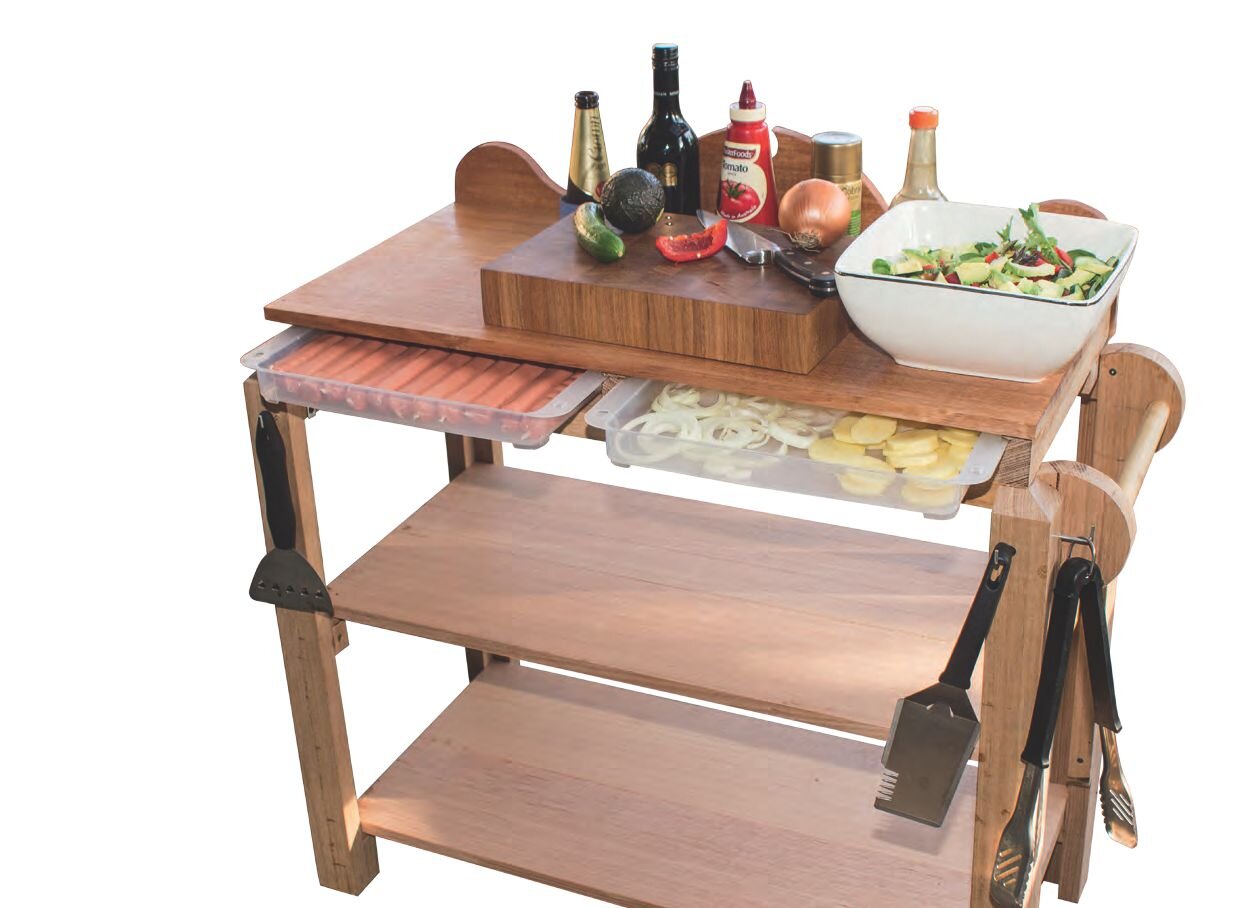
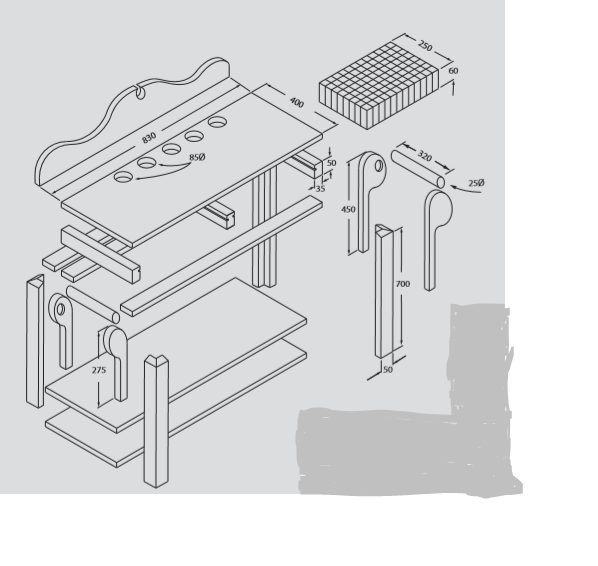
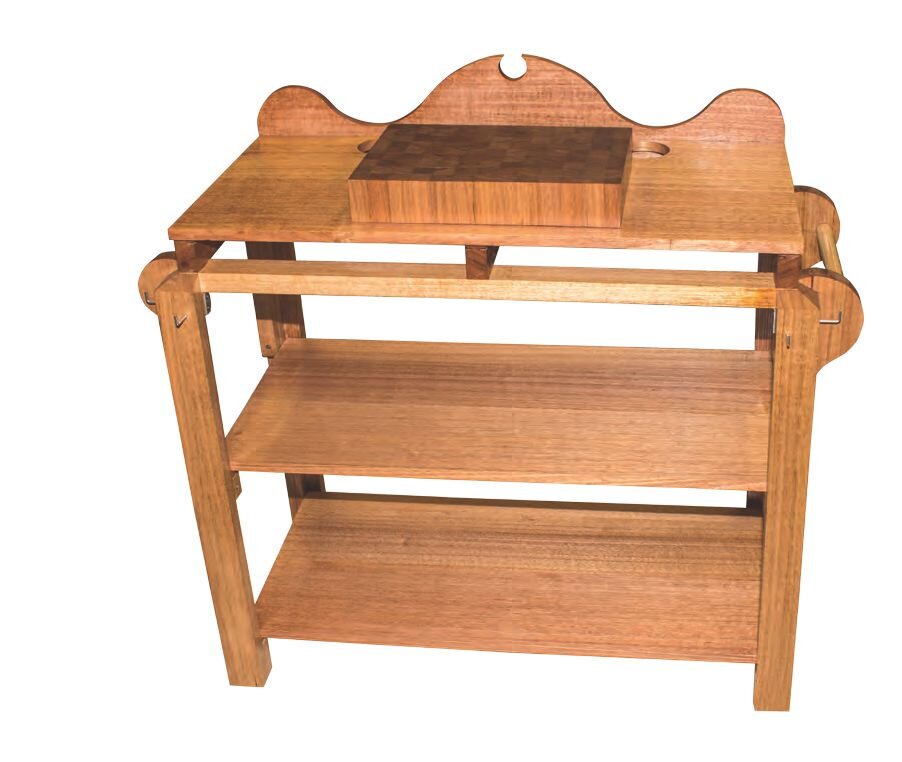
My current project is a BBQ trolley, one with preparation surfaces, all the storage you could want and importantly, storage for the raw meats so they are kept well separated from the preparation areas. As time is a premium for everyone, this project can be knocked over in a single weekend, ready for a test run on Sunday night.
Materials
• 8 x 1600 mm hardwood lengths 35 mm x 90 mm
• 7 x 850 mm hardwood lengths 220 mm x 20 mm
• broom handle, 25 mm diameter
• 2 castor wheels
• 250 ml polyurethane glue
• 250 ml Titebond III glue
• Plastic BBQ trays, with a lip at either end
• 250 ml food-safe mineral oil
Dressing
Step one as always is dressing the timber so it is straight, square, and a consistent thickness. Ideally, you want to be able to do this yourself, with a planer/thicknesser combo (either as separate machines, or a combo machine, of which there are some pretty interesting examples available these days).
I still have straight cutters on both of mine. But one day it would be really interesting to upgrade them to spiral heads and gain the advantages of noise reduction, smaller chips for the dust extraction and, so long as it is a genuine spiral head, a very smooth finish thanks to the slicing action of each cutter. Dressing all the timber at the start has a significant benefit—not only is it faster to run it all through step by step, but you also end up with all the timber uniformly dimensioned.
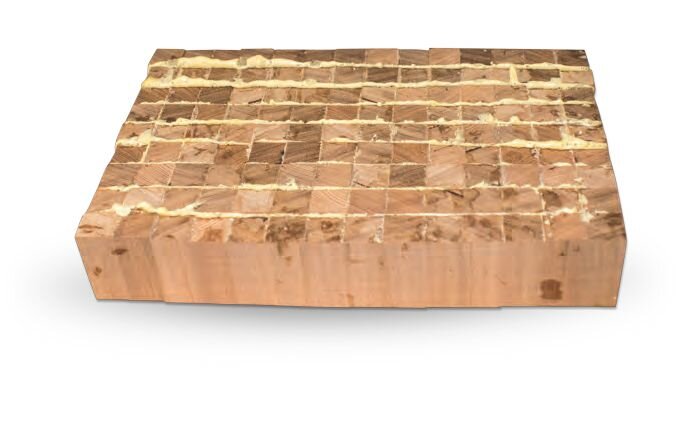
Chopping board
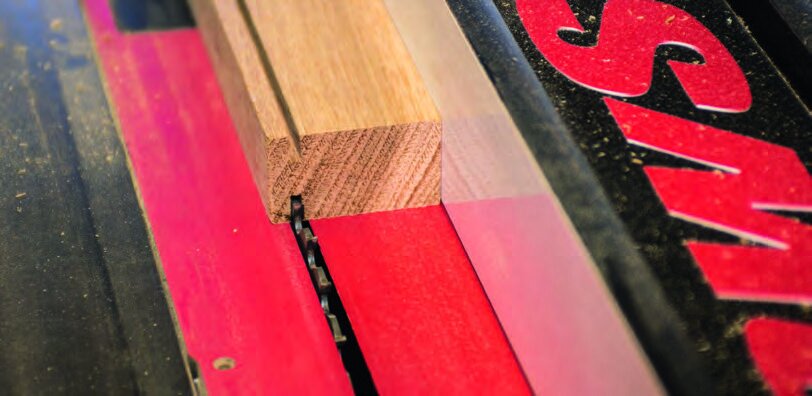
I ripped the first few lengths of hardwood on the table saw to produce (near) square sections, around 28 mm x 28 mm.
Unless you are a glue-up genius, it is actually useful for the sections to be more rectangular than square by a couple of millimetres (more on that shortly). These are then docked to 70 mm long. During glue-up, this allows some movement that can be trimmed away, and you still end up with an end-grain chopping board over 60 mm thick (2 3/8” approx.)
You need about 120 individual pieces, depending on how large a chopping board you want. Mine is 13 x 9 pieces, which seems a reasonable size. Unless you have a clamp that not only brings boards together, but also restrains their movement laterally, it is highly likely that you will end up with the short sections glued with a bit of a curve, or some pieces slightly out of position.
This is the reason to start with a rectangular section.

Chopping board needs 13 x 9 pieces
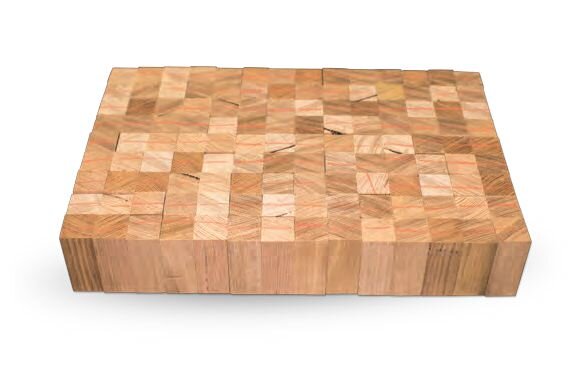
Red lines indicate shorter dimensions
Red line
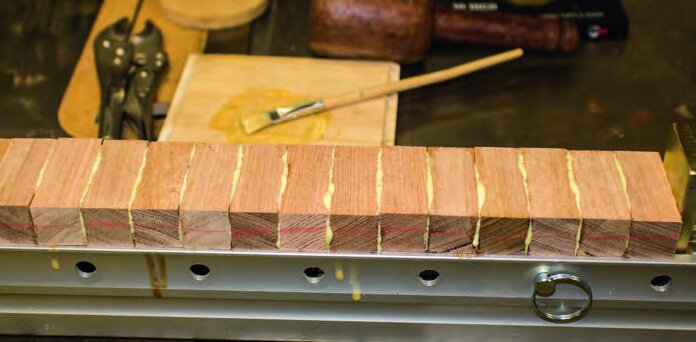
You will notice in some of the photos of the chopping board in progress, I have drawn red lines using a lumber crayon.
This is a visual indicator to me of the shorter dimension of each block, particularly useful as my blocks are only about 0.5 mm out of square at this stage. Once the rows are glued, they can be sanded down, back to flat, and that also results in them being more square.
Clamps
There are clamps that save (or at least minimise) this step.
The ones I use are Frontline clamps, but there are a few others out there, including Veritas and CompressX. These are worth their weight in gold. Not because of the amount of timber they save (which in the scheme of things is not a lot), but the amount of time you spend flattening the resulting boards after a glue-up. There are other ways around the problem, including using dowels, biscuits or dominos, but if you have a dual-acting clamp, you can also save time by not having to set up and use the biscuit joiner. You can toss the boards straight into the clamps once the glue is added and still get a good result.
Glued row will be sanded down
Clamps save time and timber
Slippery
Wet glue is annoyingly slippery between boards, so if you don’t adequately restrain boards (especially if you go a bit tight on the clamp), they can slip over each other, and the result is a real nightmare, even to the point that the pieces can slip right out from between the jaws of the clamp.
It may look very messy with the polyurethane foaming out of the joints, but it cleans off easily, and any gaps are sure to be fully filled.
Once each of the nine rows is glued up and flattened, the rows can then be glued together to complete the chopping board. It may take some work to flatten the upper and lower surfaces, but the result is worth the effort. Either a belt sander or ideally a drum sander is invaluable for this step.
You cannot feed the chopping board back through the thicknesser as the end-grain will ensure the board is chewed up and left suffering from substantial amounts of tearout, rather than being flattened.
Flattening
To judge the progress of the surface flattening, it is useful to mark the surface all over to see which areas are done, and which are still to go.
The lumber crayon also proved quite handy for this task. Where there were areas particularly high compared to the surrounding surface, I helped the process along by hitting them with a belt sander (being careful not to make the situation worse by getting too carried away).
Once the board is sufficiently flat, a quick sand to 400 grit, then a coating of food-safe mineral oil preserves the timber and can be easily reapplied as required.

Surface flattening of chopping board
Polyurethane glue
I used polyurethane glue for the chopping board. I wanted a strong, fully waterproof joint and no gaps. Polyurethane glue needs a moist environment to set and it is common (if not rather counterintuitive) to need to moisten the boards before you join them.
Polyurethane is a strange glue to use—both sticky and slippery during application. It is what happens next that makes it unique. It foams. In fact, it looks exactly like space filler as it foams out of the joint. Not surprising really, considering space filler foam is also polyurethane.
It has a reasonable set time, providing you with an opportunity to get the pieces together while the foaming action makes it great for filling unintended gaps. While the glue starts dark, it dries to a pale yellow/chalky white.
Advanced polymer glue
For the rest of the project, I used Titebond III, which is also fully waterproof and very strong (and flexible).
It is a bit of a bugger to clean off if the squeeze-out is left to completely set, so it is best to remove as much squeeze-out once it has gone rubbery, but before it has had a chance to cure. If it is left too long, you need to be careful when scraping, as the glue is that strong it can pull the surface off the timber rather than scraping off clean. These glues were chosen for this project so that you can treat the BBQ trolley as outdoor furniture without risking the glued joints and it can be cleaned with copious amounts of water.
Foaming polyurethane cleans easily
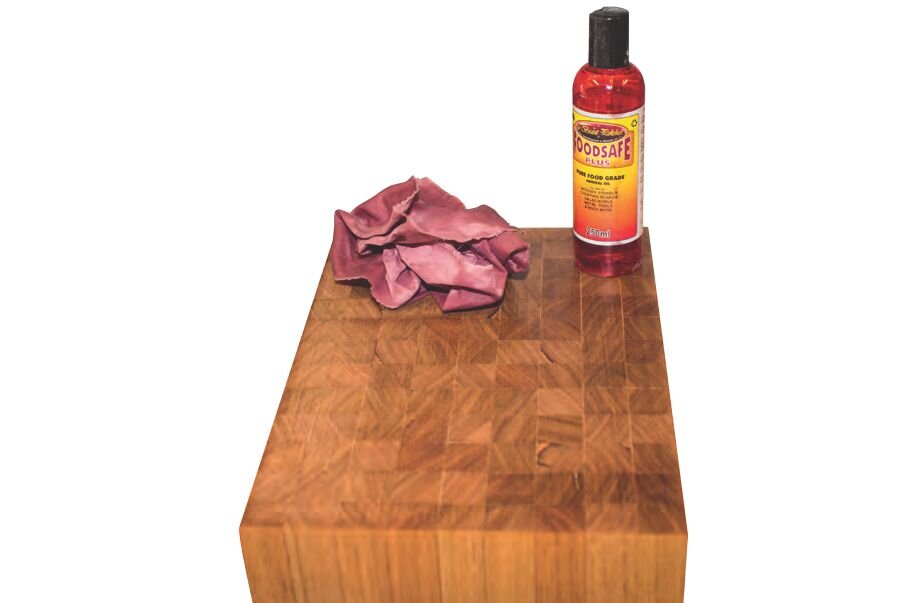
Coat chopping board with food-safe mineral oil
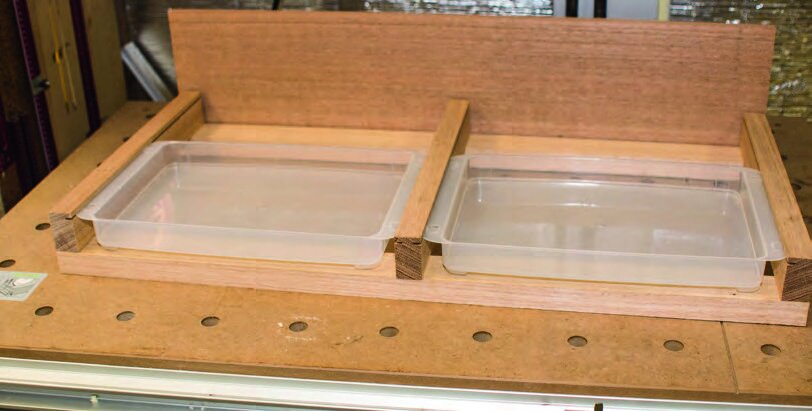
Trays
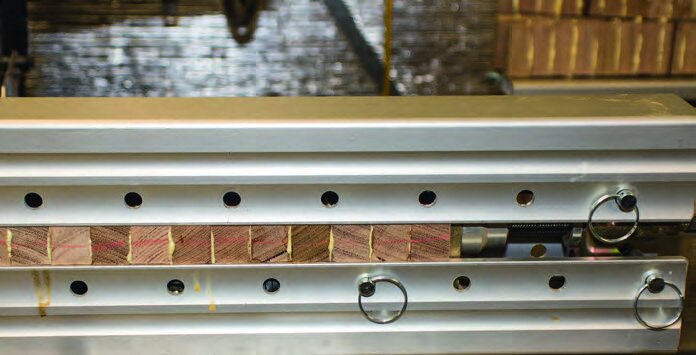
With boards trimmed to 50 x 28 mm, dock three to 830 mm and three to 400 mm.
The 830 mm worked well for me with the trays I had chosen, but you will need to confirm that this is appropriate for you and the trays you source.
The 400 mm boards have a slot cut in each (a slot either side for the middle section), and then they are attached on top of the 3 x 830 mm boards.
The trays should slide in and out easily and not contact the long boards underneath. If the trays sag at all with the weight of all the thick Angus beef steaks, you don’t want the trays contacting the base and getting stuck.
Cutting a slot for trays
Test-fit tray supports
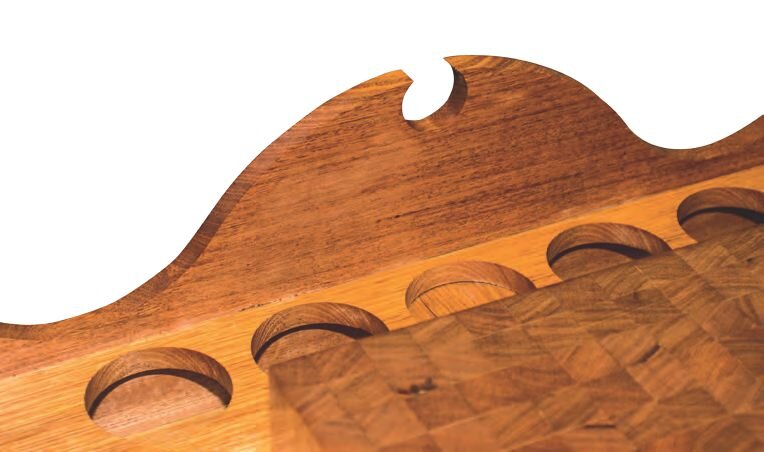
Top
With the tray supports secured in place (glue and screw), the top can be prepared.
The boards are planed and thicknessed and the planed edges glued together to get the board of the required width.
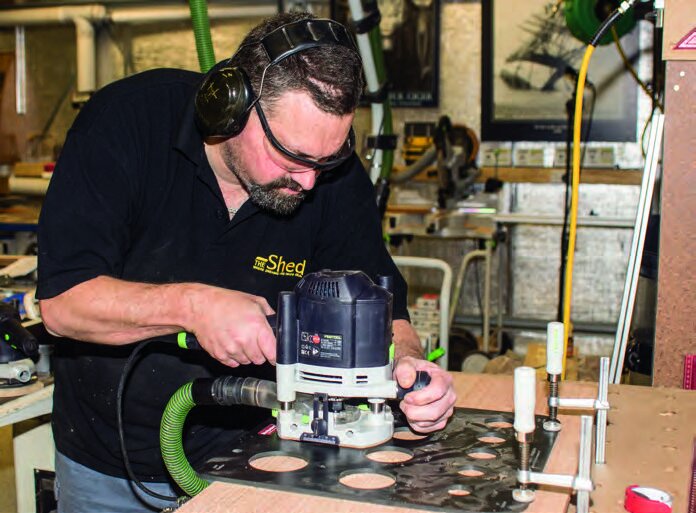
As the clamps are freed up when the glue cures, the two shelves can also be jointed and joined. Before the top is attached, I cut the holes for the sauces (and beverages). There are a number of ways to achieve this, such as using a high-speed cutter and circle-cutting jig, a hole saw or a scroll saw.
My preference is a router using a template guide and a circle template. Rather than forcing the router bit to waste away all the timber, I used a large Forstner bit to remove the bulk of the unwanted timber. The router is then plunged down to a pre-determined depth that ensures the router bit bearing is in proper contact with the template, then moved in a clockwise direction until the bearing contacts the template all the way around.
The resulting holes are very clean and neat, without any burning from the friction that some other methods suffer from.
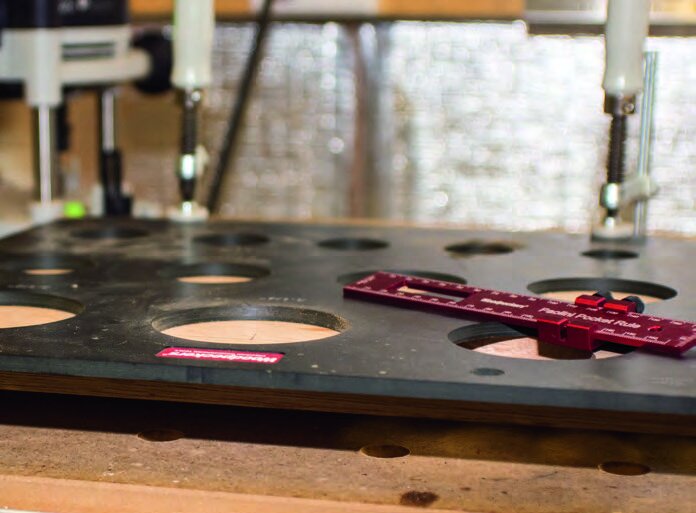
Circle template for…
…router cutting…
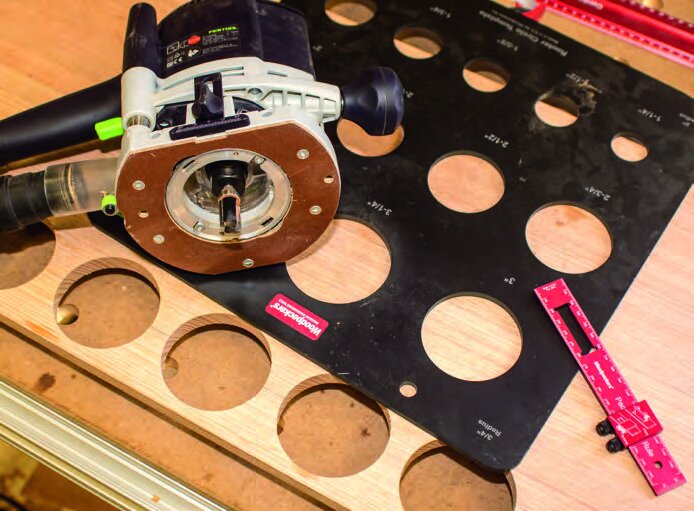
…holes for sauces etc
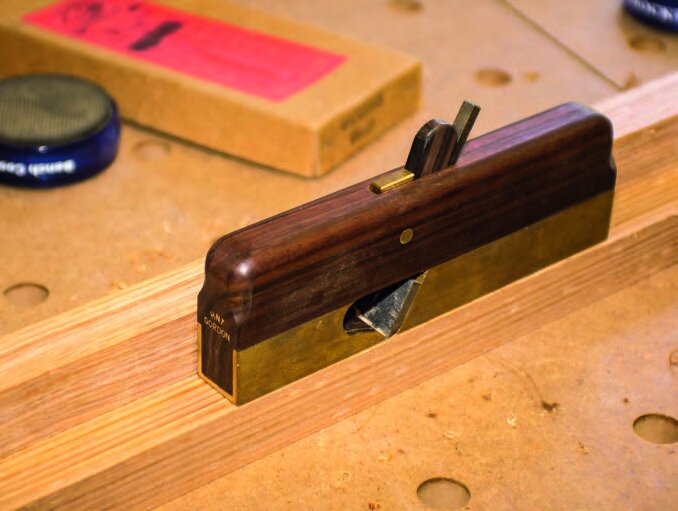
Shoulder plane removes squeeze-out
Legs
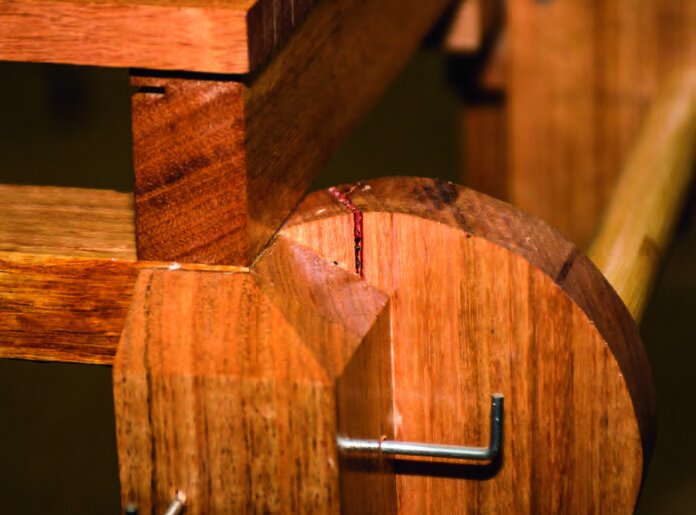
The legs for this unit are L-shaped, as much for a bit of difference from the norm as anything.
I was looking for a leg profile that wasn’t just another square block of timber. I removed the squeeze-out resulting from the glue-up with a shoulder plane. Then I chamfered the top edges of the legs on the mitre saw.
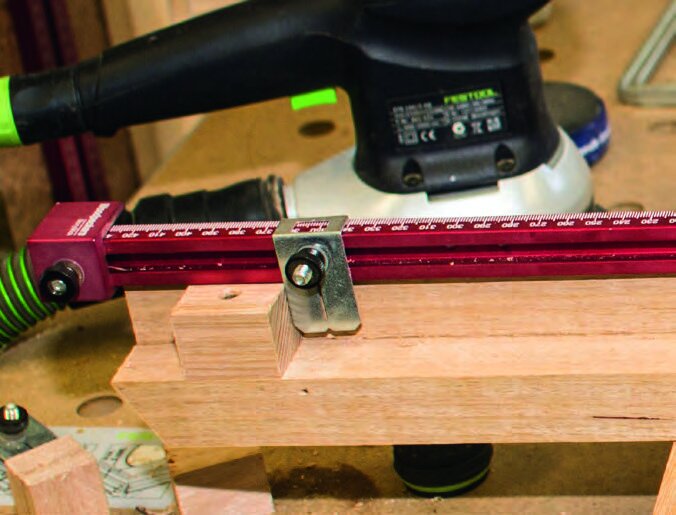
To support the top and each shelf, I fitted a small block of timber into the rebate and to ensure each block is at exactly the same height, I used a story stick. This concept is similar to the “go/no-go” templates used in manufacturing to confirm parts are cast and machined within tolerances. Two of the legs are shortened by exactly the height of the castor wheels and the lowest shelf blocks are oversized so they not only support the shelf but also provide an extra attachment point for the castor wheel.
With only two of the four legs having wheels on them, the unit is not prone to move around unduly. Additionally, you can use castor wheels that have a brake if this is a particular concern. With the shelves in position, I dropped the top into place. The unit is quickly coming together.
Story stick measuring legs for blocks to support shelves
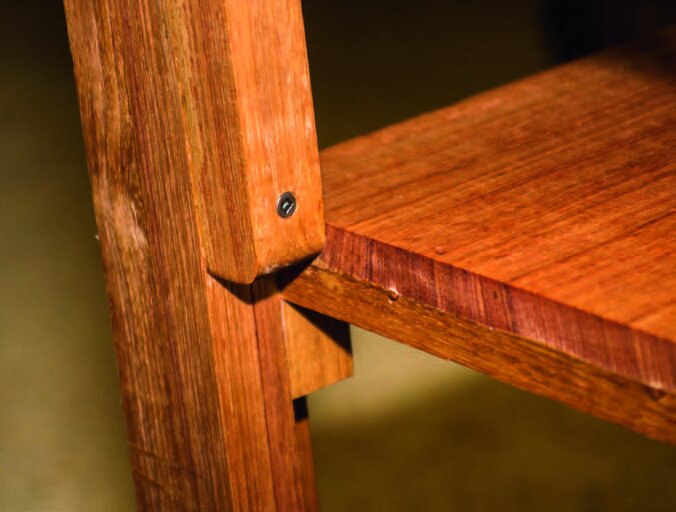
Wood block support for shelves.
Handle
How to attach a handle to the side opposite the castor wheel legs took a little thought, but it quickly became obvious when I considered the main load direction (vertical).
I cut out two brackets on the bandsaw, then drilled a partial-depth hole for the handle. The handle does not have to be an expensive piece of dowel. I find an excellent source of round-section pieces to be broom handles.
They are straight-grained, smooth and the right diameter. In this case, I managed to find a bamboo broom handle which worked out particularly well. When I attach the brackets, the handle becomes permanently captive. I used the same solution at the other end of the unit as a paper towel holder. I made the brackets smaller and cut a channel to allow the handle to be removed.
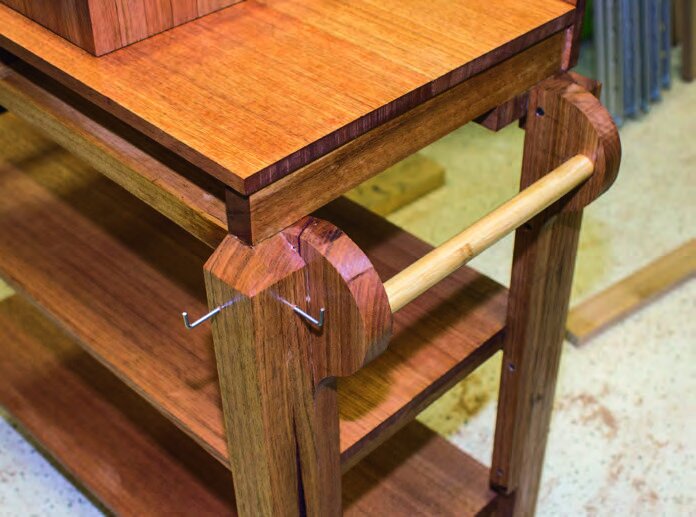
Broom handle solution
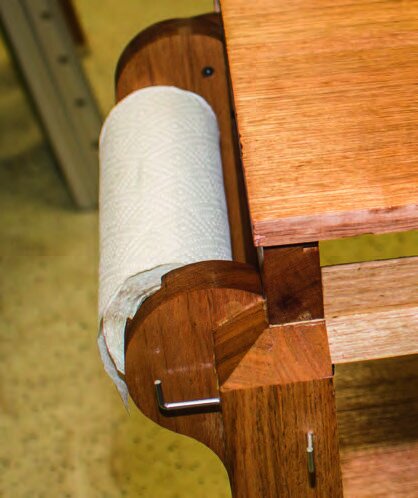
Broom handle as paper towel holder at other end
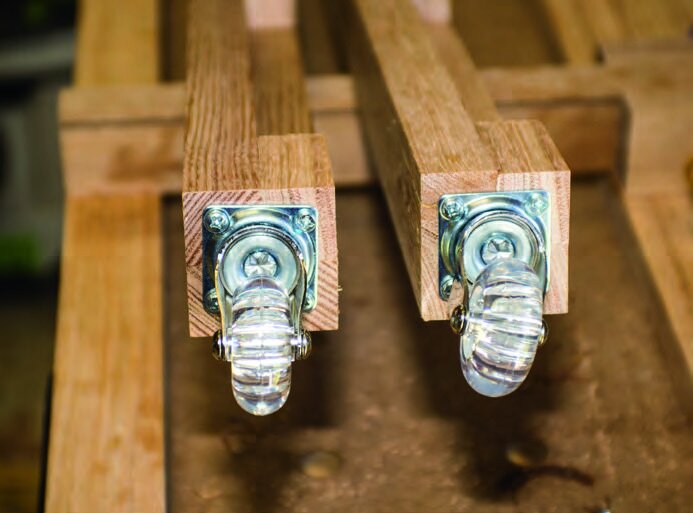
Castors on two legs only
Hooks for BBQ tools
Backing board
I shaped the backing board on the bandsaw before I attached it. By cutting close to the line, I found that a quick sand on the bobbin sander was all it took to get the curves perfect.
If you don’t have a bobbin sander, a sanding drum mounted to the drill press is a functional alternative.
Decorative finish
Food-safe oil finishes whole trolley
Finish
To complete the trolley, I screwed hooks into the front legs for various BBQ implements and gave the wood a nice finish with more food-safe oil.
The resulting trolley has plenty of storage for sauces and beverages, a good-size working surface and storage for raw meats below the working surface to prevent cross-contamination.
This is a pretty straightforward project and results in a great addition to your BBQ area. The design can also be easily adapted to make a kitchen butcher’s block if you prefer your cooking indoors. Bon appétit!
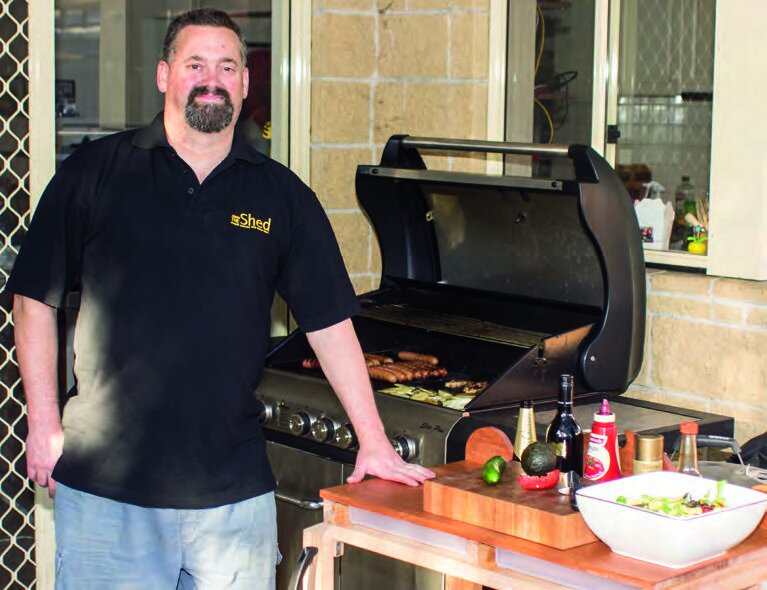
Chef Stuart Lees with a great addition to his barbecue area