By Geoff Merryweather
From a piece of forklift steel, a hammer head emerges after a bit of hard yakker
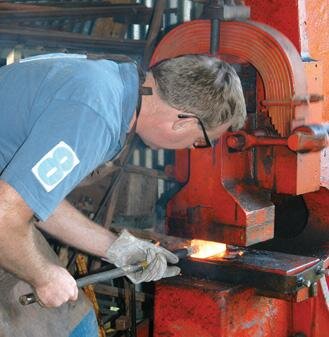
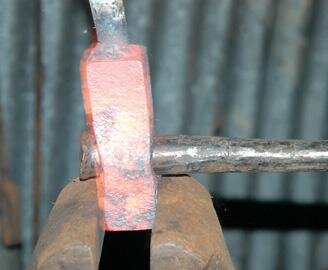
Forge heating the block.
Making a hammer head is a project not really worth doing financially, given the cost of a handle alone vs. a new hammer and how easy it is to get an existing hammer and re-forge it to suit your special needs. Having said that, mere project economics never stopped a true Sheddie, and it is a good demonstration of some basic techniques. In this case, it turned out to be one of those days which demonstrated all the ways to salvage a project that is not going according to plan.
Tools
You will need: a forge, tongs, punch, sledgehammer, drift, small hammer and an assistant. A drift is a piece of metal the size and shape of a replacement hammer handle and tapered to fit the punched hole.
It is driven into the hole to make it the correct size and shape. The cross-section is the shape of the finished hole and the small end has to fit into the punched or drilled hole.
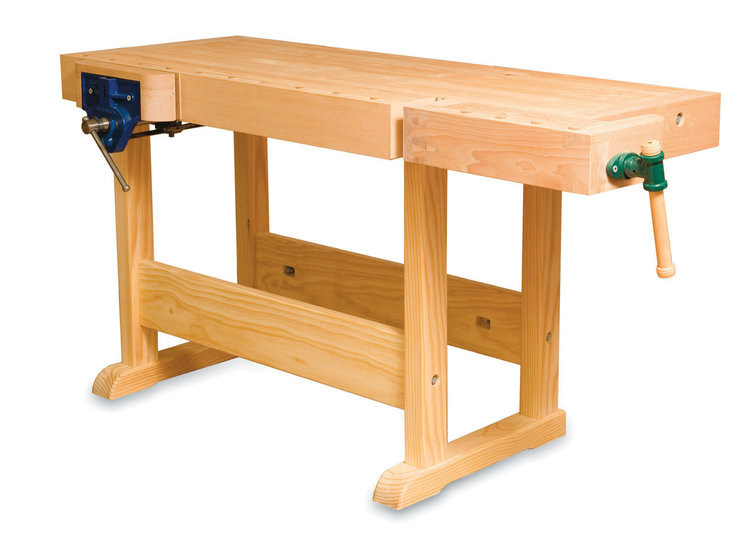
Drifts can be made from mild steel, as they are driven into hot metal. Pictured (from left below) are sample materials and tools with a finished hammer, punched hammer head blank with hammer eye-tongs, two drifts, punch (with handle) for starting the eye and original piece of forklift fork.
Materials
I used a piece of forklift fork I was given a few years ago by a friend working for a forklift repair company. When forks get damaged, they cannot be welded or repaired and one fork will go a long way. I have been told that the material is 4140 steel, or something very similar.
You can use the top flange of railway track (for small hammers) and car or truck axles. I believe it is possible to buy new steel, but I have never seen evidence that any Sheddie has actually done this. I cut off a slice of forklift fork in the morning with the cut-off bandsaw, and after downing a cup of tea, we fired the forge up and welded a bar onto the end of the hammer head-to-be as it is much easier than using tongs, especially for heavy work.
Handle hole
The first thing is to make the handle hole, easiest to do before forming the ends. If you get it wrong, you haven’t wasted a lot of time. The handle hole must be square to the head, so the head isn’t at an angle to the handle, and in line with the centreline.
The initial hole can be formed either by drilling through the blank with a 13mm drill and a drill press or by punching in the more traditional manner. If you don’t have help, drilling is easier to make sure the hole is correctly located, square and centred.
For tradition’s sake, this one was punched. Punching has the advantage of forcing the metal to flow around the punch so the width on narrow heads or top tools is maintained. But you do need an assistant to help with the hammering. Heat the steel up to a good bright yellow colour, place it on the anvil, line up the punch with the hole location and give it some good sharp blows with a hammer.
Take extra care that it is square and located correctly. The idea is to get it started so there is a good recess before really laying into it and so you can see where to continue when it is reheated. By this stage, it is starting to cool off, say, down to a bright orange-red. Remove the punch and dip the end in water to cool it down. Reheat the hammer head in the forge and repeat.
As the punch goes deeper, you need to wiggle it out every few blows and dip the end in water to prevent it from overheating, mushrooming and jamming in the hole. A traditional technique was to sprinkle coal dust into the hole before returning the punch into the hole to help remove the punch next time.
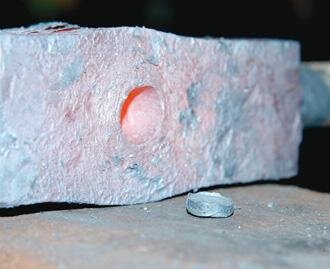
As the punch gets close to the other side, it will feel different as the steel underneath will cool off because there is only a thin section between the punch and the anvil face. At this point, if you turn the steel over, you should see a cold spot surrounded by hot metal showing where the hole will come out.
Put your punch onto the cold spot. A few good blows to drive the punch back will knock the slug out. The amount of metal removed by hot-punching is very small – the slug from making the hammer hole was around 3mm thick. The rest of the metal has flowed around the punch, bulging the sides of the head blank.
Enlarge hole
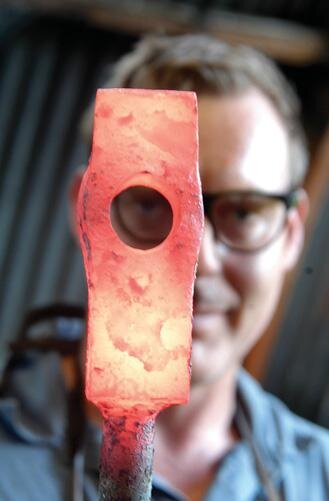
The next step is to enlarge the hole to take the handle.
The aim is to have an oval hole to match the shape of the hammer handle, with an hourglass-shaped cross-section so the wedges expand the end of the hammer handle and lock it to the head. It is important to have the long axis of the oval hole in line with the axis of the hammer head and not at an angle, otherwise, you will never be able to hit square.
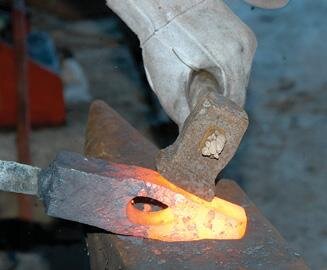
For this, we need a drift (or two). They are tapered so the small end fi ts into the punched hole, and in this case, the cross-section expands to larger than the final size of the hole. Heat the head up in the forge so it is a bright-yellow colour, place the drift into the hole and drive it part-way through.
As the hole is to be tapered, the drift isn’t hammered all the way through the hole. Rather it is driven part-way, then removed and driven part-way from the other side, to give an hourglass-shaped cross-section to the hole. What happens if the hole ends up at an angle because you got distracted? In order to demonstrate this (ahem), it just happened to occur in this case.
Once the drift has been started, you won’t be able to straighten it out. The only real solution is to drift the hole out to round and then reform the oval. As the hole may then be too big to fit the handle if you use a larger drift, we need to get the oval shape and make sure the hammer handle won’t loosen off. As no metal has been removed, the sides bulge out. If you flatten the bulging sides of the hammer head the hole becomes oval again. An oval drift can then make sure the hole is nicely shaped.
Home-made punch handle.
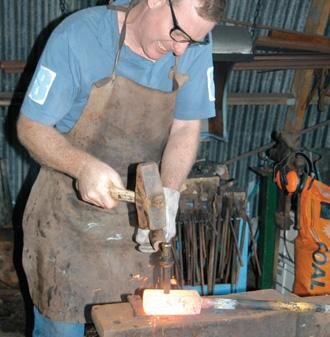
Assistant hammering
Re-taper
At this point, the hole doesn’t have much of a taper.
The hole can be re-tapered a bit by heating the hammer head blank, putting it in the vice and putting a bar through the hole and hitting the bar downwards so it rocks up and down in the hole. The rest of the solution is modern adhesive science when fitting the handle.
The next step is to forge each end, and this depends on what sort of hammer it is to be. In this case, it is a straight peen blacksmith’s hammer where one end is tapered for forming or drawing out. The name refers to the tapered end, where a straight peen is in line with the handle and a cross peen is at right angles to it.
Peen
The peen is formed by forging down the end. It may tend to splay out the sides slightly, so rotate the hammer head 90° and keep everything square.
Some blows on the end will tidy up the end of the peen and keep it square across from side to side. At around this time, we will need to remove our convenient handle we welded on earlier. In order to hold the hammer head we need some “hammer eye tongs” which have lugs which fit into the hammer eye to hold the hammer head while working on the other end.


Anneal
Before the head is heat-treated, it should be annealed.
Heat the head to a middle red colour and bury it in sand or turn off the forge and leave it to cool overnight in the ashes. The objective is to cool the steel as slowly as possible to reduce the stresses from forging that might cause cracks when it is hardened.
Grind and clean up the ends. Use a flap sanding disc to polish the faces and the sides. Slightly round the face and break the edges. The metal needs to be clean for the next stage of hardening and tempering, so you can see the tempering colours.
Hardening
In the process of hardening, the objective is to leave the faces hardened and tempered to a tough state that won’t chip or mushroom but the centre around the eye soft.
Hardening the head is achieved by heating the hammer head to a middle red again. Dip one face in the water to around 20mm, moving the head up and down 5mm or so, so there is not a clear line between hot and cold.
Have one end in the water for a few seconds, then flip it around and do the other end and so on until each end is cold. The centre should still be hot, so quickly rub off any scale or coal dust with some sandpaper so you can see the bare metal and watch the colours run on the surface as the heat travels from the centre to the ends.
It will start at a light yellow and progress to a purple then dark blue. Dip each end in the water again when the face becomes a purple-blue colour to stop any further softening
Overcooled?
If you over-cool the hammer-head so there is not enough heat in the centre to temper the ends, then there are a couple of options without having to anneal the hammer head and starting over again.
The modern (and easiest) way is a gas torch to heat up the centre. The other way for small hammers is to heat a bar and jam it in the hole to heat the centre.
For larger hammer heads, then place a fi re brick or kiln shelf either side of the forge fire, so the gap in the middle is less than the length of the hammer head. Place the head across the gap so the ends are protected by the fire brick The blast from the forge will heat the centre and the ends are protected by the fire brick.
Fitting handle
It used to be that ready-made hammer handles were stocked by every hardware store in the country but you may have to search to find one.
The handle for this hammer is a 24-inch (610mm) small sledgehammer handle, which is cut down to the length I want, and the cost of the handle was $22. The alternative club hammer handle was too short to be comfortable with this particular hammer head
There is no reason why you could not make a handle from scratch, given suitable wood. Hickory or ash is traditional, although I have used manuka (tea tree) for a small axe handle in the past, and seen various Australian hardwoods from power pole cross-arms. Take your hammer head along with you if you didn’t buy the handle before making the head.
The handle should be slightly oversized for the hole so it can be trimmed to fit. Make sure it comes with the wooden wedge and a metal wedge.
Trim the handle to match the hole, using a rasp and sandpaper or a spokeshave. Before fitting the head, check that the slot, in the end, is long enough to reach to around half the thickness of the head when it is in the final position.
Straight peen and cross peen
Cleaning off scale.
Glue
Purists will say that a well-wedged hammer head will not come loose, but blacksmith’s hammers get a hard life, and in particular, if the hole is not well tapered, it will need some extra help.
I used a standard epoxy glue to make sure the handle would not loosen. Trim the handle to length, leaving it so 10mm or so will extend past the head. Mix the glue according to the instructions, and cover the inside of the hole and the wedge slot and handle where it goes into the hole. Use a soft-faced mallet to drive the handle into the head. Another way is to hold the hammer upright, handle vertical, and bang the end of the handle downwards onto the anvil, so inertia will drive the hammer head onto the handle.
Check that the head is square to the handle then hammer in the wooden wedges into the slot. Hammer in the metal wedge at 90° to the wooden wedge and leave the glue to set. Trim off any excess and trim the handle flush with the end. Many hammer handles come with a slippery varnish, which makes it hard to grip with sweaty hands. I prefer to rub-down the handles with sandpaper and apply two coats of linseed oil.
Clean up ends