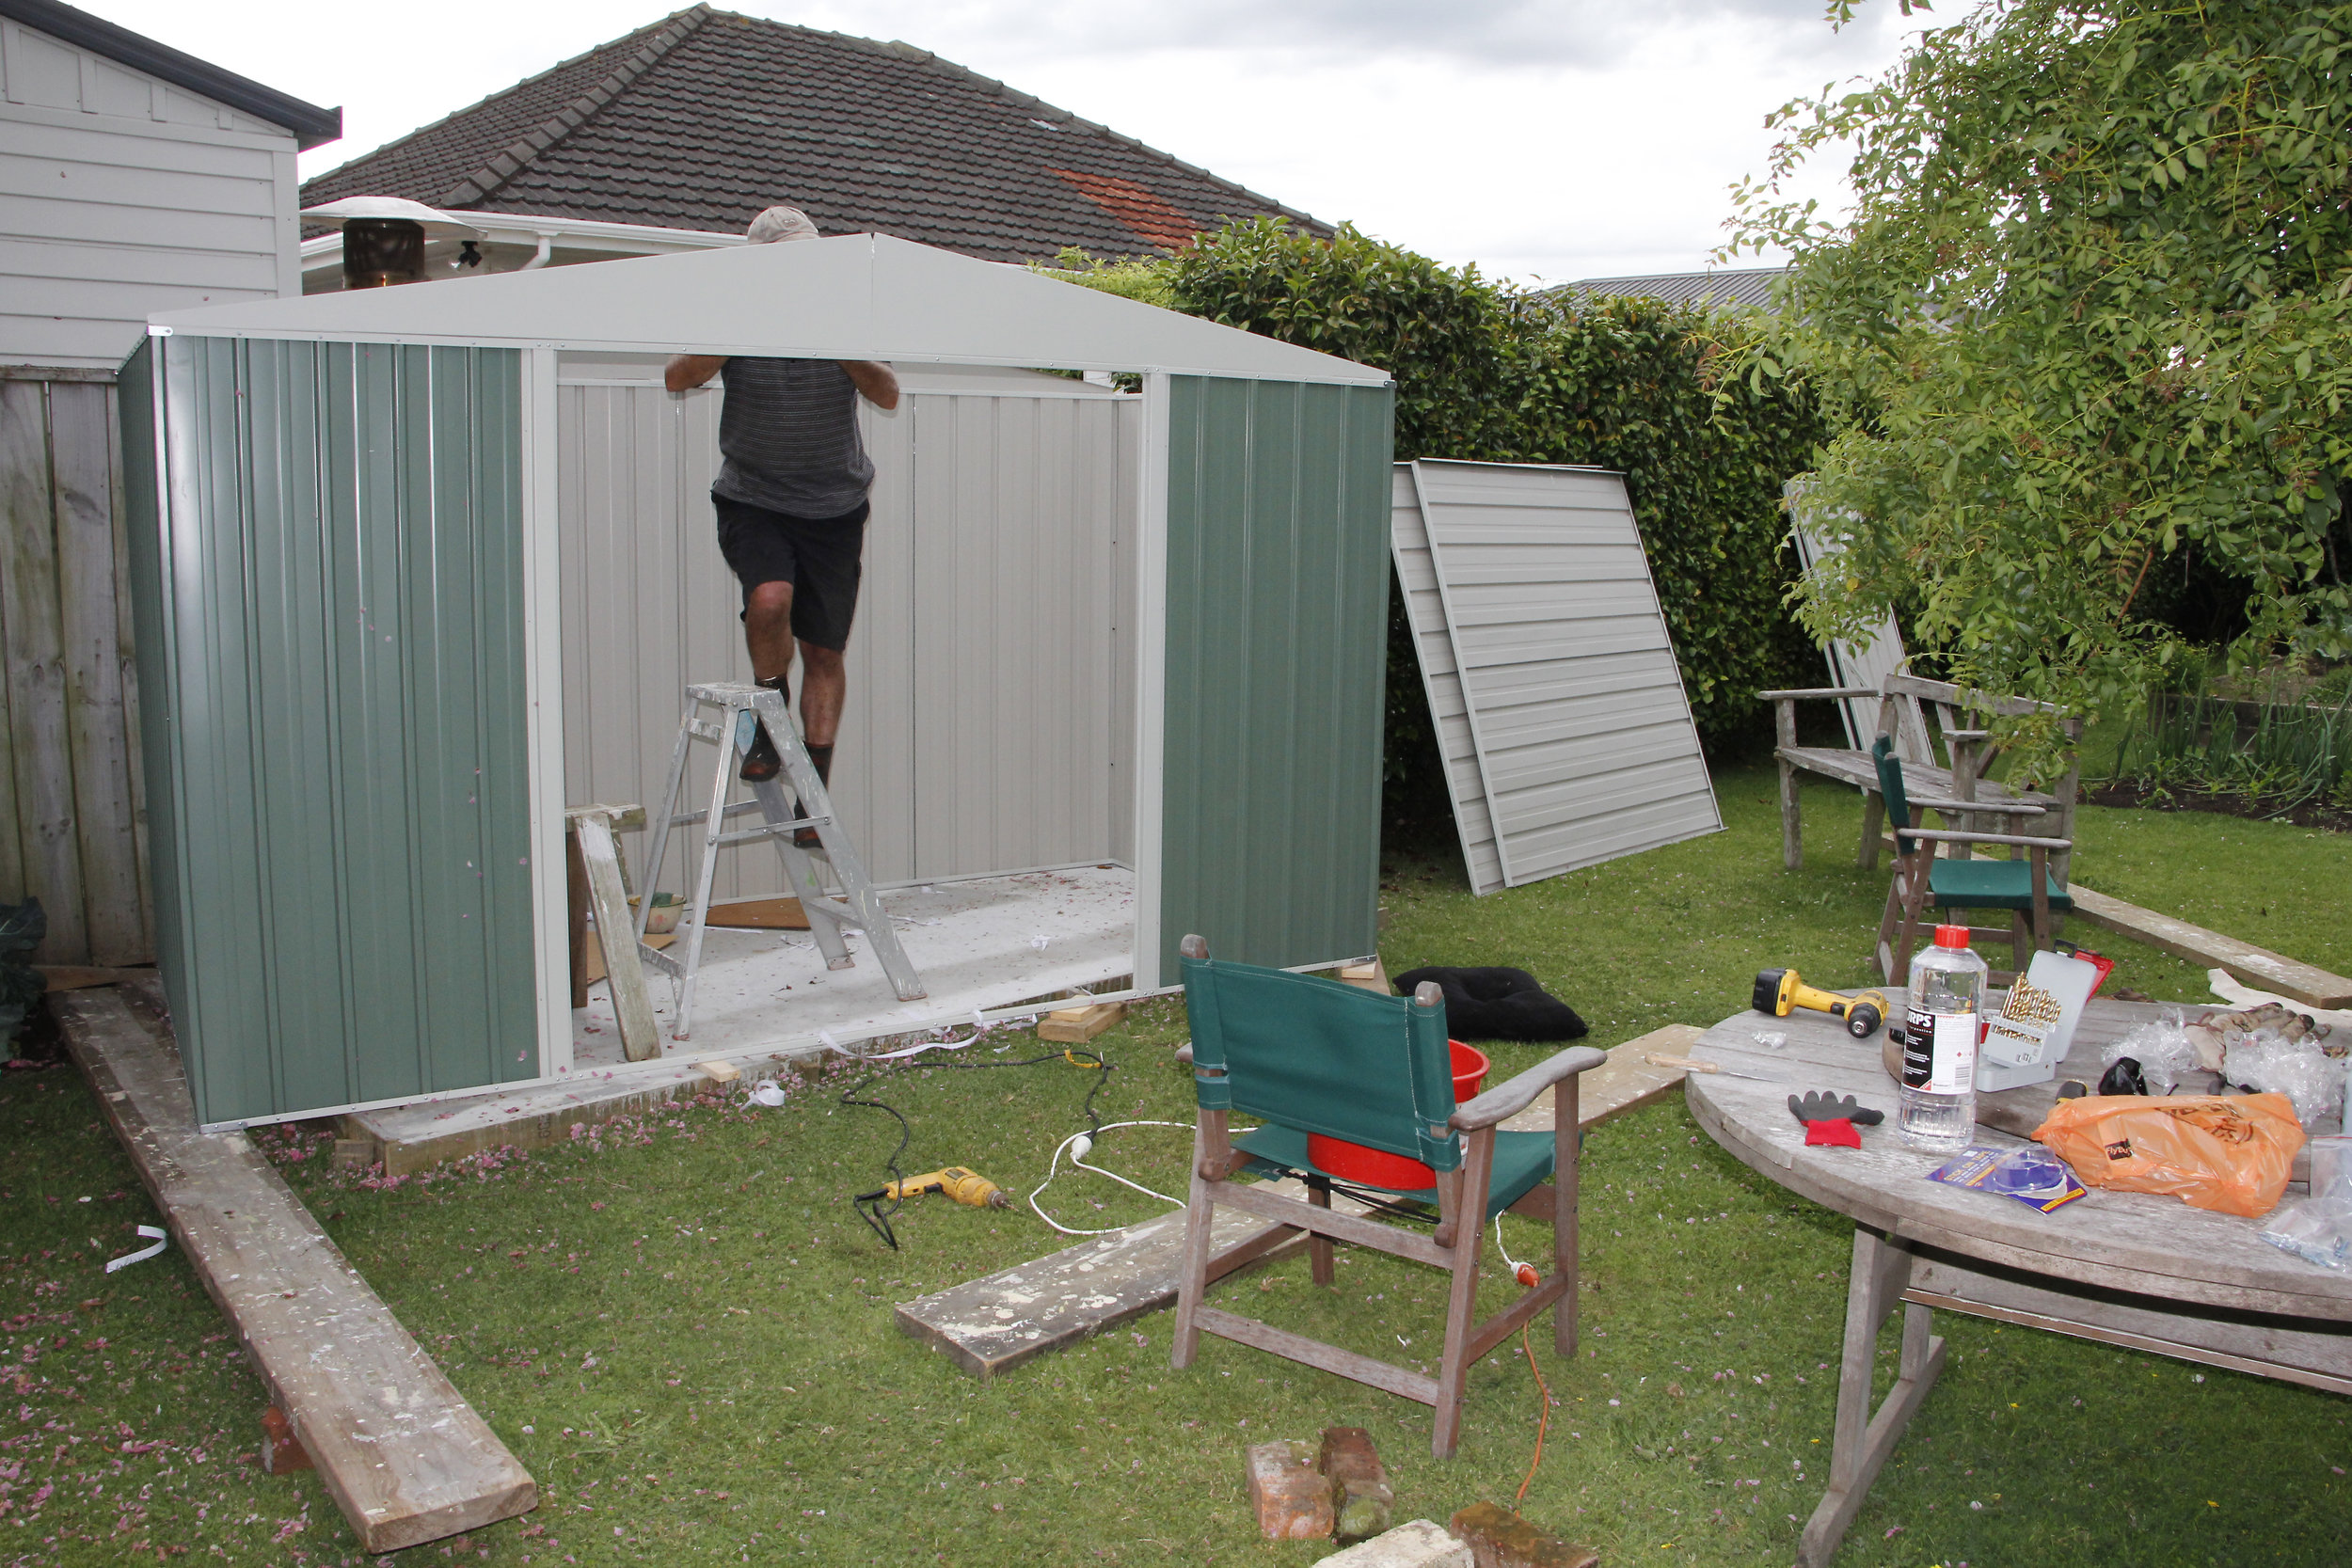
The brothers Tucker tackle a shed
How hard could it be for a couple of seasoned and more-or-less professional Kiwi do-it-yourselfers? When the kitset tin garden shed—3.45 metres long by 1.75 metres wide— arrived in a tidy package after being ordered online, it comprised pre-cut, mostly pre-drilled and numbered parts. All you needed for assembly was a drill and a screw-driver. And a concrete pad. Which was where the trouble started for my brother Rob—who makes up for lack of patience and screwdriver skills with high-tension enthusiasm—and for me, a would-be house renovator who makes up for poor eyesight, bad knees and perfectionism with…well, something.
Concrete
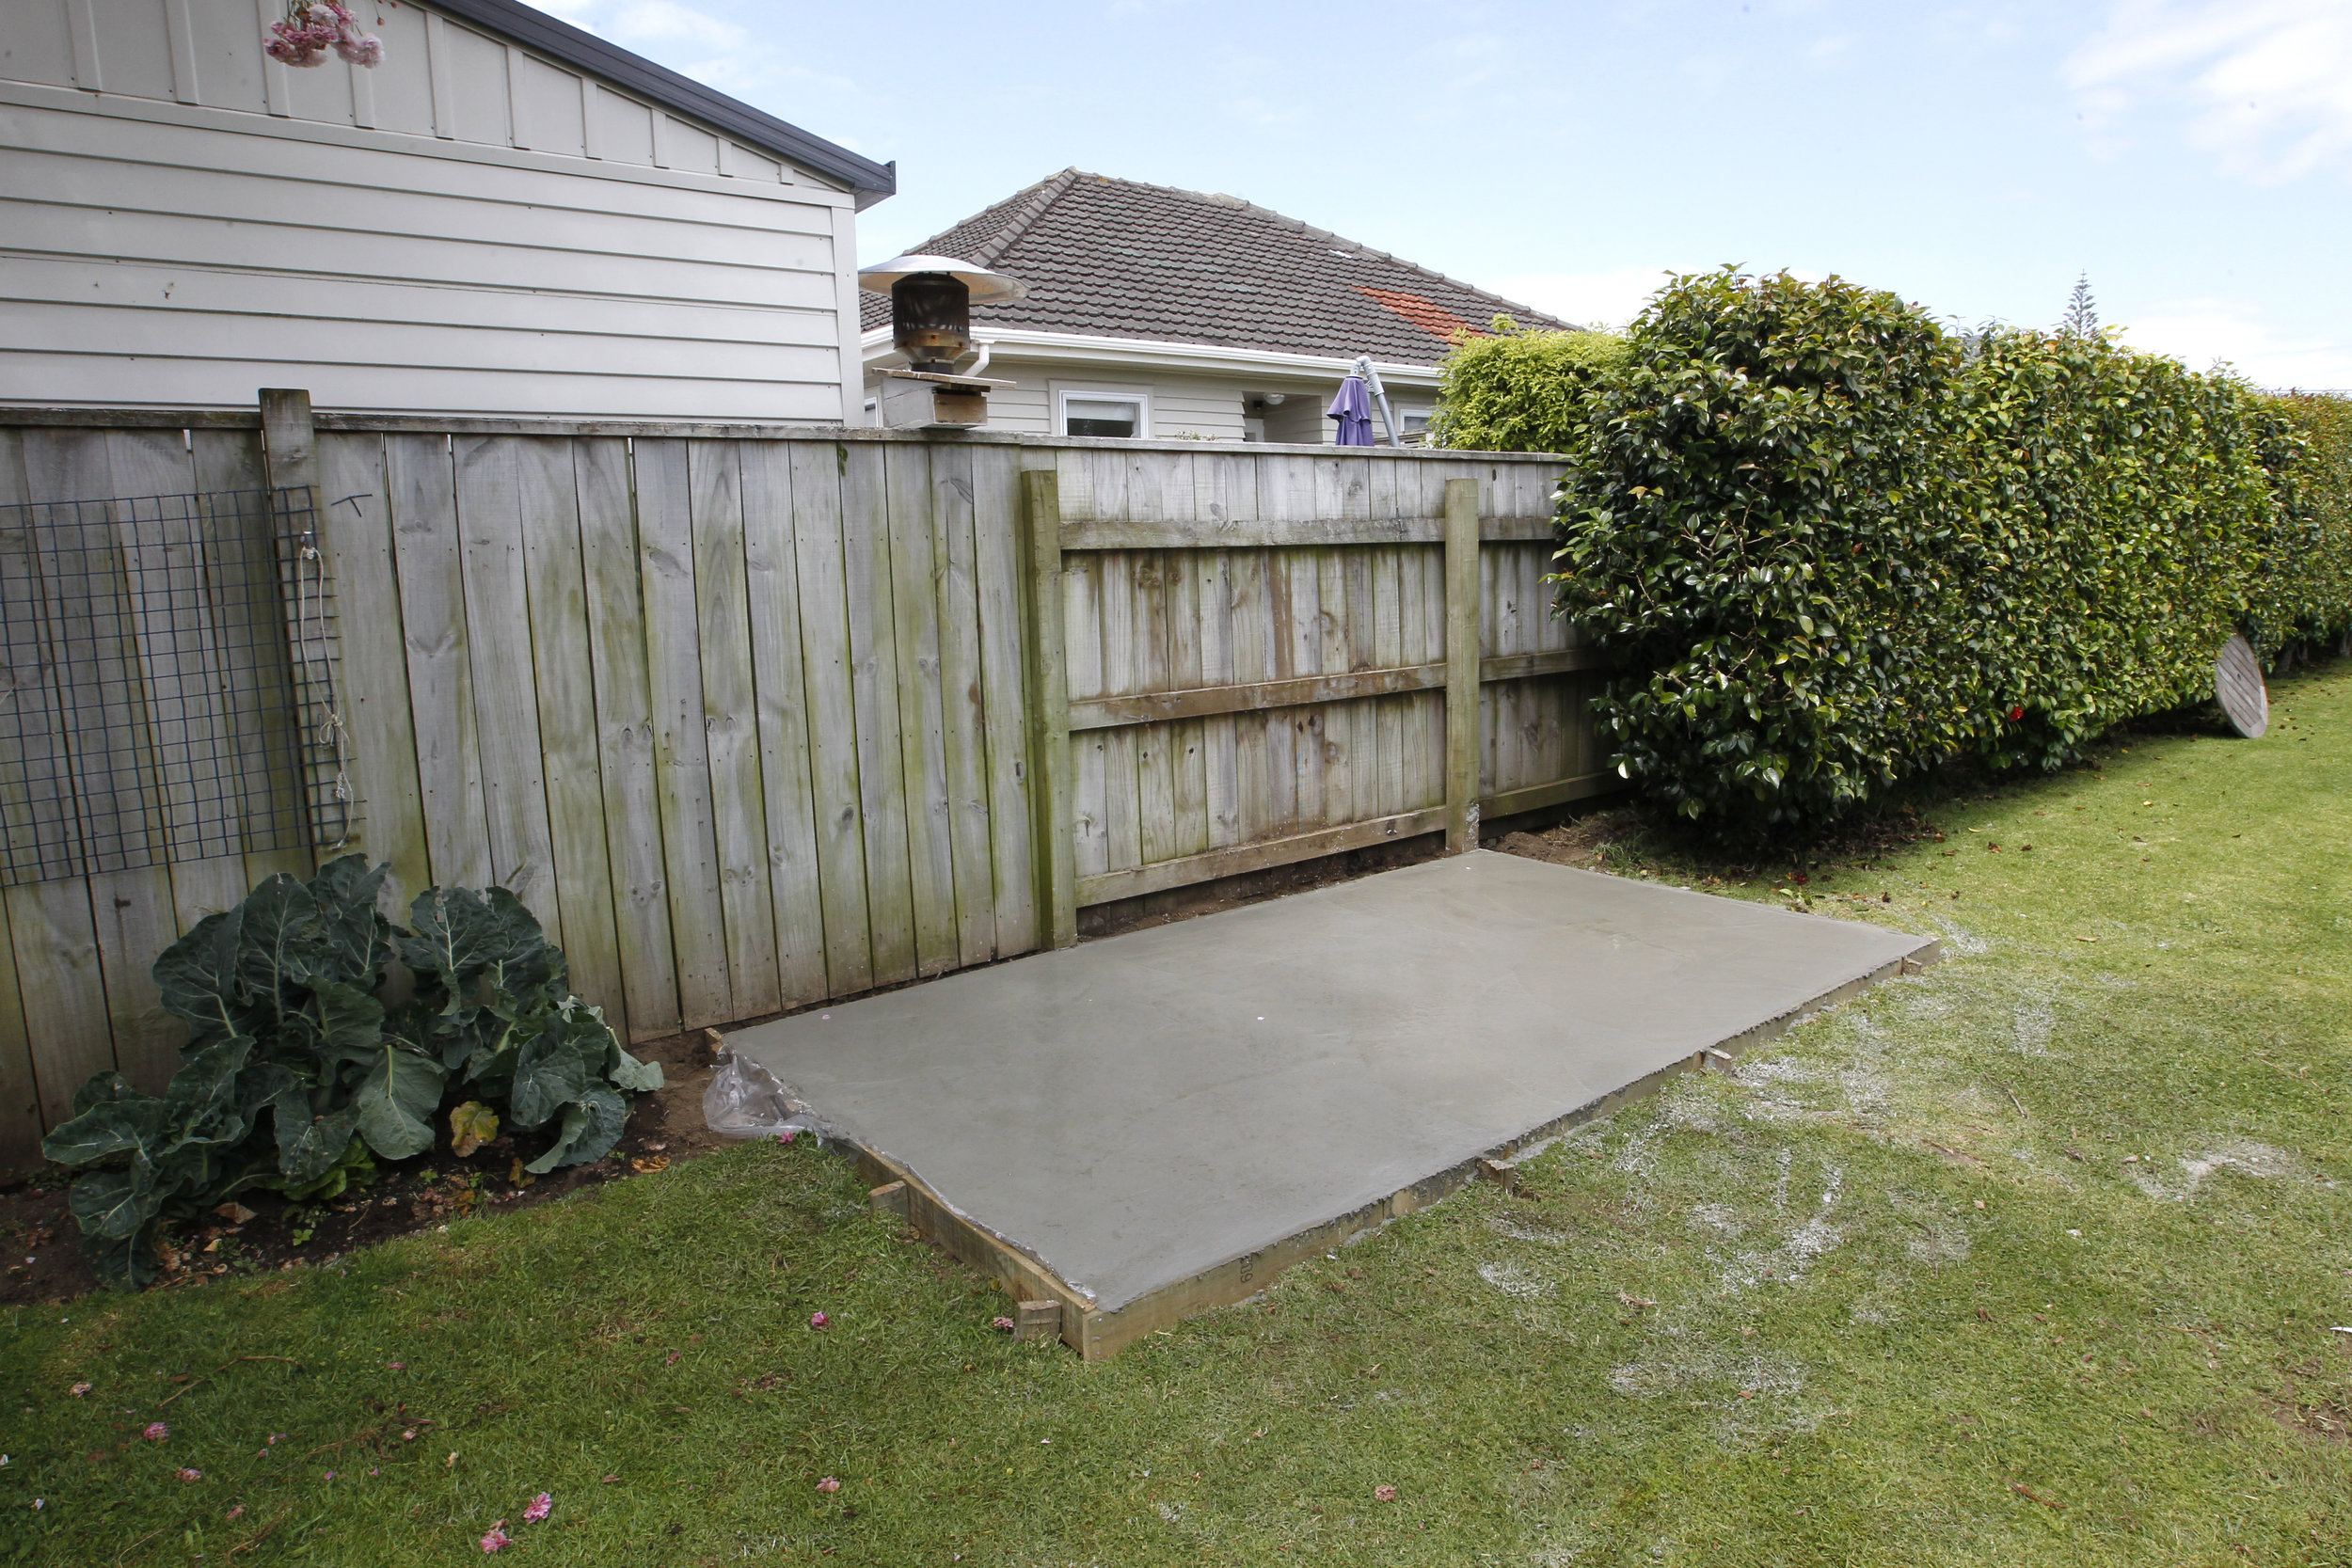
Rob got 75 mm boxing and installed it without digging anything out other than cabbages and a passionfruit vine, leaving spongy kikuyu lawn in place for the concrete to settle on. Not ideal, so we compromised. Forgetting we weren’t laying a driveway for Kenworth trucks, I insisted on major excavation (by spades), 100 mm boxing, damp-sealing plastic and a sheet of reinforcing mesh sitting on proper mesh chairs. The boxing nailed along the fence went downhill a bit. But that was intentional, of course, because you want water to run out rather than in. Rob rang a ready-mix company, tried to order a half metre of concrete and was asked if he could take it “now, like in the next ten minutes?” Rob: What will it cost? I can pay cash. Concrete man: Can’t take cash—it’ll have to be a coupla dozen beer. Rob’s lucky day—it was left over from a job. But it arrived literally within minutes and he was alone with one wheelbarrow, no floats and no idea.
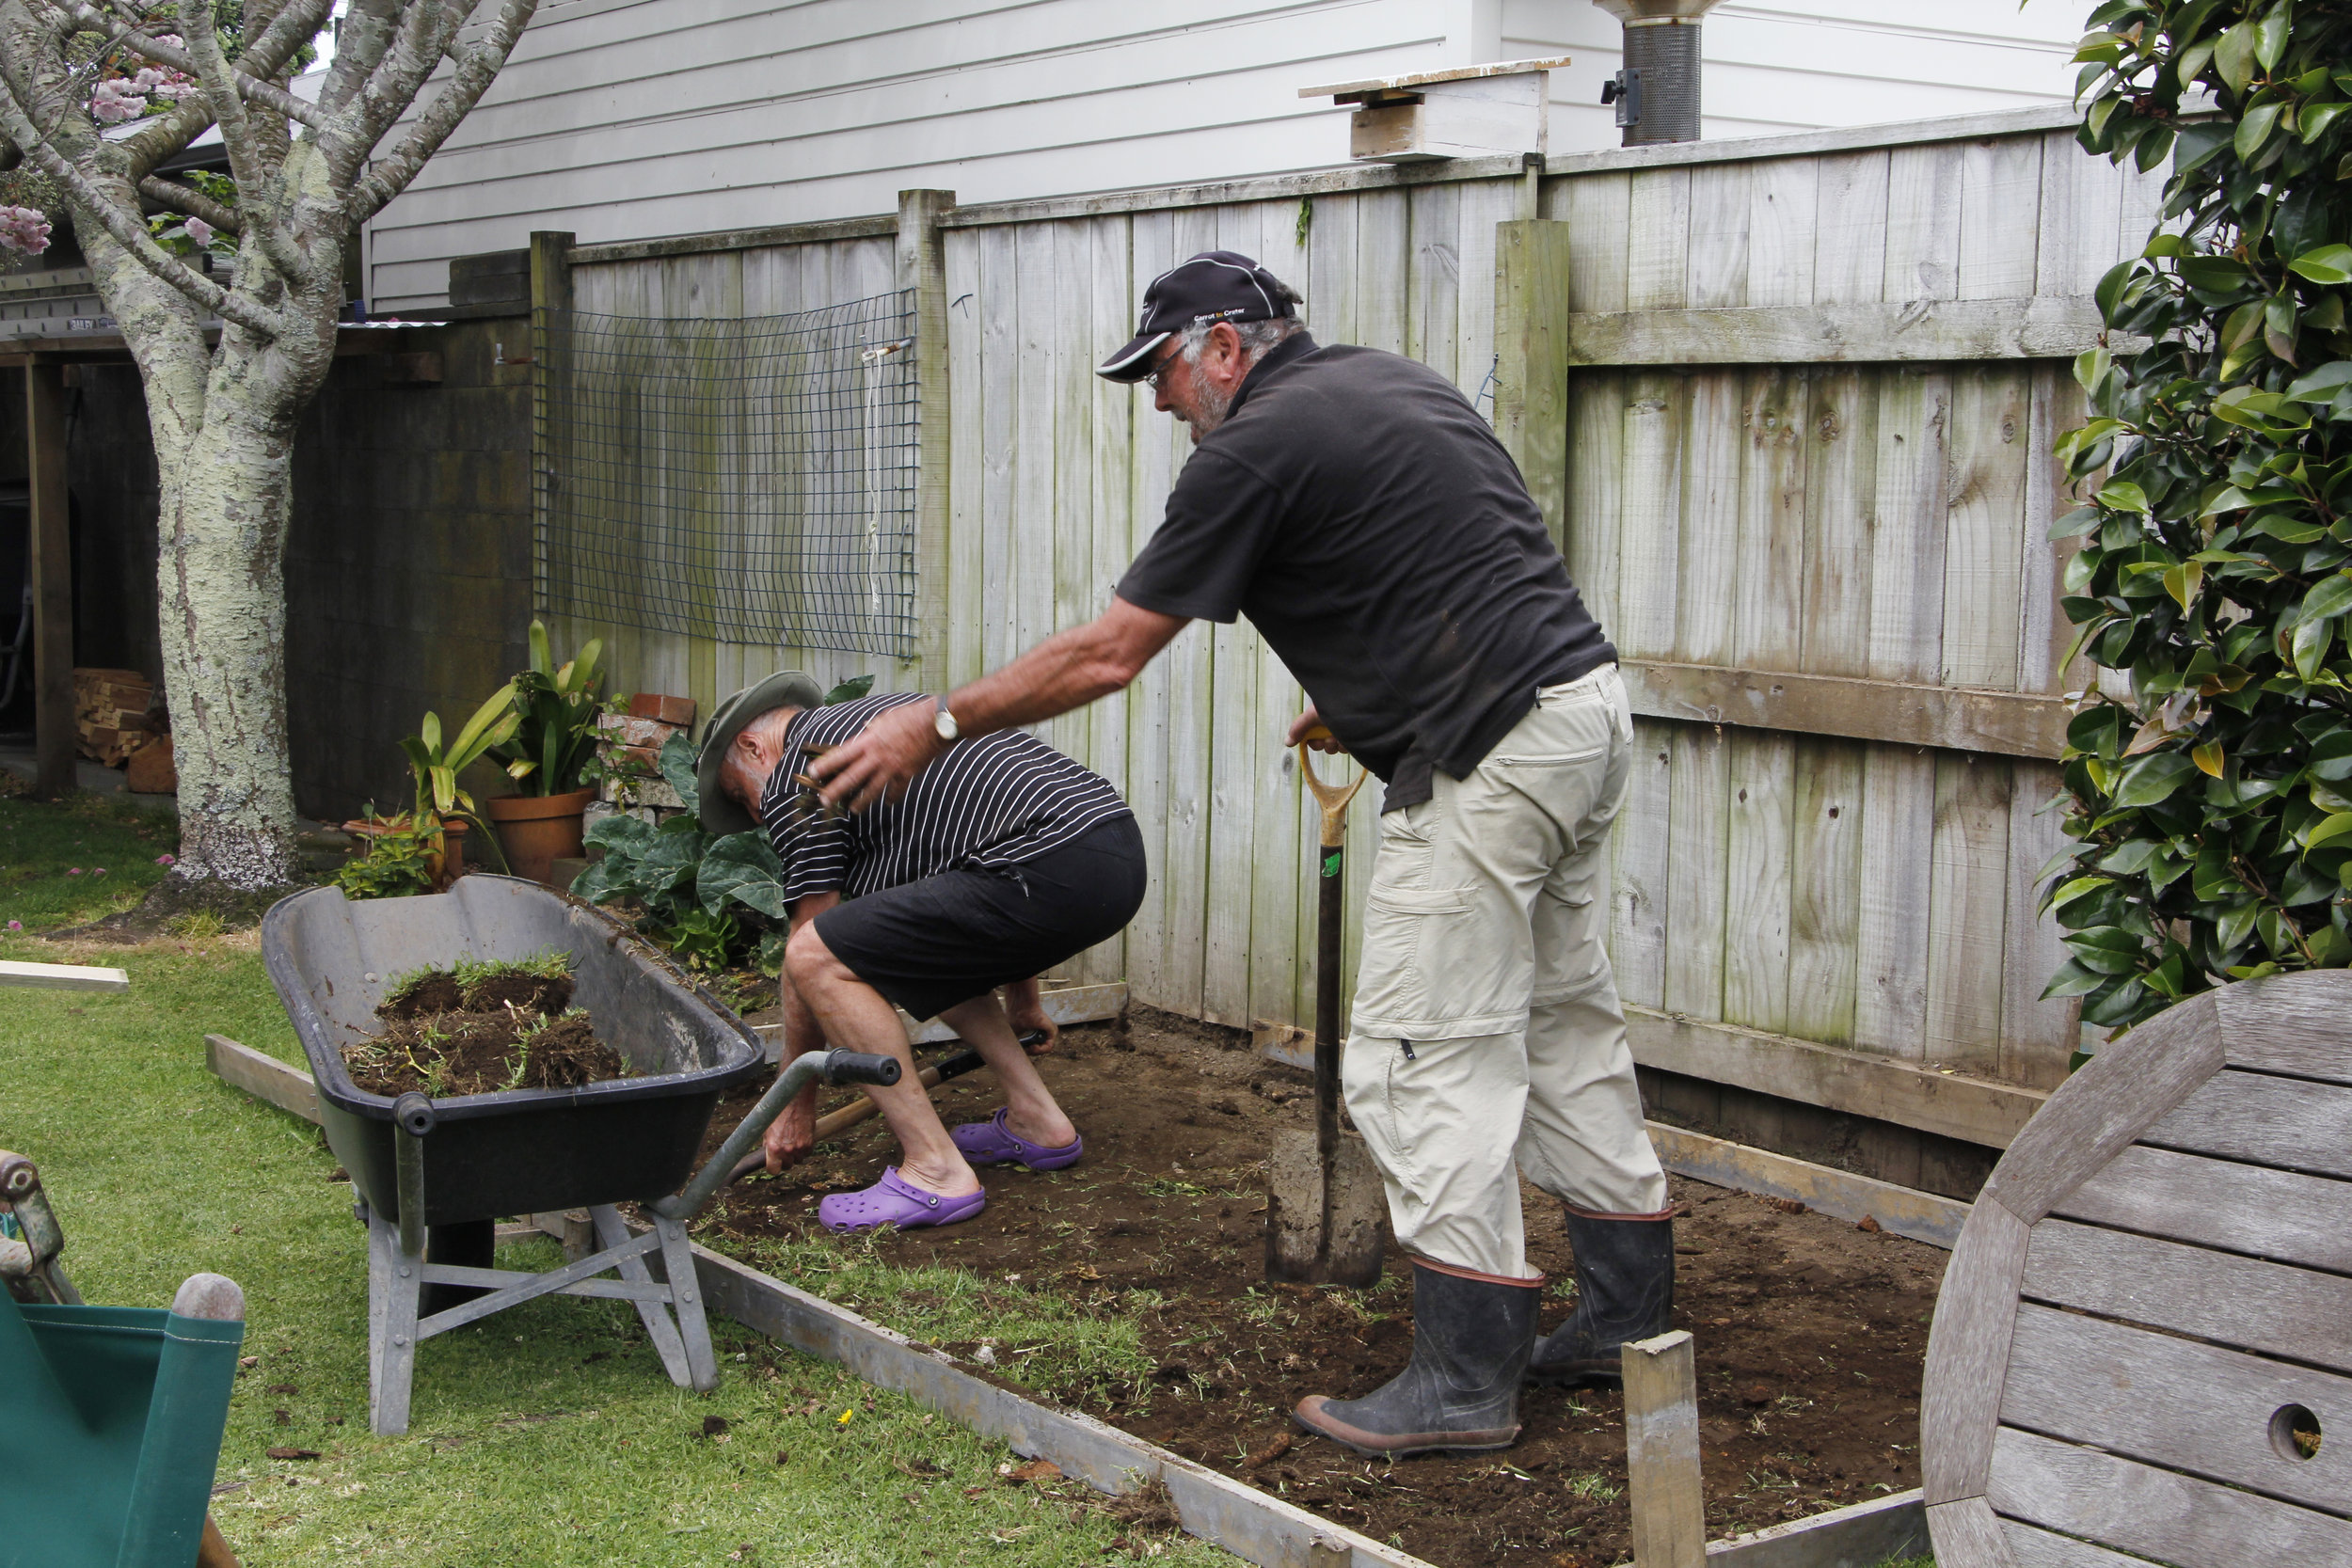

Builder
Well, one idea: he rang experienced builder Thirdy who said he’d be there as soon as possible but had to come a long way. He had the floats. It was close to perfect. Except it was just one barrow-load short. A quick trip to Mitre 10 for a bag of readymade fixed that. Except that bit set more quickly that the rest, and after Rob forgot to keep the pad wet long enough, there was one small patch that cracked. Just wee cracks, though. No matter. Bonnie—for whom the shed had been bought as that kind of intimate birthday present middle-aged couples give one another—would never see the imperfections once all the stuff went in. Stuff hides a lot of sins. As he was leaving, Thirdy said assembly would take about four hours. Not strong on verb tenses, Thirdy. That was “should” take about four hours. A day. Four hours twice a day, in fact, for three days. First sign of assembly angst came when it was apparent the instructions were badly translated from another language, possibly Elbonian.
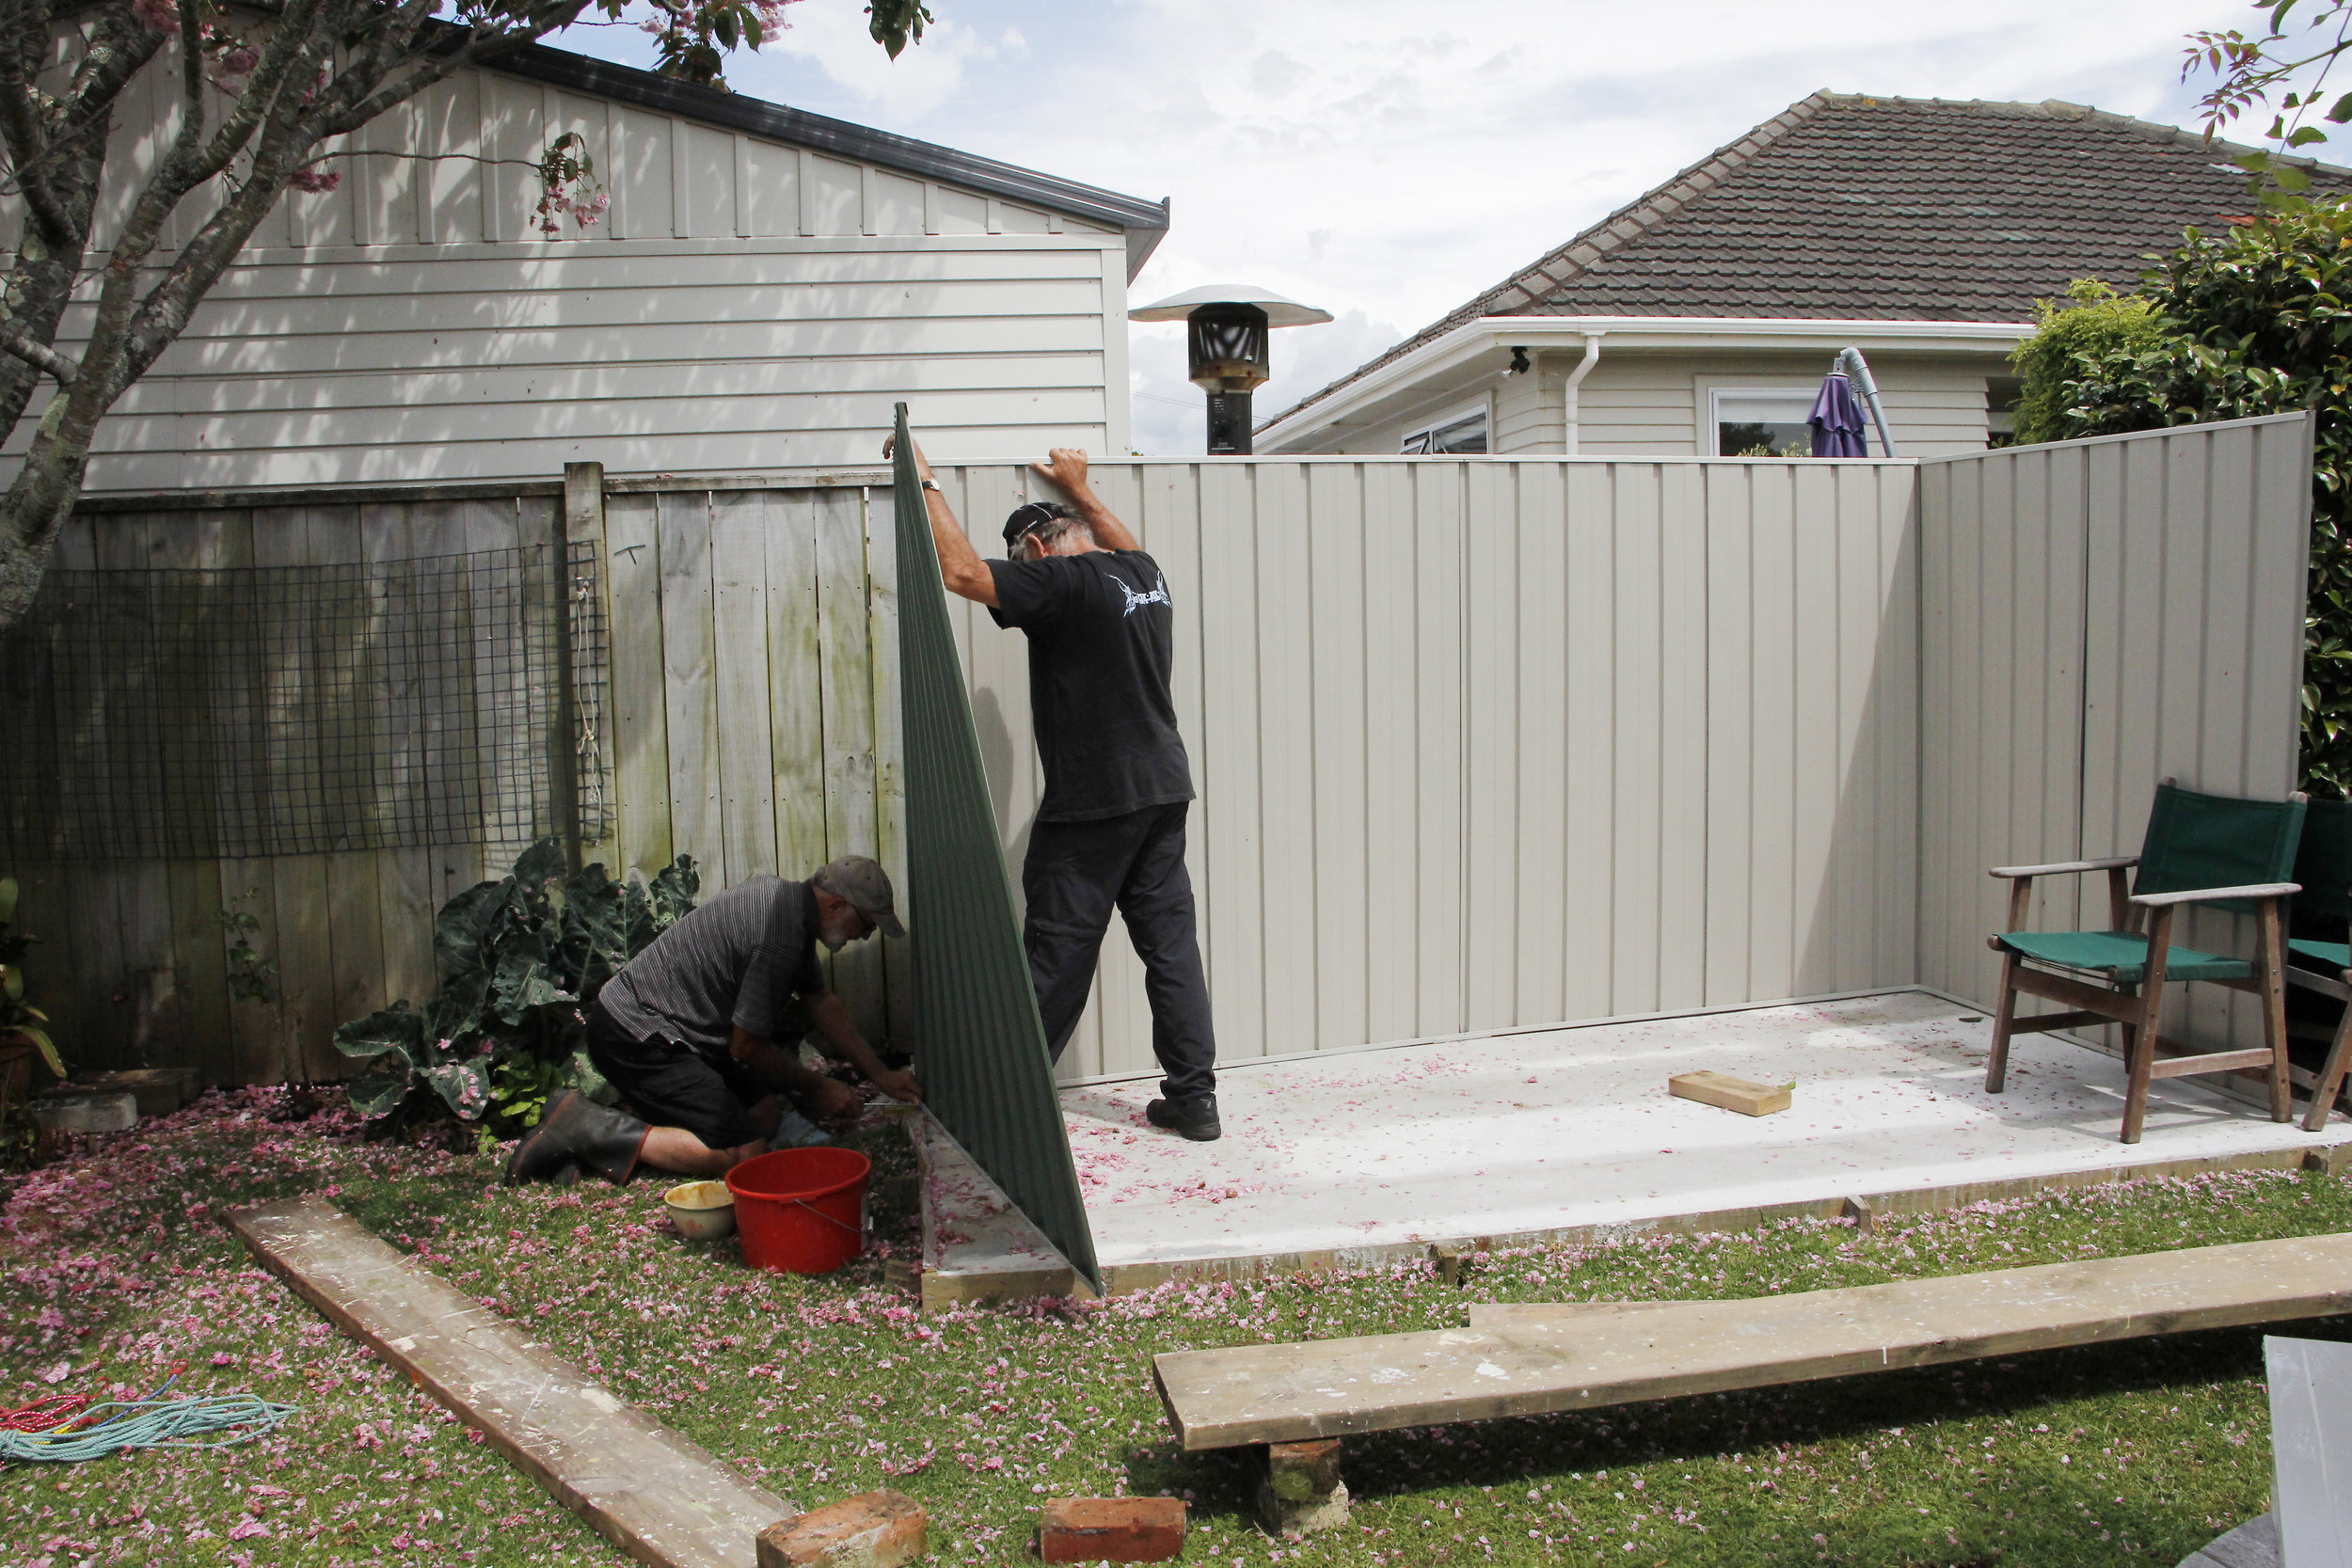
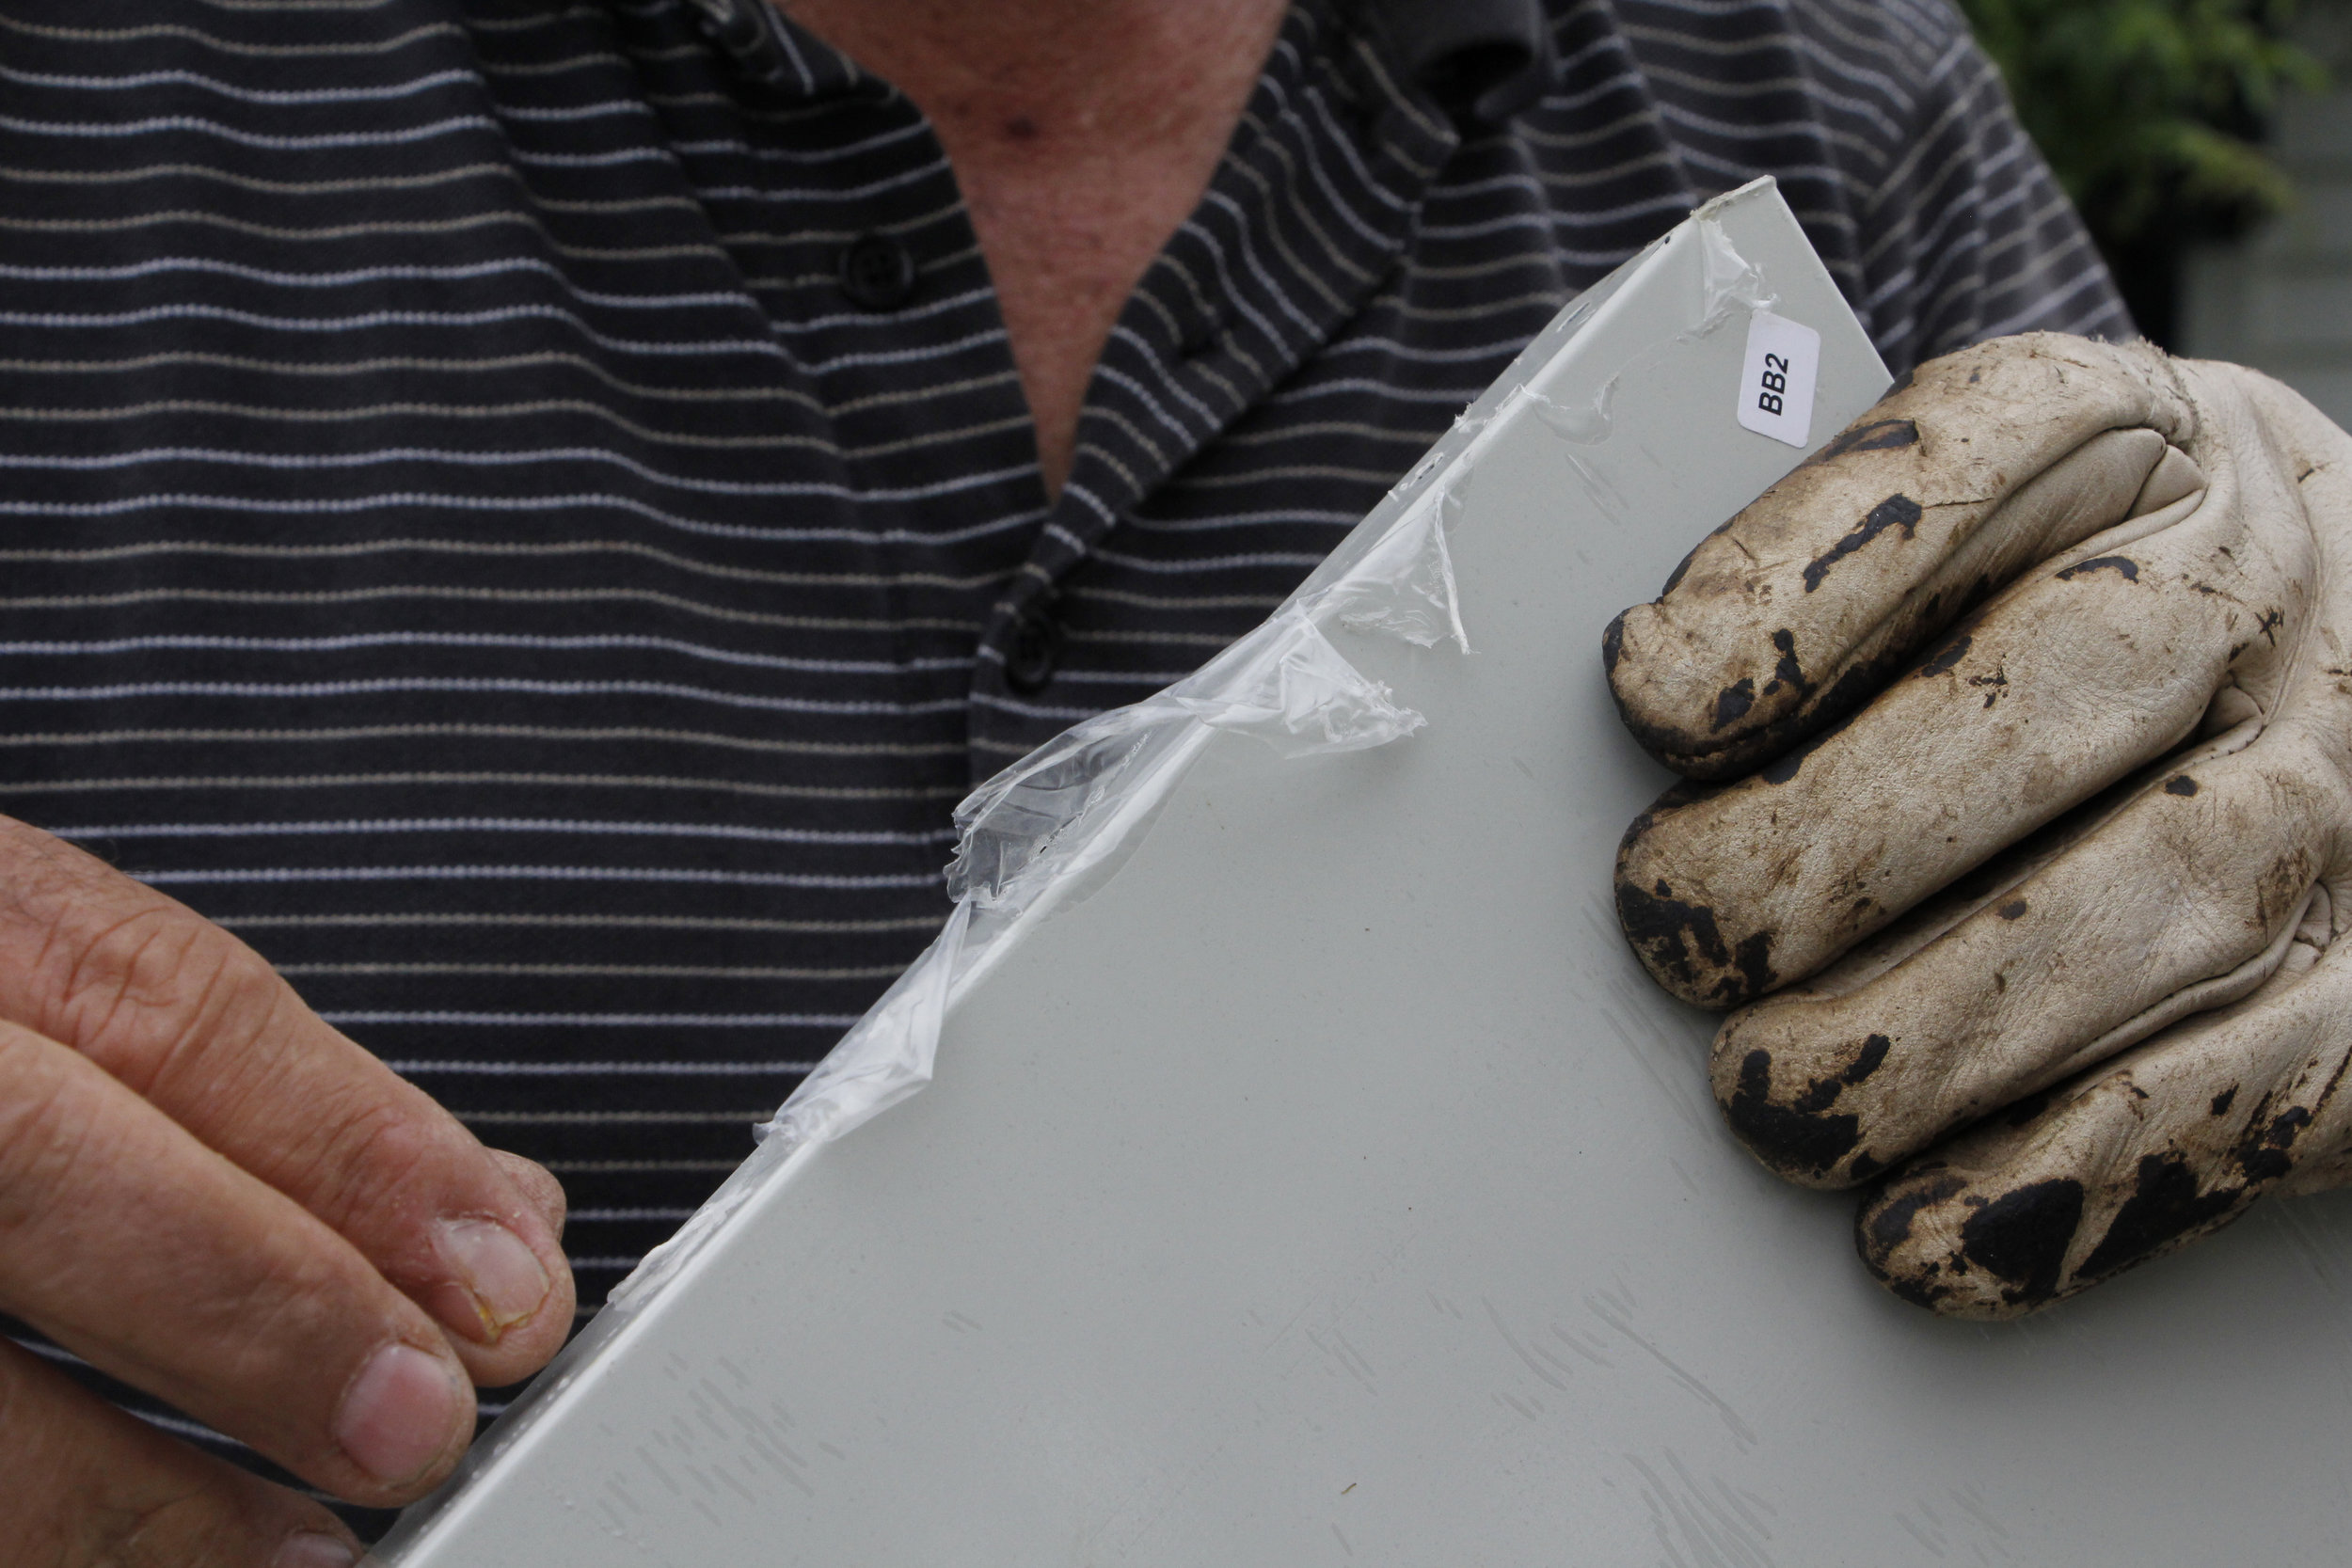
Cling-wrap
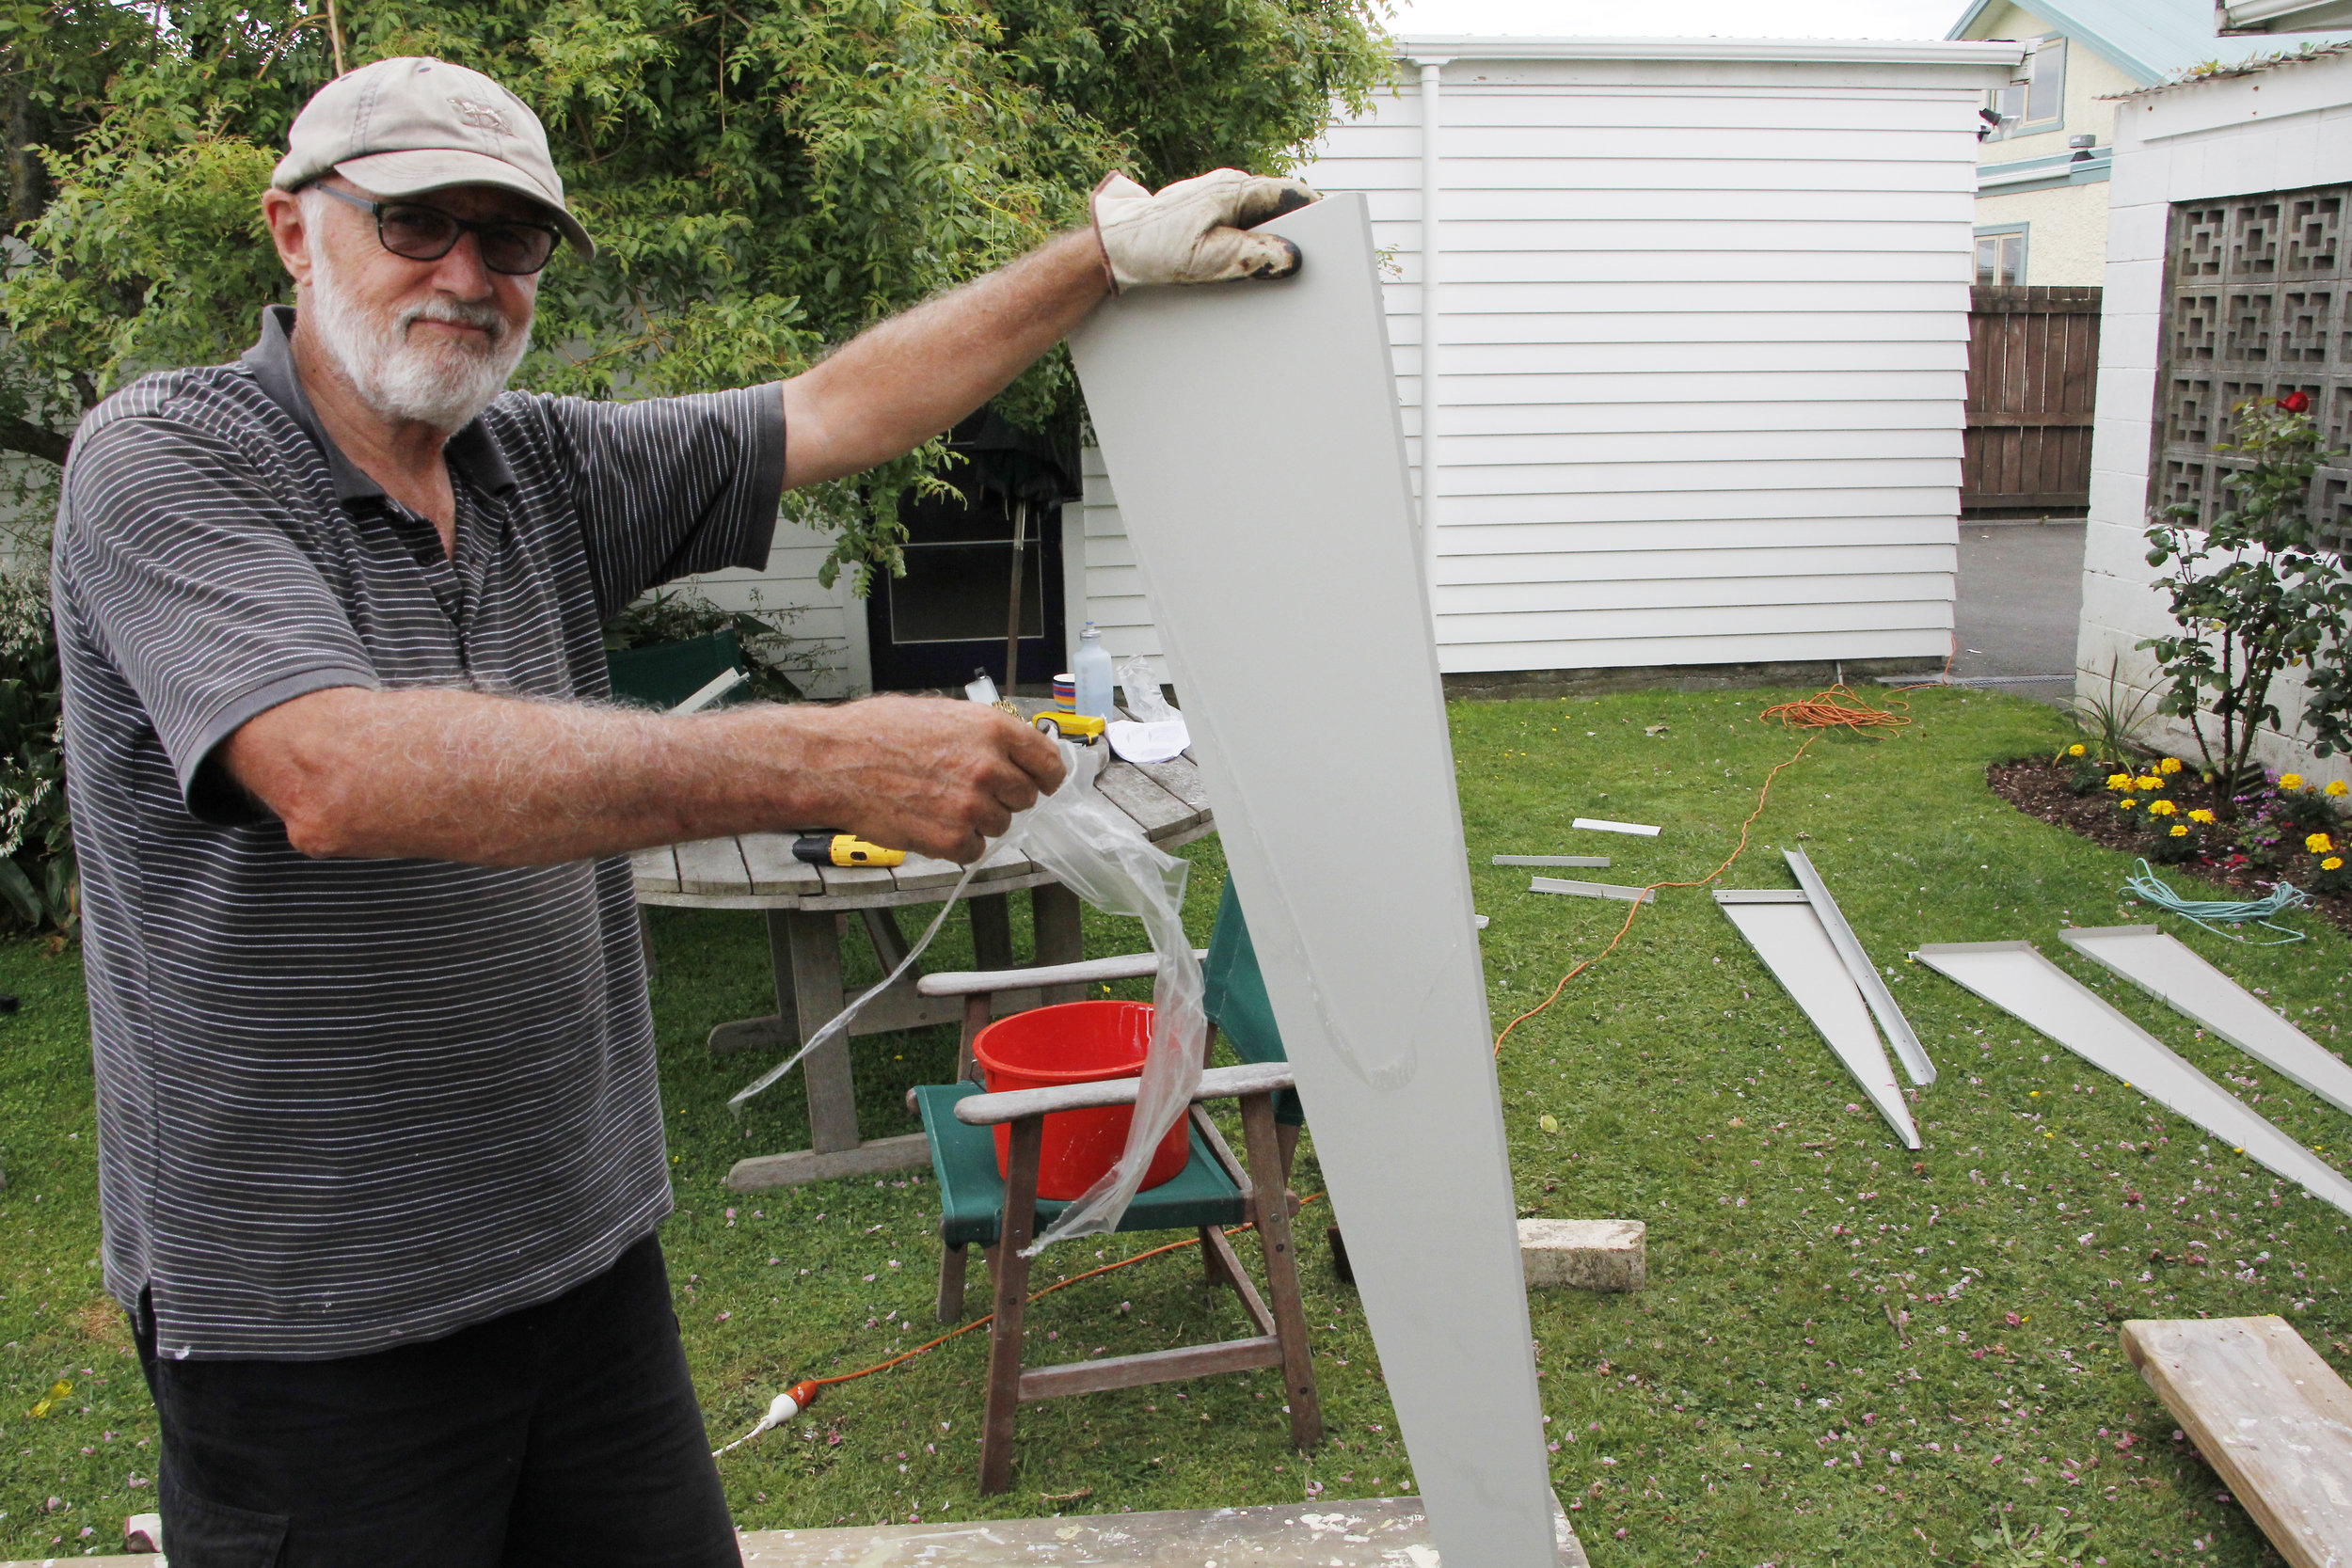
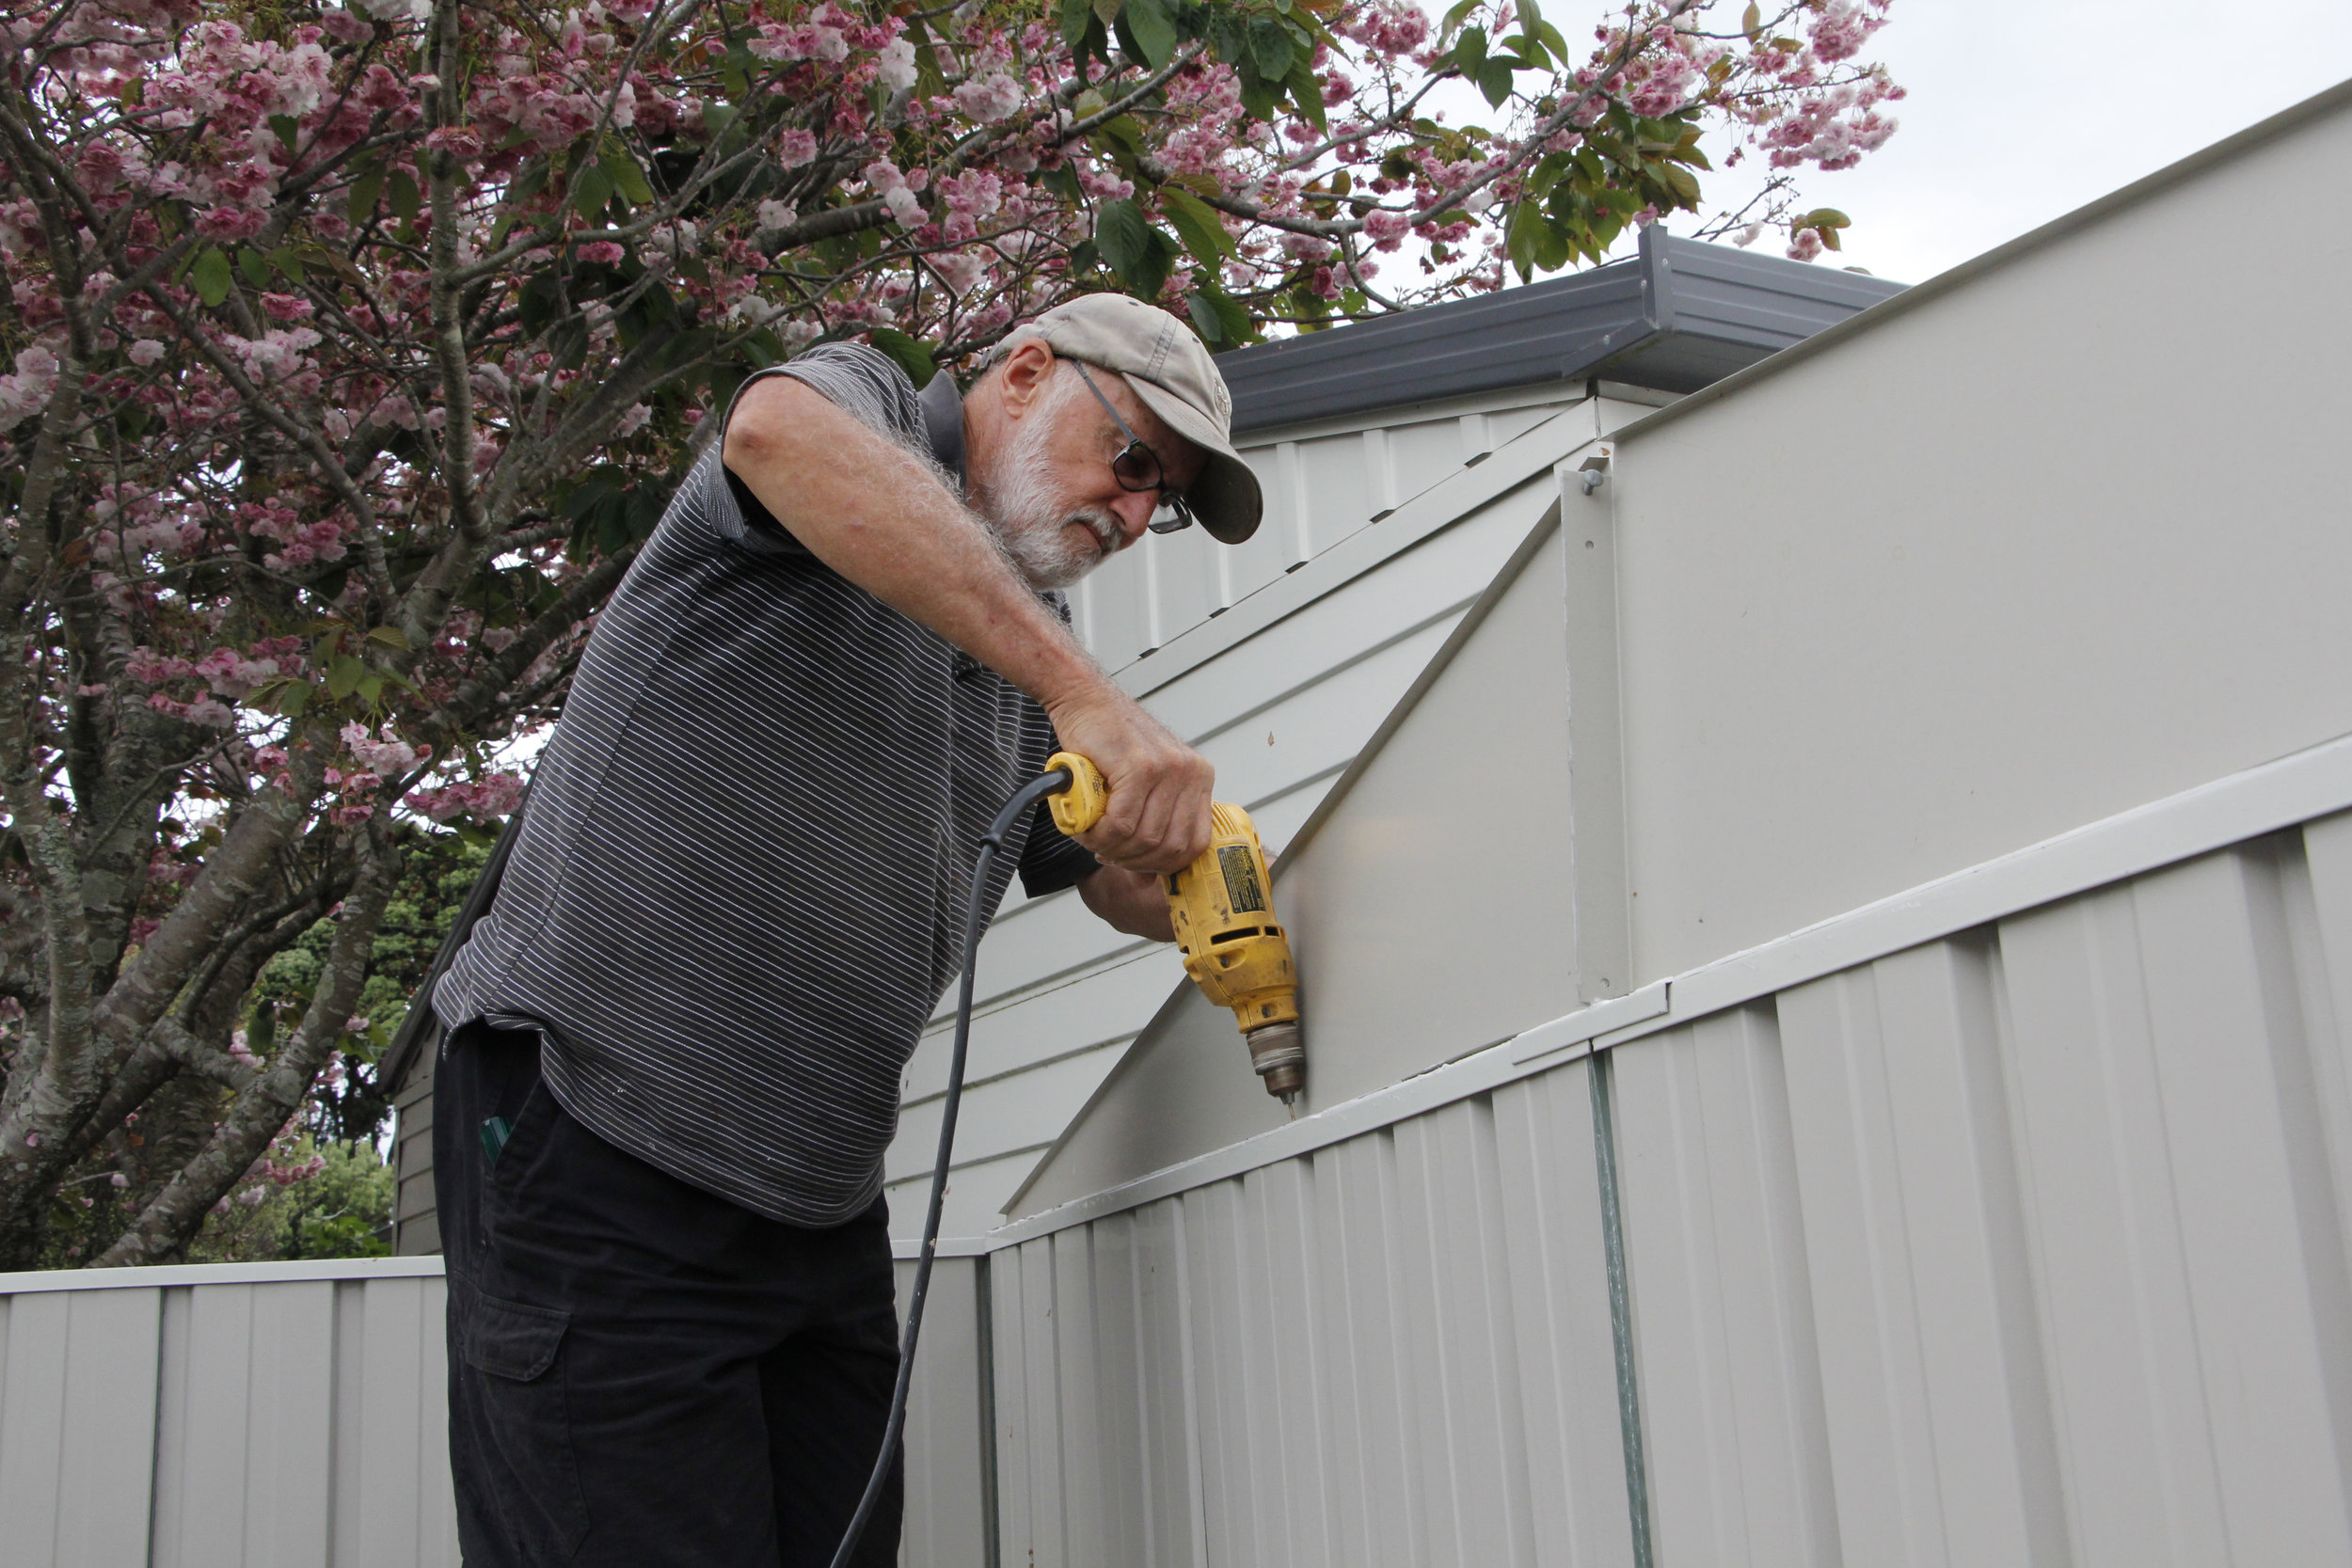
Then there was the cling-wrap. This was applied as thinly as a tight condom and around so many sharp angles it was impossible to tear it off without tears, and eventually, tears. We must have spent two hours over the three days scratching at cling-wrap, whose filmy plastic-ness appealed to Kodak, the puppy, who may have swallowed enough to line his small intestine before someone realised the dangers. Instead of waving our hands around wildly and swearing a lot to shake the stuff off, we needed to put it carefully into the bin. We should have gone with Rob’s excellent idea of water blasting it off after the shed was up. There was also the hazard of sharp edges. The gables were razor-like, nicking finger tips of the unwary and ungloved to the point where seven pieces of sticking plaster were needed to stem wounds that were seriously rearranging the subtle green shades of the metal panels. And there were other obstacles. Two of the key parts must have been incorrectly numbered, because there was no way they could be used as directed. After half an hour of consultation with one another and checking with Bonnie, we risked a divergence. From memory, we counted up all the parts left and worked out which part went where by deduction, which is of course a fancy word for guessing. We deduced correctly, so far as we know. It worked.

Short
What didn’t work was the double-sided tape needed along the top of the front and back walls to ensure a weather seal. Well, the tape worked, but the roll must have been for a smaller shed, because it ran out a metre short. We also worried about the corner overlaps, which seemed to need a few extra self-tapping screws to make them tight. That left us short of screws. Struts to stiffen up the central roof span at each end fitted well on the instruction diagram. But they were made in such a way that fitting them in reality was impossible. More freehanding. Reality can be like that.
Doors
We worked out for ourselves that the doors should be laid into the doorframe while we screwed it together to make sure it was square. After the fact, that fact was mentioned in some additional instructions emailed by the agent. We had rung him to say we needed replacement doors because the ones in the package were bent. We did mention a few frustrations. Unfortunately, the extra instructions to ease our frustrations mentioned parts whose numbers bore no relation to anything we had, so that led to more frustration. Even some swearing. The replacement doors were promised (and duly arrived) straight away, so no complaints about that service.
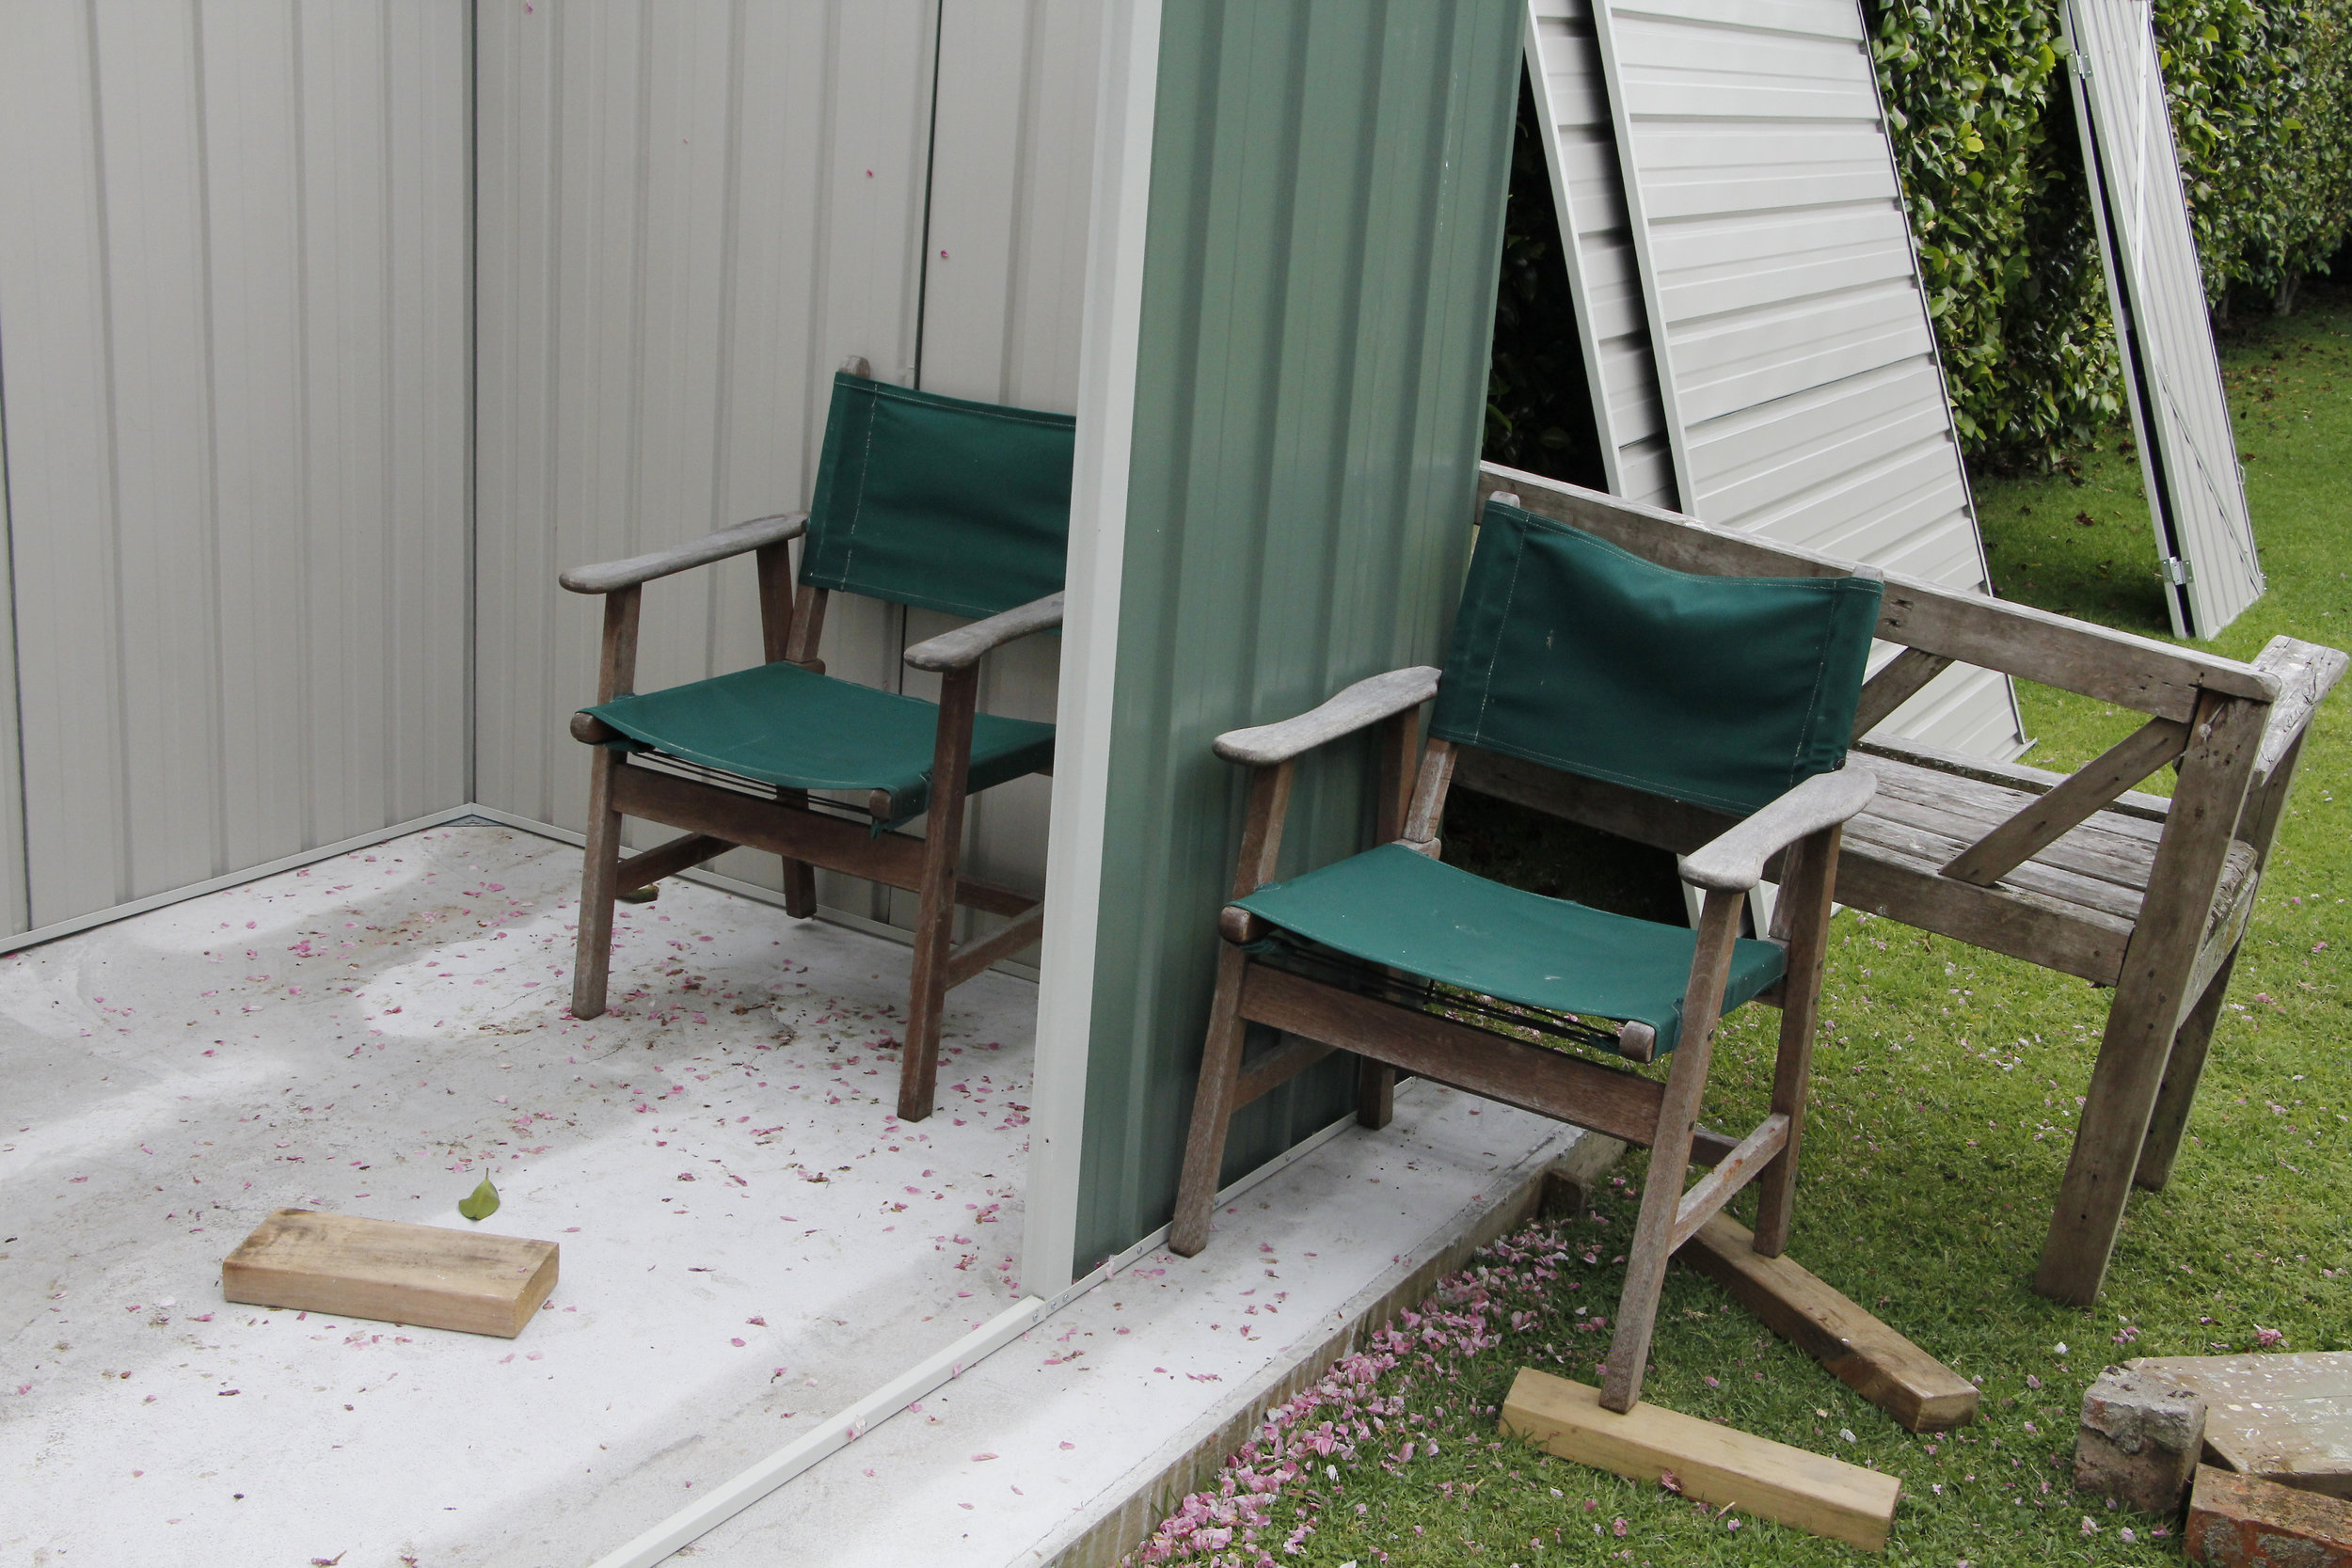
Finished
Now the shed is up, bad language has receded to its usual white noise levels and the cuts have begun to heal. The new shed looks damned splendid with all the stuff in it, although the doors don’t fit properly, which is the fault of the assemblers who didn’t manage to get the building square. The doors are sort-of manageable with a couple of bolts fitted to hold one still so the other can be prised open. Apart from some alarm at the medicine cabinet’s depletion of sticking plasters, Bonnie is delighted: “It’s bigger than I thought it would be. It doesn’t leak and I can have all my gardening stuff in a place where I don’t have to climb over a car to reach it.” Graham Third was particularly impressed with the flag erected for the shed opening (and wetting) but less so with the do-it-yourselfers: “You’ve done well, considering. But these things are tricky if you haven’t done one before.” He stands by his four hours—for the experienced.