With the simple materials of box section steel, steel plate and fire bricks, you can create a handy forge
By Darryl Frost
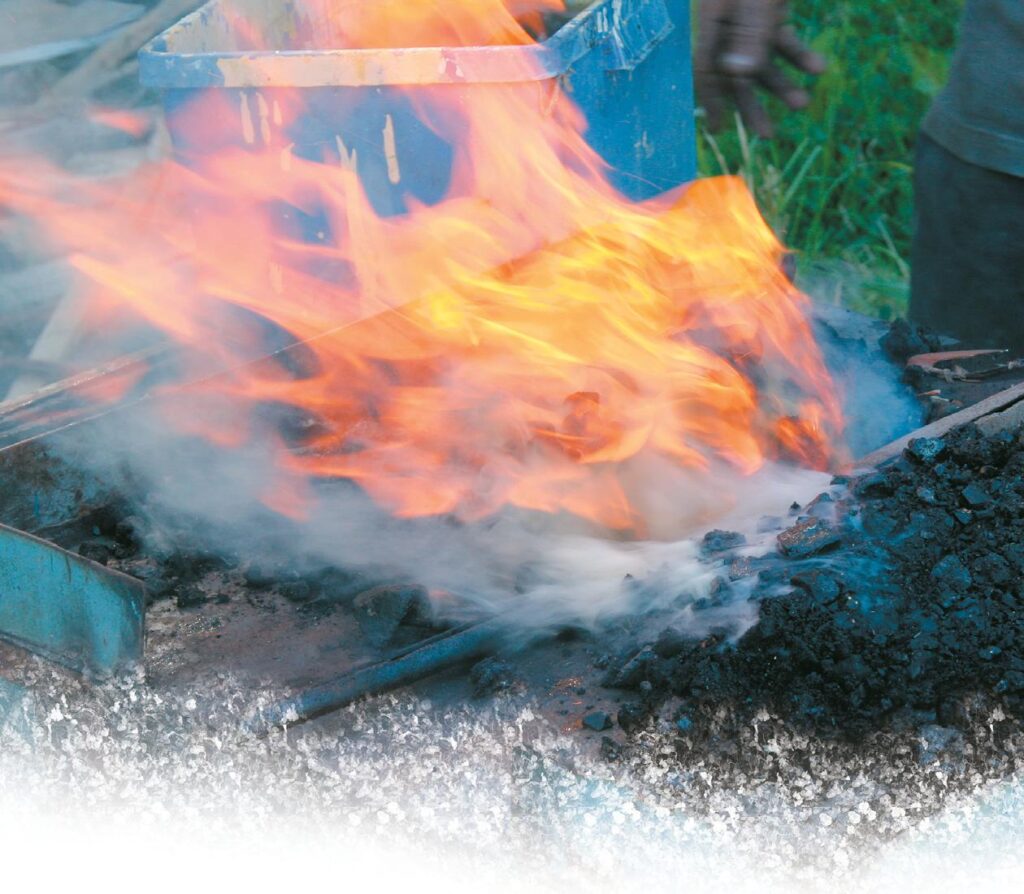
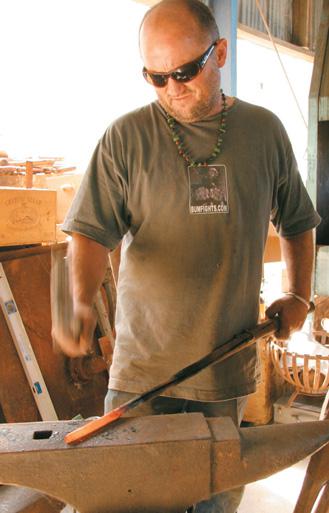
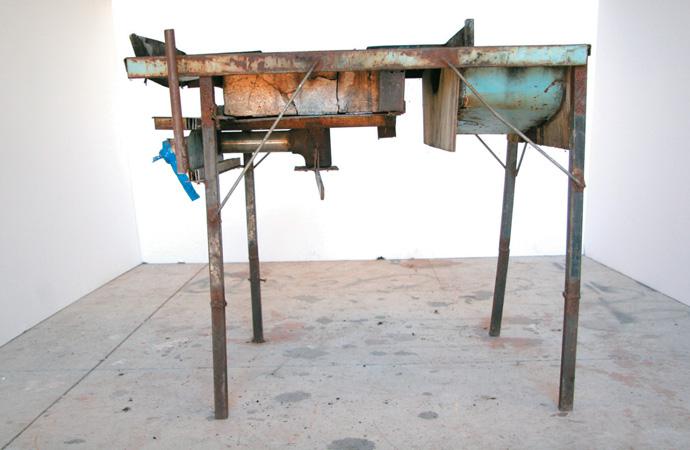
This is one of the very basic forges for heating metal bars. There are many other types of forge out there and Youtube can show you how to build and use them. My forge was made of scrap steel from my workshop and the local recycling centre.
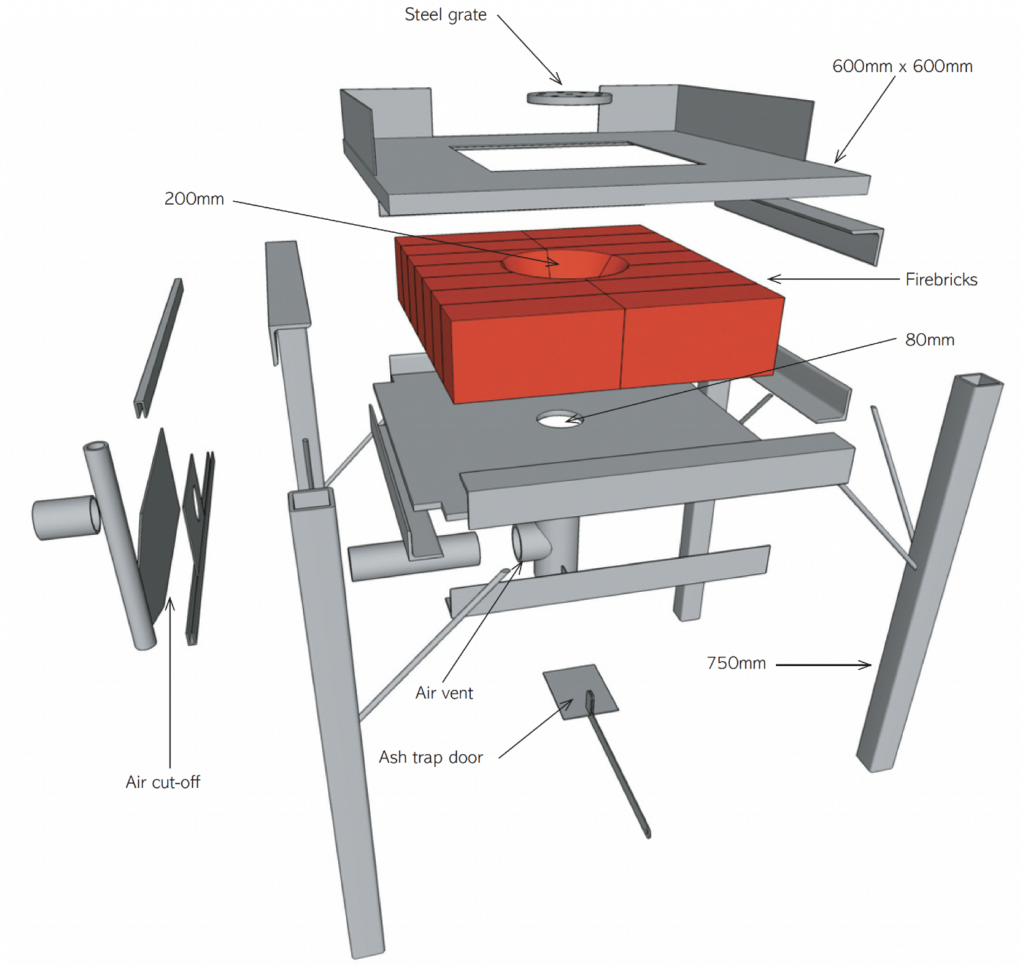
The forge essentially consists of a fireplace or “bowl” in firebricks which are held firmly together in a brace or strap. They sit on top of a steel plate. Another steel plate sits on top of the bricks, with a large square in it to allow access to the firebowl.
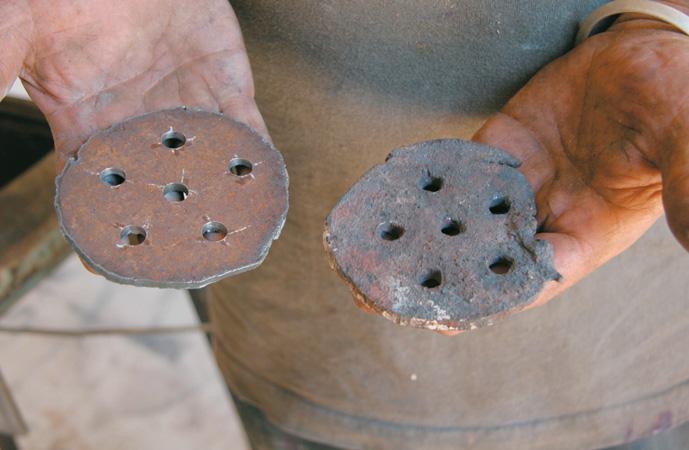
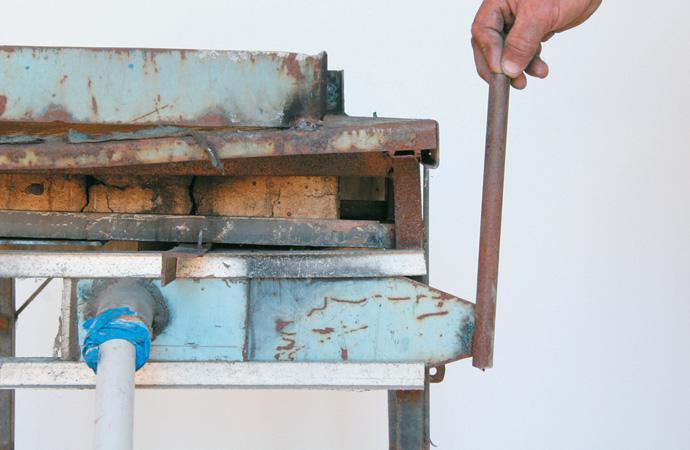
A small, round, high-grade steel grate with several holes in it sits at the bottom of the brick bowl. Below this fireplace, a vertical pipe-fitting is welded into the supporting steel plate. The bottom of the pipe is an ash trap, and the ash can be dropped out by opening a small trapdoor.
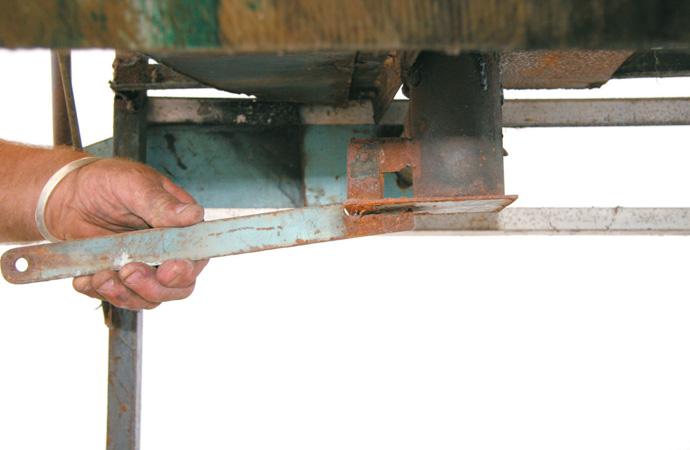
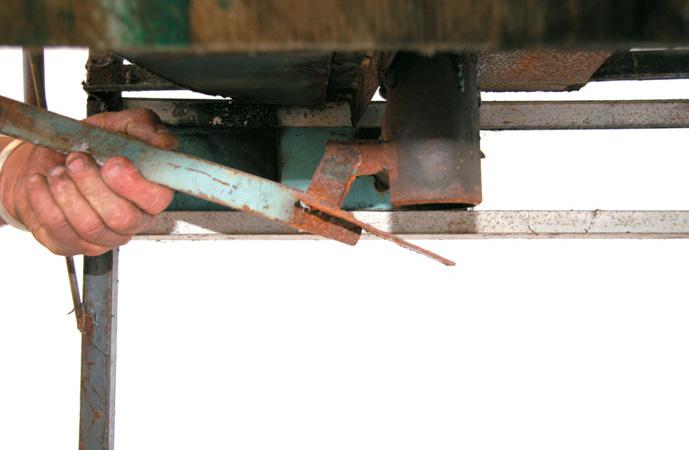
Into the side of this pipe is welded a small entrance pipe. Through this, a vacuum cleaner or similar air source will blow air to increase the heat of the fire. There is a slide at the side of the furnace frame which can be pushed in to cut off the air supply when the fire is not being used to heat metal. It helps to save on coal if the fire is not at full heat all the time.
Stage 1
Stage one is to create the brick firebowl or fireplace.
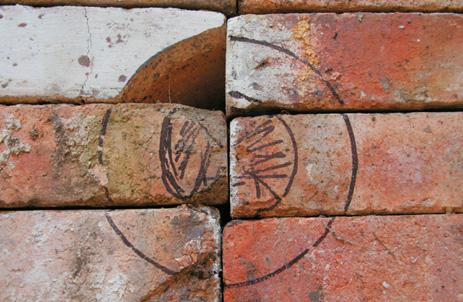
Take ten firebricks. Lie the bricks in two rows of five on their narrow sides, and place the rows side by side with the ends of the bricks touching. Around the centre, mark a 200mm-diameter circle and inside this a circle with a 80mm diameter. The idea is to make a tapered “bowl” in the bricks to hold the coal fire. The marked circles represent the top and the bottom diameter of the “bowl.”
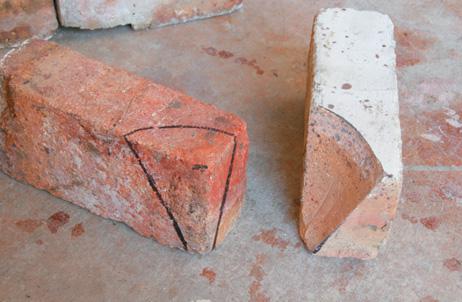
Using the outer and inner circle circumferences as a reference, mark the sides and ends of each brick from the top to the bottom. When you cut the bricks, you can taper the shape into a concave hollow, like the interior of a circle, as the bricks are quite soft to cut. I use a masonry blade on my grinder for cutting.
Cut a steel brace or strap and place it around the bricks. It will fix the bricks in place permanently, holding them together and stopping movement. If the bricks are not a perfect fit, mix up some clay to a smooth paste and put it between the bricks as a mortar mix.
In my forge, I used a solid block of clay that I made and fired myself. If I made another forge, I would use bricks. Forming the clay block really was not worth the effort.

Stage 2
The second stage is to build the frame to hold the bricks. Start by building a 600mm x 600mm frame from mild steel Rectangular Hollow Section (RHS) or hollow steel tubing on top of four 750mm RHS legs with some bracing. My forge is very old but is still serviceable. You could angle iron or other pieces of scrap metal, which is how I put together my forge.
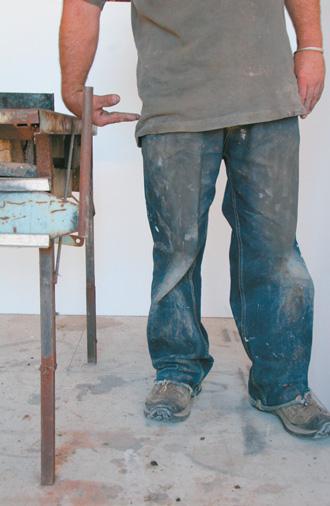
The bricks are going to be placed level with the top of this frame, and resting on a sheet of 3mm steel which has been welded below the top of the frame. The height of the top of the bricks from the ground should be at the same level as your wrist height when you are standing. This is an easy way to measure a comfortable height for the forge and anvil.
Place the bricks with the firebowl on the centre of a steel sheet and mark out the 80mm diameter hole at the bottom of the brick bowl. Remove the bricks and cut out the hole scribed on the steel sheet.
At about 100mm down from the top of the standing frame, weld tube steel or angle iron supports so that the top of the bricks resting on them will be level with the top of the frame. Weld the sheet of steel with the 80mm hole in it to these supports, and to metal straps which are welded to the top of the frame.
Prepare the ash trap and air vent pipe. Take a steel pipe of 80mm or more diameter and about 200mm long. Around a hole cut in the side of this pipe, weld a slightly smaller pipe which leads out to the side of the frame. A similar diameter pipe is fixed on same plane to the outside of the frame. This allows the slider to move between the two pipes, cutting off the air supply when you want to control it. Air is pumped through this series of pipes – I use a household vacuum cleaner which I can control.
The ash trap at the bottom of the vertical pipe is simply a flat piece of steel, hinged and held up against the bottom of the pipe by the weight of the long handle which I found among my scrap metal. Any kind of weight would do.
Now weld the pre-built ash trap and air vent under the steel sheet which holds the bricks, and ensure it covers the 80mm hole in the sheet.
Completion
Fix two pieces of aluminium channel to the legs on the side where the air pipe is fixed. Into these channels, introduce a piece of metal with a welded handle to act as a slide. The slider is meant to cut off the air supply to the burning coal when you’re not actually heating steel, and is placed for ease of opening and closing.
On top of the whole frame, weld a 3mm steel sheet 600mm x 600mm which sits on top of the bricks. First, cut a large hole in this sheet steel to give access to the fire. The rectangular hole should be evenly measured around the centre of the firebowl in the bricks to let you work the fire easily.
At the bottom of the firebowl, place a metal grate plate made out of heavy grade steel, the thicker the better. A solid, thick steel plate will last longer, too. Drill six 10mm-diameter holes in this steel grate to allow the ash to fall through. This grate is just placed where it sits, since you will need to remove it for cleaning out slag.
Finally, weld metal sides 50mm high onto the sides of the table top to stop the coal from spilling off.
I built a coal box on the side of my old forge, pictured, for the coal supply. This was a great idea, but the box needs to be really solid and made out of steel. In the event, this was not the most efficient way to have the coal at the ready, and I now prefer to bring the coal in a bucket, and from there to pile it on the table.
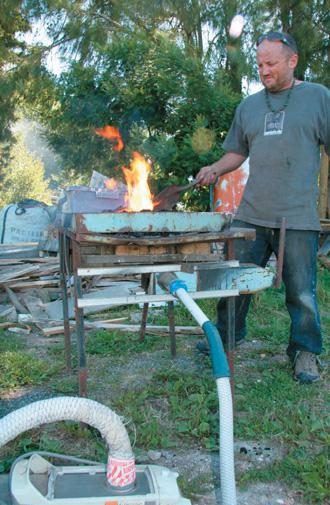
Start up
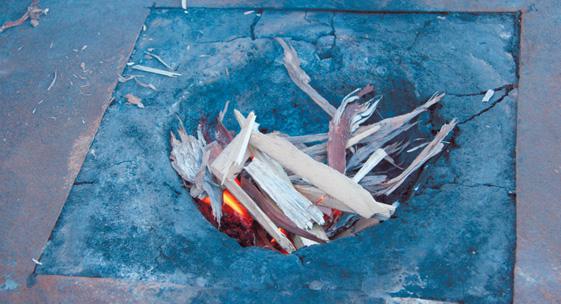
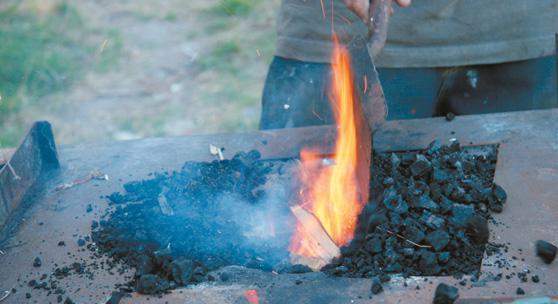
Crush your coal into small bits as it burns more efficiently, compacts down and therefore keeps the heat in better. To start the fire, use a small amount of paper and wood. As it starts burning, slowly add the coal.
I like to keep a heap of dampened coal on the steel table. As the fire progresses and you use the forge, the coal is heated and the gases are driven off. This is the theory that wet coal, as it heats up, it changes to coke which, when burnt, creates more heat than coal.
Good luck and remember the hotter the steel the easier it is to hammer. But when it sparks like a Guy Fawkes sparkler it’s too hot.
You need to have a good water supply handy, such as a barrel of water. This is essential for quenching the steel and your hand, if needed. You also need to use the water to control the fire and to manage the re-hot metal.
