Bow making – take aim!

Archery is a satisfying sport that has its roots fixed in the primal skill of hunting. As a woodworker it is an added bonus that you can make at least part of your own bow yourself. A bow like the one in this project is called a recurve and consists of a handle, or riser, two limbs (the flexible parts that bend), a string and an arrow rest.

They say you need to make at least three bows before you can make a decent one. Raf Nathan shows how to make your first one
By Raf Nathan
Photographs: Raf Nathan

Archery is a satisfying sport that has its roots fixed in the primal skill of hunting. As a woodworker it is an added bonus that you can make at least part of your own bow yourself. A bow like the one in this project is called a recurve and consists of a handle, or riser, two limbs (the flexible parts that bend), a string and an arrow rest. 
When you pull back on the string, the energy is transferred to the limbs which, on release, propel the arrow forward. Limbs are graded into poundage: beginners may use 28lb whereas the pros may be drawing up to 40lb or more. Hunting bows can go up to 60lb. This poundage represents great force which the riser must be able to withstand. This project is about my third bow – the first two broke.

(1)
(2)

Practice makes perfect
Number one was made from two pieces of blackwood laminated together. My idea was that two pieces would be more dimensionally stable than one. I used  epoxy bought at a hardware store and the bow broke along the glue line. Number two was a beautiful thing made of mahogany with maple and blackwood detail veneers laminated at the middle. This bow broke purely due to wood failure. The mahogany lacked guts.
To avoid any problems with glue, number three is made from walnut because it adds cross-grain strength and look beautiful. The limbs are 34lb – any more poundage probably requires the skills of a professional bowmaker to ensure long life.
Purchase your limbs first. The international standard for archery is the imperial system, so your limbs will be 1 1/2inches wide (about 38mm). Phone around archery stores to locate one that will sell limbs separately. Buying them  secondhand on Trademe is an option. Limbs of 28-30lb are a good starting point. Be warned that some people will tell you that it’s all too hard and to forget the whole thing. 
The limbs sit in a pocket consisting of a shoulder on the riser and brass side pieces. The brass sides are set flush into the riser. A final thickness of 42mm for the riser, less the two thicknesses of 1.6mm brass, houses the limbs snugly.

(3)
(4)
(5)

Making the bow
Select wood clear from defects and orient the grain if possible so that it is quarter sawn with the heart side toward the face of the riser (the side facing the archer). Dress the wood square and straight. The wood should be 90mm or more in width and, say, 44mm thick. The final thickness will be 42mm (the extra 2mm is to accommodate any wood movement). Trace the pattern (see fig.1) onto the wood and bandsaw the shape, but do not saw out the shoulders where the limbs sit. You will also need to bandsaw the cut-away where the arrows rest. This is sawn full at the arrow cut-away in preparation for later routing (step 1).
Put the riser away for about a week to let the wood settle. All the sawing will release any inherent tensions in the wood and a bow or twist may develop. To re-straighten the riser skim it over a jointer and then thickness it down to 42mm thickness. Plane the edge above the shoulder square and parallel (steps 2 and 3), and then use a marking gauge to mark out the shoulder (step 4). Next, bandsaw out the shoulder (step 5).
The shoulders need to be as perfectly level as possible and square to the faces. To achieve all this you can work quietly with a saw and chisel, or use a power tool and a jig. Steps 6 and 7 show a shop-made jig used to cut the shoulders with a router.
The arrow cut-away consists of a level face that ends with a lip that continues up in a sweep. The level face can also be made with a jig and router as in steps 8 and 9. The jig holds the router level and makes a clean arrow cut-away. A bowl cutter was used to rout this (step 10). Rout down deep enough so that 18mm thickness of wood remains. This should then position the arrow shaft central to the string. The sweep that continues up allows you to sight the arrow when it is mounted. A bowl cutter is a flat-bottom bit with radiused corners.

(6)
(7)
(8)
(9)

Shaping
Now begins the actual shaping of the riser. This requires sanders, chisels, spokeshaves, and patience. Step11 shows a belt sander reversed and the front drum being used to shape the hand grip. Using a rounding-over bit in the router and running this over some of the edges can speed things up. A spokeshave is of great value for refining lines, as is a scraper. An inflatable sanding bobbin is absolutely invaluable for this type of work, but not essential – just a lot faster. Try to refine the shape as much as possible before starting hand sanding. Use 80-grit paper followed by 100 and 120 grit.
At this stage the holes for the limbs can be drilled. The holes need to be exactly centred. Mark a centre line on the shoulder, then hold the limbs in place and mark where the holes need to be. In this case a horizontal mortising table was used for the drilling with a 9.5mm (3/8inch) bit.
Now the brass sides can be fitted. The action of the sides is to position the limbs parallel to the riser. The brassware (Step 12) was prepared by a local engineer. He was presented with a drawing and the shapes were cut with a metal router. The holes for the 4 square drive screws were drilled and countersunk, and a sink with an 82° angle was used to ensure a tight fit with the screw heads. 
Set your drill press to allow the screw heads to protrude slightly; they will sand back flush to the plates later. Hold the brass plates in position and mark out the shape with a scriber. A laminate trimmer with a flat-bottom bit can remove most of the waste and, importantly, keep the surface flat and level. Before routing set the cutter depth to the thickness of the brass. Pre-drill the holes and fit steel screws first, remove them and replace with brass screws. 
The hard walnut can break soft brass screws and removing broken screws is a hassle. Without the use of specially made brass sides an easier but more simplistic way to align the limbs would be to have the riser at 38mm (1 1/2inch) thickness so the limbs were flush with the sides. Small, shaped pieces of wood could then be fixed at the sides to form pockets for the limbs.

(10)
(11)
(12)

Sanding and polishing
The brass sides can then be sanded level with the wood with a belt sander. Now the whole piece must be hand sanded up to at least 320 grit. Polishing comes next and the choice of finish is optional. A bow will be used outdoors hence a water-resistant polish is best – oil, lacquer and oil/shellac/varnish mixtures can work well.
Now the limbs can be fitted. I sprayed the original white limbs shown with a black enamel. Brass bolts with dome heads and washers have been used in this piece, but stainless steel is another option. 
At this stage it is time to visit an archery store for help with a string and arrow rest. Strings and rests are inexpensive and the store will be able to recommend what to use. They can fit the rest and set up the bow, matching arrows to suit your bow and personal draw length. 
A bow, like a gun, is shot, hence it can be a dangerous implement so sensible and supervised use is critical. A novice will benefit from joining a club to learn correct technique and, more importantly, safe shooting practices.

Share:

More Posts

Steampunk toy: Back to the future

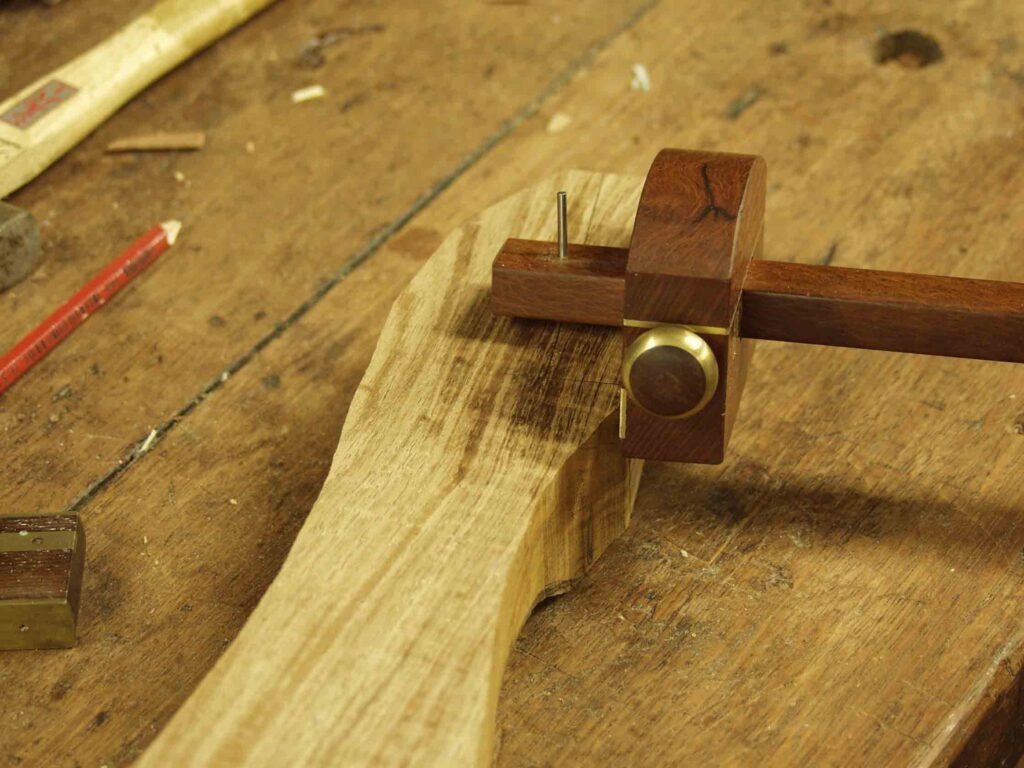
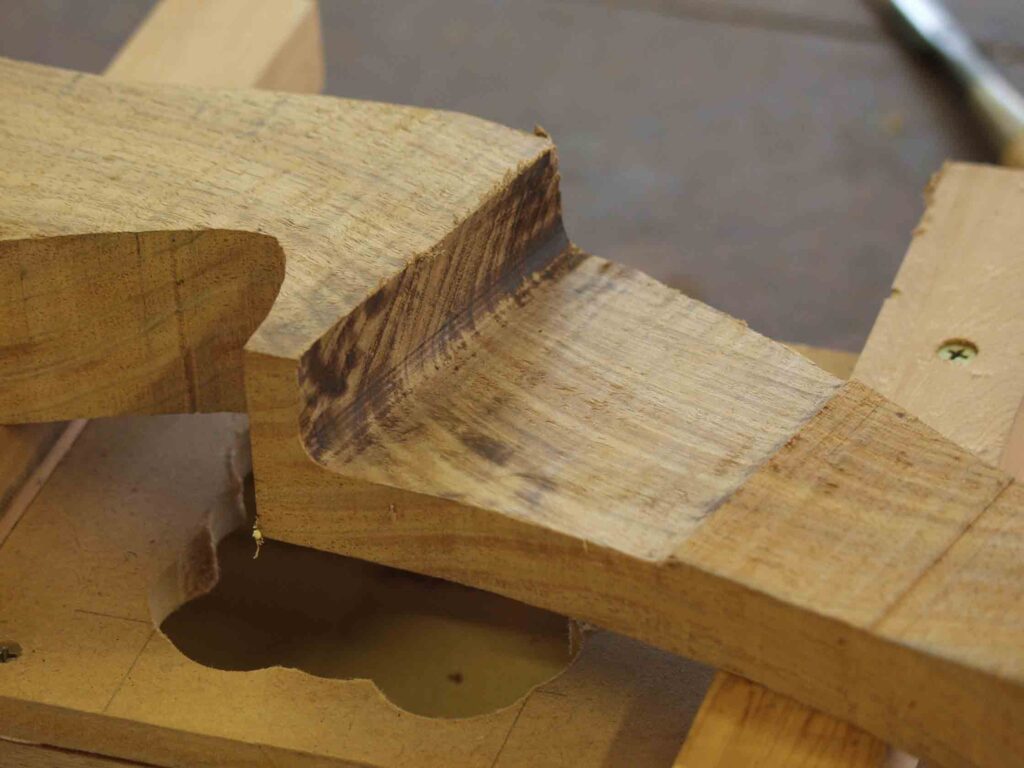
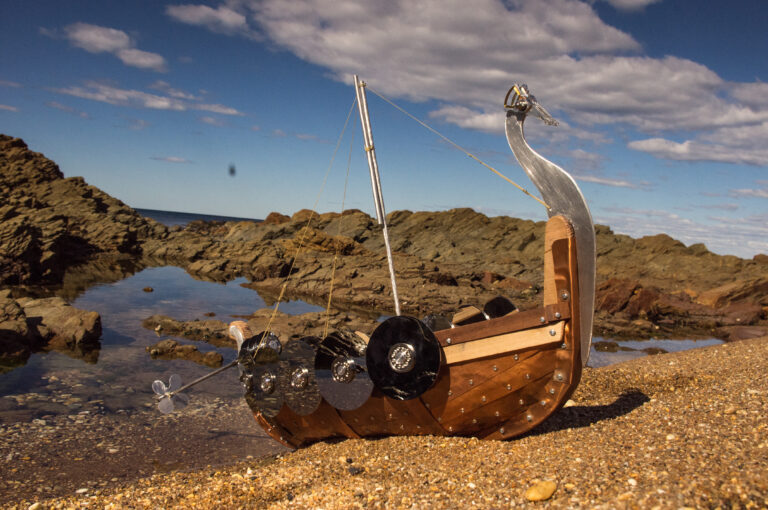
Having been bitten by the steampunk toy bug recently I couldn’t resist trying once again to bring the theme to bear on another model. I have always admired the elegant lines of the clinker-built Viking longboats, their savage, war-like image on storm-tossed seas, and the whole mythology of the Viking era. I decided to see if I could combine that vision and steampunk to produce a modern take on the old boats.
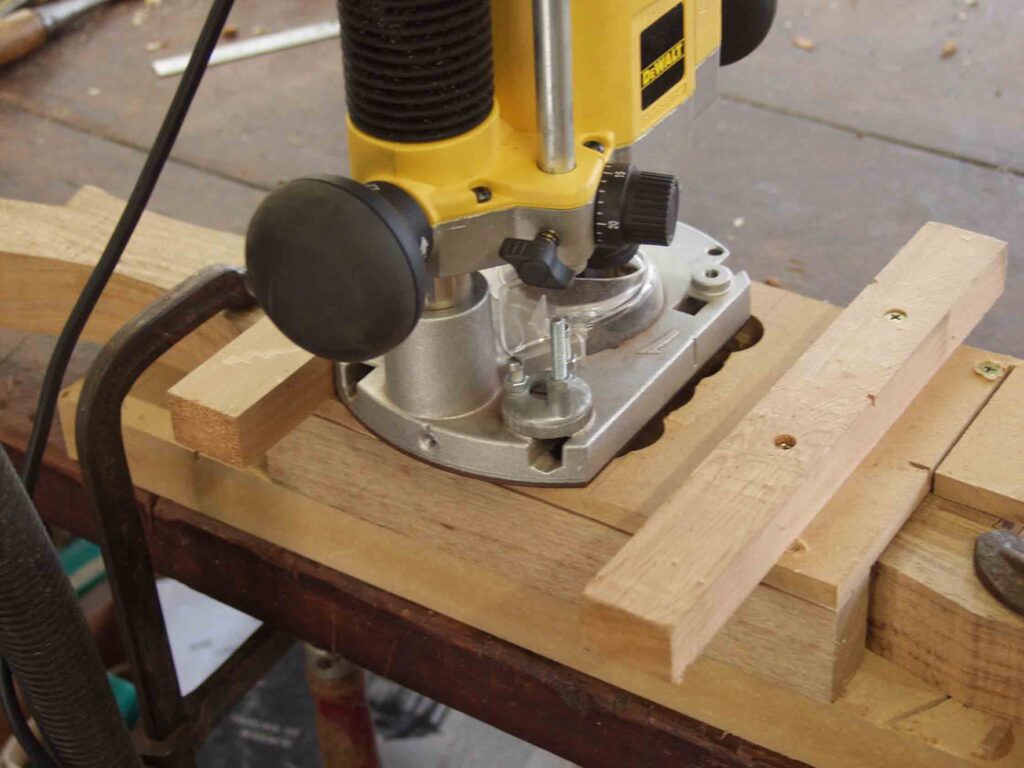
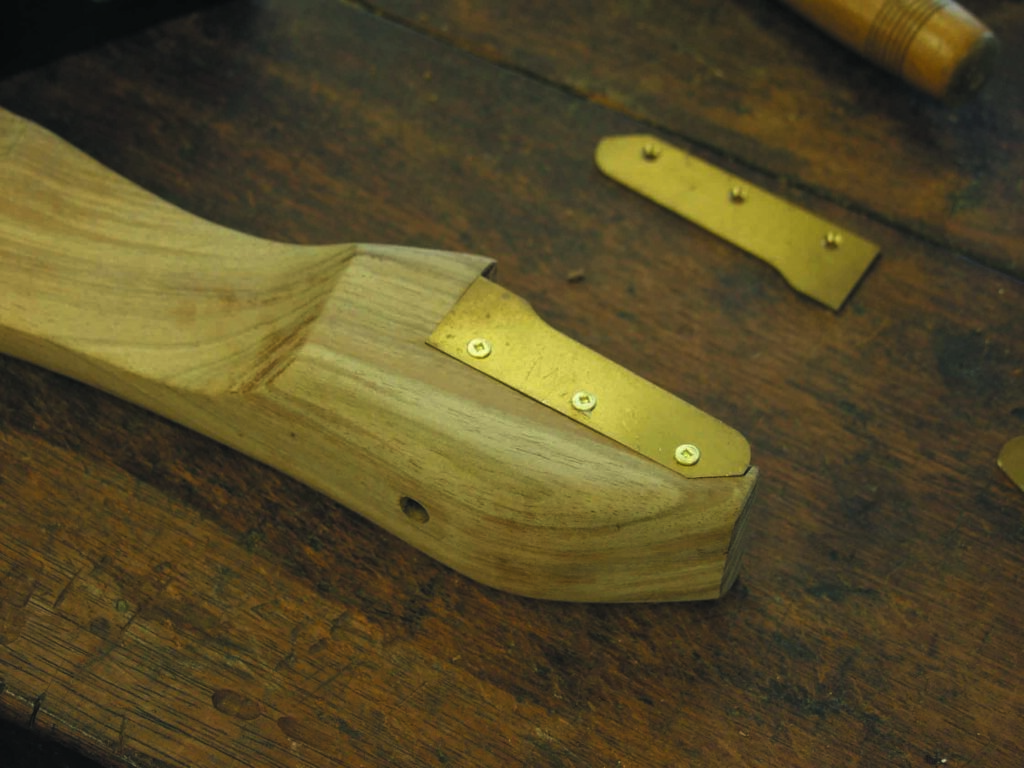
As with my other steampunk toys and models, I chose a central element around which to base this one. The ultra-smooth, mirror-like, hard-drive disks I had used as hub caps in a previous steampunk toy are especially well suited to replicate (with a modern twist) the Viking shields that adorned the gunwales of their longboats.

The Shed magazine June/July 2025 issue 121 on sale now

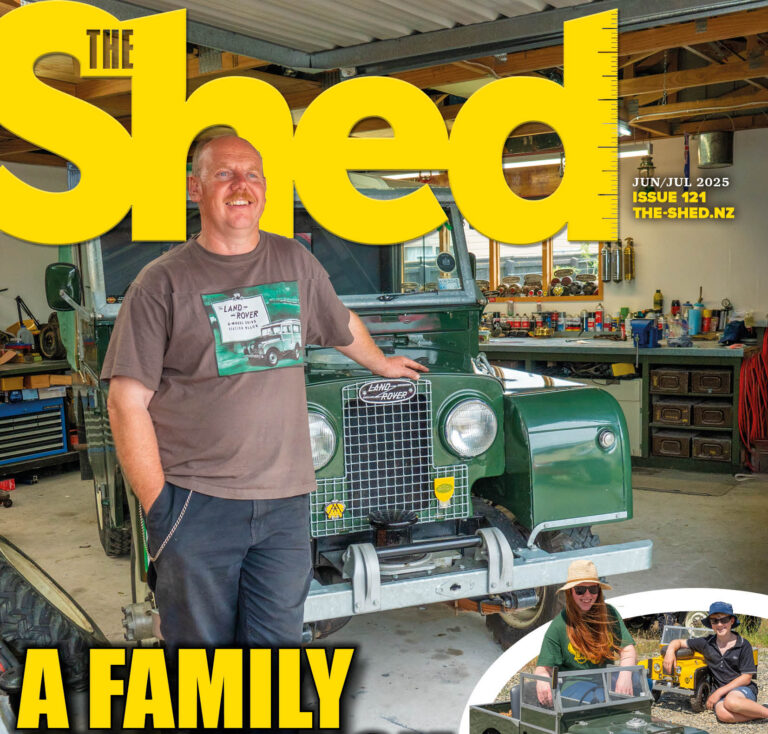
With the genealogy of the five generations of South Island engineers in the family, Ross Hayes thinks nothing of rebuilding Land Rovers for fun, family and farm.
Ross Hayes was 17 when he bought his first Land Rover. It was road-legal, but that was about it. It turned out that it was cosmetically covering up a huge amount of rust, so it wasn’t going to make the long haul.
Ross bunches his lips. “I got a bit disheartened and decided that if I couldn’t trust anybody to sell me a good one, I’d build myself one.”
He bought a 1954 short wheelbase Series 1 Land Rover in December ’96, just after he turned 18. “I paid six hundred bucks to a guy out of Naseby called Owen Rawcliffe, who’s since passed. I brought it back to Oamaru through the Danseys Pass and set to pulling it to bits.”
He bought workshop and parts manuals from the UK and a set of Whitworth sockets and Whitworth spanners and got stuck in.
The Mistress, as he came to call this ‘54 Series 1, spent five years, three months in the workshop – 6000 hours – while he pulled it to bits and rebuilt it.
His idea was to start with a chassis, and everything that went onto the chassis was either rebuilt or brand new. It was hard to get parts back then in the 1990s.

A man of many sheds

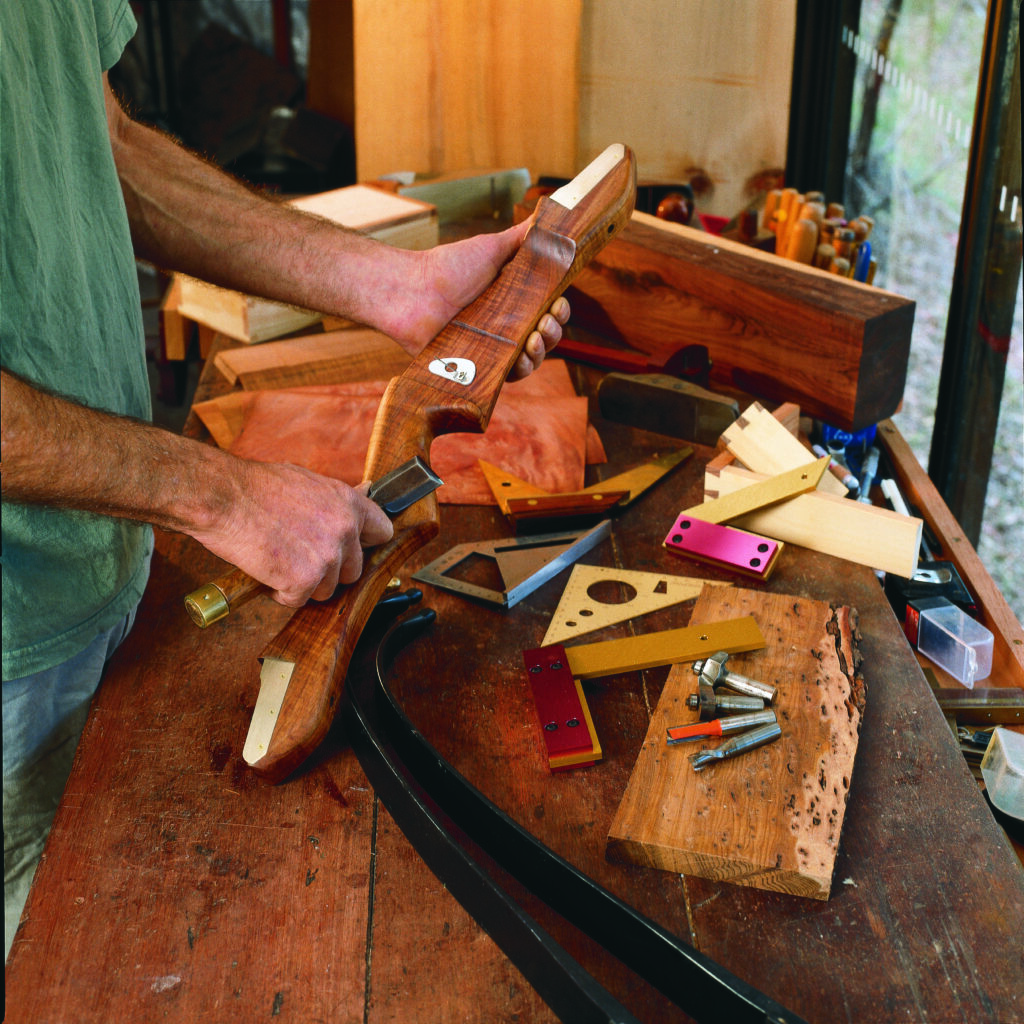
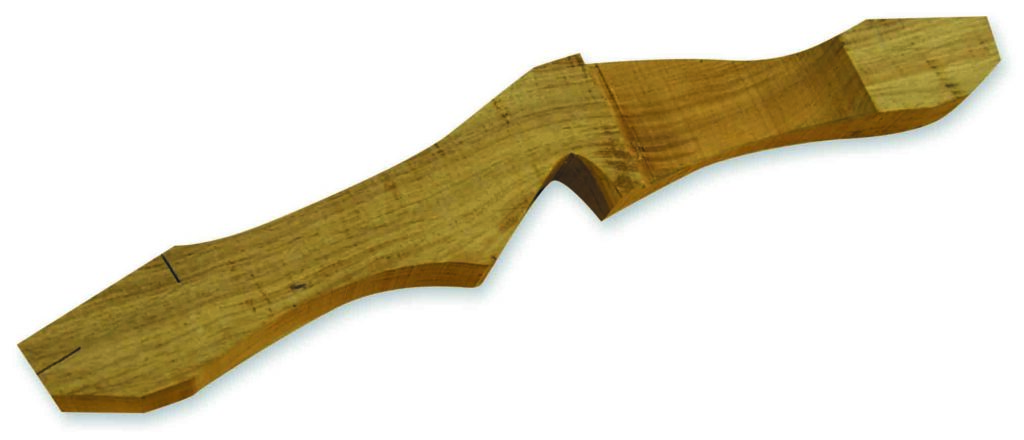
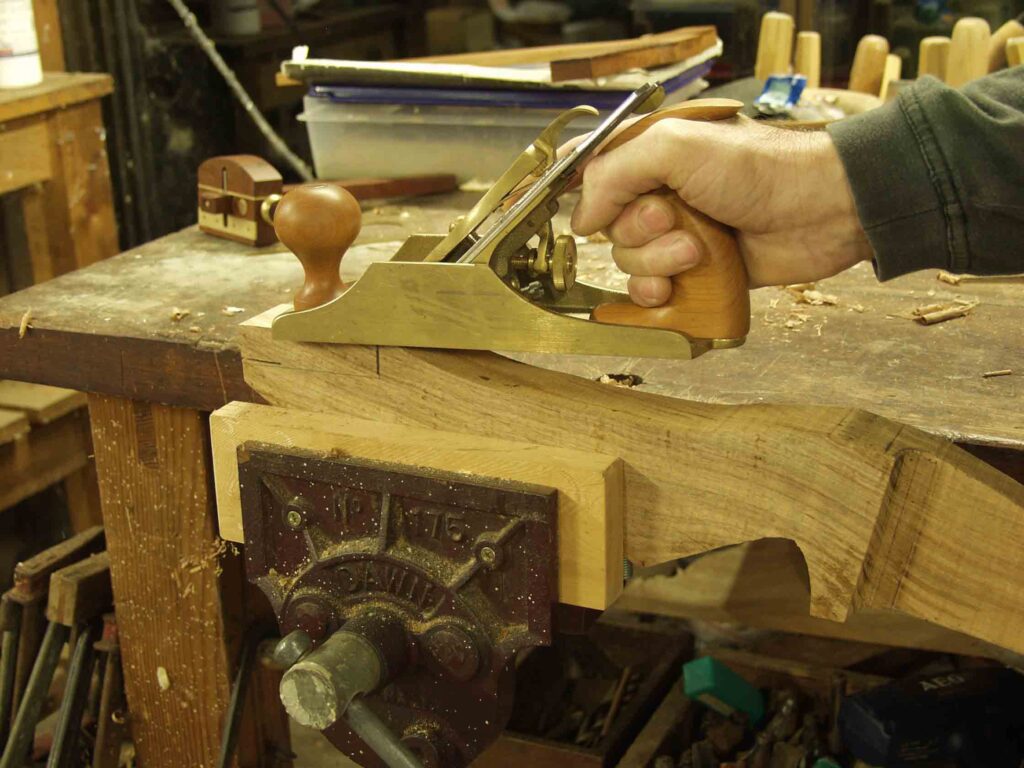
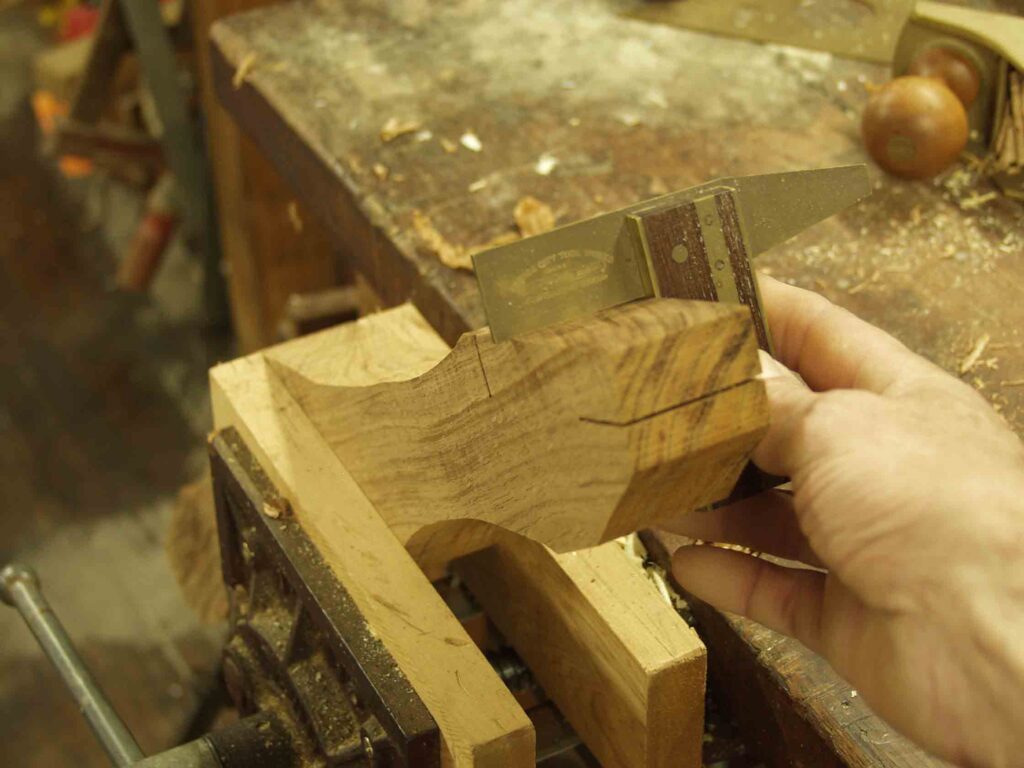
Sitting on the edge of a little paddock in the river mouth settlement of Kakanui, ten minutes drive south of Oamaru, is a ramshackle shed where Lindsay Murray creates things of rustic beauty.
The shed has a long history. It was built in 1875 as the house and shop of a nurseryman, George Packwood, who came from Scotland to plant and tend trees around the mill manager’s house in Kakanui.
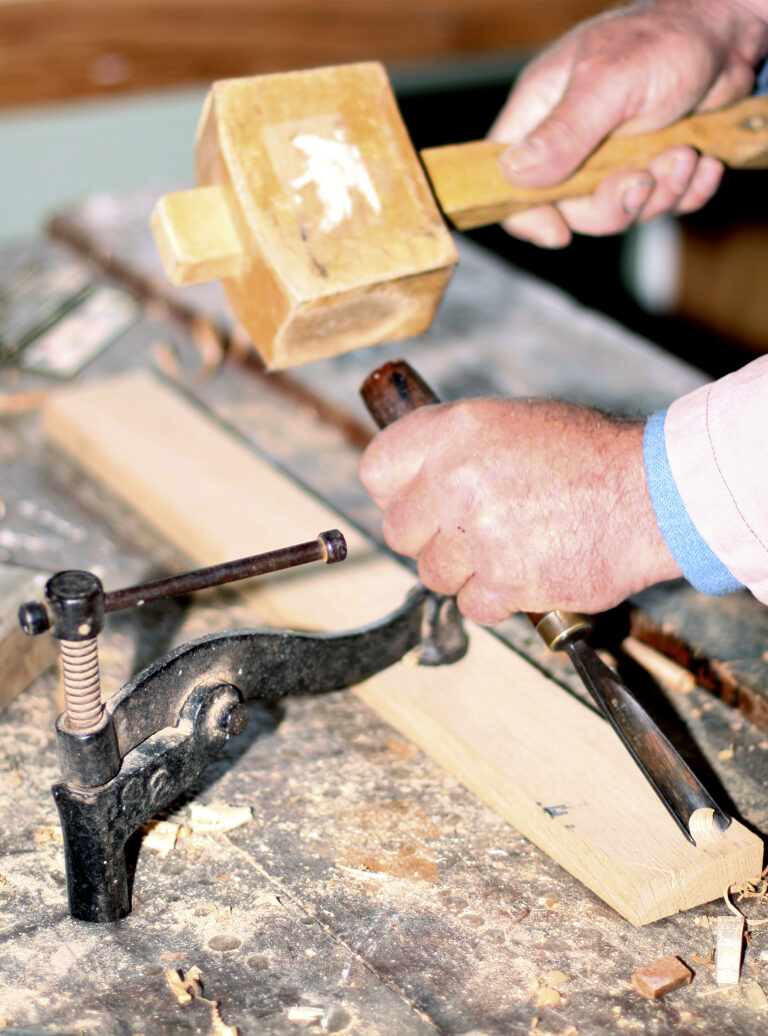
When Lindsay, an artisan wood worker and sometimes blacksmith took it over in 1993 the back wall had fallen off, half the roof was collapsing and the floors were rotted through in the living quarters. As far as Lindsay was concerned, it was perfect.
It had the remnants of the original dwelling: a kitchen with no running water but with a working coal range, and two other rooms which have served, over the years, as sleeping quarters and a sitting-cum-dining room. This is where Lindsay stays overnight when working on a major project. It also serves as temporary accommodation for visiting artisans and is currently home to Rolands Selis, a highly skilled leather worker.