Create one of the most-used jigs for your woodwork
An extension table for my drill press is one of the most used jigs in my workshop and it is very simple to make. The standard drill press, generally, has a small-sized table. For most woodworking tasks a bigger table is much more useful. As with any jig that you make for your workshop, you can add as many “bells and whistles” as you think you might need. I have two drill presses, a cheap lightweight Chinese-made one with a table that winds up and down and an older New Zealand-made Tanner. I use the Chinese drill press for 99 percent of my work because it is easy to use and so I have made the extension table for this. The Tanner is a fantastic, very accurate drill press but it is much heavier work to always be adjusting it.
Easy to make
This extension table is easy to make and if you have all the MDF, bolts, T track, knobs etc on hand then the whole project can be knocked out in just a few hours. I had the advantage of a router table for cutting the slots for the T track, but do not worry if you do not have a router as there are always other ways to do the job. I did cut the MDF on my table saw but again you can cut it with a skill saw or a hand saw. As with most of the jigs that I make, I use scraps of material from previous jobs. Instead of MDF you could easily use plywood or laminated MDF for the table. The fence could be made of ply or almost any wood offcuts. If you use ply, you could reduce the thickness of the table a little but be aware that thinner ply can warp with temperature changes.
Sacrificial piece
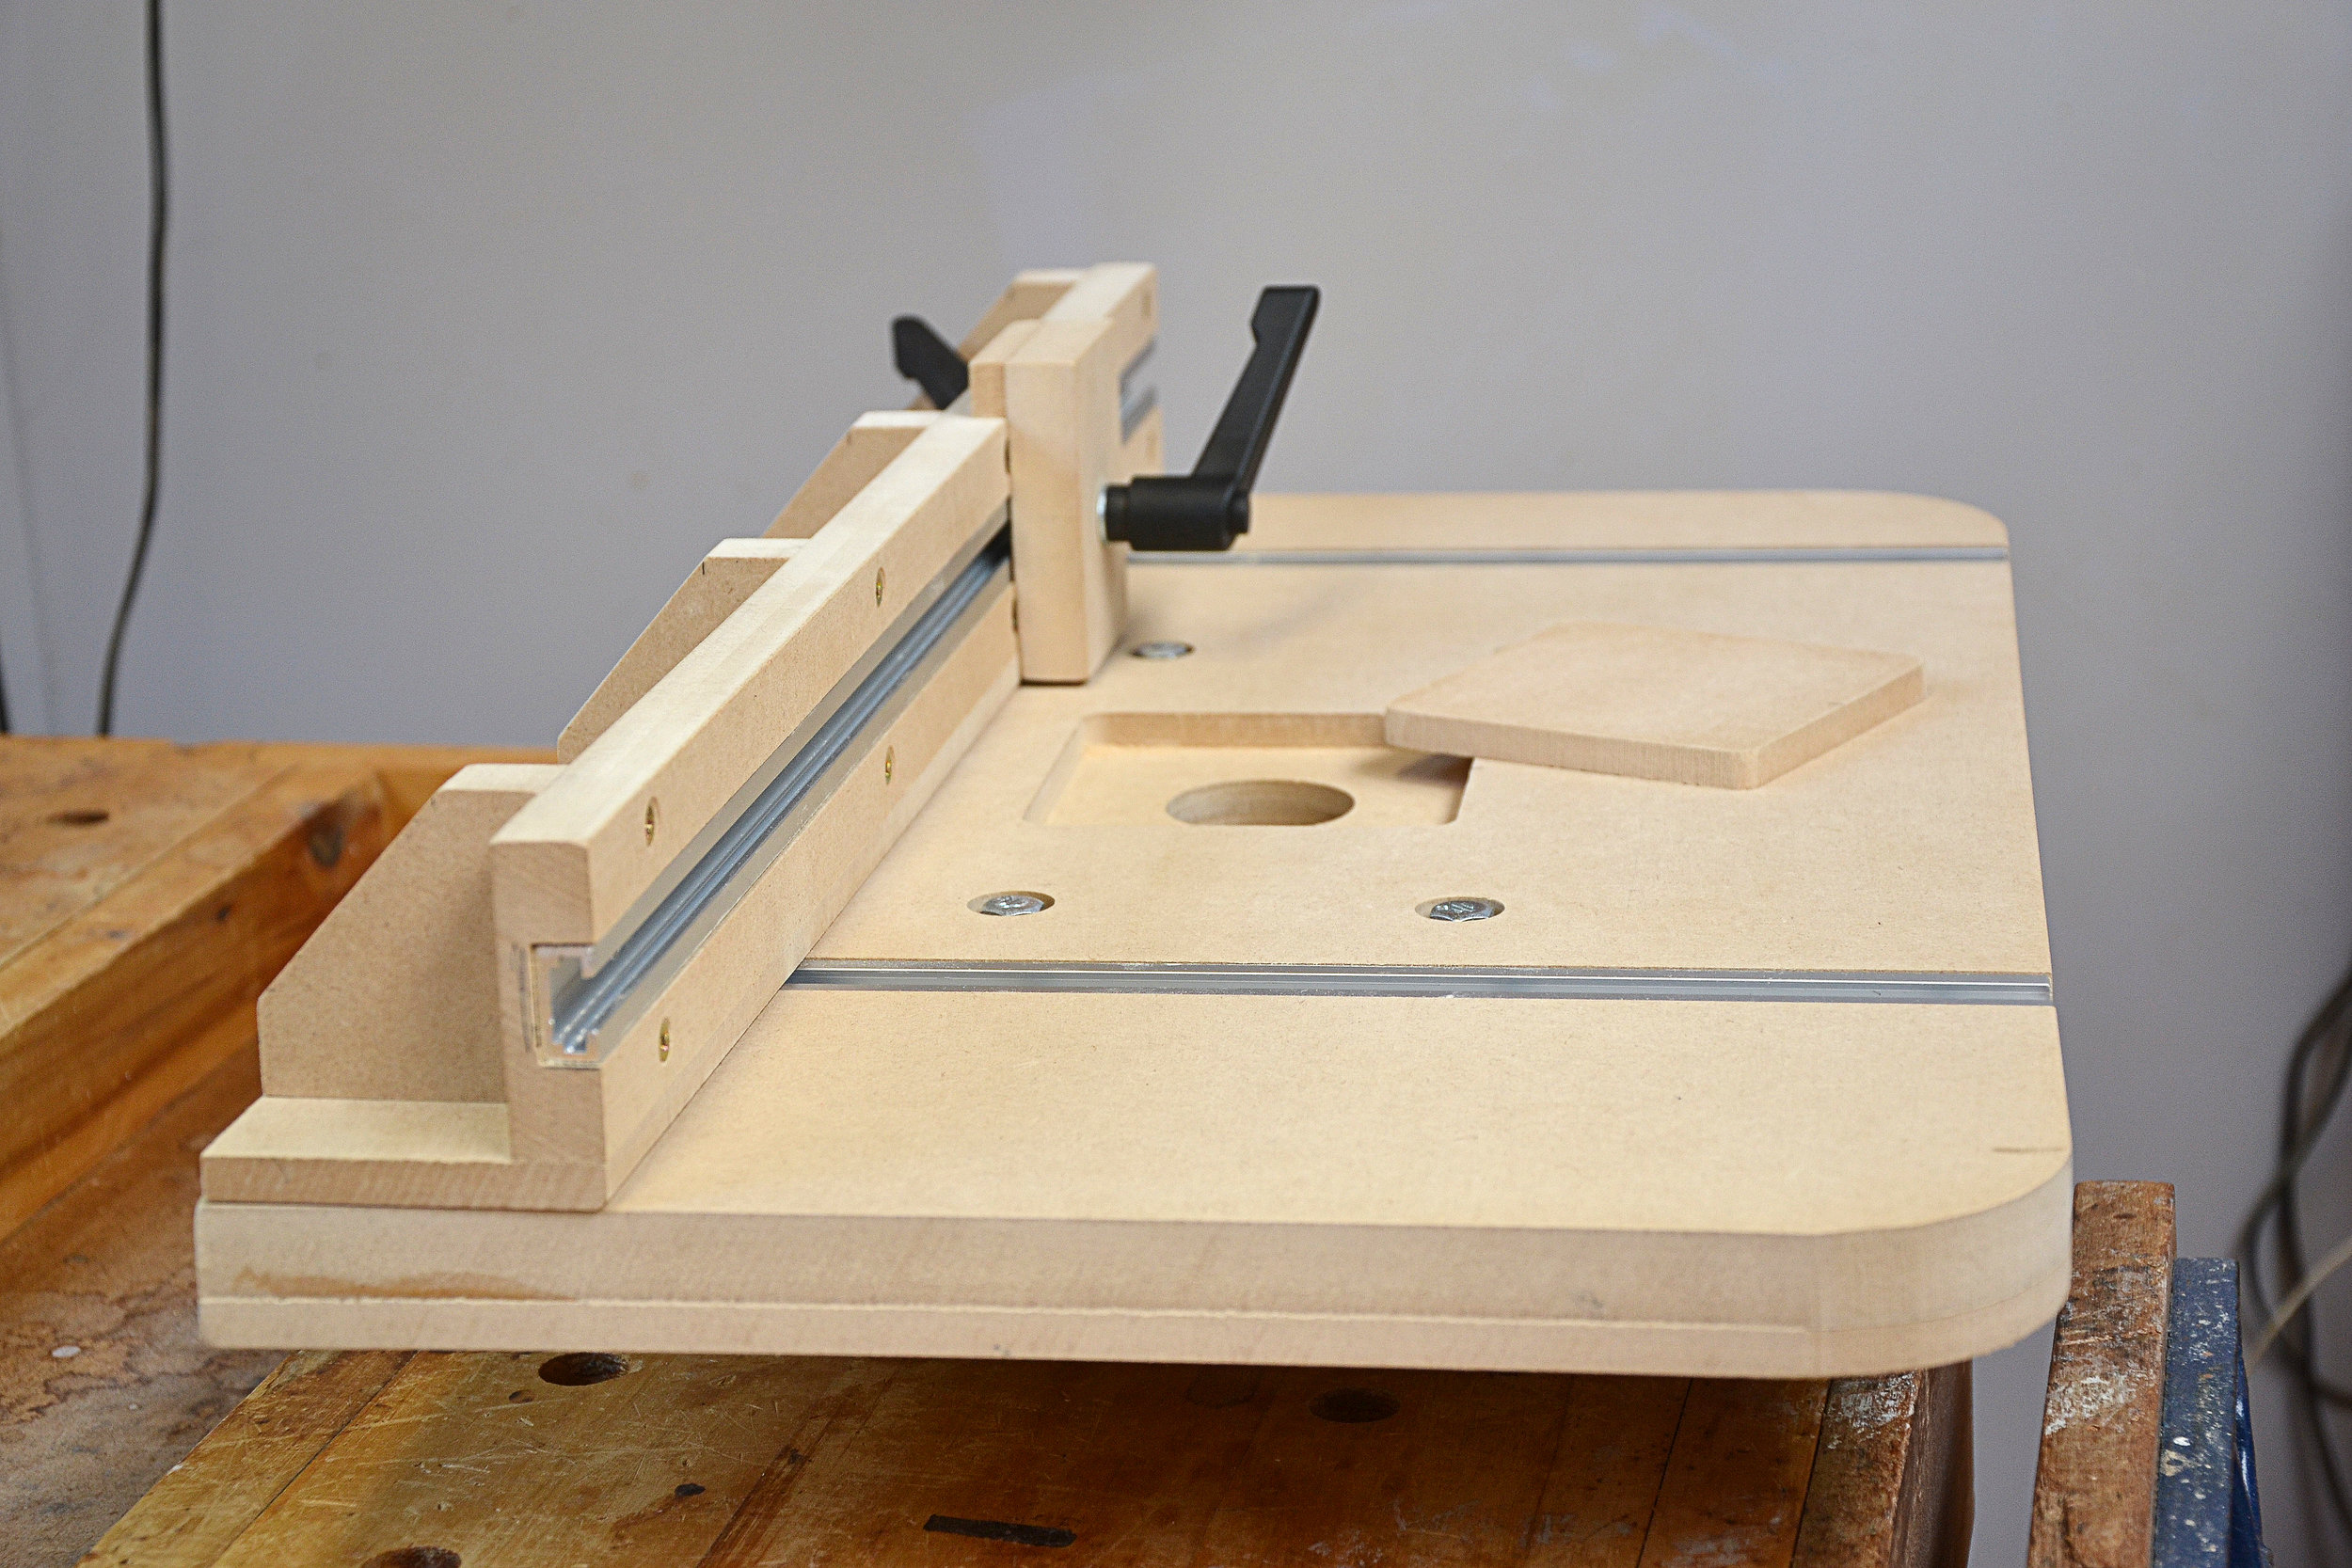
The table has a sacrificial centre piece about 100 mm square that can be replaced from time to time when you think the number of holes in it is detrimental to your drilling. I used 10 mm for this and routed a square to take the sacrificial piece. The T track I used was 12 mm deep and once I cut slots in the 18 mm MDF to hold it, there would be only 6 mm support underneath. That would be a little thin. So I glued and screwed a piece of 10 mm MDF on the bottom, making the table 28 mm thick. If you are not using a router, I suggest that you use 12 mm for the top strip and 18 mm for the bottom strip. This would allow you to cut the 12 mm as strips either side of where you wanted the T track. Your sacrificial piece would also be 12 mm and would be easy to cut out with a jigsaw or even a coping saw.
Handle slot
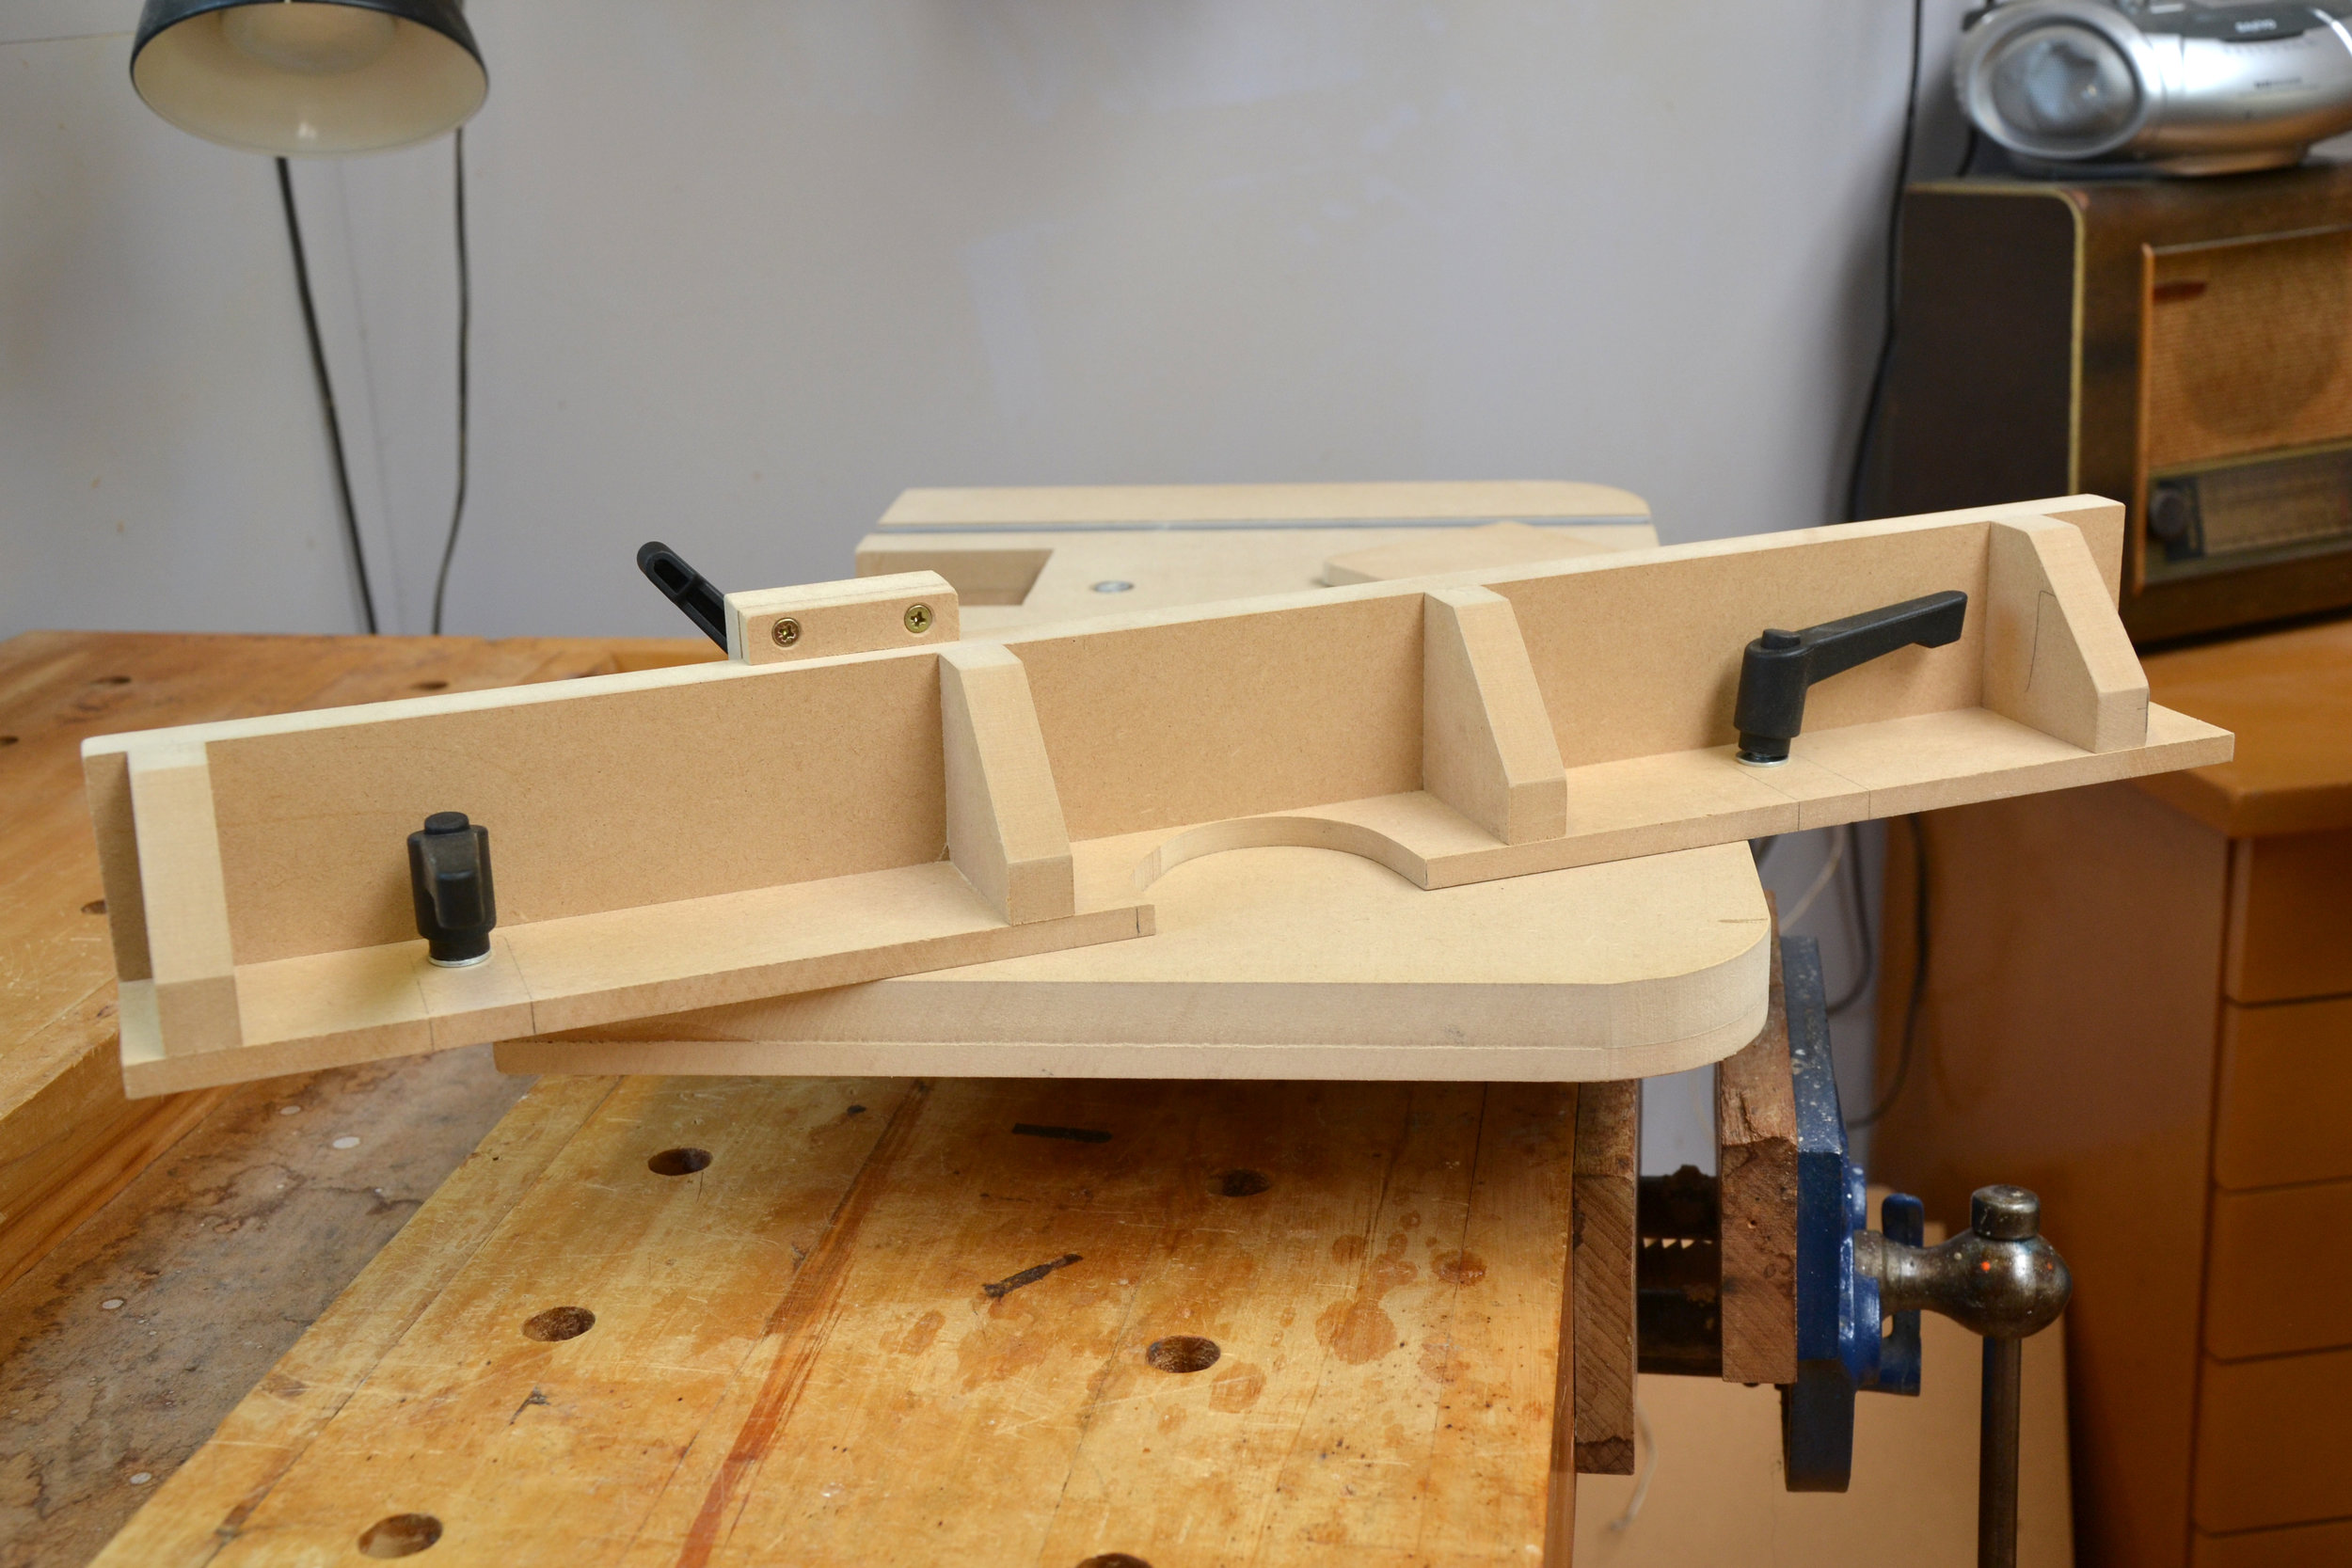
The drawing shows the approximate sizes of my table but you will need to make yours to suit the drill press you have. The other issue with my drill press is that the handle for winding the table up and down goes through an arc that includes the back, right-hand side of the table. I looked at several options to overcome this including building the table up on a platform, but decided the easiest way was to just cut out a slot for it. I also made the back edge of the table roughly in line with the centre of the drill-press column. This ensures I could get the fence as far back as possible and thus not reduce the maximum depth of the drill press by very much. You obviously need to cut a half circle in the centre back for it to fit around the column.
L Sections
I hold my table onto the drill press table with two wooden L sections underneath the table held in place by four bolts. I have found this method to be very efficient as it can be removed and if necessary re-installed in just a few seconds. This is vital otherwise you will not use it as often as you should. If you felt it necessary you could also make a clamp fastened to the T track to hold your work while it is being drilled. I have never bothered with this but should a specific job come along then I am sure I would.
Fence
The fence is very simple to make. It is important to ensure it is square and it has a T track running along it to make it easy to adjust the stop. The back is cut out to allow it to go back as close as possible to the column and in my case I only lose 18 mm in the available depth of the drill press. I put a small chamfer on the front edge of the fence to avoid any small dust build-up. That would stop the piece that is being drilled from sitting flush with the fence. I tighten the fence into position with two adjustable toggle levers and the L sections below the table with four plastic knobs. If you really want to be fussy you could give the finished table two or three coats of Danish Oil. The T track, adjustable toggle levers and knobs are available from Carbatec in Auckland and Co-Mac in Palmerston North.