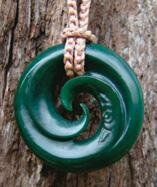
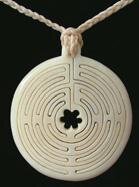
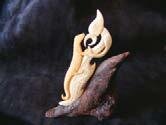
More than 700 one-off pieces of jewelry began life as bare bone
By Rebecca Hayter
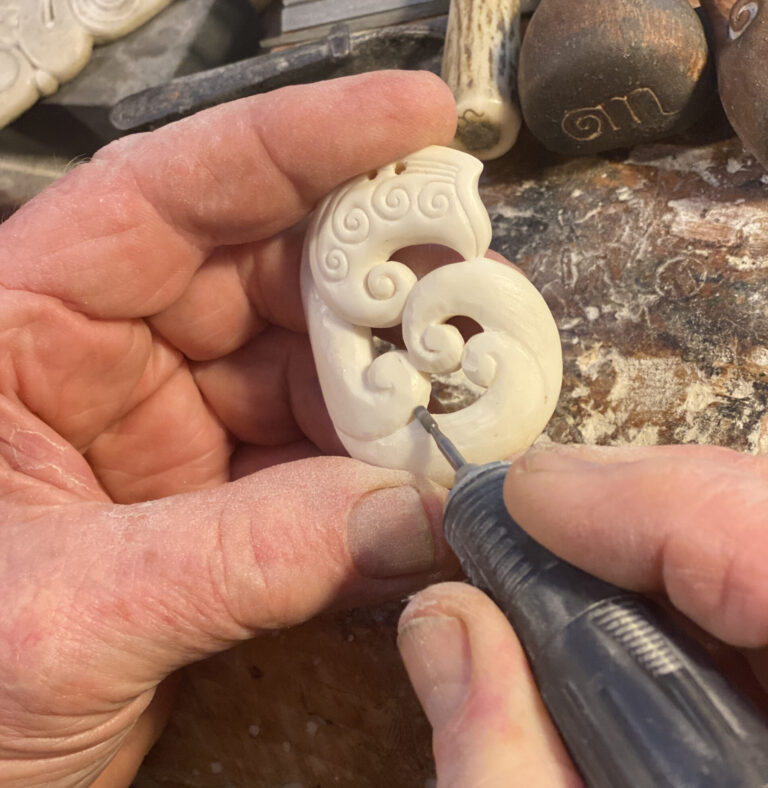
When the meat lovers among us think about carving up Daisy the cow, we’re picturing the Sunday roast but Lilach Paul sees bare white bones: blank canvases to be brought to their full potential beneath her Dremel drill.
The Kumeu bone carver had dabbled with carving wax candles in her home country of Israel but when a friend in New Zealand suggested she try bone, it proved the perfect outlet for her creative and spiritual energies.
Lilach, 33, came to New Zealand with a Kiwi friend when she was 18. After trying various jobs and carving bone and wood as a hobby, her art and occupation came together when she worked for a jewelry manufacturer. There she gained an understanding of the customer’s high standards, especially the need to polish every mark to a satin-smooth finish.
She left that job, because, she says, “I wanted to do my bones.” She answered an advertisement for carvers at The Bone Art Place. Initially, her job was to carve pieces to a set design for the tourist market but for the strong individual character it was frustrating, like repeatedly trying to copy someone else’s signature.
Raw bone
Dremel drill smoothes bare bone
Artist
When she showed her own work to The Bone Art Place directors Don and Heather Campbell, they made her a featured artist on the website.
That was four years ago and Lilach estimates that since then, carving full-time, she has made nearly 700 one-off carvings in bone. She also sells at The Arts Factory in Te Hana, The Kauri Museum in Matakohe, the Ancient Kauri Kingdom in Awanui and New Jewellery in Auckland.
Despite all her carvings being one-offs, she is always happy to see them go. “It means there is room for a new one to come,” she says. “It’s as though I have done something for the bone and now it’s time for it to continue on and let somebody else take care of it.” She likes the permanence of bone as a medium.
Lilach lives on farmland just out of Kumeu; her studio is a small caravan in the garden. In winter it’s a gum-boot walk to get there and while it’s well-weathered on the outside, the caravan is a compact mix of homely and artistic endeavour within.
The rear has a bunk, cushions and a few books; the front end has three small workbenches with a mounted drill to one side and, opposite, the carving area with small works in progress lined up, awaiting their next stage. Across the width, under a protective cover, is a major work in progress: a large piece of kauri with the early stages of bone inlay work in a pen-drawn design of a Maori chief. It is Lilach’s most ambitious project and still many months from completion.
Draw design direct onto the raw bone
Beef bone
Nearly all her work is in beef bone which is easy to get, inexpensive and sustainable.
Mostly, Lilach makes pendants, occasionally earrings and sculptures, but the options are limited by the size of the bones. Only the leg bones, the femur, and fibia are suitable, as the walls of the bone are thick enough to carve; other bones are too thin-walled and brittle.
She usually gets them from farmers and prefers to work with bones that have lain on the ground for a few years. They are drier and sometimes develop a grain that can add interest to the work. Lilach’s close friend, Fiona Mead, is a lapsed bone carver and a vet; her understanding of bovine anatomy often comes in useful.
The middle section of the bone has the thickest walls and is easy to cut into flattish sections but the more angled end-pieces may suit a particular design, such as a bird with its wings arching back behind its head. There are openings where veins pass through the bone – these can be a hindrance or an opportunity in designing the work.
“Bone can break but it’s not as bad as stone,” Lilach says. “It almost wants to be carved and it’s quite easy to carve. You can do really fine details.”
Even nicer, but harder to get, is whalebone. “It’s a little bit softer. It’s really nice to work with hand tools.”
Easiest to drill hole for necklace while bone is big
Tools
Her main hand tools are the coping or fret saw—used for cutting out the design; chisels or gravers for shaping and cutting; and files for shaping the carving.
“Using hand tools can take a lot of time compared to power tools. However, the control and accuracy is much higher,” Lilach says.
“Because the nature of the power tools is to spin fast it is easy to make mistakes with them and to take more material off than intended; the key with power tools is practice.
“With the hand tools, although it is a slower process, the chances of making these kinds of mistakes are less.”
Whalebone has several layers, enabling a carver to find different tonal colours for effect. Carving a whale tooth is a rare joy because it offers more depth with which to work and although Lilach would never dream of using ivory, she can imagine the thrill for ivory carvers of old who had the sheer luxury of size to carve.
She gets her ideas from “anywhere and everywhere”. Her early work tended to be representative and with intricate detail – an example is a piece named Independence.
“We had a baby starling,” she explains. “It was tiny, just a little tube with a mouth and the other end. We had quite a few baby birds and most of them never made it.” She is referring to birds that had fallen from their nests or been attacked by other animals. “But this one made it and flew. So he grew up to be independent.”
The starling would be proud; he is depicted as an eagle with an American flavour but since then Lilach has become more involved by the lines of Maori carving and they are clearly a strong influence. The carvings are less detailed but their simplicity allows the lines of the piece to dominate. Often, they include wood, pinned and glued together like pieces of a jigsaw puzzle.
Lilach Paul (standing) and Fiona Mead… the caravan “shed.”
Coping saw cuts out design
Design freed up
Golden Mean
Lilach sometimes obeys the Golden Mean, a mathematical expression of a proportion that occurs throughout nature, such as the arrangement of seeds or petals in some flowers, the curves in some seashells, or the veins in leaves. It expresses the relationship between two parts with each other and with the whole.
Ancient Greek philosophers believed it expressed beauty and truth since one cannot exist without the other. As it is applied to her work, Lilach believes that when a piece follows the Golden Mean, it provides asymmetry that satisfies the eye: a pleasing visual balance.
As Fiona explains: “Maori spiritual leaders tapped into the natural elements and then brought them together through carving patterns such as the kowhaiwhai and koru.” Lilach designs her work, usually with pencil and paper, before she begins to carve. It may take a few minutes or several hours. As for when it’s right, she says: “You feel it, I guess.”
The Dremel drill on a flexishaft.
Rounding off edges
The process
Having solved the design on paper, she either draws it onto the raw piece of bone or cuts out the paper and glues it onto the bone – the paper sands off later.
At this stage, she is usually working with a decent chunk of bone, so she saws it off neatly into an oblong shape. If it is a pendant, it is easiest to drill the hole for the necklace while the bone is still big enough and shaped correctly to sit level on the bench beneath the drill.
Then, Lilach places the piece of bone in a small vice and uses the coping saw to cut it out, changing the angle of the bone in the vice as required. This is a crucial stage: if these cuts go well, it is likely the rest of the work will flow.
Most important is to make the cut perpendicular through the bone surface so that the shape is the same on both sides. That takes some practice, although the blade cuts the bone fairly easily.
From there Lilach works at the bench and begins hollowing out the larger spaces in her design and rounding off the outer edges. For this, she uses her trusty electric Dremel drill, permanently mounted above her bench. An expensive accessory was the Flexishaft. “You really need it,” she says, “otherwise you’re holding a heavy, vibrating drill in your hand, instead of just the bit.”
Frequent use with the Dremel is tough on human hands, as they are constantly under vibration. Wearing a mask is vital, too, as the dust is fine.
Drill bits are the next stage
Fine dentists’ drills are essential
Drill bits
The carver progresses through smaller drill bits as the cuts become more intricate.
She has a selection of about 40 bits. Some of them are similar to attachments on a dentist’s drill, and Lilach says in all seriousness that dentist’s tools work well for bone carving. As for which bit is best for which job, it’s a matter of practice and individual preference. She learns a new technique with every project, which is something she particularly enjoys with her work.
“It’s never just the final product,” Fiona explains. “It’s the learning process that takes you on to the next process. It’s the evolution of the passion that feeds the passion for the next piece.”
Lilach says she enters a relationship with the bone. Fiona adds: “It’s all in the way you present yourself to the bone. The thought process you’re in makes the shape of the work.”
Lilach agrees: “If you’re having a bad day, don’t try it.”
Sanding by machine
… and by hand
Taniwha
One of Fiona’s favourite pieces, now sold, was a tuatara with a taniwha.
The tuatara is covered in tiny, raised scales and the whole animal is stained a deep yellow, with tea. Fiona likes the piece for the perseverance as Lilach perfected the technique of forming the creature’s scales and then repeated it many times over.
It also required a clear vision of the outcome since it involved removing bone to allow the scales to emerge, rather than building them up, as in some art forms. Although the thickness of the bone limits the depth of the piece, Lilach can create larger pieces by joining several flat sections of bone together. One project underway comprises four pieces of bone but you’d never know it. The joins are never straight-line edges; instead, the edges curve and form part of the design. They blend so well that the viewer assumes the curve is carved into one piece of bone, rather than disguising a join.
For joining and inlay work, Lilach pieces together the shapes of bone and wood-like tiny pieces of a jigsaw puzzle, using tiny metal pins and glue to keep them together. It is intricate work since the finished piece may be only 50 mm high and 4 mm thick. Some works comprise four or five pieces, some smaller than a woman’s fingernail. She uses two-pot, epoxy craft glue and wears gloves when working with it. When the inlay work is complete, it is sanded, starting with 100 grit then working through to 180, 200 and finally 300.
Polishing breathes life into it. Lilach uses Dialux Blanc wax and the polishing wand on the Dremel drill. She says you need to use white wax and white sandpaper to avoid staining the bone.
The final touch is the name. “Sometimes it comes easily; sometimes it’s just a little bit harder. I do the design and try to think about what it is.” Lilach places them in a felt-lined box to keep them free of dust and scratches. Most pendants are attached with a piece of braid rope, available from craft shops.
White sandpaper avoids marks
Pounamu
Occasionally, Lilach works with greenstone or nephrite jade, New Zealand’s pounamu. It is an extremely dense stone, rating 6.5 to 7.5m on the Mohs scale, which measures the hardness of stones with talc rating at one and diamonds coming in at 10.
Even apart from its Mohs scale, pounamu is particularly tough due to its structure. In many stones, the crystals sit side by side but pounamu has fibrous crystals which interlace, making it even harder to break. The techniques for carving pounamu are similar to bone carving except that the tools must be diamond-coated burrs and wheels, to be harder than the stone.
Because of the high friction, the carving is kept wet to stop the stone and the tools from overheating.
Lilach says that even though pounamu takes much longer to carve, it is extremely rewarding. “To think that the piece of stone I hold in my hands has been millions of years in the making and that no two stones are ever the same, to be part of its life and to be able to reshape it is a great honour.
When I finally hold the completed piece in my hand and see it in its new light and feel the mana of millions of years held in it, it really does give a huge sense of accomplishment and wonder.”
Final design…
…cut in by drill
A final polish with white wax
Advice
Lilach is generous in advice for anyone wishing to carve bone. While not everyone has access to dead cows, they can get bones from their butcher and have them cut to a manageable size.
Simmer the bones for about two hours to remove the meat and sinew; don’t boil it, she says, as the heat will make the bone brittle. Then, soak it in bleach and water for several hours to kill off the bacteria. Rinse and dry.
Beginners may like to practice on wax. It may be easier to copy a shape, rather than try to do your own design while learning the techniques. Lilach recommends a book: Bone Carving: a skill base of techniques and concepts by Stephen Myhre.
After nearly 700 pieces, Lilach sometimes hears how her work has fared in its next life. Like that of the US marine who commissioned a piece to match his mermaid tattoo, of which he attached a photo. “He told me to make it as big as I could and to make the boobs big,” Lilach says.
She made it 150 mm high and voluptuous. The marine liked his mermaid but said she was too big to wear. “So I made a smaller one,” Lilach says. “Then about a year later, he sent an email saying it had fallen overboard in Iraq so I had to make another one.”
Lilach Paul (left) and Fiona Mead examine a bone carving. “It’s a learning process.”

