The making of pattern damascus
Heating billet
Wire the layers together
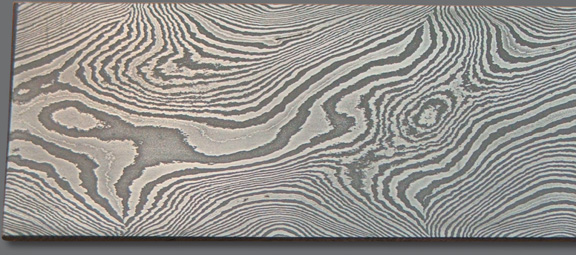
Damascus types
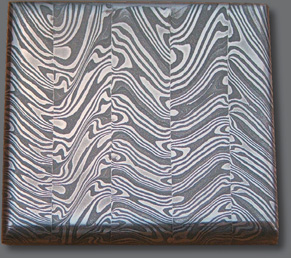
Damascus types
The process of making what is commonly known as damascus steel has, in some ways, been a little shrouded in mystery. If you try to make damascus remember it is a process. You may not have instant success but look at what you are doing and try to evaluate what you may change in order to “get it right.”
History
True Damascus steel or wootz was made in a crucible and cast into ingots and then forged. Examples of bladeware made from this steel date back to 600 AD. The Vikings, although not the first, did make some very complex bladeware using twisted bars of damascus. Later in Europe and England during the 18th and 19th centuries there was a tradition of using damascus in the barrels of fine shotguns. Today, damascus is used mainly for knives but has other applications in jewellery and art forms.
In spite of being made as one homogeneous mass, this steel displays the patterning which results from making pattern welded steel (PWS, commonly called damascus steel). Pattern welded steel is made by stacking at least two types or more of steel in alternating layers to form what is termed a billet. These layers are then forge-welded into one mass, a bar of steel where the layers still retain their individual characteristics.
The end-use determines the steel mix in the billet. Apart from considering the steel types available, you need to consider what characteristics you want in the finished damascus.
For a knifemaker, the ability of the steel to hold an edge is important. If flexibility is required then perhaps using mild steel in the mix would assist in this (not in knives). For decorative purposes only, for example jewellery, the maker can simply look at what will produce the best contrast. Yes, steel has colour and different steels will show contrast when etched and put beside each other.
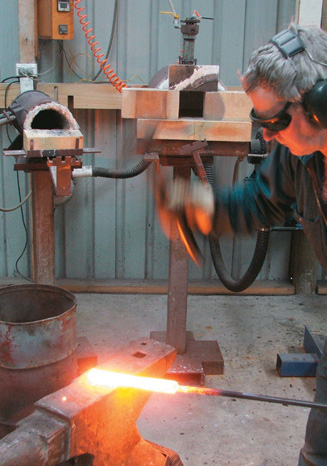
Weld with hammer blows
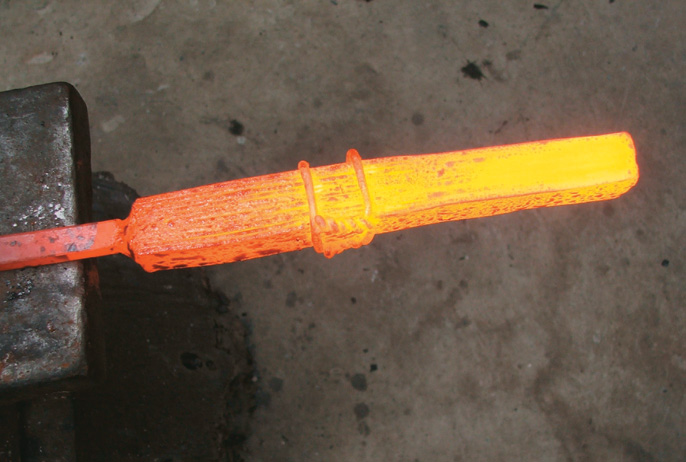
Forge weld half done
Types
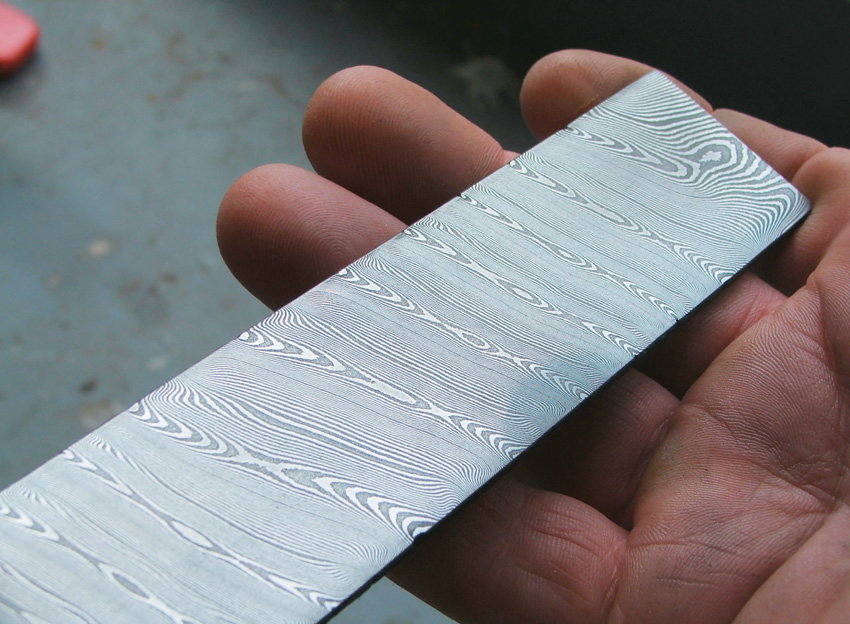
In types of damascus patterns, some of the steel is white or bright, some has shades of gray and some is black. The brightness is caused by a certain chrome or nickel content in the steel, the black by carbon. The steel mix and its elements will govern the final appearance. One mix I have made is 1075 and pure nickel. This is a very high-contrast mix, as the nickel is very bright and the steel quite black.
Apart from contrast, the final look is governed by the pattern we introduce. This is affected by the number of layers in the bar and what type of manipulation is done to the steel while you are forging it. One of the simplest forms of pattern is created by twisting the bar.
The subject of pattern creation is very wide-ranging and modern-day smiths have pushed the boundaries in this area. Some of the patterns you will see here have been made longitudinally in the bar and some in a loaf-type form where the steel has then been cut off as tiles.
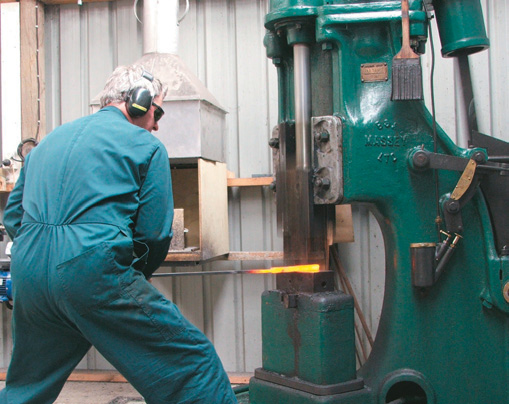
Steel under power hammer
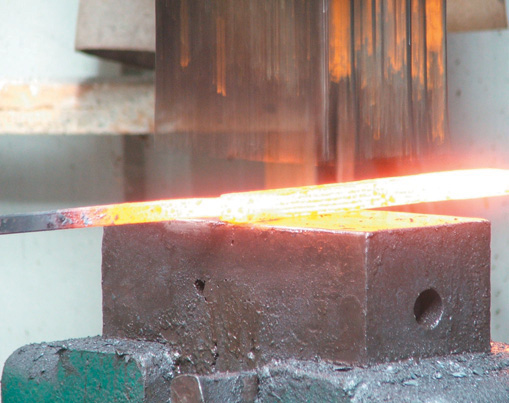
Equipment
Before we light the forge, let’s look at the four methods you can use to move metal “in the shed” (the nonindustrial, kiwi nutcase situation):
1. Hand hammer and anvil;
2. Power press;
3. Power hammer;
4. Rolling mill.
The hammer and anvil is what most people probably relate to when they think about forging. Handforging gives probably the best control for smaller work when in the hands of a skilled person. There is a lot of drawing out (extending of the steel) to make a damascus bar and for bars with a low layer-count, hand-hammering is probably OK. Using a press is a very practical way to make damascus although not the fastest. A press of 20 to 30-tonne capacity will normally suffice. I have made a press specifically for damascus, although a standard H-frame press can be used. The steel can be drawn out using flat or drawing dies and taking “bites” at the billet. The bite size is determined by the power of the press. A lower-powered press will suffice, it will just take longer to do the job. The power hammer I have was imported as one of three used by the New Zealand Railways department. It can be a bit of a job setting up a power hammer and if you do come across one, it would pay to research how to do it correctly. I use both the power hammer and the press for my work. While the press tends to suck the heat out of the work rather quickly, the power hammer has the tendency to prolong the heat as a result of the hammering action.
There are plans available for rolling mills (check the internet). I don’t use one but I think they are a very practical way to make damascus – you could probably do it a few feet away from your neighbour’s window on a Sunday morning.
Forges
Once you’ve figured out how you are going to beat the metal, you just have to soften it enough to do so. I use two types of forge, both fuelled by propane gas. One type is venturi. This means the gas is piped into the forge and in doing so sucks in sufficient air to make the air/gas mix to create the flame. The second type is a blown forge. The air is blown into the forge using a squirrel-cage blower and the gas is mixed with it before entry into the forge. Each type has its pros and cons and again you will find plans on the Net for both.
Billet
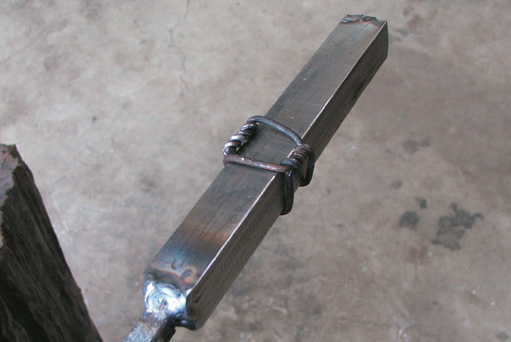
Cut the steel to size. The steel pieces should be as close to the same size as possible. I generally make billets with the same type of steel on the outside of the billet which means they have an odd number of layers in them. This does not have to be the case – it’s up to you. Stack your layers alternately on top of one another. The layers should be clean of rust, scale etc. The layers should then be welded together on the ends using say an arc or MIG welder (I would not recommend gas welding). This is just to hold them until the first forge welding is done. If you do not have welding capability, then the layers can simply be wired together. Then add the handle (you do need to weld this). I am not good at using tongs so I prefer to attach a handle. The size of the handle depends on the size or weight of the billet. If the handle is too small in diameter, the billet will hang from the end like a piece of spaghetti when you pull it out of the forge. The handle needs enough substance to keep rigid when hot. Then wire up the billet as in the photo.
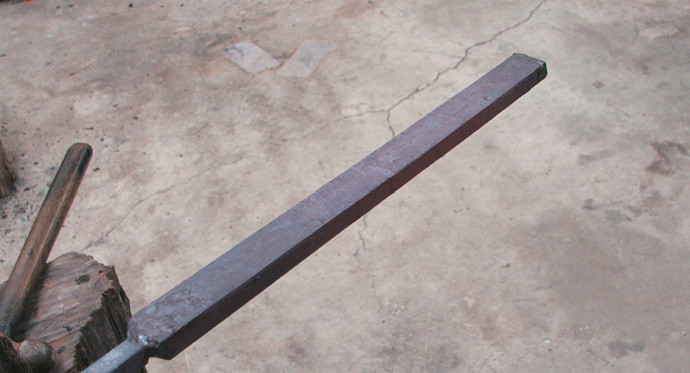
Drawn out 1 1/2 times
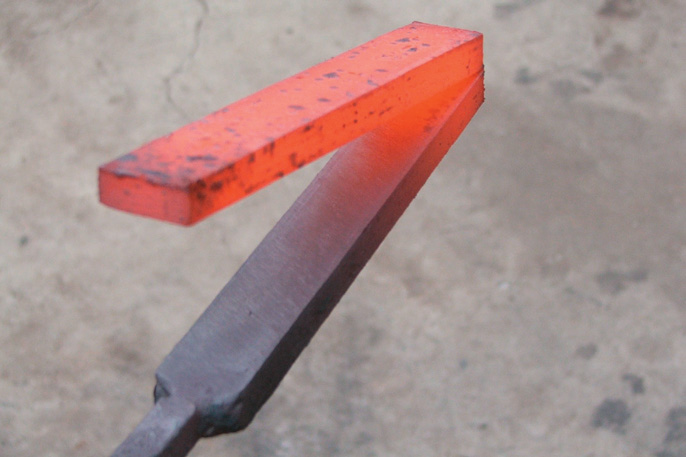
Billet being folded
Forge welding
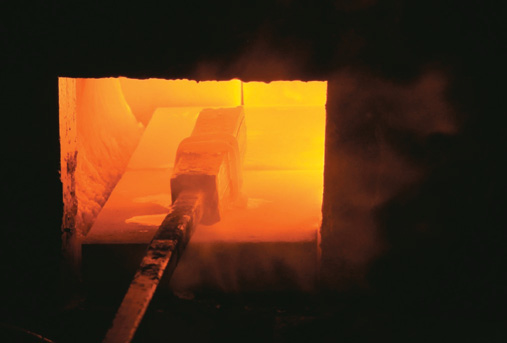
The forge needs time to heat up so don’t try to put your billet into a forge too soon. The billet will require a certain “soaking” time, depending on a number of factors, to get it all up to heat. If your billet is large in relation to your forge, it will take longer. You are looking to achieve a yellow heat – 1300+ degrees. If the billet starts showering sparks, then it is too hot. I use borax as a flux on the billet to stop oxygen from creating scale and interfering with the welding process.
Borax should be liberally applied to the billet throughout the process. When the billet is up to temperature, quickly remove it from the forge and weld with overlapping hammer blows on the anvil from the far end to the wired up section. Remove the wire with side cutters and repeat the process for the other end of the billet after reheating it. You only have about 6-8 seconds to complete the forge-weld. After that, the billet has cooled below forge-welding temperature.
Try not to cover too much area in the forge-welding process; rather make sure the area you cover is done well. The borax tends to fly everywhere so good protective gear is a must and it pays not to have your girlfriend standing next to you in a clean dress. No 3 welding goggles are good eye protection and keep the glare down from the forge.
Drawing-out
The process of drawing-out means the lengthening of the bar to a size that you can then fold in half to repeat the process of welding and drawing. By doing so, you build up the number of layers in the bar to the required number. I have drawn this bar out to about 1½ times the length I started with.
Next I take the bar and cut the ends off it with a cut-off disc in a grinder (cutting and grinding outside for health reasons). This is to remove the two ends originally arc-welded together so all of the material we have is now forge-welded.
Then put a handle back on one end of the bar. Mark the bar exactly in the middle with a piece of chalk and cut almost through the bar with the cut off disc. Leave just a small amount of metal as a hinge. Turn the bar over in the vice and grind the whole of that side of the bar to remove the scale.
Now lift the end of the bar that is not held in the vice and fold it back on the other end. This means that both ground sides will be against each other and the ends should line up. I should also add here that the forging of the bar should be as even as possible so that the sides and edges are parallel.
If the bar gets too cold during this phase you may have a problem with the folding over of the halves and the steel will want to break. Put the bar back into the forge. The small area of the hinge will heat very quickly and enable you to fold it easily. Flux the bar and return it to the forge. The hinge will hold both pieces together and in line. I bring the bar back to welding temperature and in this welding phase I use the press. The bar can be hand-hammered to weld it as before, but at this point I prefer to use the press.
The forge-welding process is a combination of pressure, heat, flux and cleanliness of the steel. Get that right and the welding process takes place. Once the steel is welded, a consolidation of the weld takes place as more work is done on that piece of steel. If the weld is not successful to start with, no amount of pressure or hammering alone will correct it. The area must be opened up, cleaned, fluxed and re-welded.
Grind the edges on both sides (so that one edge is not proud of the other) and the end where the handle is for the same reason.
We are now back with the bar ready to draw out. The original bar had 11 layers but we now have 22 layers as a result of the fold. Simply continue in this manner, drawing out, folding, and forge-welding until we have built the layers up to the desired number.
The bars I make have between 20 and 250 layers in them depending on their end-use. It is easy to take the layer count up to the thousands because each time you fold the metal you are doubling the number of layers. However, once you are over about a thousand layers, the eye cannot differentiate between them.
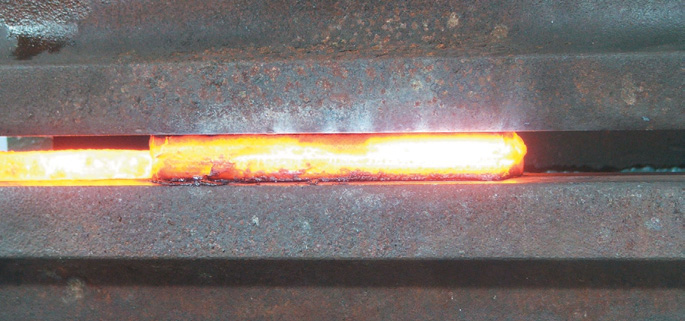
Steel in the press
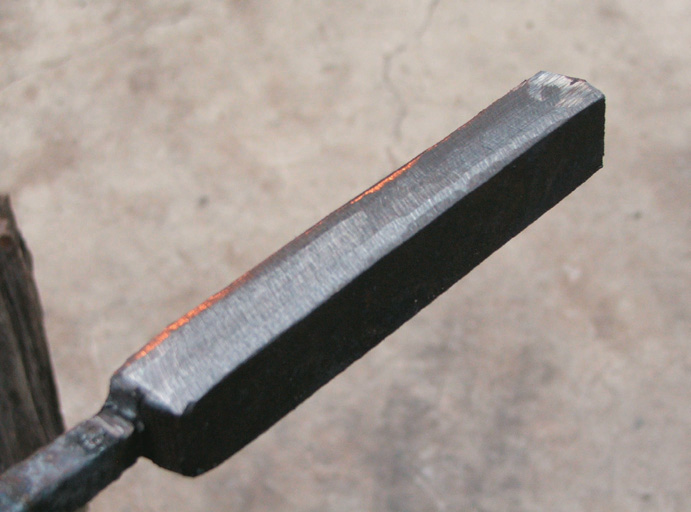
Billet welded to 22 layers
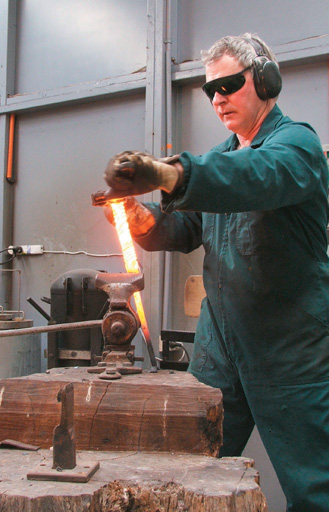
Twisting the bar
Pattern formation
I am now going to twist the bar I have made. The twisting should be done at welding heat or close to it. I use an old pipe wrench with an extra handle welded on the other side.
Due to the heat of the steel it will twist very easily. I will now resquare and draw down the bar to its finished size. There is a large loss of material in the making of damascus because of the continuous scaling of the metal and the grinding and cutting.
Annealing
Now the bar is finished it needs to be taken to critical temperature (this is the temperature the steel would be taken to if you were hardening it) and slowly cooled. When the steel gets to critical temperature, it will become non-magnetic. Use a magnet to check this if you are unsure. Depending on the steel you use, this bar will be at the dull-to-medium- red range. The bar should then be pushed into a container of either lime or wood ash. This retains the heat and allows the bar to cool very slowly. This is annealing and leaves the steel in a very soft form suitable to drill, grind, file or cut.
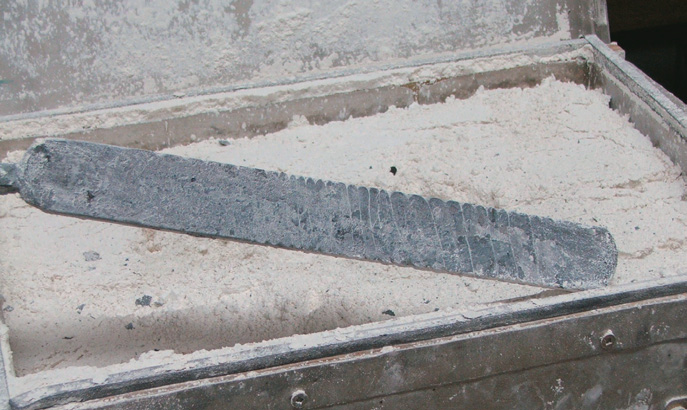
Bar annealing in wood ash
Etching
The final phase here is the etching of the steel to expose the pattern. The scale is removed and any pitting or other surface imperfections ground away. The higher the finish on the metal, the better the result when etching. It is commonly thought that the etching process will remove any imperfections. Not so. It tends to highlight them. Different acids will produce quite different results when etching. One that I have found to produce good results is ferric chloride at about a 4:1 mix. Do make sure to wear good protection against possible exposure of your skin or eyes to the acid.
Place the bar in the container of acid. You will find the pattern will show almost immediately but leave the bar in the container for say ten minutes to allow the etching process to start taking effect. Etching will be quicker on a warm day than in cool weather.
Take the bar out, put it under running water and rub it down with a fine grit paper, preferably the same as you used to finish the bar with or finer.
You are removing the sludge of fine oxide that has built up on the bar and will slow the etching process. Put the bar back in the acid and repeat. How deep you etch is up to you and really a matter of preference. When you are happy with the etch then take out the bar for the final time and rub down as before under running water, then neutralise the acid.
The neutraliser for ferric chloride is trisodium phosphate. But if you don’t have it handy, spray the bar with WD40 or similar and this should stop any rust occurring as a result of the etching. If you do have trisodium phosphate then make a saturated solution of that and put the bar in it for a few minutes. Well that’s all there is to it…
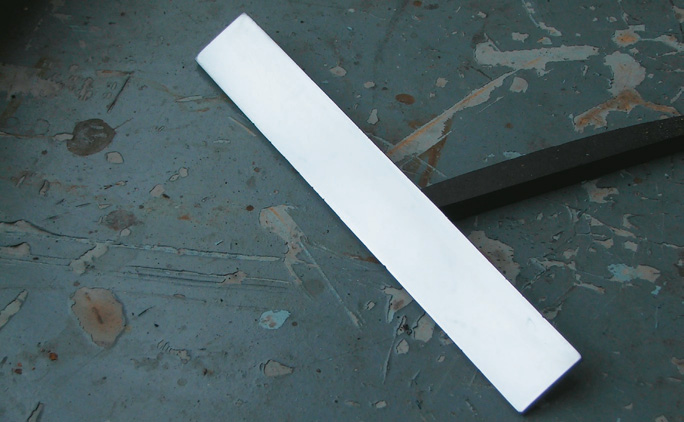
High finish before etching
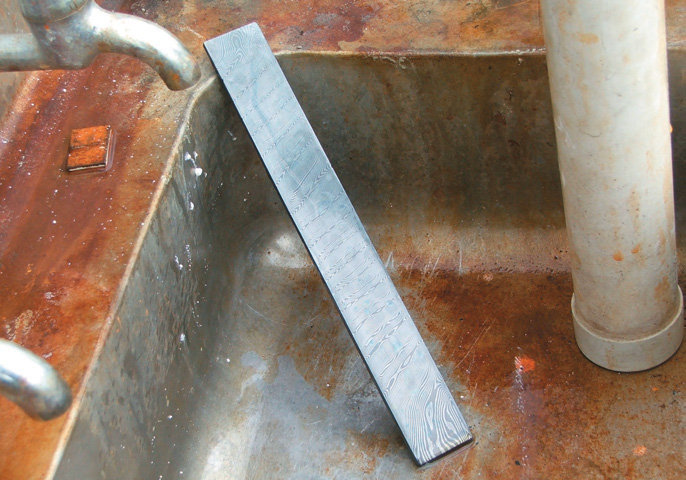
Afer 30 seconds of etching
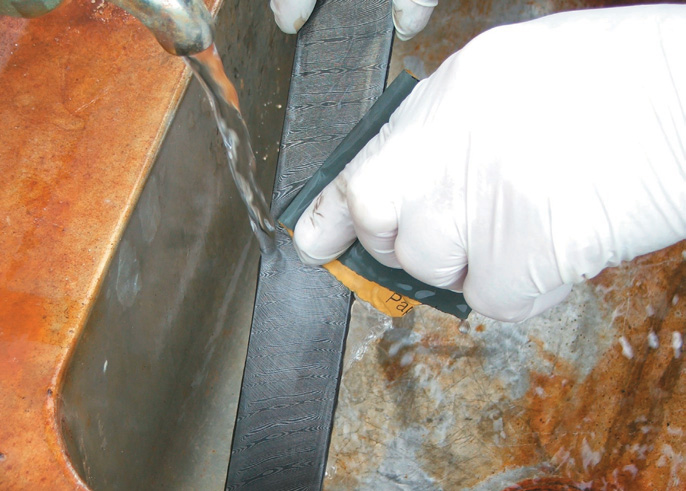
Rub down with fine grit

