By Peter Minturn
Create textured, monogrammed silver cufflinks as a gift to celebrate a special date or person. This project will explore how to produce a cast textured surface and use it to make a pair of monogrammed cufflinks. The textured face of the cufflinks can be produced in two ways. For the first way you will need some sculpture wax, available from Regal Castings tool department. This is a soft brown wax that becomes softer still when warmed in warm water. Simply press the wax into the a suitable textured surface and peel it off.
Our students have produced some incredible examples from many surfaces. They have used brick walls, heavy woven material, even the texture of the 3M Nomad plastic mats used to catch the silver on the soles of our shoes.
TEXTURE
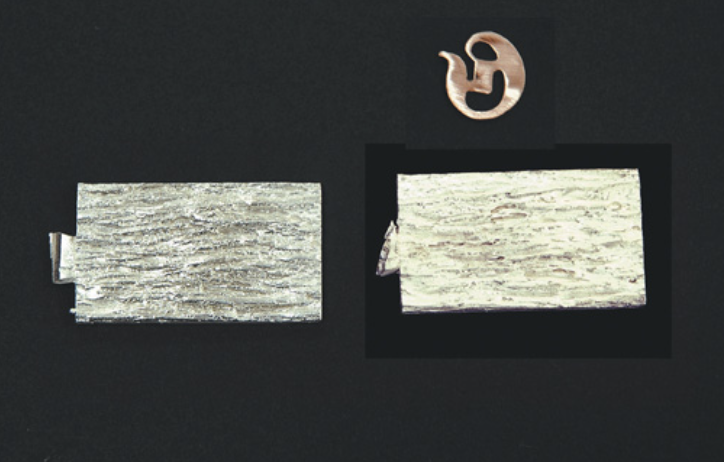
For this pair of links, I used a textured surface I took from a slab of natural cork that I once attacked with an engineer’s wire brush. I have used this over the years on hundreds of pieces of jewellery from rings to earrings and bracelets. My wife has a bracelet and ring made like this. The other method is to take the impression of your textured surface with Fimo modelling clay or a similar modelling material which hardens when placed in an oven on low heat for an hour. When it is hard, you again press in the wax, but with this method you arrive at a texture the same as the sample. With the first method, you have a negative image of the texture.
Once you have produced a texture that you are happy with, you cut your wax to the size you require. Shave the back down if the wax is too thick. Send it off to the casting company to have it reproduced in silver or gold. These textured surfaces in 18ct yellow gold are just beautiful. With sterling silver castings that I’ve had made, I will make cufflinks that are just a simple rectangle. There is a lot of truth in “less is more” and the rectangle is an almost religious shape to designers.
1: Textured sterling silver casting 2: Sketched numbers on template copper
To start, I true up one side of the casting with a coarse hand file. Then with a small set square, I mark a right angle on the face with a darning needle in a pin vice and square off one end. I am making my links 14mm x 22mm, so I measure off 22mm and again scribe a square line across the face and cut it off with the saw. Again square off and trim it down to 14mm. Repeat the operation to make the other face.
Now we have the basic shapes for the cufflink faces, we can trim down the backs if they are too heavy. The links need only to be 1mm or so in the thinnest part of the texture face. This is most easily done by putting the face on a dap stick with some shellac or setters cement to hold it firm and filing the back with a coarse file until the required depth is reached. Clean off the cement – warm methylated spirits will do the job quickly (I put the meths in a jar in my ultrasonic cleaner) – then on the sides and the back of the cufflinks, fine file and emery to 1200 grit.
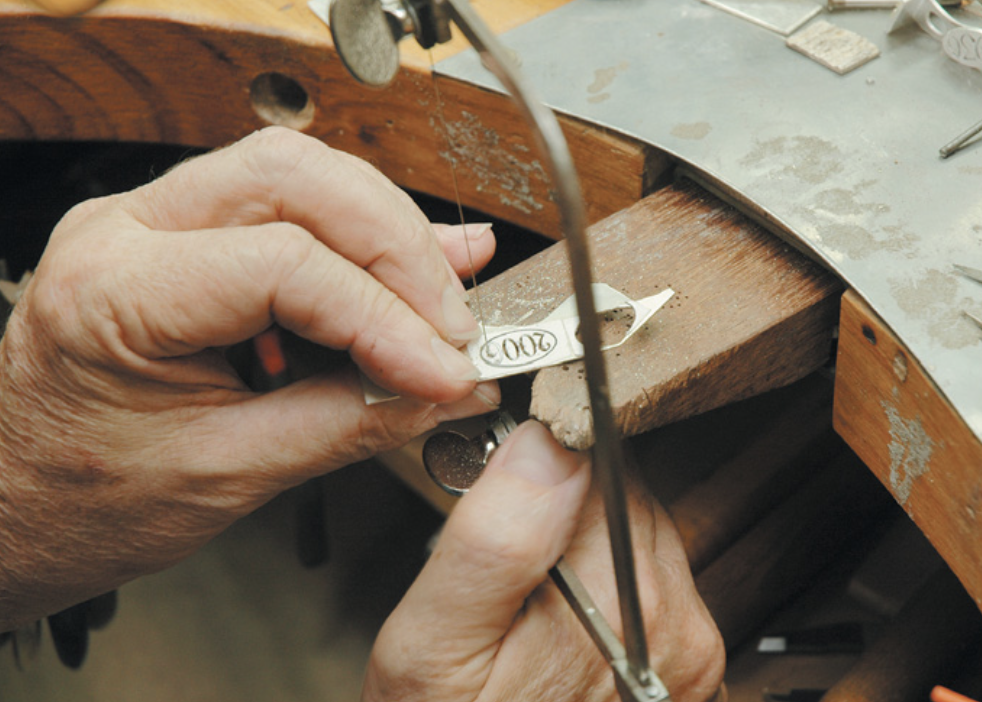
Pierce out the inside holes
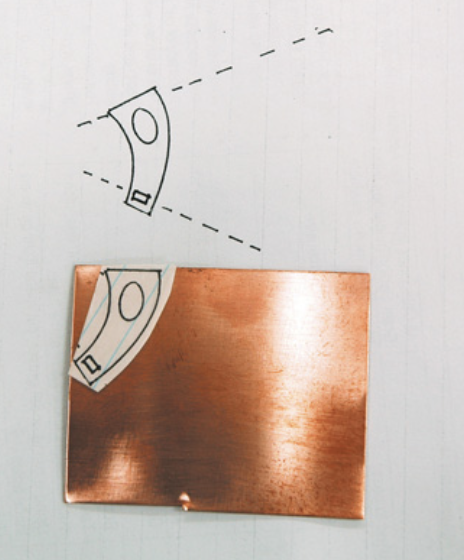
1: Toggle arm template 2: Saddle folded over to 2mm gap
TOGGLES
Now we come to the toggles that hold the links in the shirt. Most commercial cufflinks have machine- made findings. It seems to me that they are designed entirely for the jeweller not for the client. Because those toggles are sprung, they are prone to snapping back into the vertical position which will almost certainly ensure that the link will fall from the cuff. When making expensive cuff links, I always use a handmade non-sprung toggle.
First you need to make a template for the toggle arm and then another for the toggle itself. Because handmade cufflinks are made most often to celebrate special milestones in life’s journey, I often add the date to these toggle faces to mark this special occasion. The toggle arm for this kind of link is shaped to conform to the shirt cuff and is angled both on the face and the toggle to sit snugly on the cuff.
Because silver is softer than gold, the arm for silver links needs to be cut from plate that is 1.3mm-1.5mm thick. Place the template over the plate in the most economical place and mark round with your darning needle scriber. Drill the holes for the toggle saddle first and cut out the slots before you cut out the toggle arm shapes. Doing this job first while both arm shapes are still part of the silver plate makes holding the piece a lot easier. I usually put my maker’s mark and carat alloy stamp on this part of the links. When the toggle arms are cut out, finish off with fine file and emery the toggle arm to 1200 grit.
The toggle itself I usually make as a long oval. This ensures it will go through the cuff buttonholes with ease. For these I use my draftsman’s oval templates and find a long oval with a 30° ratio about 16mm x 8.5mm. If the toggle is flat and plain I cut it from 1.2mm plate. If it is to have a slight dome, I use 1.5mm and file in the dome, rather than punch it in. If the toggle is to have a half-pierced date on it, I use 0.5mm for the back plate and 1mm for the pierced top plate.
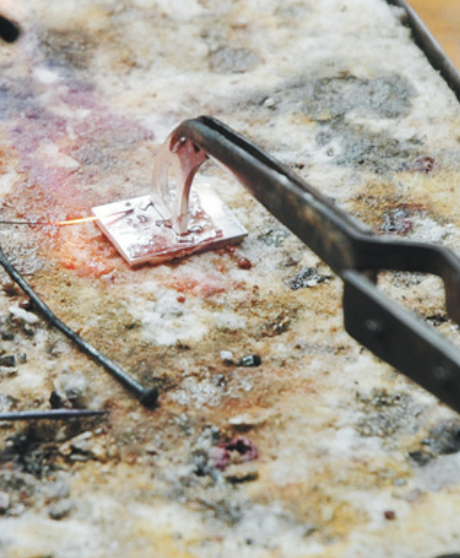
Solder toggle arm
DATE
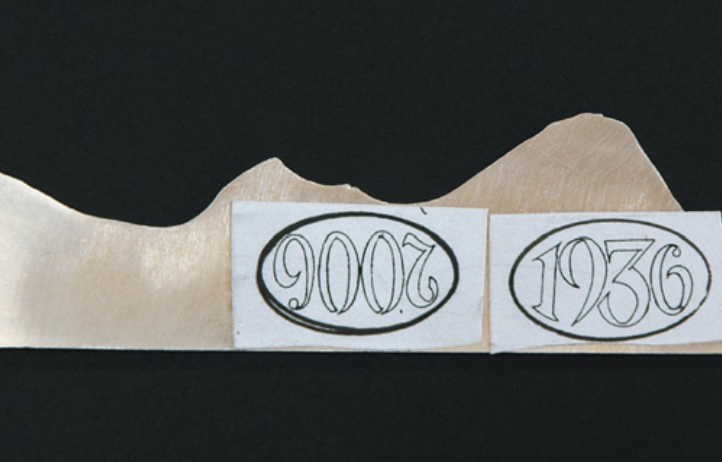
To pierce a date in the toggles, I first sketch out the type of font I will use in an oval the same size as the finished toggle. Then I blow up the sketch on the photo copier and redraw it as accurately as I can. This way when you reduce it back down, you will have a very precise line to paste onto your template copper.
Pierce out your template, and when it is as perfect as you can make it, scribe it onto a 1mm plate. Pierce all the inside holes out first, again because it is much easier to hold. Cut out the ovals and solder them with hard silver on to a piece of 0.5mm plate. Cut out once again and file to the oval’s scribed line.
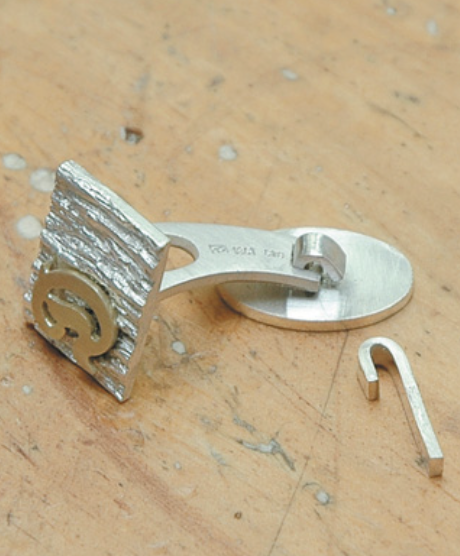
All that remains to be done is to make a saddle for the toggle from 1mm plate. The saddle will be about 3mm wide and folded over to have a 2mm gap. Fit it through the slot in the toggle arm and make sure it will allow the toggle to move easily. When you have adjusted the saddle to fit the arm slot, solder one side only to the centre of the toggle.
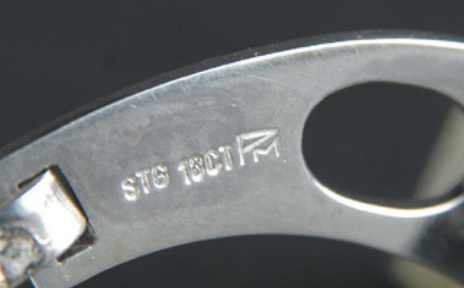
Maker’s mark and carat alloy stamp
LETTER
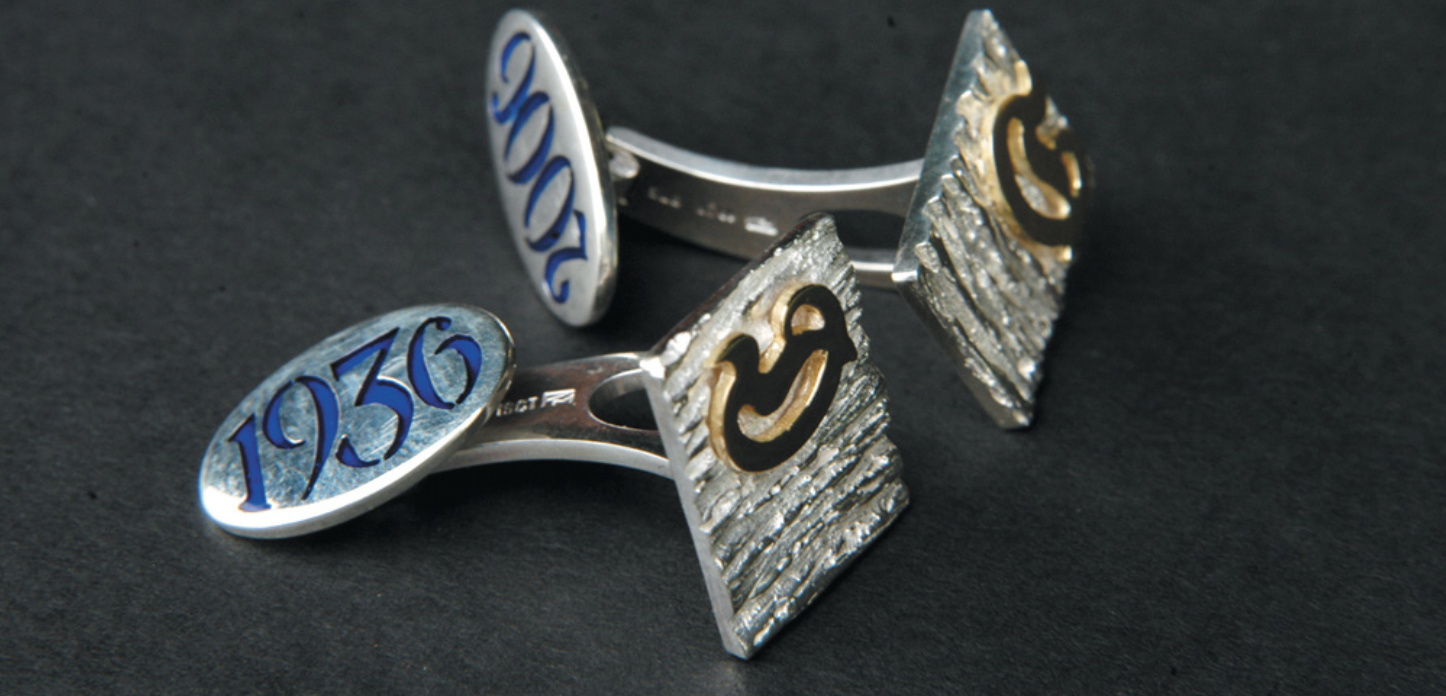
Before I solder the toggle arms to the cufflink face, I have one more job to do. I am going to add to the textured surface of the silver an 18ct yellow gold “D”. I intend to give these cufflinks to a pal, for his 70th birthday, hence the dates I have chosen for the toggles in this exercise. Again I will choose a font, draw it to 1:1 scale and blow the sketch up to ensure a good shape. Repeat
the same process for this monogram as we did with the pierced toggles. When the monogram is pierced out, place it on the link in the position you wish it to sit and draw round it with your scriber. With a dental burr, carefully burr away the high spots inside your scribed line until your letter sits flat. It is not important that the whole of the back sits against the textured surface, just enough for you to be able to solder it into place safely. Turn your monogram letter over and place paillons of solder on its back surface and melt the solder until it covers the back surface. Pickle and rinse and then file away the solder until just a thin coat remains. Place the monogram onto the textured face and if your burring has been well done it should sit where you intend it to go, without wanting to move. Flux it well, hold the face in cool tongs and direct the blow torch heat from below the head until the letter is soldered into place.
When both letters are in place, clean up the back of the cufflinks face to remove any oxides and with a third hand hold the toggle arm in place and with very small paillons, solder into place. All that remains to be done, after you have pickled the links, is to polish them and assemble the toggles. I use a small stiff brush for this job as it will not remove the nice sharp edges.
SADDLE
When you have polished all the pieces, open up the saddles with a sharp knife and hook them over the slots in the toggle arms. When they are in place, close down the staples with a pair of parallel pliers and a piece of leather to protect the links face. If you do this job well you will not need to solder the other side of the saddle. It will be plenty strong enough to do the job and you do not have to risk the wonderful finish you have just imparted on the job with the polishing mops.
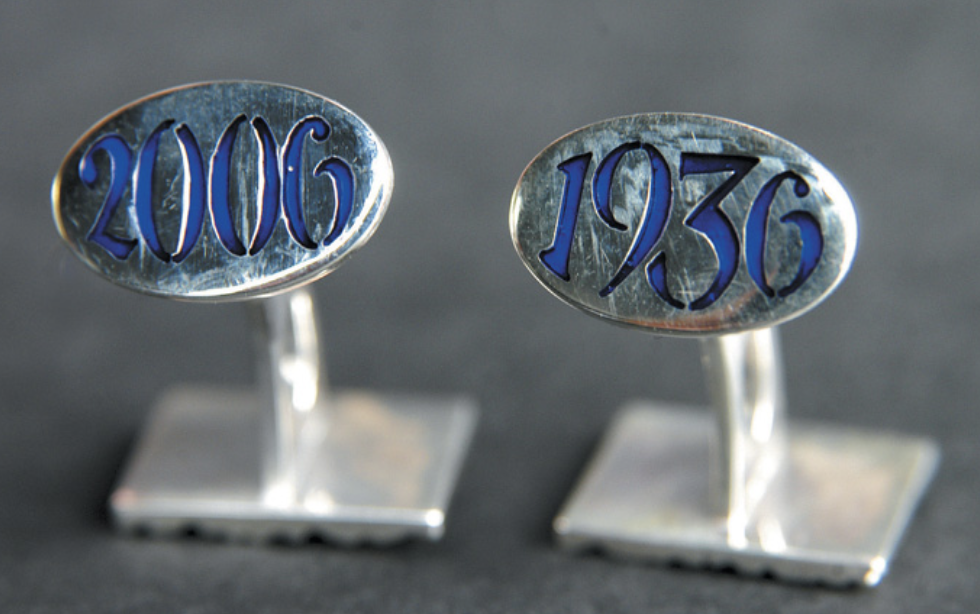
ENAMEL
As a final flourish, I am going to enamel the pierced dates on the toggles. Traditional glass enamels require the article to be heated in a kiln to near-destructive levels of temperature in order to allow the glass powder to melt. It also requires the use of very toxic and dangerous acids, for which we do not have the room or the facilities at the school.
So we invested $10,000 in an enamelling system based on the ultra-violet enamelling technique that your dentist uses. This requires no acids or heat and is much easier to apply, less likely to damage, but like anything even remotely associated with dentistry is very expensive. Fortunately, a very little goes a long way. The enamel is placed in the cloisons (a walled enclosure), or in this case in the half-pierced date, after a cleaning fluid and a bonding agent have been applied. The enamel is applied in very thin layers, and cured under Ultraviolet light for about six minutes per layer. When the cloisons or in this case the date grooves are just over full and the last layer has been hardened, you can now emery the excess enamel away and polish it with Tripoli and Rouge in the usual way.
The final result is an extremely personal, very professional and safe-to-wear set of cufflinks.

