Small enough not to need consent
By Claire Benge
Photographs: Claire Benge
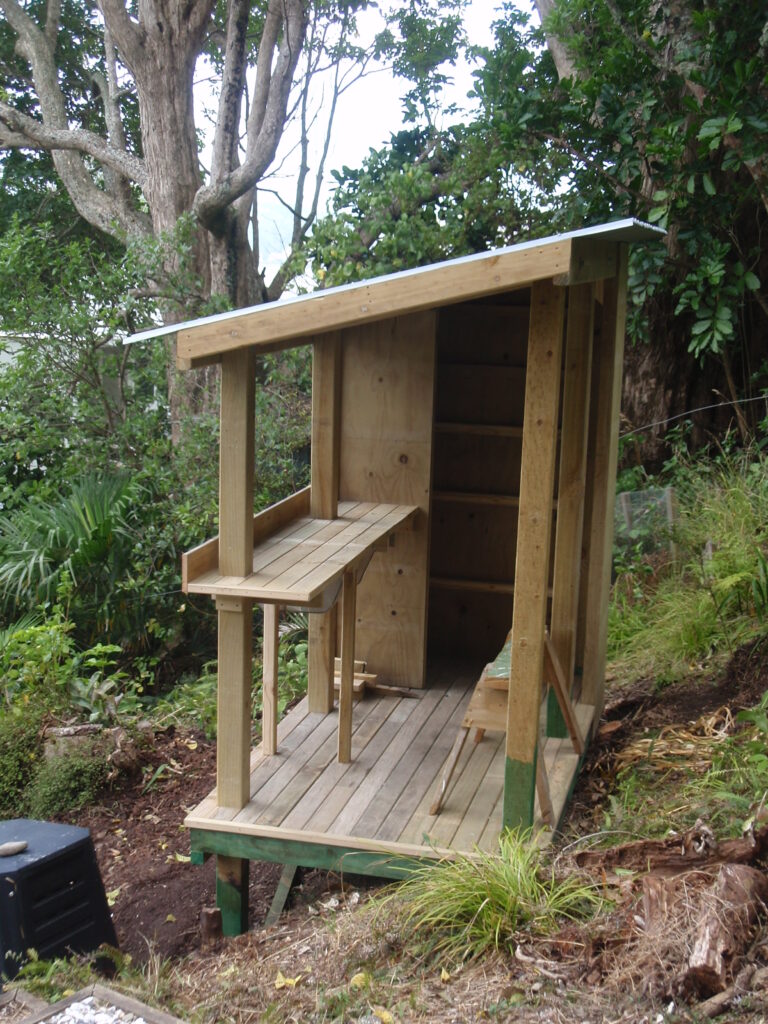
Among small buildings you can create without council building consent, a potting shed is very handy. The fact the builder agreed to put up this structure to get the gardening tools out of his shed is another story.
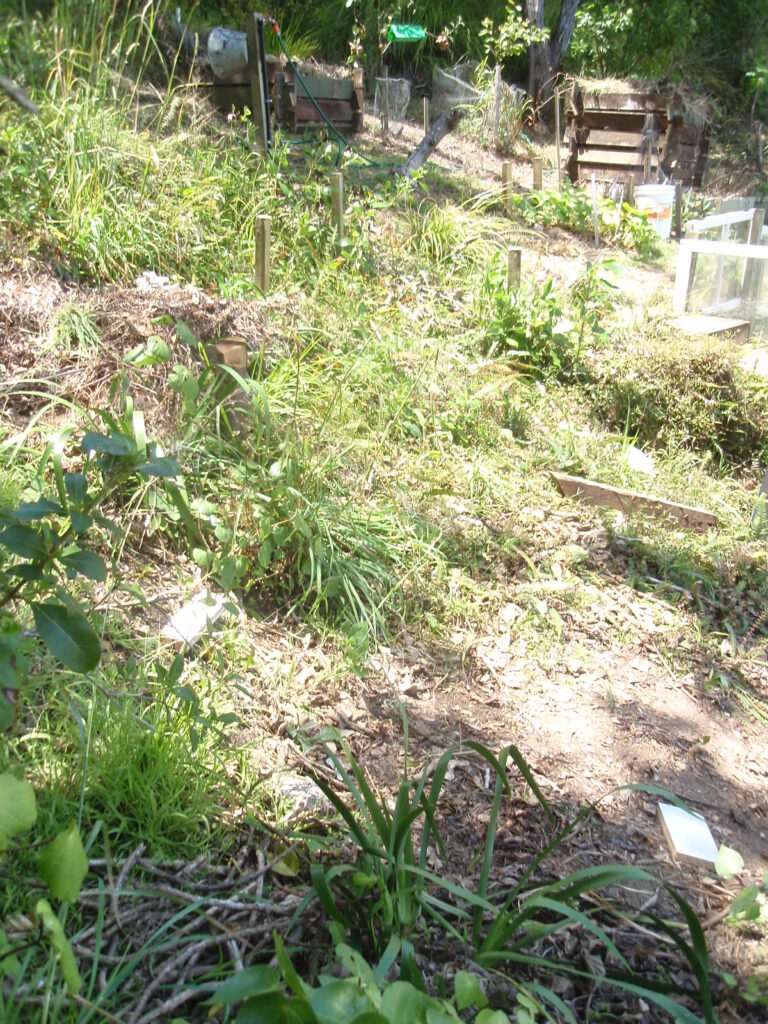
If you can possibly choose a flat site, do so. In this potting shed, the only site available was on a hill which meant a fair bit of work for the builder because of the extra labour and time.
Then in order to avoid the need for a building consent, measure the site up to ensure the 10 m2-or-less potting shed is no closer to the boundary or to a dwelling than its own height. In this case, the boundary is nearby but there are no dwellings close by to worry about. Here the original idea was a three-metre long building but it had to be shortened to 2.1 metres because the boundary was closer than first thought.
Draw a sketch plan to scale to give the builder something to work with and to settle details (note that the position of the cupboard changed during the building stage).
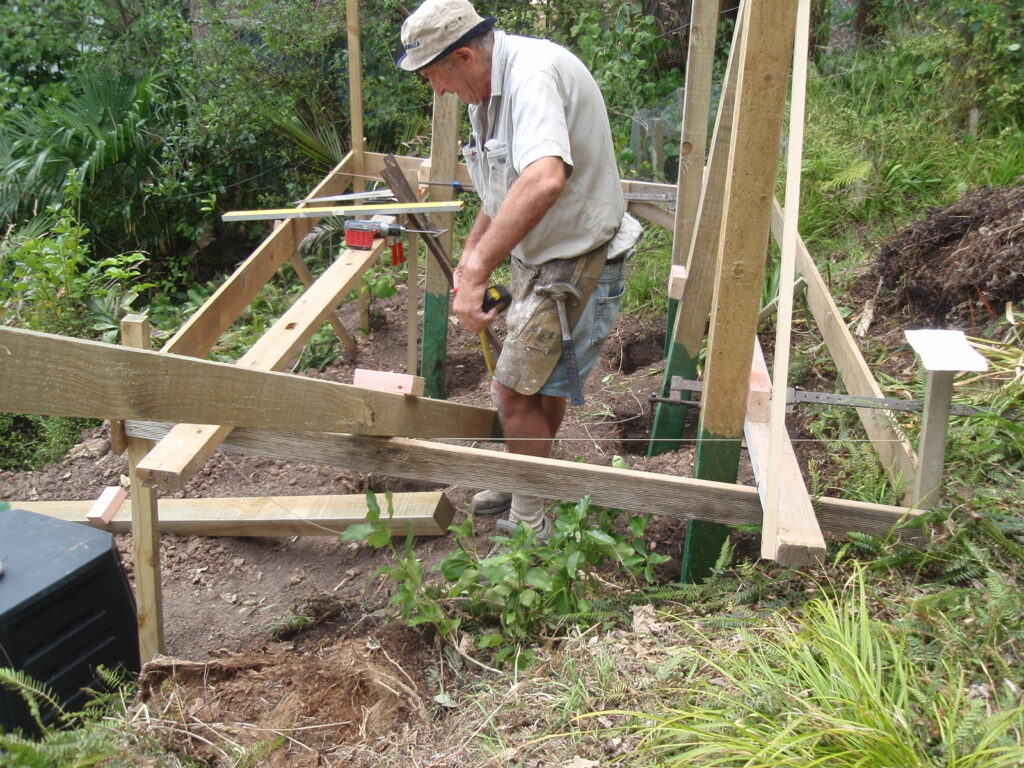
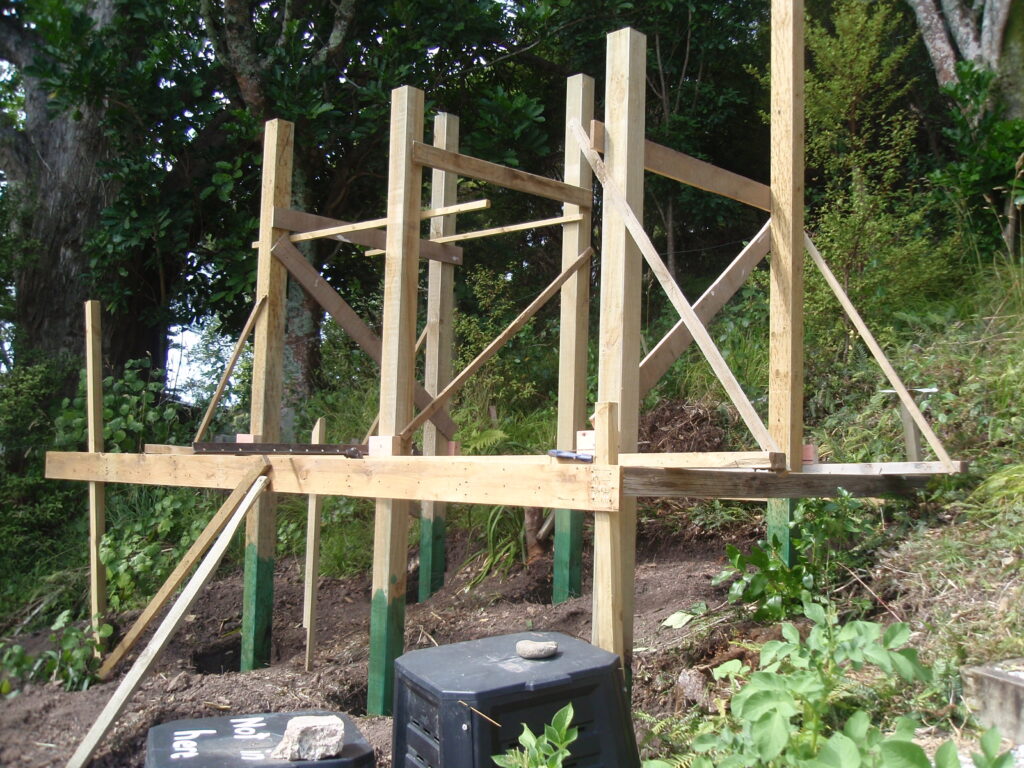
Draw a cross-section to scale, working out sizes of bearers, floor joists, rafters and beams (in New Zealand, use NZS 3604 Light Timber Construction). Bracing is also needed even for a small building. Visible in the opening photo, in this case one bracing pile is sufficient with an angle brace in each direction fixed to the bracing pile at the bottom and to the adjacent piles at the top. The structure above the floor is braced by
- the plywood exterior linings on the cupboard end, and
- a roof brace.
Normally joists sit on top of bearers and rafters on top of beams. In order to keep the building height to a minimum—as it is so close to the boundary in this case—the joists are set between the bearers and rafters set between the beams.
NB: A building that doesn’t need a building consent still has to comply with the building code. Using NZS 3604 to size timbers and work out the bracing ensured general compliance here, but there were a couple of parts that did not comply with clause B2 Durability which requires that structural members have a durability of not less than 50 years.
To do this, the piles should be treated to H5 and all bolts and other fixings need to be stainless steel (because it is within 200 metres of the sea).

50 years
In order to save costs, this potting shed has 100 mm square piles that carry on up through the building to support the roof. These are only available treated to H4 so may not reach 50 years before failing.
The bolts and other fixings are galvanized steel which may rust out in the potentially salty atmosphere of the sea spray zone and also may not reach 50 years before failing. In this sort of situation, if you have to apply for a building consent you can nominate a specified intended life of 25 years, instead of ticking the box for the standard period of not less than 50 years.
In the case where no consent is needed, it is a good idea to notify your local council that this has been done with a realistic intended life of, say, 25 years—or at least make your own record of it in the unlikelihood of failure in the future or of a future buyer questioning it.
Clear the site then set up the profiles of the building. Bruce used a temporary framework which was roughly 300 mm outside each corner with the cross-pieces set at a reference level for all work up to floor level. Set out the positions of the posts which also act as piles.
Footings
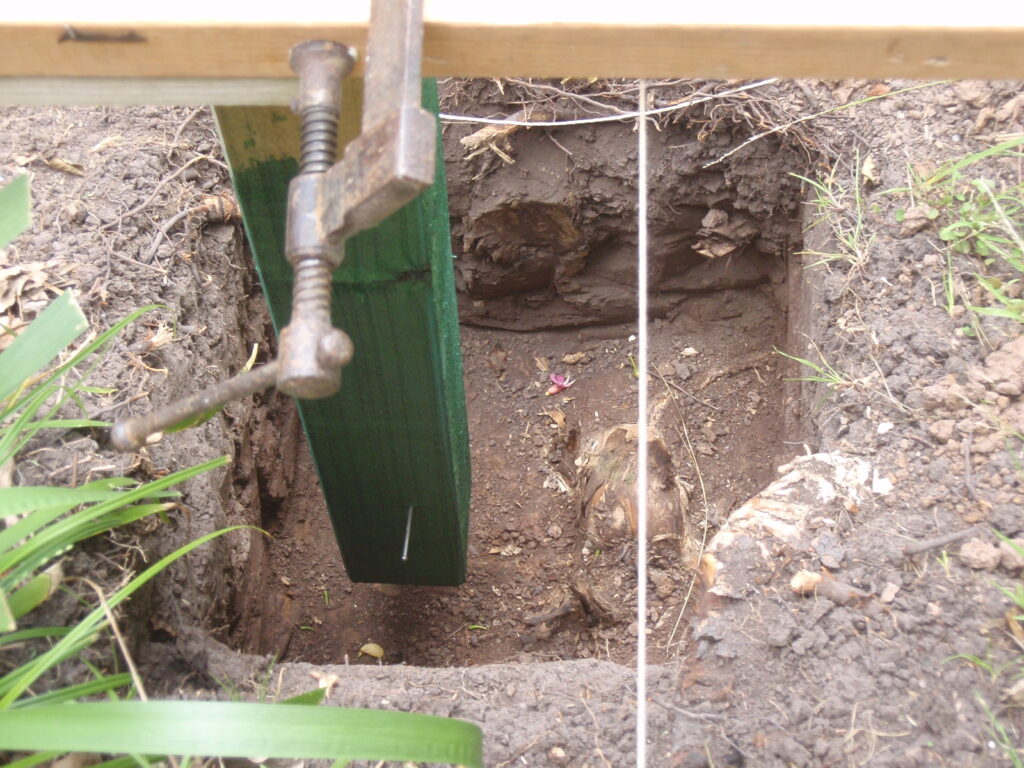
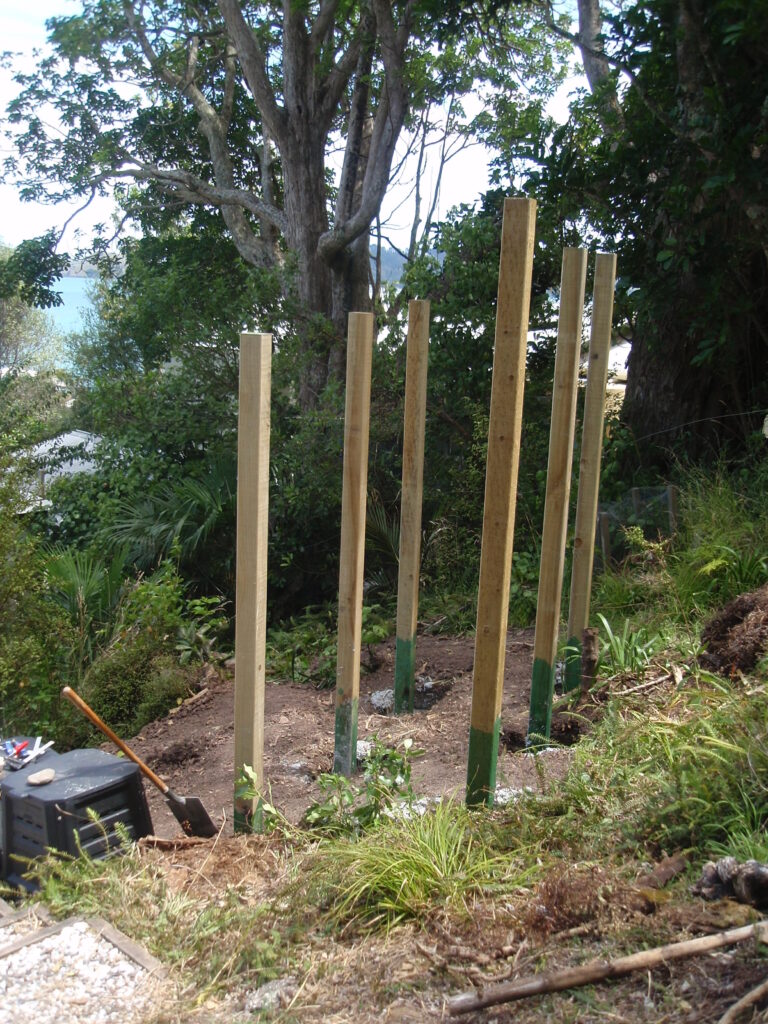
Dig the holes for footings. Footing holes for the ordinary piles need to be 300 mm square and 200 deep below-cleared ground level; the bracing pile needs to be 350 mm square and 450 mm deep below-cleared ground level.
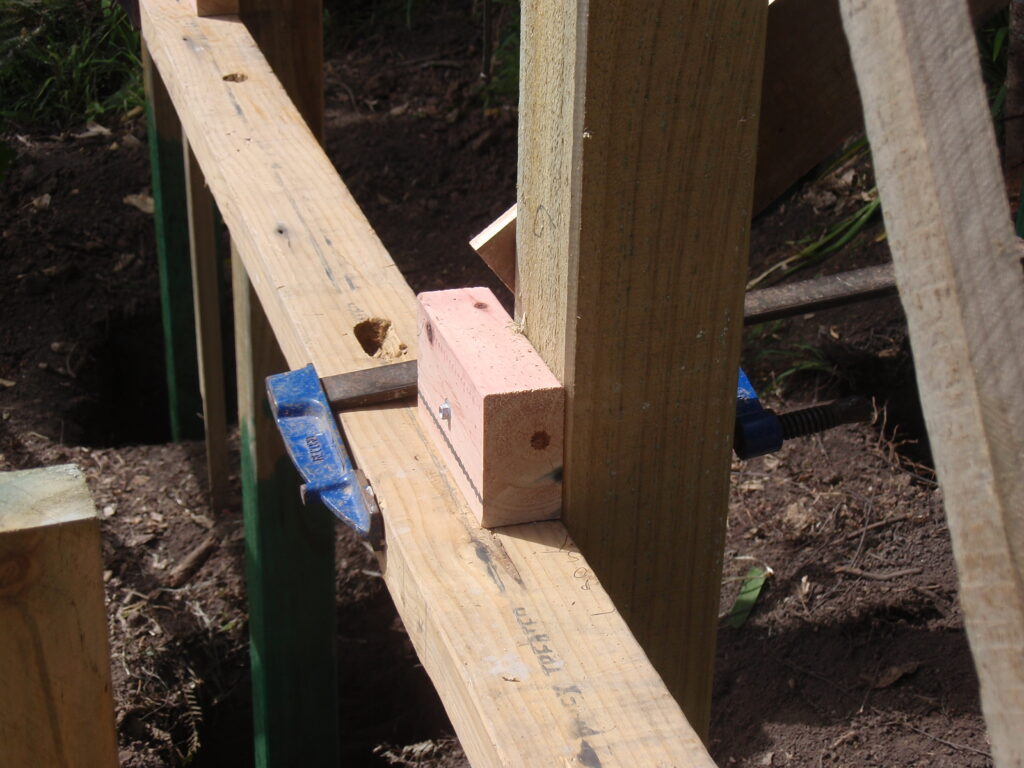
Suspend the posts on temporary framing so that they are in the middle of each hole and 100 mm clear of the bottom of the pile. Tack a block to the post at the correct height from the bottom of the hole then clamp each post to the temporary framing. The temporary framing locates the posts across the width of the potting shed whilst the string locates the posts along the length of the shed. Note that the bottom of the posts are painted with Metalex to extend the life of the H4-treated timber.
Brace the poles off each other and off the temporary framing to prevent the posts from moving out of place during the concrete placing.
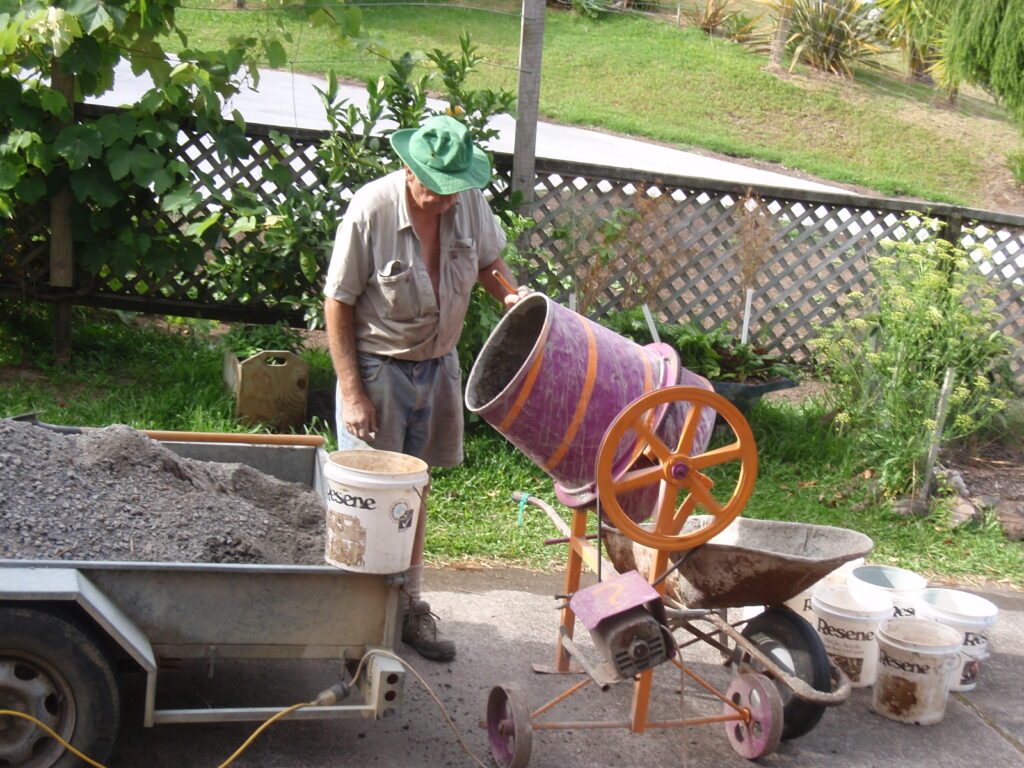
Six holes do not take much concrete so this was mixed the old-fashioned way in an ancient, electrically powered concrete mixer but could even be mixed by hand in a barrow. The mixed concrete had to be carried in half buckets up 24 steps to the pile holes. Tamp the concrete in to ensure it gets under the posts, into the corners, and to eliminate air pockets.
The posts should stand proud and straight the next day after the temporary supports are removed and will be trimmed to height after the beams supporting the roof have been bolted into place.
Construction
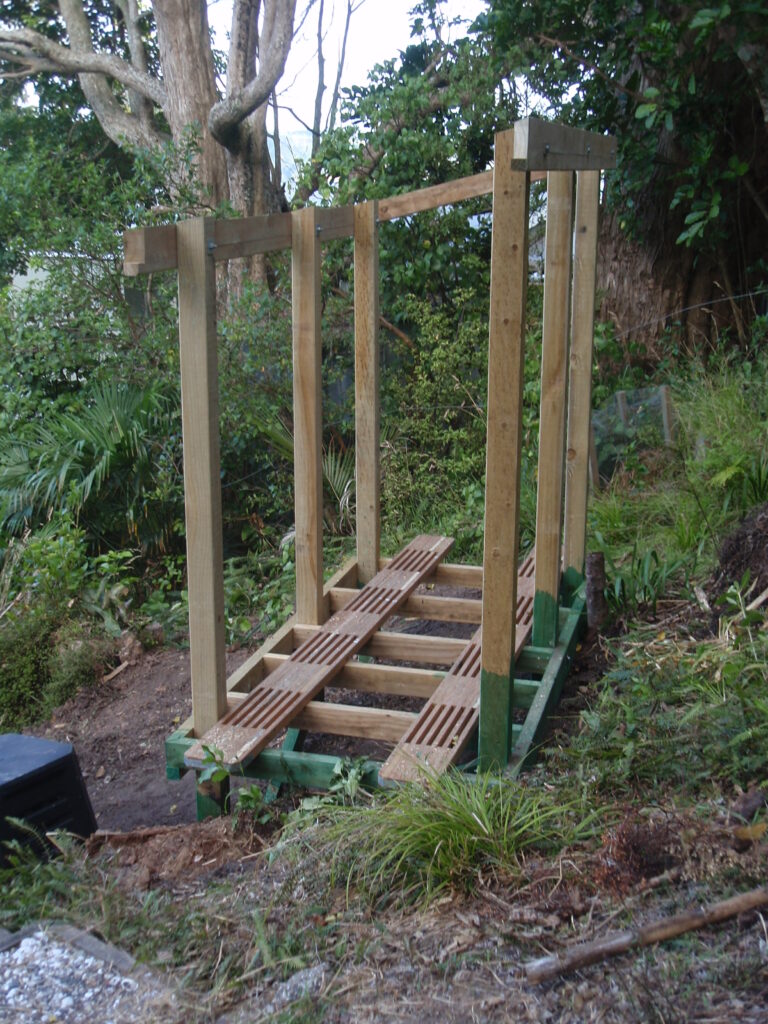
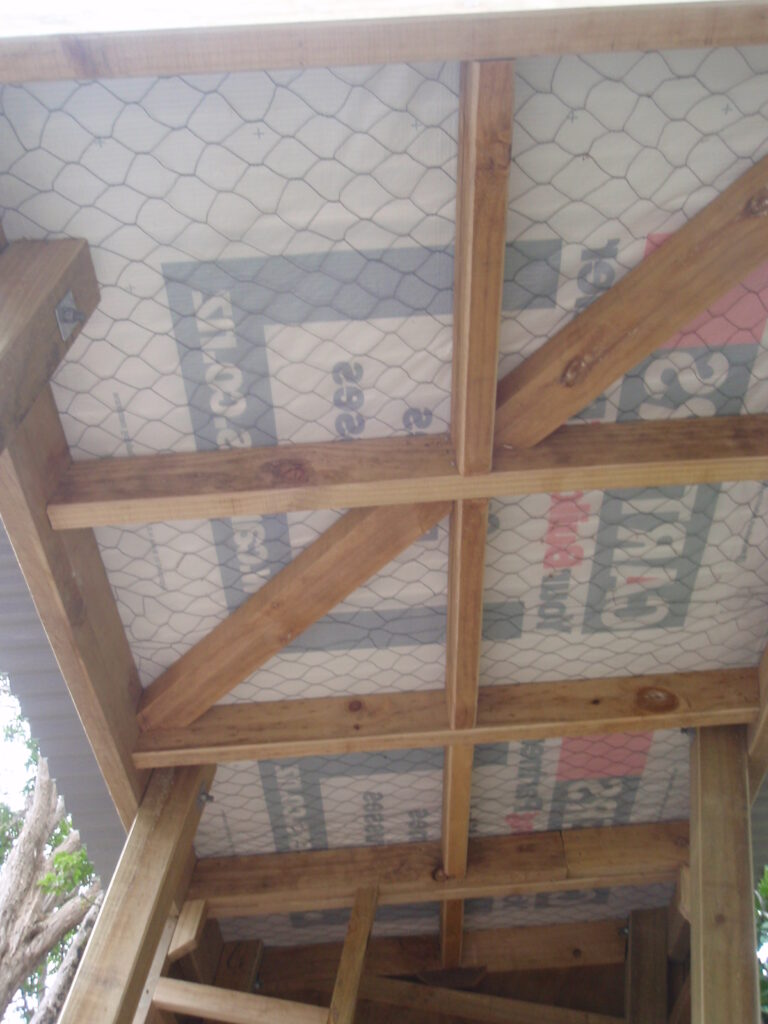
Bolt the bearers to the posts, cut the joists in between the bearers, and nail them in place with two skew nails from the inside and two through the bearer (joist hangers could also be used). Similarly, bolt the beams to the tops of the posts with rafters cut in between and similarly nailed in position. A tall person might like to add 150 mm to the height of the building. I am only 1625 mm high (nearly 5ft 6in) so the rafters easily clear me when I am standing in the middle but a person over 1800 mm (6ft roughly) might feel a little uncomfortable. Scaffold planks make moving around the platform easy—the more planks, the easier the movement.
Fix all the rafters and the roof brace in position (Bruce also used galvanized square washers and bolts) before placing the wire netting. Fix the building wrap and then the corrugated galvanized roofing with galvanized roofing screws. Black paper could be used with lining on the underside.
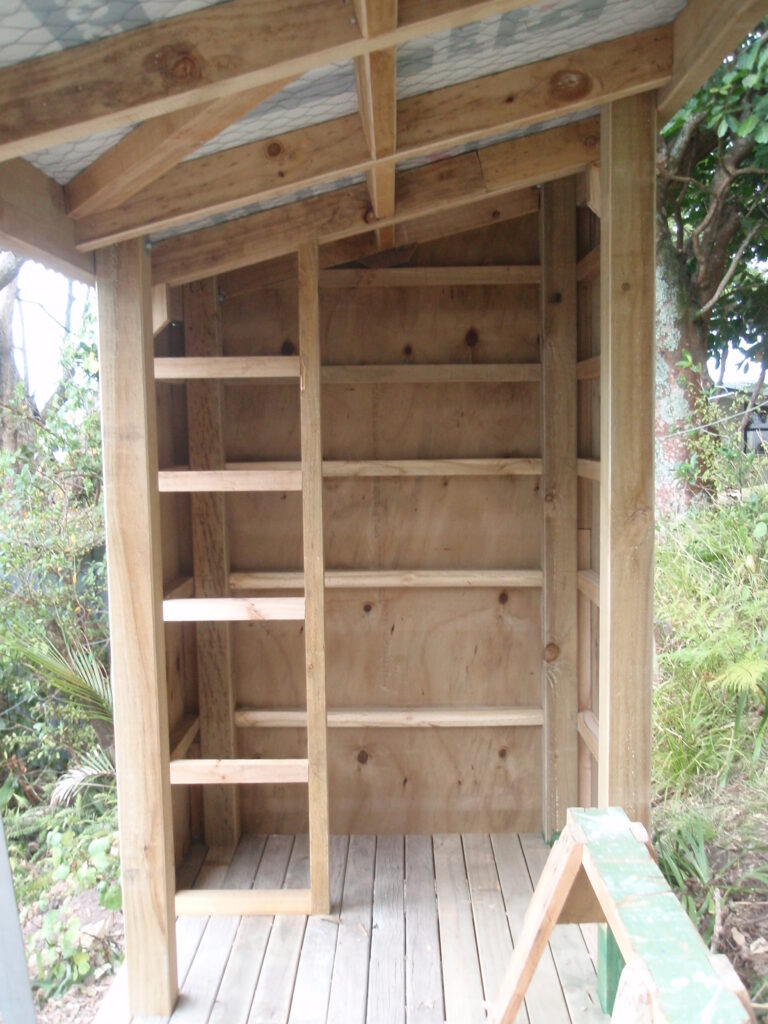
Now nail the decking down (in this case it is not grooved but that could be used) and then fix the framing to the deck and to the end posts. The dwangs are in excess of NZS 3604 requirements but will be used to support shelving at each end of the cupboard and to fix tool hangers to the back wall.
Bench
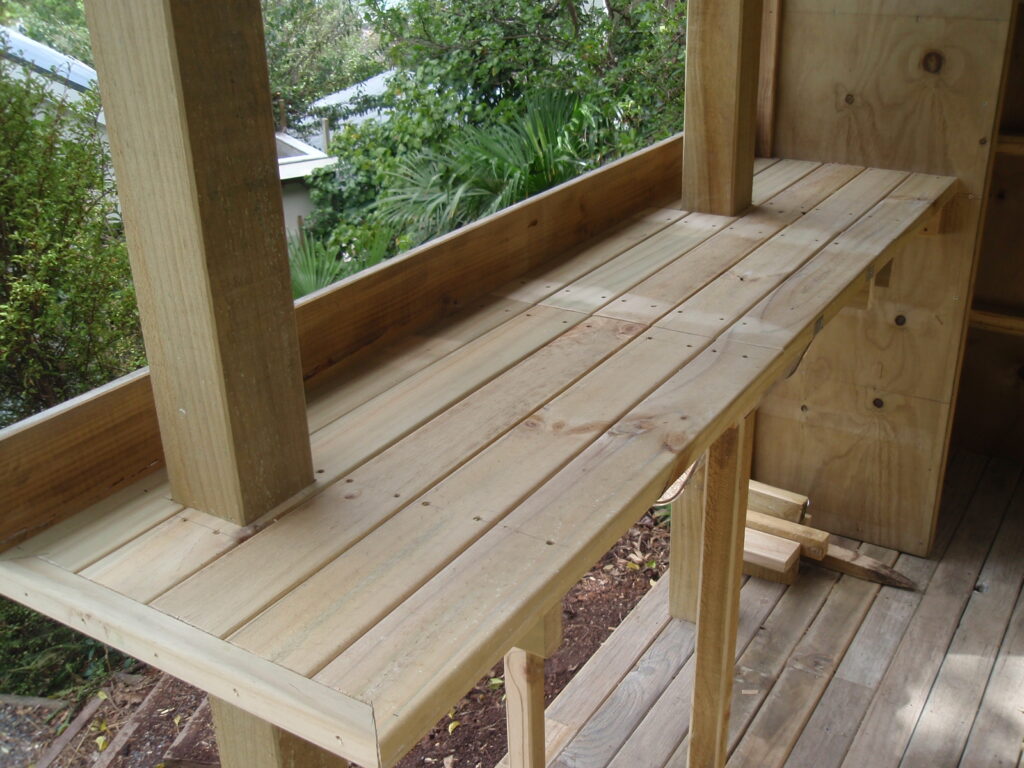
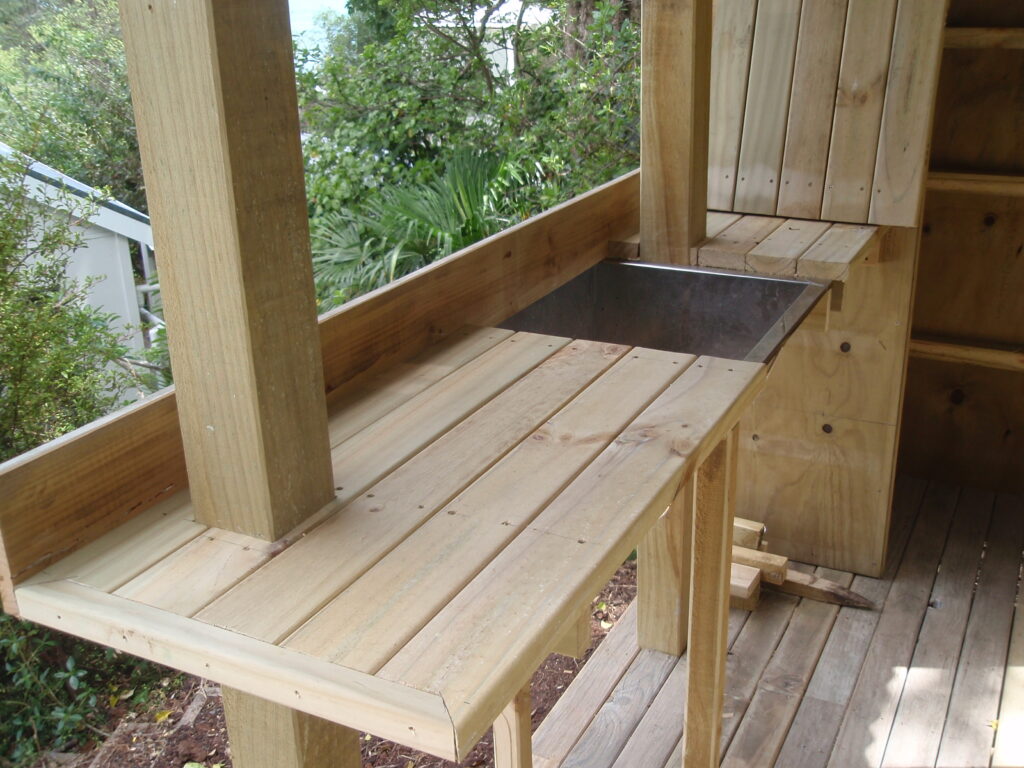
Build the potting bench next. It is around and supported by the two posts and the cupboard wall, and is 100 x 50 mm framing covered with decking and a 100 x 25 mm upstand to stop pots from falling off the back of the bench. Position the bench top to a height that suits the gardener; a kitchen bench height of 900 mm was used in this case.
The “secret” tub has a removable top to extend the area of the bench when the tub is not in use. This was an interesting challenge to the builder, who rose to the occasion with a little advice from the gardener. The removable section of benchtop can lean against the cupboard wall at the end of the bench when not in use.
The potting shed is now ready to have a path constructed from the top of the steps.
Water
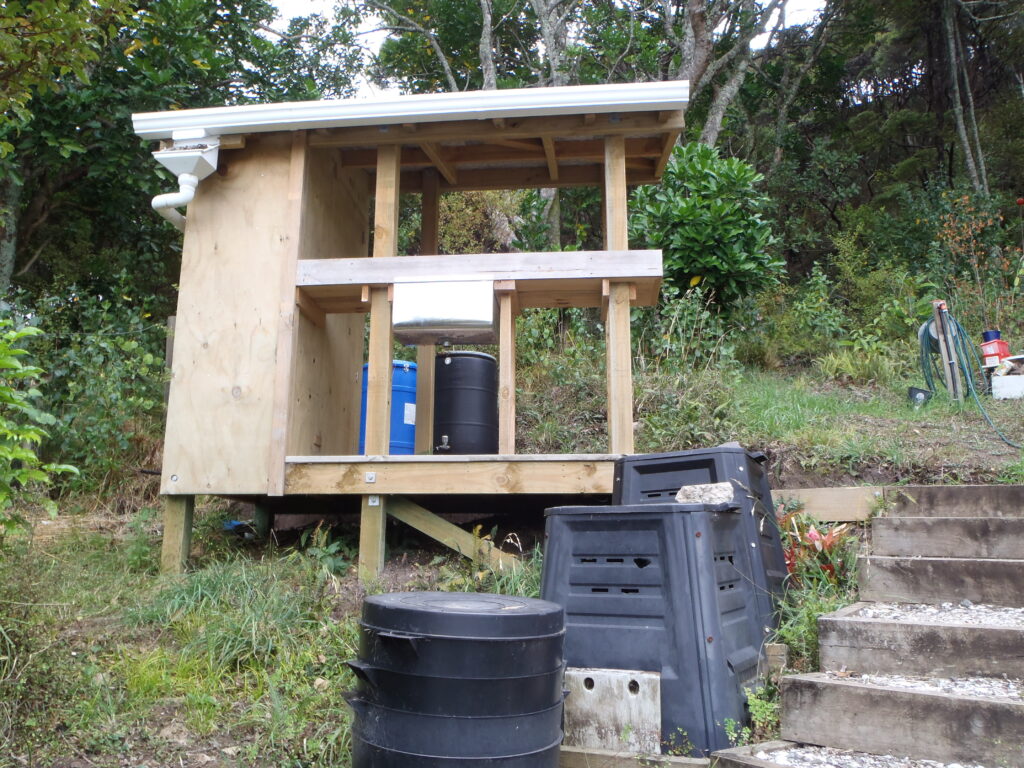
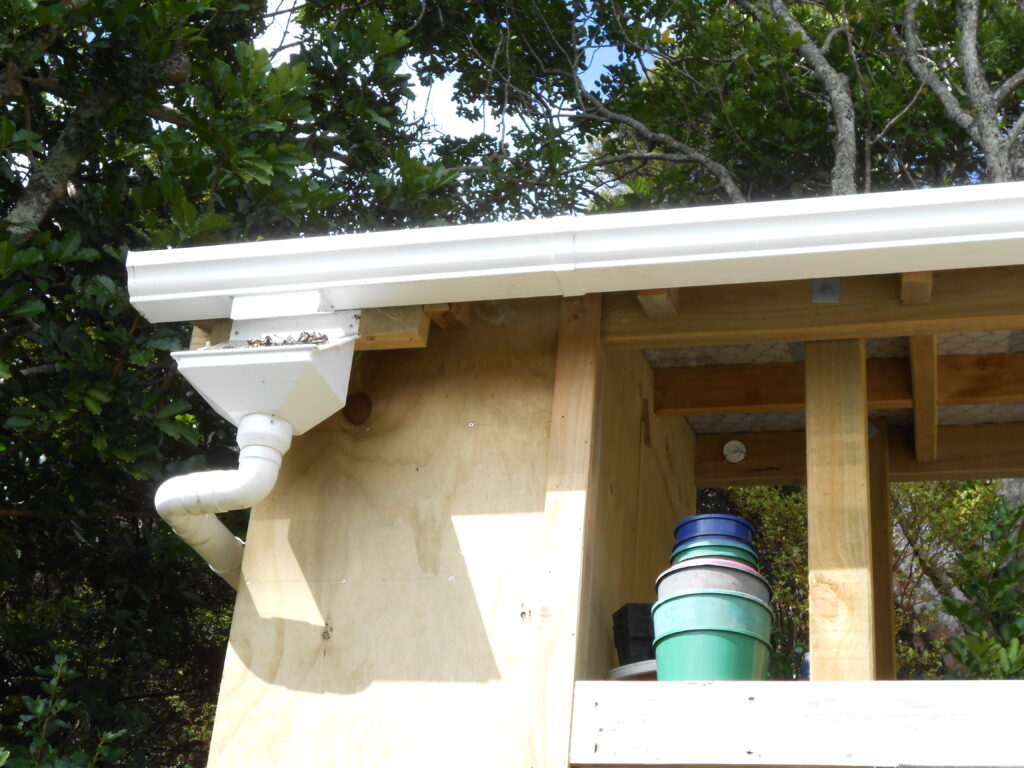
As there is no mains water supply, a water collection system is put in place with a spouting added to collect water from the roof. This will be saved in reused plastic drums for the vegetable garden below.
Because there is not a traditional eave or fascia, blocks were fixed to the top of the lower beam for fixing spouting brackets to. We fixed a leaf shedder under the spouting outlet and a downpipe runs to the drums behind the potting shed.
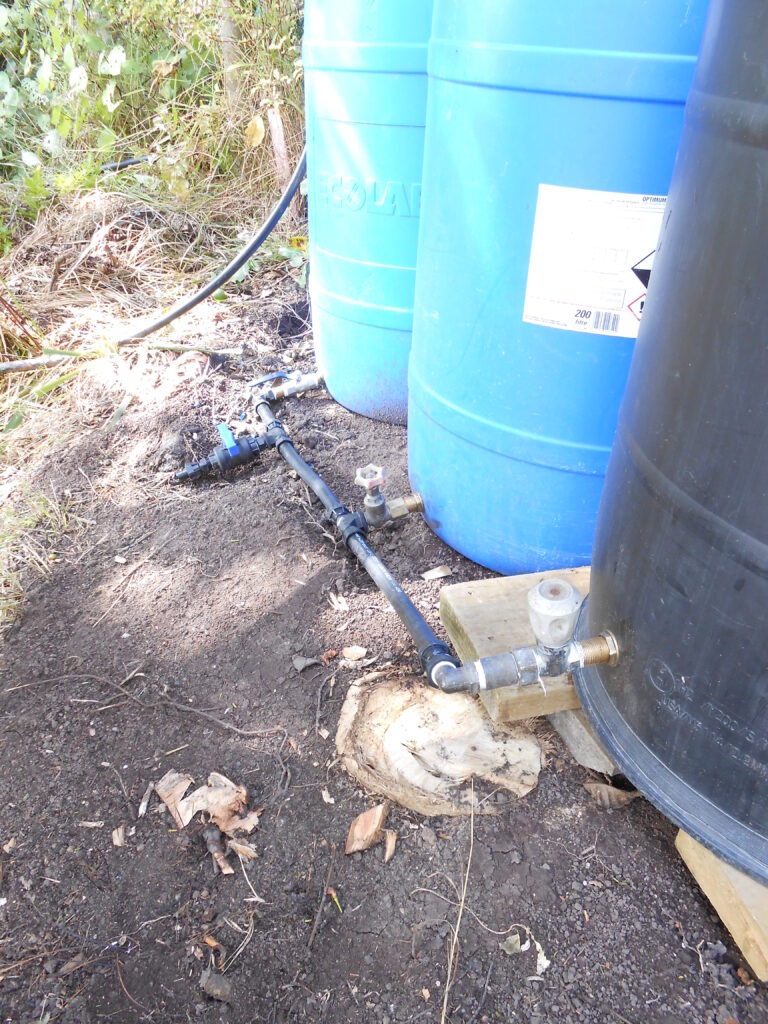
The 44-gallon (200-litre) drums had their tops cut off and were scrubbed and rinsed thoroughly before having a valve fixed at the bottom, the tops fixed and sealed back on.
The valve fixed through the bottom of a drum has a length of threaded pipe screwed into it and sealed with white plumber’s tape. A flanged nut on each side of the plastic drum’s side in turn is sealed with hemp and black sealing compound.
The three valves were then connected together to one pipe which has its own valve from which a pipe will be run to the bottom garden and a standing hose tap. Thus, for future maintenance, any one drum can be isolated or the whole three, without losing excess water.
The potting shed today waits on corner boards for the outside of the cupboards, internal shelving, a tap and waste for the tub, and perhaps a coat of paint. Although we have visited the property several times, fishing and other projects tend to get in the way of finishing the shed. It has its positive side because I am refining the shelving design as I use the shed. I suspect that I will have to give Bruce a cutting list and I will have to put the shelves in myself.
