A basic third-world cooking technology makes sense for a Kiwi home
By Daniel McLaughlin
Photographs: Daniel McLaughlin
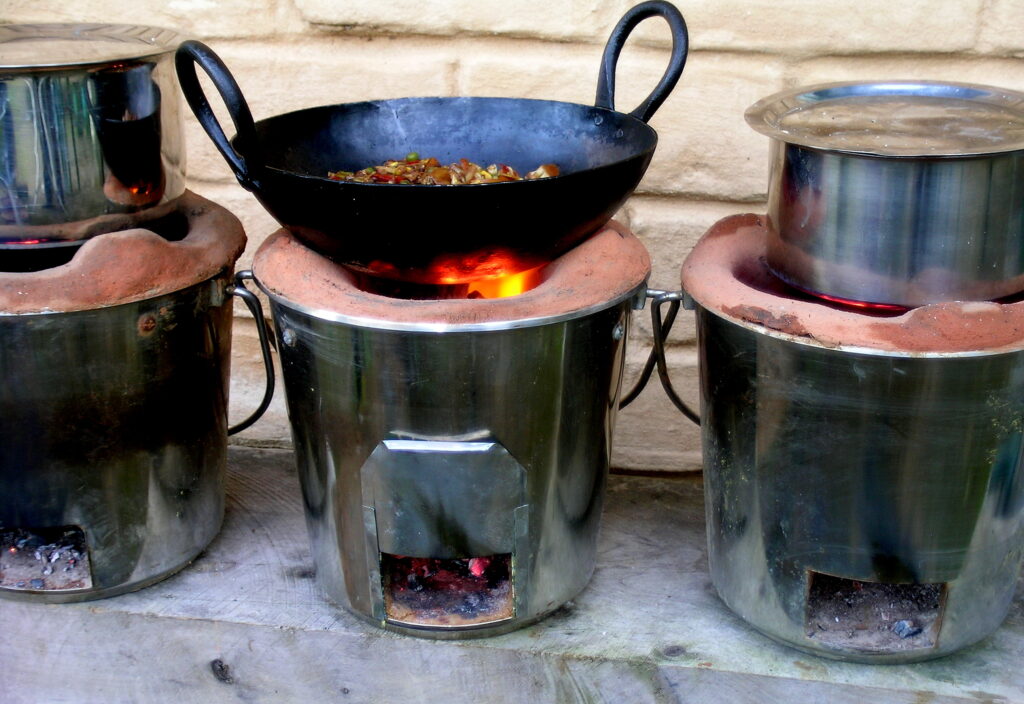
When a high wind-gust blew a tree onto the overhead cable on our Waikato property, one of the phase wires broke. In our home, the electric stove and half the lights stopped working. That night, it was just as well we had our clay-lined bucket stoves to cook on.
The observant traveller visiting Asia soon becomes aware that the clay-lined bucket stove is the prime means of cooking for families, street stalls and even for up-market restaurants. In heavy Bangkok traffic, we saw a family of five on a small motorbike. They were carrying a bamboo pole with bamboo trays suspended from each end. One tray was piled high with food for the market and balancing on the other end was a bucket stove (which had been lit and was hot). We stayed with relatives in Burma who prepared for us the most delectable food using their seven bucket stoves installed in a lean-to adjacent to their kitchen.
This is simple, practical technology used in many parts of the world. The Thai bucket stove and the improved Lao stove are two examples. In Kenya, the traditional Jiko stove has been improved by adding a clay ceramic lining.
Basic
Governmental and non-governmental organisations (NGOs) are working with third-world populations to promulgate bucket stoves to promote efficient use of scarce cooking fuels, reduce smoke inhalation and lessen the work of collecting fuel. Testing shows that they have a 20 to 30 percent fuel efficiency compared to a smoky “three stones” open fire is only 10 percent efficient.
By trial and error (see panel), I have adapted this idea. In Asian countries, it is possible to buy ceramic inserts but I describe the type made fully by anyone with basic skills and materials.
Although careless use of a poker will damage the grate which is quite brittle, the clay lining is surprisingly durable with careful use. Basic running repairs can speedily fix any accidental damage. I have been using my first stove for about two years and made only minor repairs to the rim.
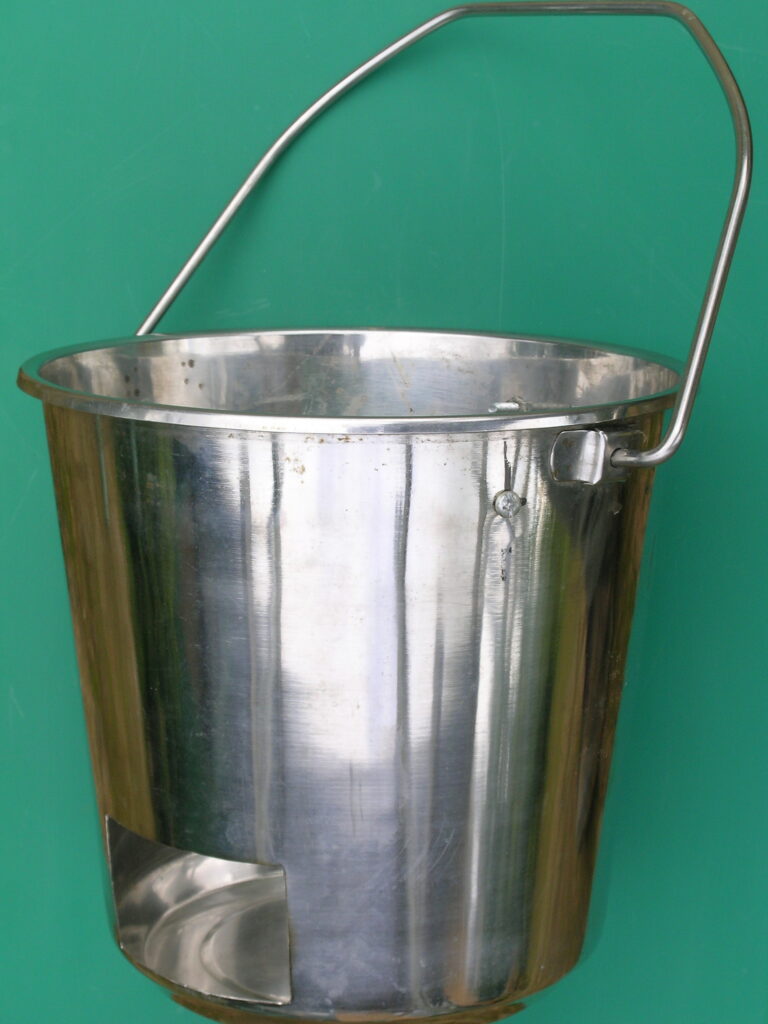
Apart from the bucket and three, small retaining screws, the basic material clay is “borrowed” from nature. None of the measurements are critical, so there is room for experimentation. The bucket both supports and contains the clay lining and a sensible size is about 12 litres. I bought stainless steel buckets as they were at a discounted price at the time. Galvanized sheet metal buckets are common in Asia.
Vent and damper
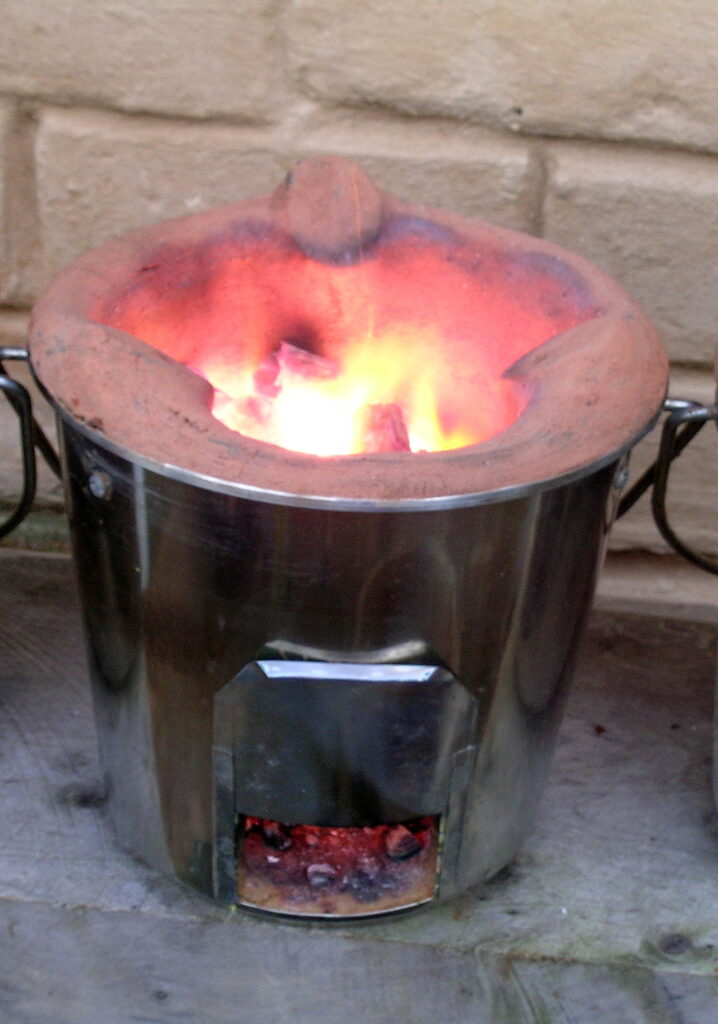
The vent must big enough to let air flow easily to the fire and for the easy removal of ash. It is also handy be able to fit your hand inside to assist in fitting the grate. I used a small angle grinder with a cut-off blade to cut a 100 mm by 60 mm rectangular hole for the vent. The bottom of the vent hole should be 20 mm from the bottom of the bucket to allow room for the clay layer which forms the floor of the ash chamber.
The damper slide is optional as it is easy enough control the temperature by limiting the fuel supply or by closing the vent off with a piece of folded aluminium foil or a clay plug. Stoves I looked at in Thailand and Burma didn’t bother with this refinement at all.
For my damper, I bent two S-shaped slides from thin sheet metal. One part of the S clamps into the side of the vent while the other part forms a vertical slot for the damper to slide in. The slide is held in position by a right-angled return on the back which beds into the clay.
Drill three 6 mm holes, evenly spaced around the bucket, about 30 mm below the rim. These are for 5 mm x 30 mm bolts (or similar) which will prevent the clay liner sliding out when the bucket is inverted.
Clay mix
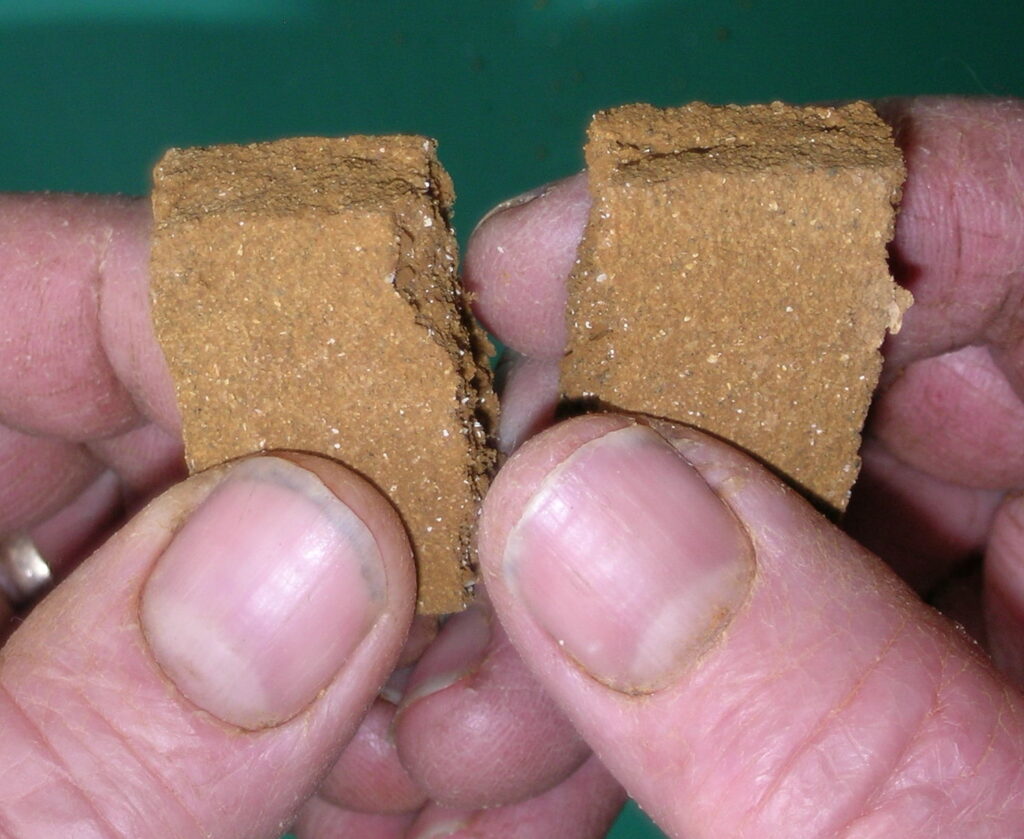
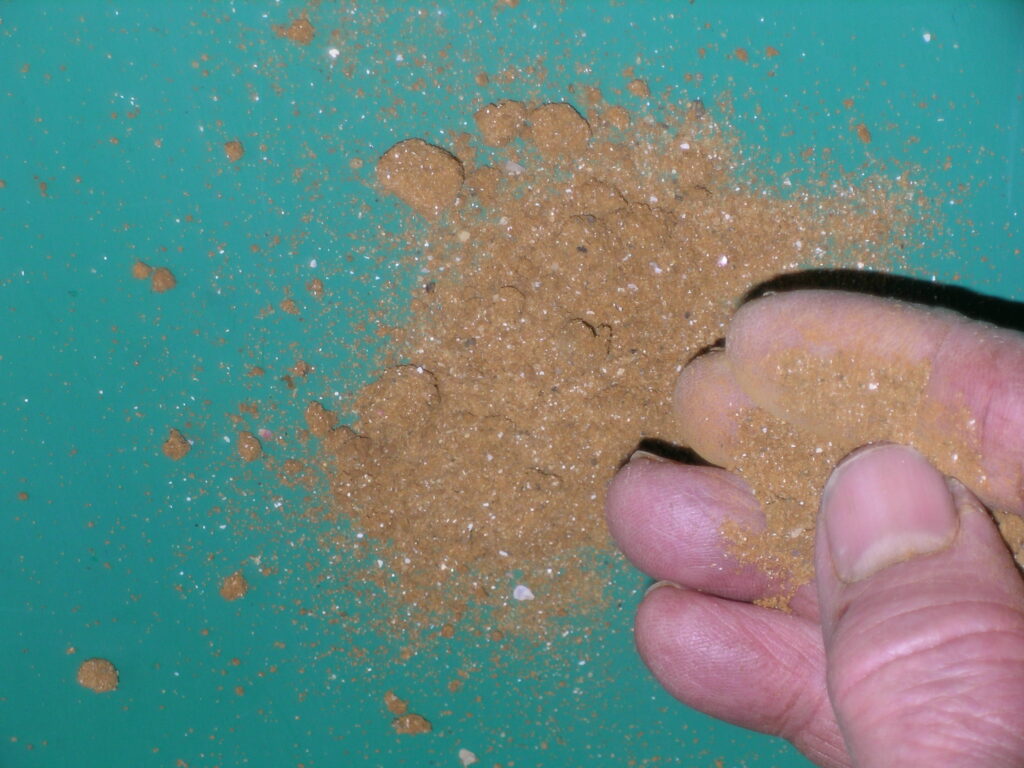
Many clays incorporating material will suit this project. The orange clay often seen in road-cuttings is probably best as these clays tend to vitrify at lower temperatures. If the sample clay mix has high clay content, add sand to reduce shrinkage and cracking. I find a clay / sand mix of 2:1 works well. For each 10 litres of this mix, add about two full sheets of shredded newspaper. This makes it easier to work the clay and to join wet to dry clay. Adding paper also decreases the density of the clay which improves insulation and increases the resilience to thermal shock.
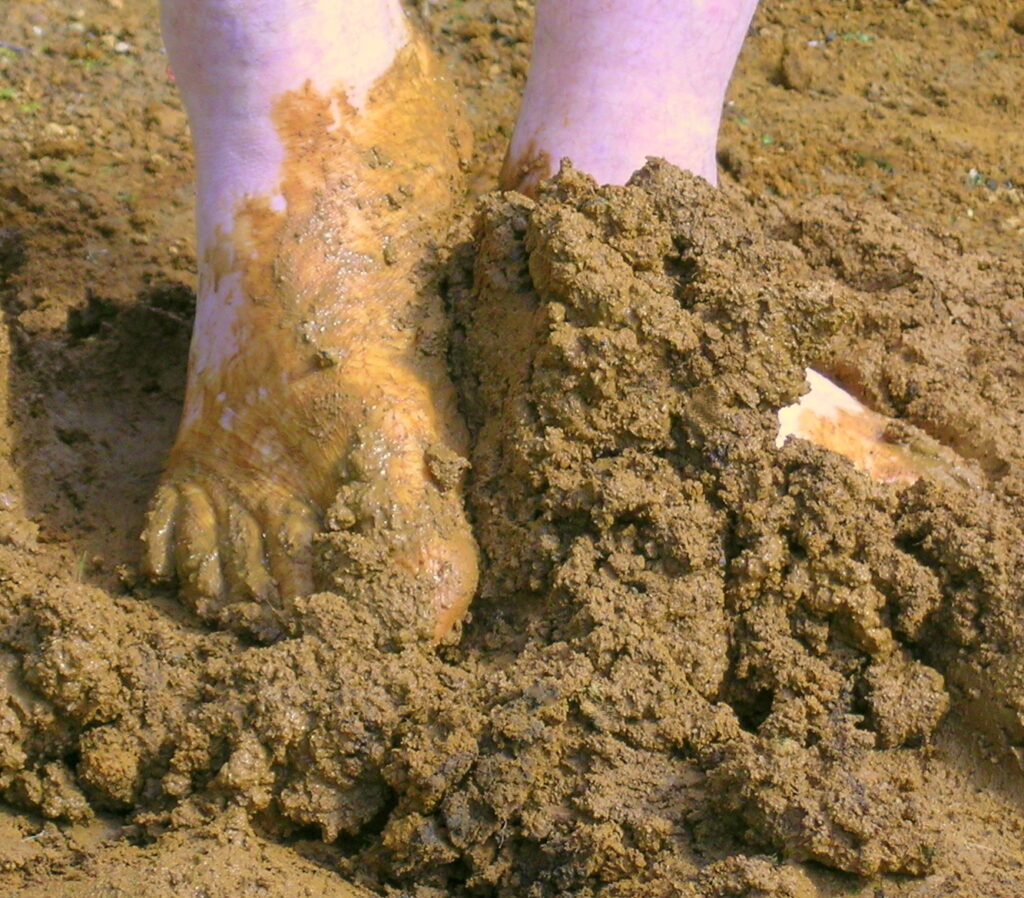
You could power-mix the material but as this is a back-to-basics project, I used efficient third-world equipment: hands and feet.
If the clay is too dry to work, break it into pieces and soak it in a bucket for a couple of hours. Tip it into a heap on a flat surface and add the wet shredded paper. Work the clay with your feet until it feels smooth and homogeneous and then work the sand into the mix. Use a shovel to regularly re-heap the mix and, of course, lean on it as you stomp the pile.
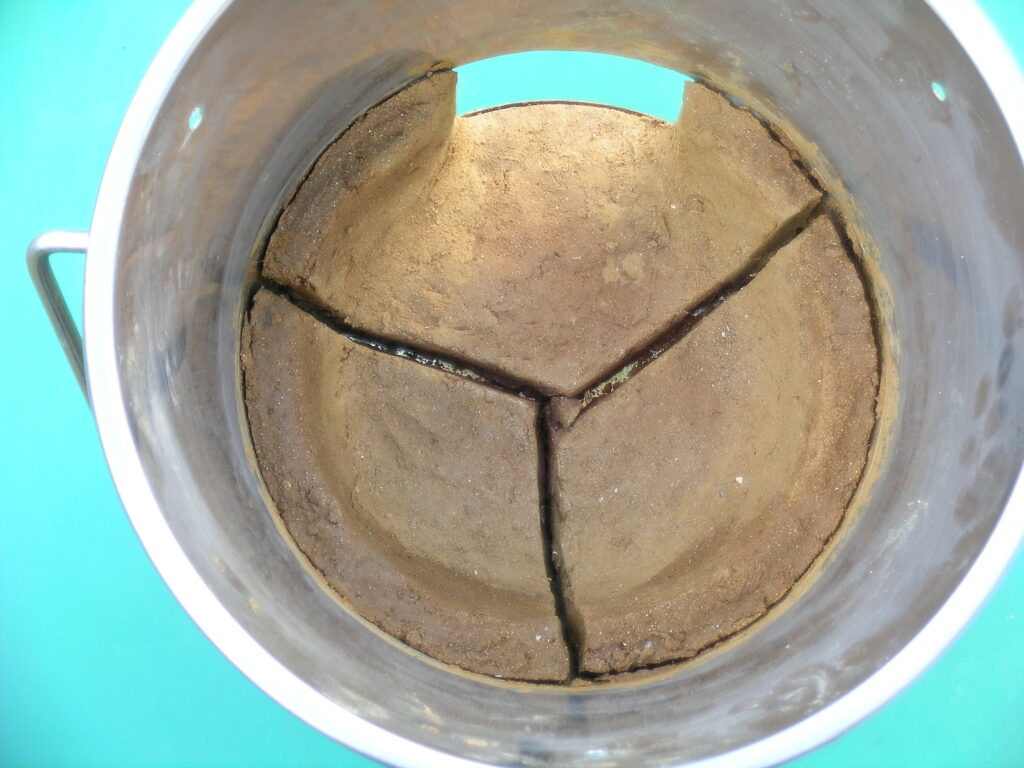
Clay shrinks while drying and cracks appear as the clay shrinks away from sides of the bucket. This cannot be avoided. When the bucket is lined with wet clay, I make cuts which control the location of these cracks. The cracks are refilled once the clay has dried.
Grate
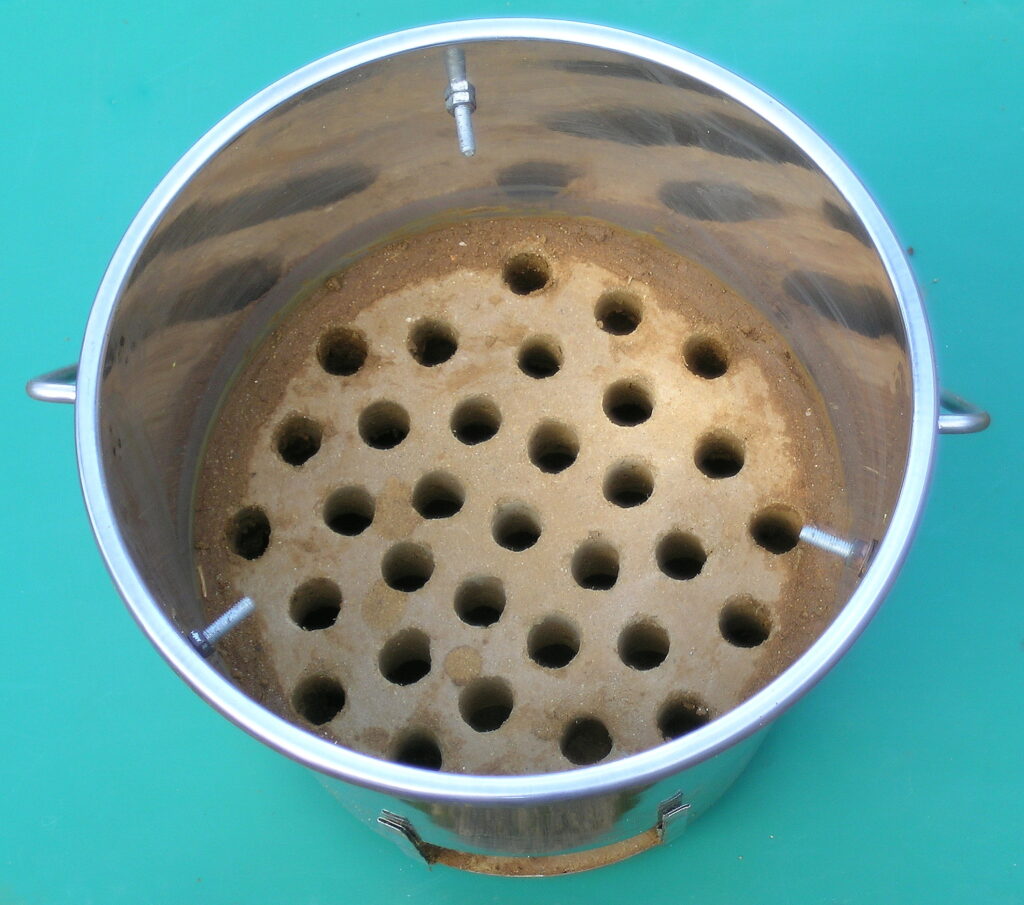
The diameter of the grate is determined by measuring the diameter of the bucket at half its height.
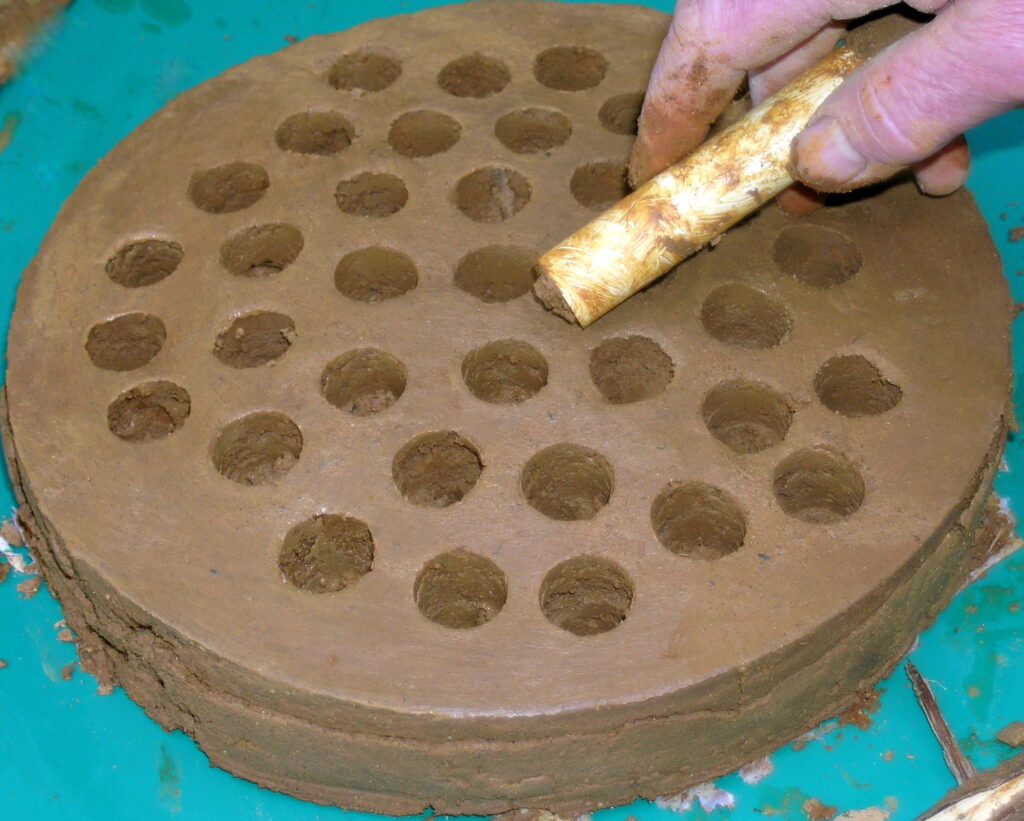
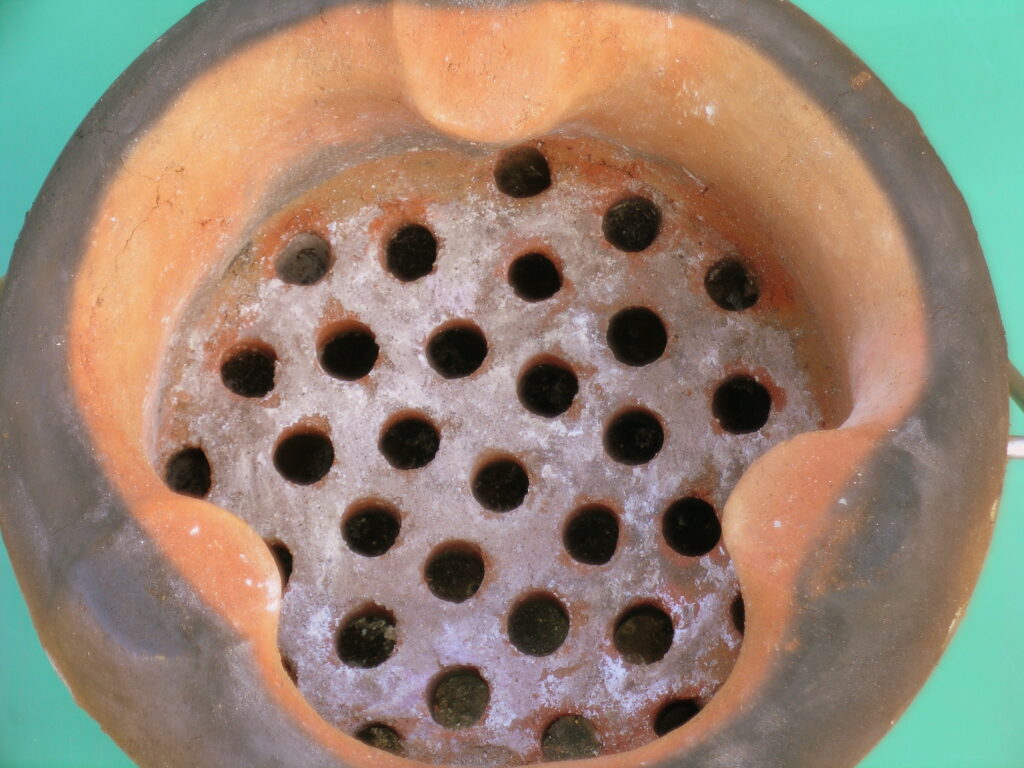
To make the grate, either work freehand to shape the clay into a flat 45 mm thick disk, using a circle drawn on paper as a guide or, as I have done, sit a 45mm-high circular former on paper and press the clay into it. Insert a knife around the edge of the former so that the clay separates cleanly as it dries.
Create a pattern of air holes by pressing a 20 mm diameter tube in into the clay disk. Place the holes 15 mm apart in a regular pattern but keep them 20 mm clear of the edge of the disk. An optional refinement is to create tapered holes (use a finger in the wet clay), small to large going downwards when the grate is installed, to help the ash to drop freely.
Make a mark halfway down inside the bucket. Draw a line around the inside of the bucket just a little more than the thickness of the grate below this mark. This ensures that the top of the grate, when fitted, will be about half way down the inside of the bucket.
Ash chamber
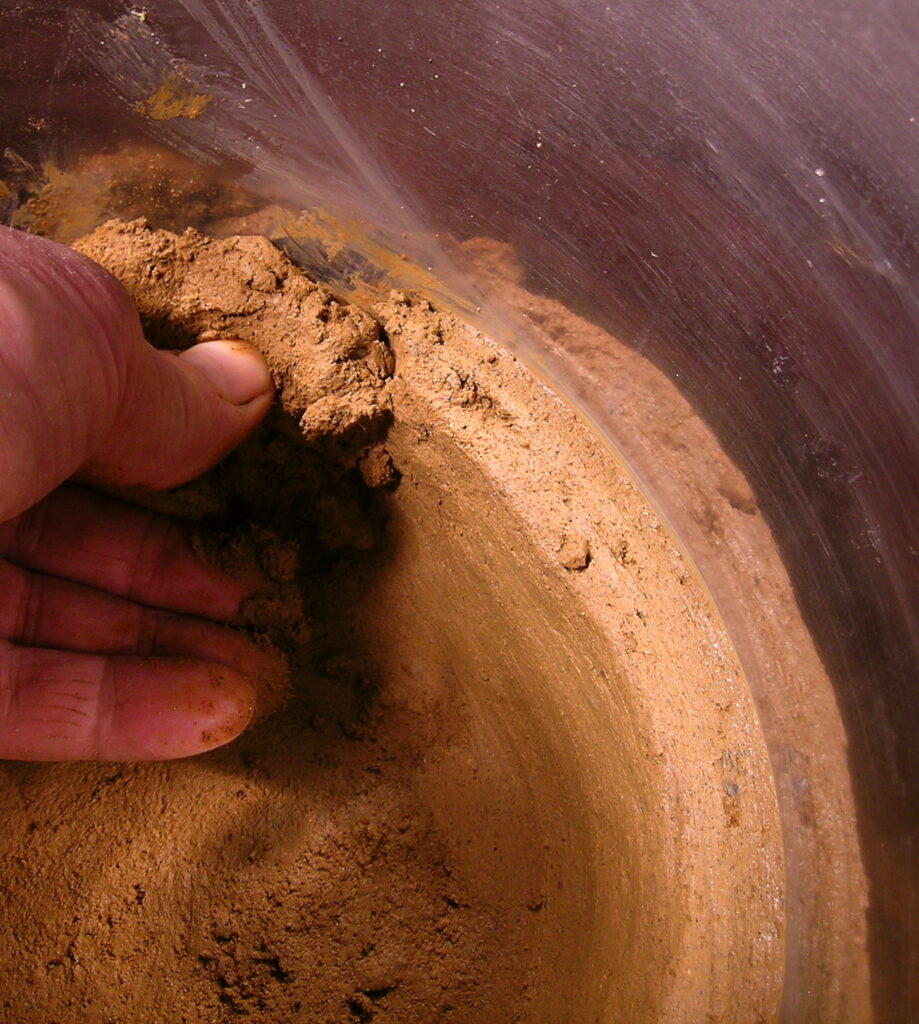
On the base and from the base up the sides to the halfway line, shape a 15 mm-thick layer of clay by hand. This becomes the ash chamber. Now make three or four shrinkage cuts with a knife or a wire. Slice through the clay from the centre of the base, out to the circumference and up the side.
When the clay is almost dry, moisten the cracks with a sponge and press firm but workable clay into the gaps. Smooth off the whole chamber with a damp sponge or cloth and leave to dry. Repeat this as necessary until no further significant cracking occurs.
Place a bead of sloppy clay on top of the ash-chamber wall and press the grate on to it. Remove or smooth off any excess clay that squeezes out. Fit and tighten the three bolts in the bucket.
Fire chamber
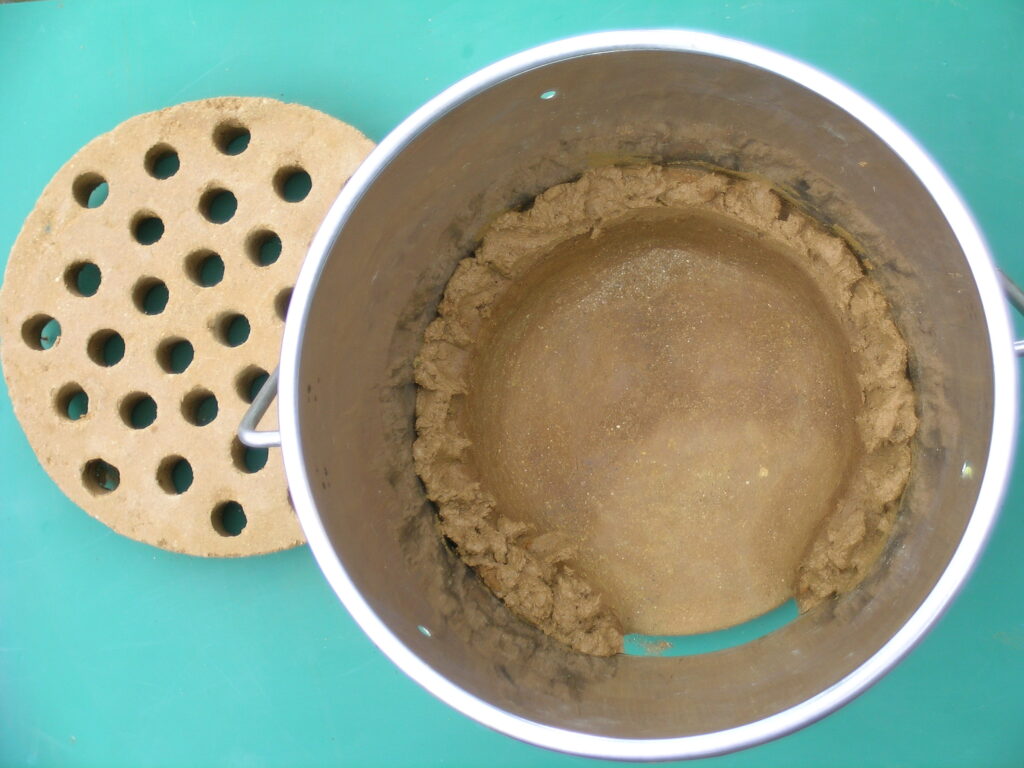
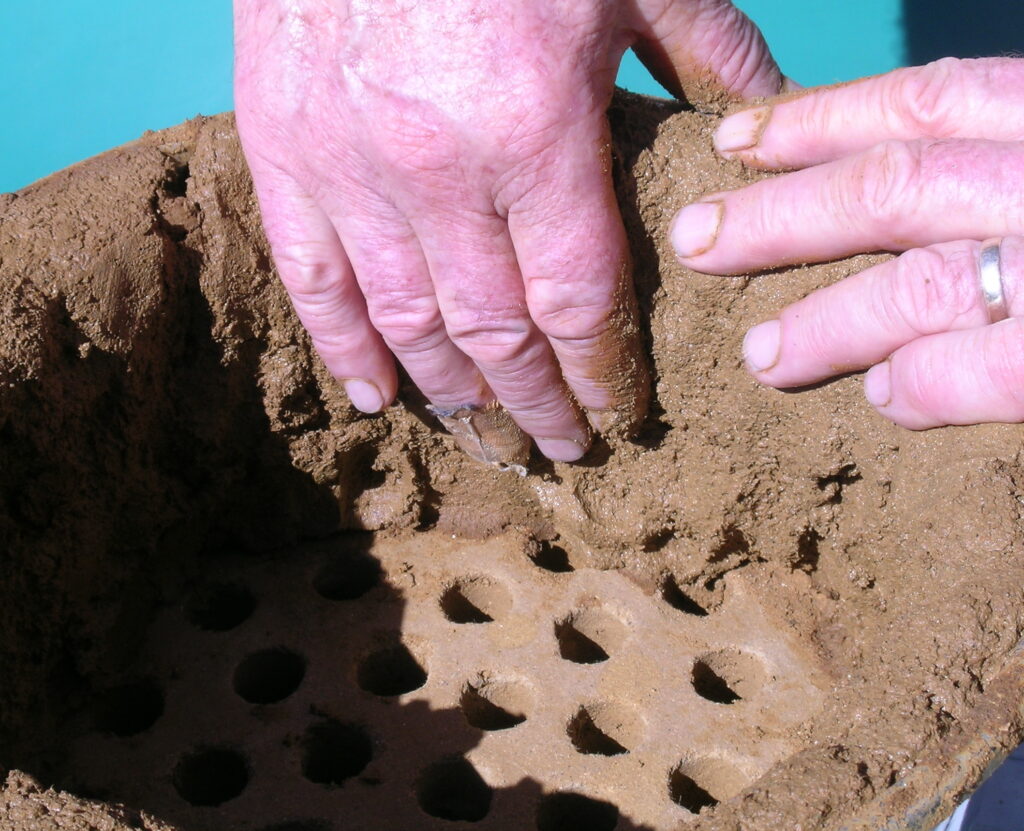
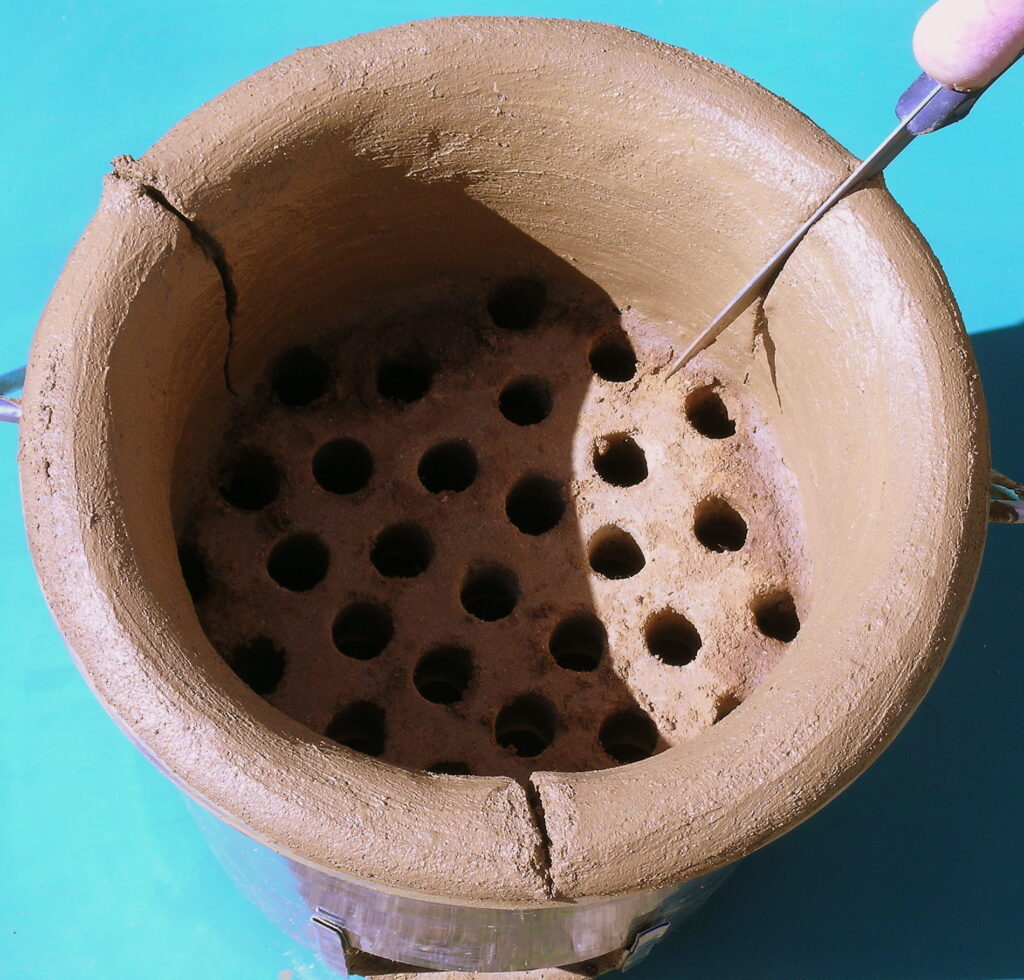
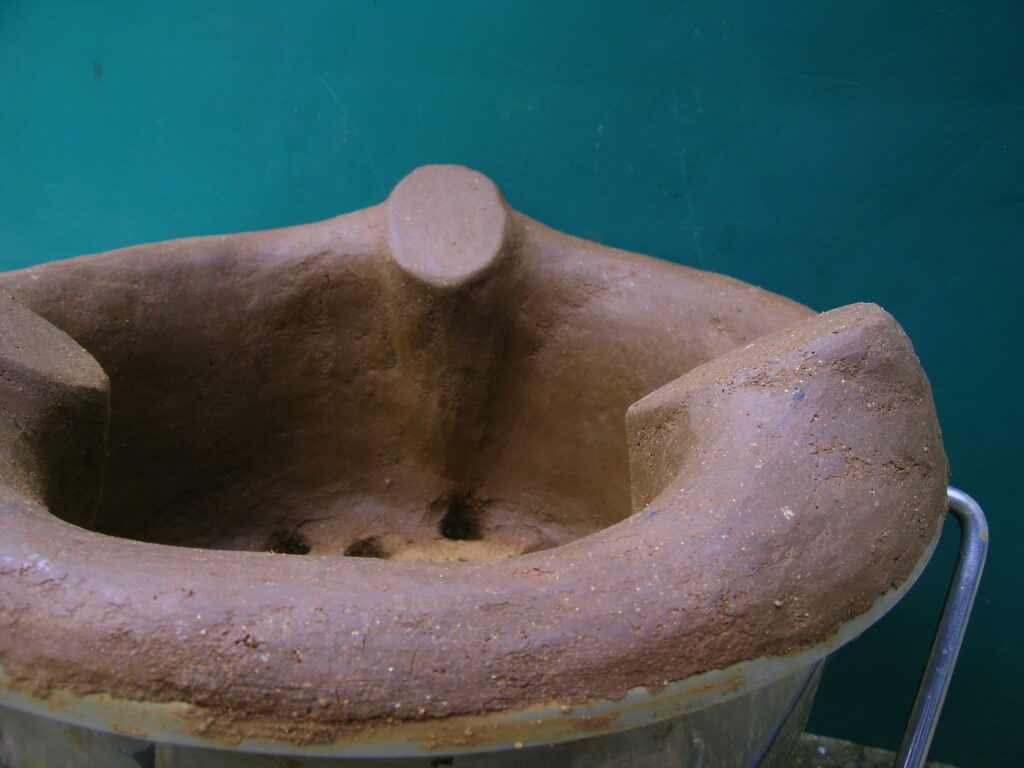
Line the bucket above the grate by hand-shaping clay around the walls, keeping clear of the holes in the grate. This is the fire chamber. Work the clay so that the vertical wall will be 20 mm thick at the grate level and something like 30 mm thick at the rim, depending on the slope of the bucket sides. Build the lining 15 mm higher than the top of the bucket and round it over to meet the outer edge of the bucket rim.
Make shrinkage cuts with a knife or wire from the grate up the sides to the rim. Place three cuts near but just clear of the bolts, slicing through the clay liner inside. Place three more cuts between each of these, making six cuts in all.
After the clay has dried, carefully press stiff but workable clay into the expanded cuts. You may have to hold the sections in place as you work in case they come free from the sides. Allow the clay to dry and refill the cracks as necessary.
CLAY TEST
To check that you have collected suitable soil with sufficient the clay content, you can try the following basic tests:
- (This first test can be carried out in the field, to avoid the time and effort in collecting unsuitable soil.) Moisten a sample to a consistency of putty. If it is too wet, you can dry it by working it in your hands. Try rolling it into a 3 mm thread between your hands. The material should have sufficient clay content for this project if you can roll this thread at least 30 mm long. Sand may need to be added if the thread can be rolled much longer than this
- Shape a small rod of clay and leave it to dry. When it’s dry, the sample should be hard and should “snap” when broken. It should not have excessive cracking and not crumble to a powder when squeezed between finger and thumb. If the sample crumbles, the clay content is too low.
Pot supports
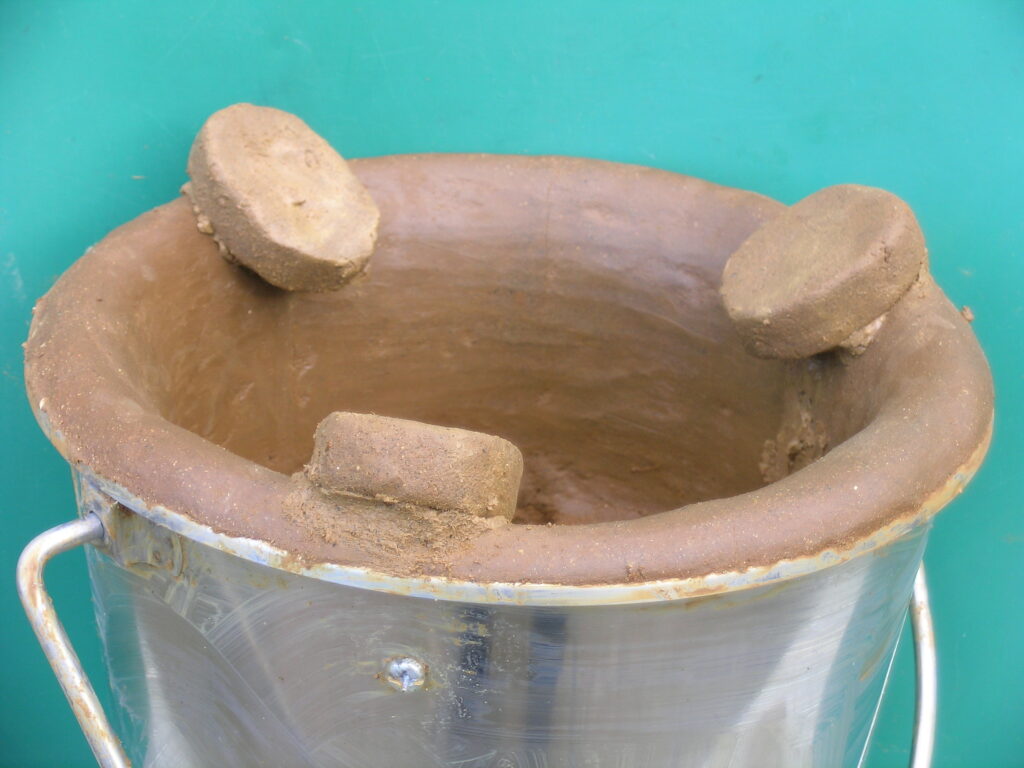
For pot supports, make three 60 mm by 40 mm by 15 mm thick oval pads. Once they have dried, attach them onto the clay rim using clay slurry as “glue”. Sit them so that the long axis slopes down 30º towards the middle of the bucket. Place them directly above the bolts so that they are spaced evenly around the rim.
Moisten the clay wall under the pads and etch with a sharp point to help bonding. Mould a supporting column of stiff clay below the pads, tapering down the wall to the grate. Similarly, moisten and etch the clay rim adjacent to each pad and mould clay around them to merge into the rim.
Once the clay is dry, press stiff clay into any new cracks that appear. An option, once the work is almost dry, is to moisten the clay and burnish the entire clay surface with a smooth stone. This neatens the work and makes it more durable.
The pot supports at the top of the bucket are traditionally used with woks or rounded clay pots in mind but they also work well with other cooking containers. For smaller pots, you could use a hot plate for cooking directly on as I do (actually an Indian tawa used for cooking chapattis). I also use a stainless grill (round cake rack) for barbecuing, and smoking.
The most efficient is to choose a pot that has similar dimensions to the “hot plate” it is sitting on, as on an electric stove. If you might cook regularly with smaller pots, the supports could be extended further into the centre of the bucket. A more efficient alternative would be to build a smaller bucket stove. For fun, I made a very small one out of a fruit can to heat my enamel coffee cup.
Firing the clay
The process of burning fuel in the bucket stove partially “fires” the clay which makes it resistant to thermal shock and to wetting. Once the stove is dry, light a small charcoal fire to complete the drying. Then, to fire the clay, stoke the fire high with fuel with the damper open. Shrinkage cracks may appear after this first firing but it is easy matter to fill these with clay to complete the project. The stove is now ready for use.
Be very safety conscious if you decide to use the stove indoors. It must be placed only on a fire-safe surface. Although charcoal is clean-burning, it still gives off fumes and must only be used in a well-ventilated area.
Heat
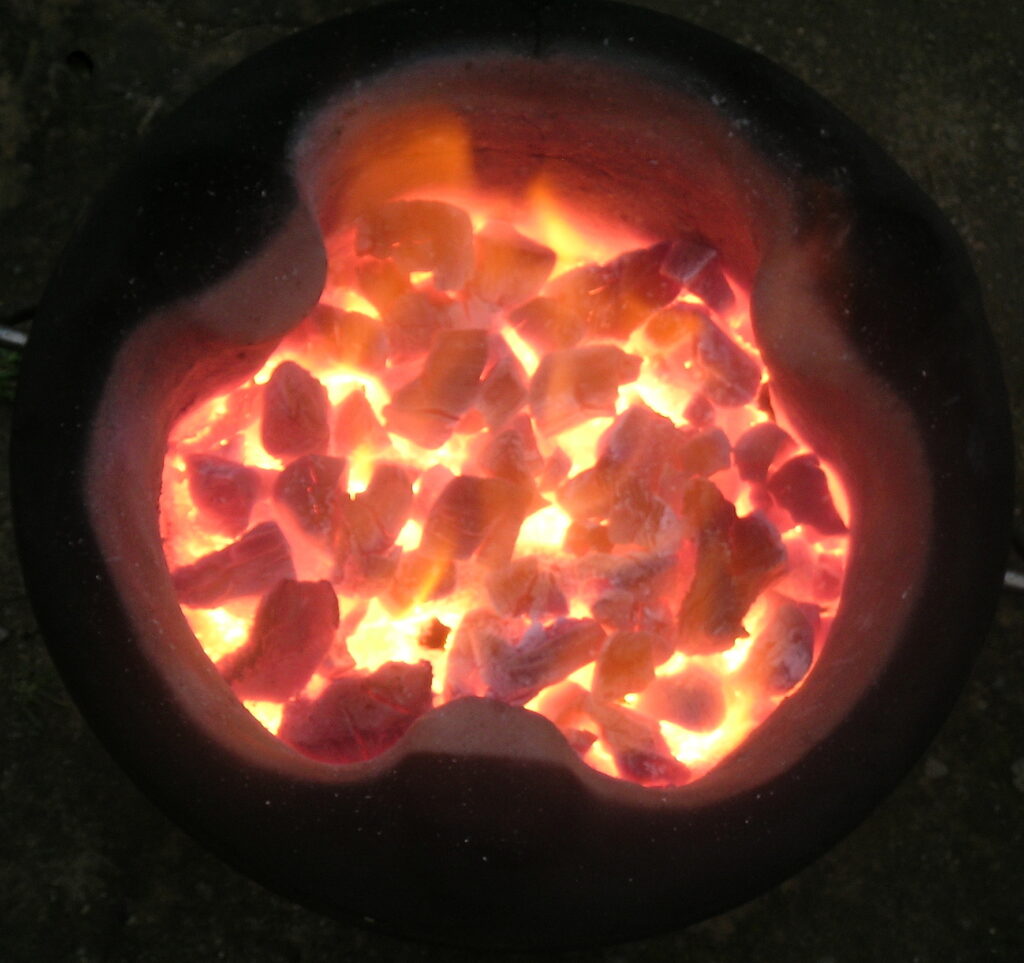
It is possible to fire this bucket stove with wood and let that die down to embers, in the style of Kiwi barbecues. But I find there is often not enough charcoal produced by this method to cook a meal, especially one of several dishes. The fuel chamber is relatively small and after carbonisation, the volume of fuel reduces to about 30 percent. This is where a second fire to produce embers is useful. Shop-bought barbecue fuels do work very well and produce a very clean and long-lasting heat.
If charcoal is not available, saw dry wood into small regular-sized pieces. Set these alight outdoors in a place where the smoke will not be a nuisance. Because the pieces of fuel are all same size, they will all burn at the same rate and after a time will reduce to a clean-burning, smoke-free bed of embers.
For low heat, a small fire can be controlled by regularly adding small quantities of fresh fuel to maintain the required temperature. A hot fire requires a well-stoked fire and a good flow of air which can be facilitated by using larger pieces of charcoal with the fine pieces separated out. Close the vent to reduce the heat.
For a hotter fire, depending on the quality of the fuel, supplement the air flow by gently fanning with your hand or by facing the vent to the breeze. In a reasonable amount of wind, the stove will behave like a forge and the heat will be far too hot for normal cooking. Once the stove is hot and food is cooking, a simmering temperature can be maintained with a well-stoked fire and the vent closed.
TRIAL AND ERROR
I first attempted to produce the bucket stove in one go. I lined the ash chamber with clay and while the clay was still wet filled this chamber with sand and proceeded to form the grate, with difficulty, on top of this using the sand for support. I then completed the firebox and pot supports. The clay took a very long time to dry before I was able remove the sand. The result was a delicate, loose-fitting effort with too much random cracking. It worked OK as stove for a time but fell out to a (timely) end when, without thinking, I up-ended it to empty the ashes. The bolts included in this design overcame that “little problem.” Constructing the lining and grate in separate sessions made for a neater and stronger job and sped up the drying time The shrinkage of the clay was the biggest hurdle but I experimented with filling cracks with fresh clay and from this evolved the technique described
Barbecues
While I am aware of the attractions of the traditional Kiwi barbecue, the effort that I put into this came initially from my fascination with third-world technology where people ingeniously solve relatively complex problems with very basic tools and materials. I am also aware that the world is changing and sometimes older simpler technology can be easier on the planet.
A conventional barbecue is designed to uniformly heat a greater area and uses a larger amount of fuel spread over this area to achieve this. The design of this little stove creates an efficient, insulated, controllable and concentrated “ball of heat” directly under the pot where the heat is needed, similar to the elements on hob.
Making charcoal
This bucket stove is designed for burning charcoal which you can buy. However, more satisfying and more economical is to collect it yourself from the domestic wood burner in your home. Load the burner with good untreated wood and once a good fire is burning, re-stoke with fuel and close the dampers. After a time there will be a deep bed of glowing embers. At this stage, use a shovel with a lengthened handle to transfer the embers into a container with a tight-fitting lid. I use an antique, five-gallon cast-iron cooking pot but any solid fire-proof container with an airtight lid will do. Remember safety: the container will get hot so it must be stable and sitting on a fire-proof hearth. Move the container only after the charcoal has cooled. Don’t be tempted to transfer embers from the fire while they are still burning with a yellow flame. While they make good charcoal, you will also fill your home with smoke.
In summer, to make charcoal for later use, I employ a “horno” (Spanish: oven) an adobe clay oven which is a similar idea to the pizza ovens featured in The Shed but with the dome made from clay rather than bricks. Of course, tongs can be used to retrieve glowing “coals” from any wood fire, enclosed or open, that is burning slowly enough to produce embers. I sometimes burn small pieces of wood in one bucket stove to produce embers to transfer to another.


