A simple idea the world needs now…a portable, beer keg steamer/hangi
By Jude Woodside
It’s not every day that you come across a blindingly brilliant and deceptively simple use for a piece of gear that you just knew would come in handy one day.
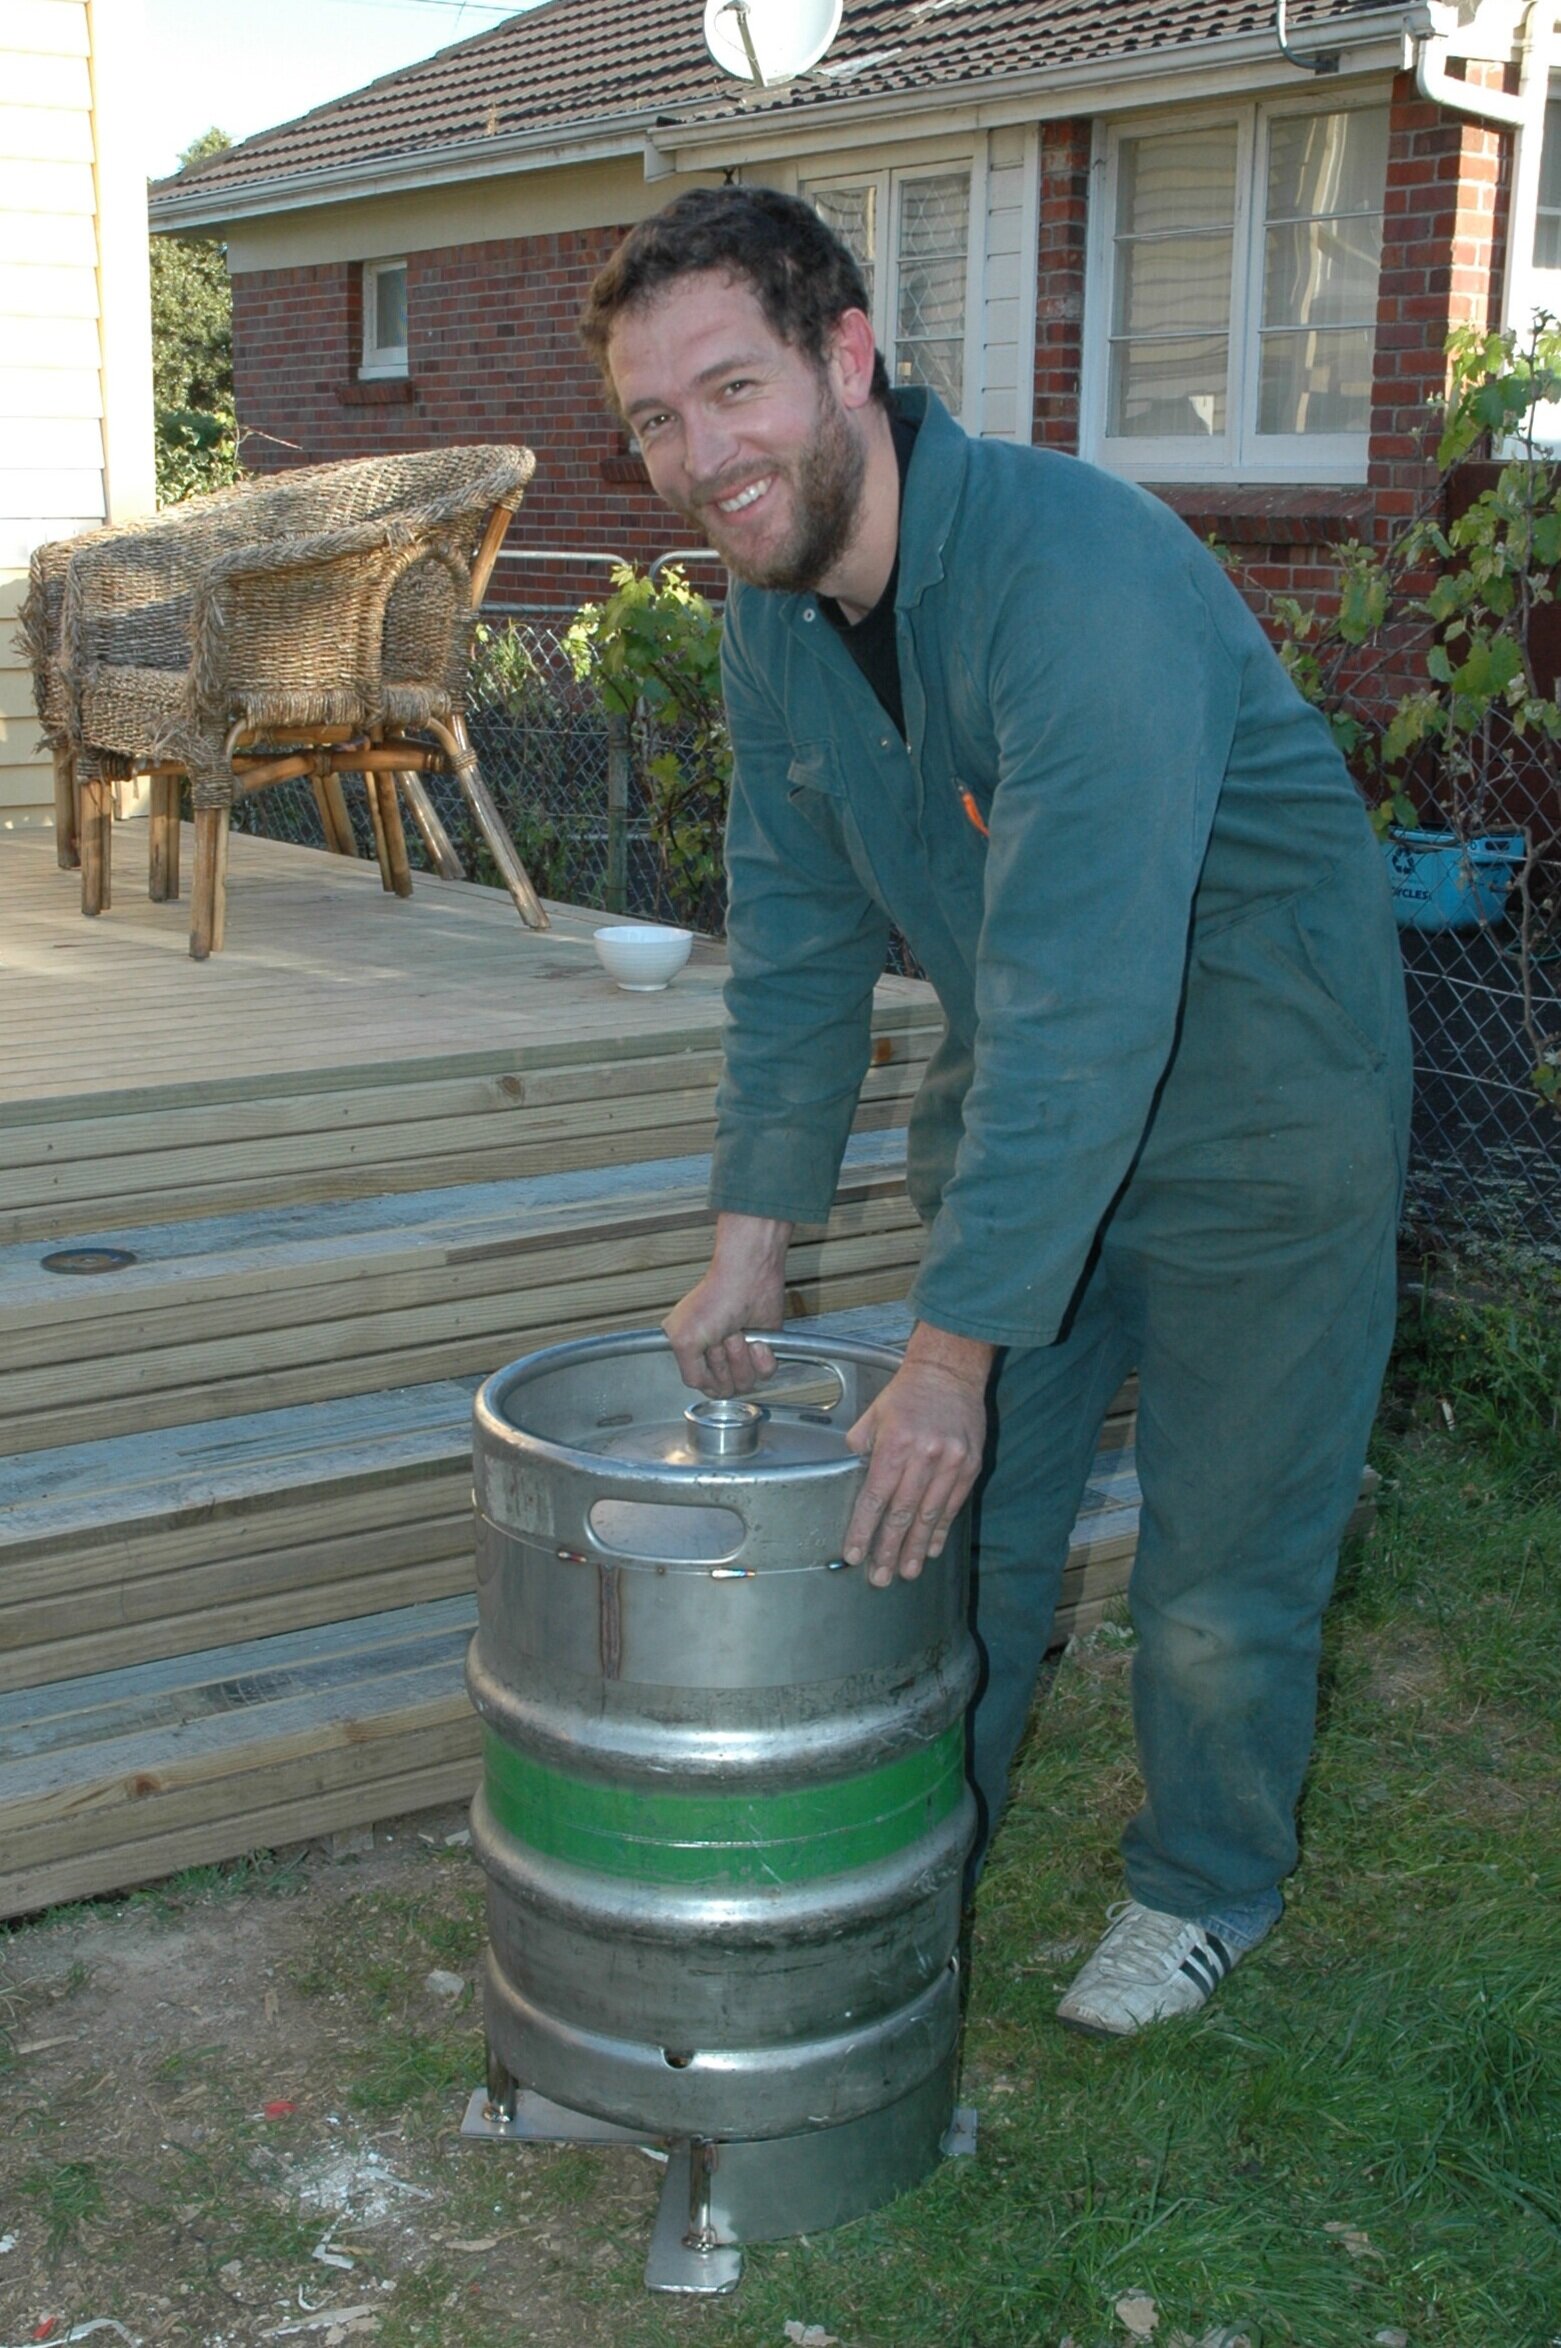
When sheddie Stan Scott showed me his prototype portable beer keg hangi, I knew it was something that the world needed right now… like world peace. It just happened that Stan knew someone with a spare 50-litre keg. These kegs are not all that readily available but can be, on occasion, obtainable from breweries. Maybe your “local” could be prevailed on to sell you an old keg. We made inquiries and found one bigger than Stan’s prototype. But we suspected it would be useful enough to hold the larger steamer baskets available from the local Asian supermarket. We duly purchased four baskets in hope.
In essence, the beer-barrel “hangi” is a type of steam pressure cooker. To make it, the steps were essentially to cut the barrel in half, create a snug fit for the top, create the legs and construction on the bottom to accommodate a ring burner, and ensure a small, safety steam-release in the centre of the lid using the beer pressure valve. For cooking, the apparatus is heated with a ring burner like those used for woks or camping stoves. For this job, builder Stan coopted his mate Colin Taylor, a welder, which does make things very easy when you need to have a bit done.
Snug fit
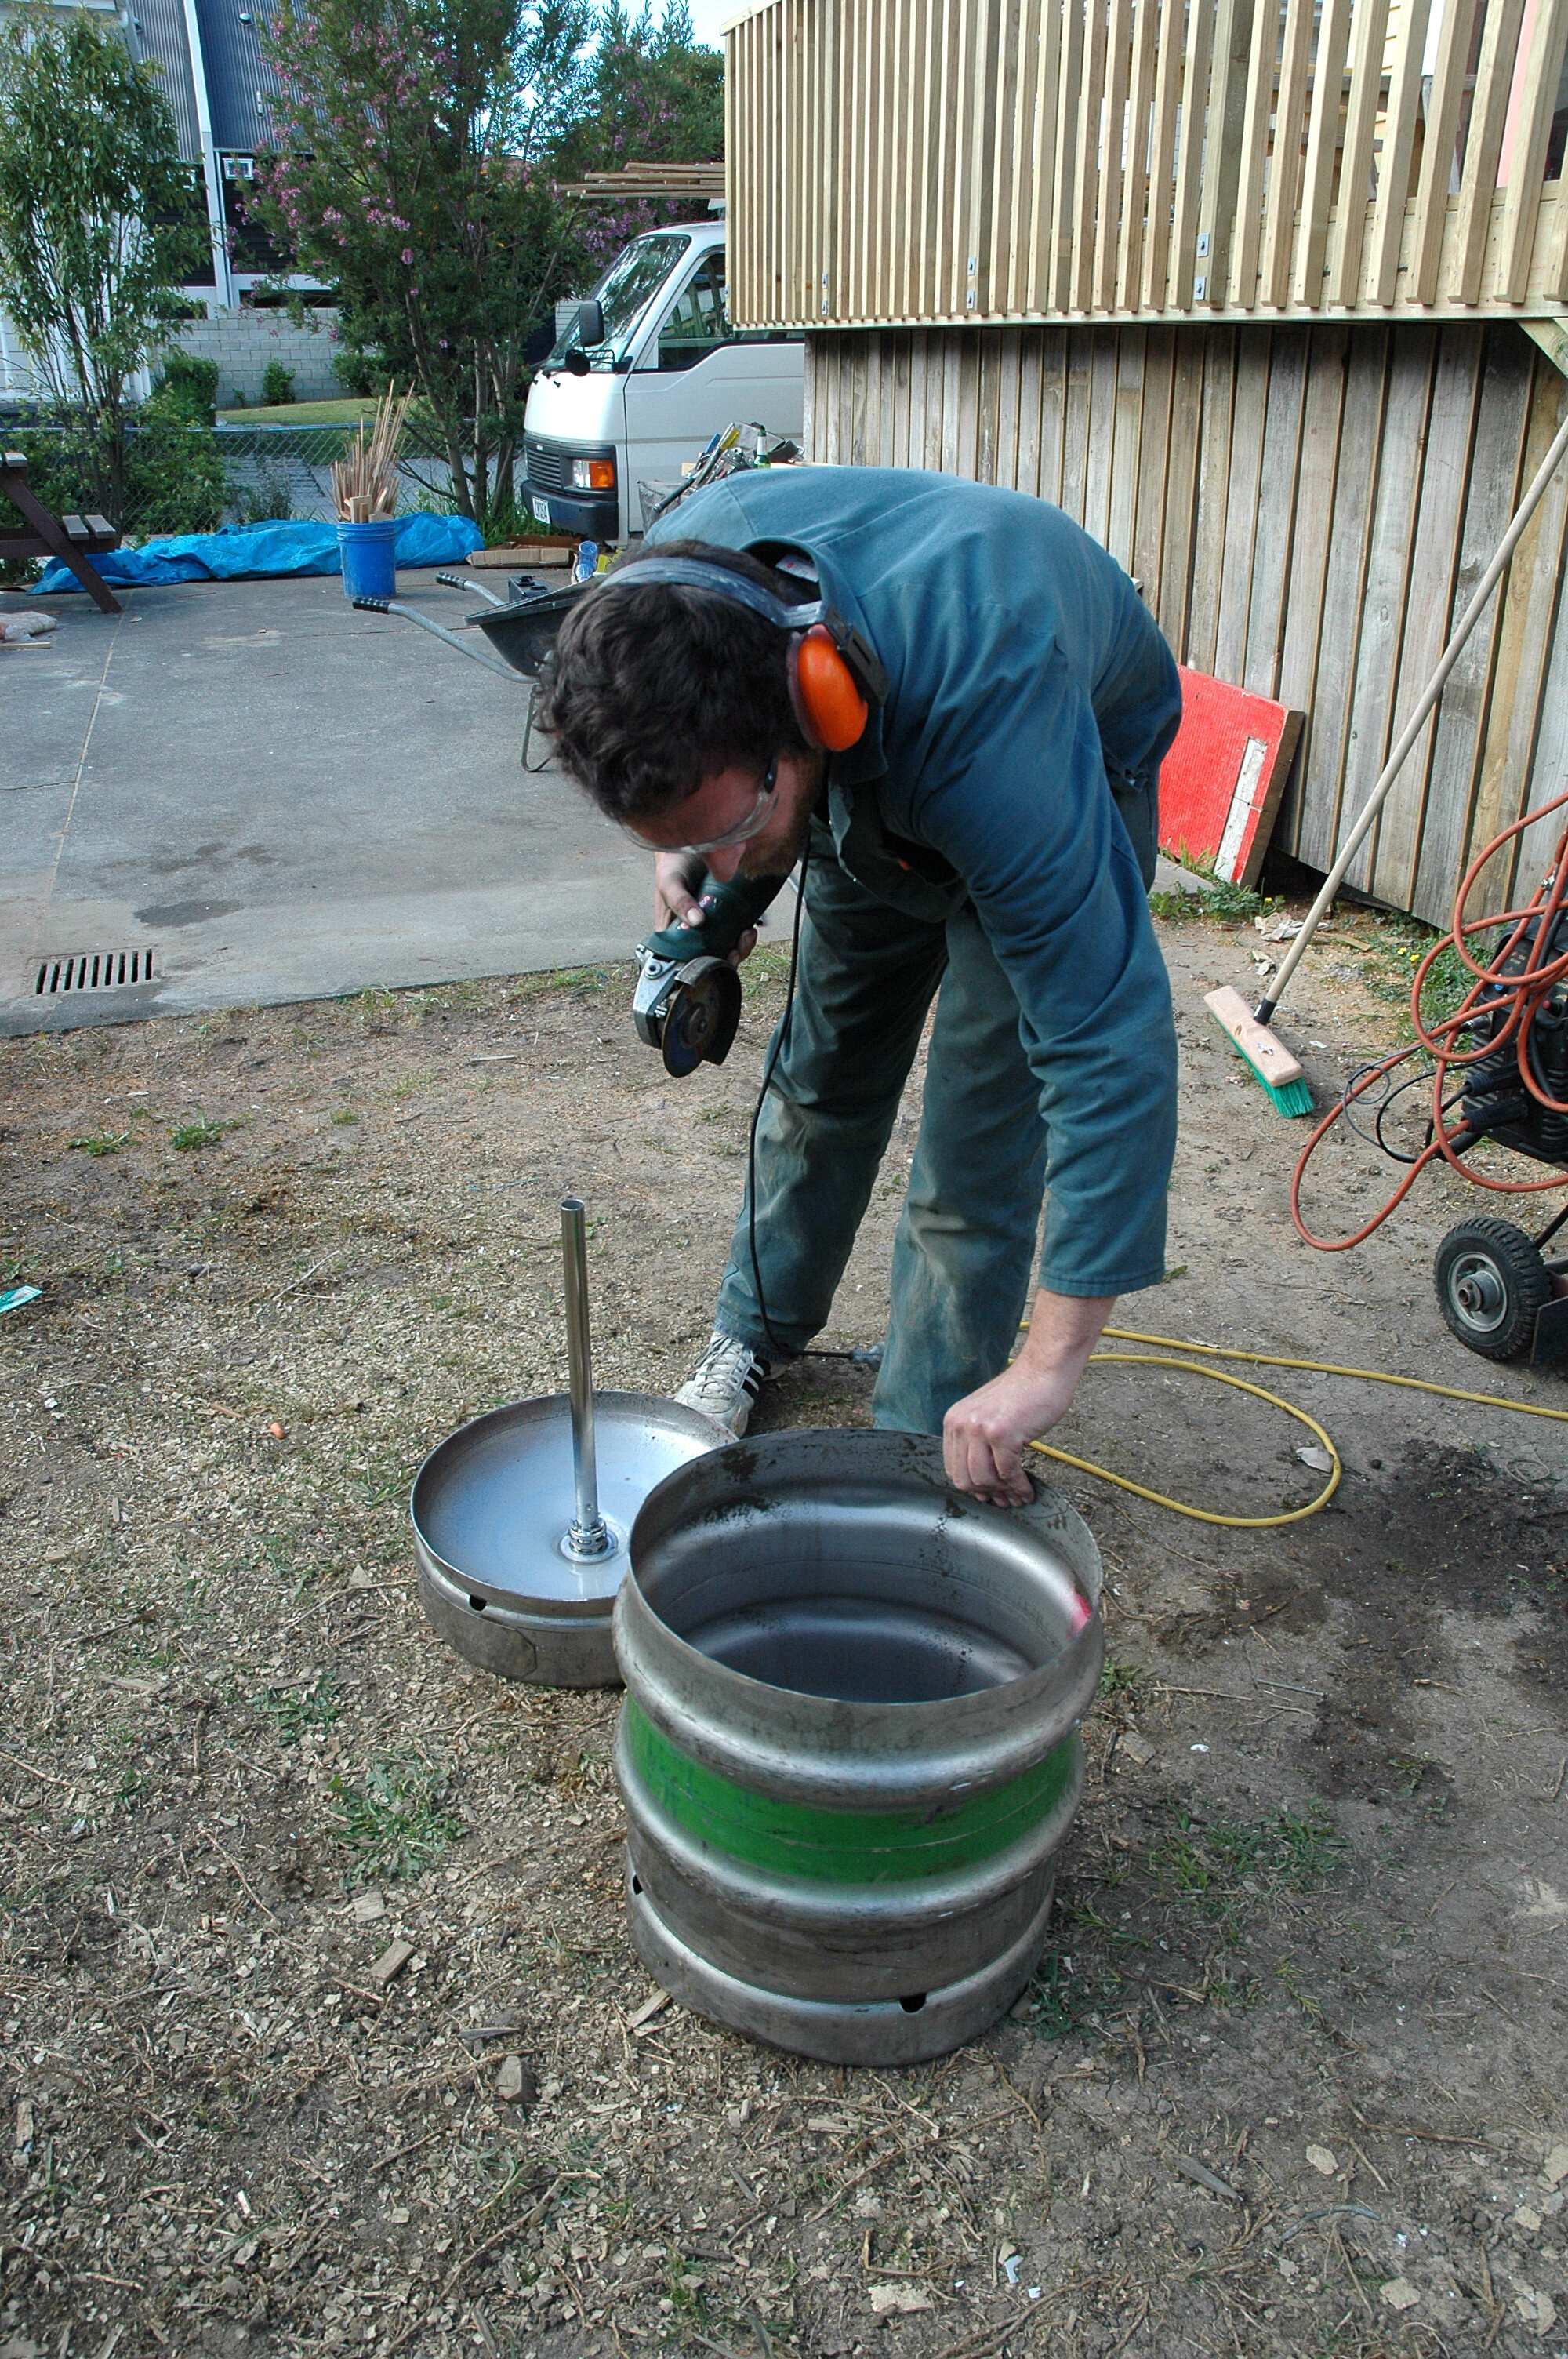
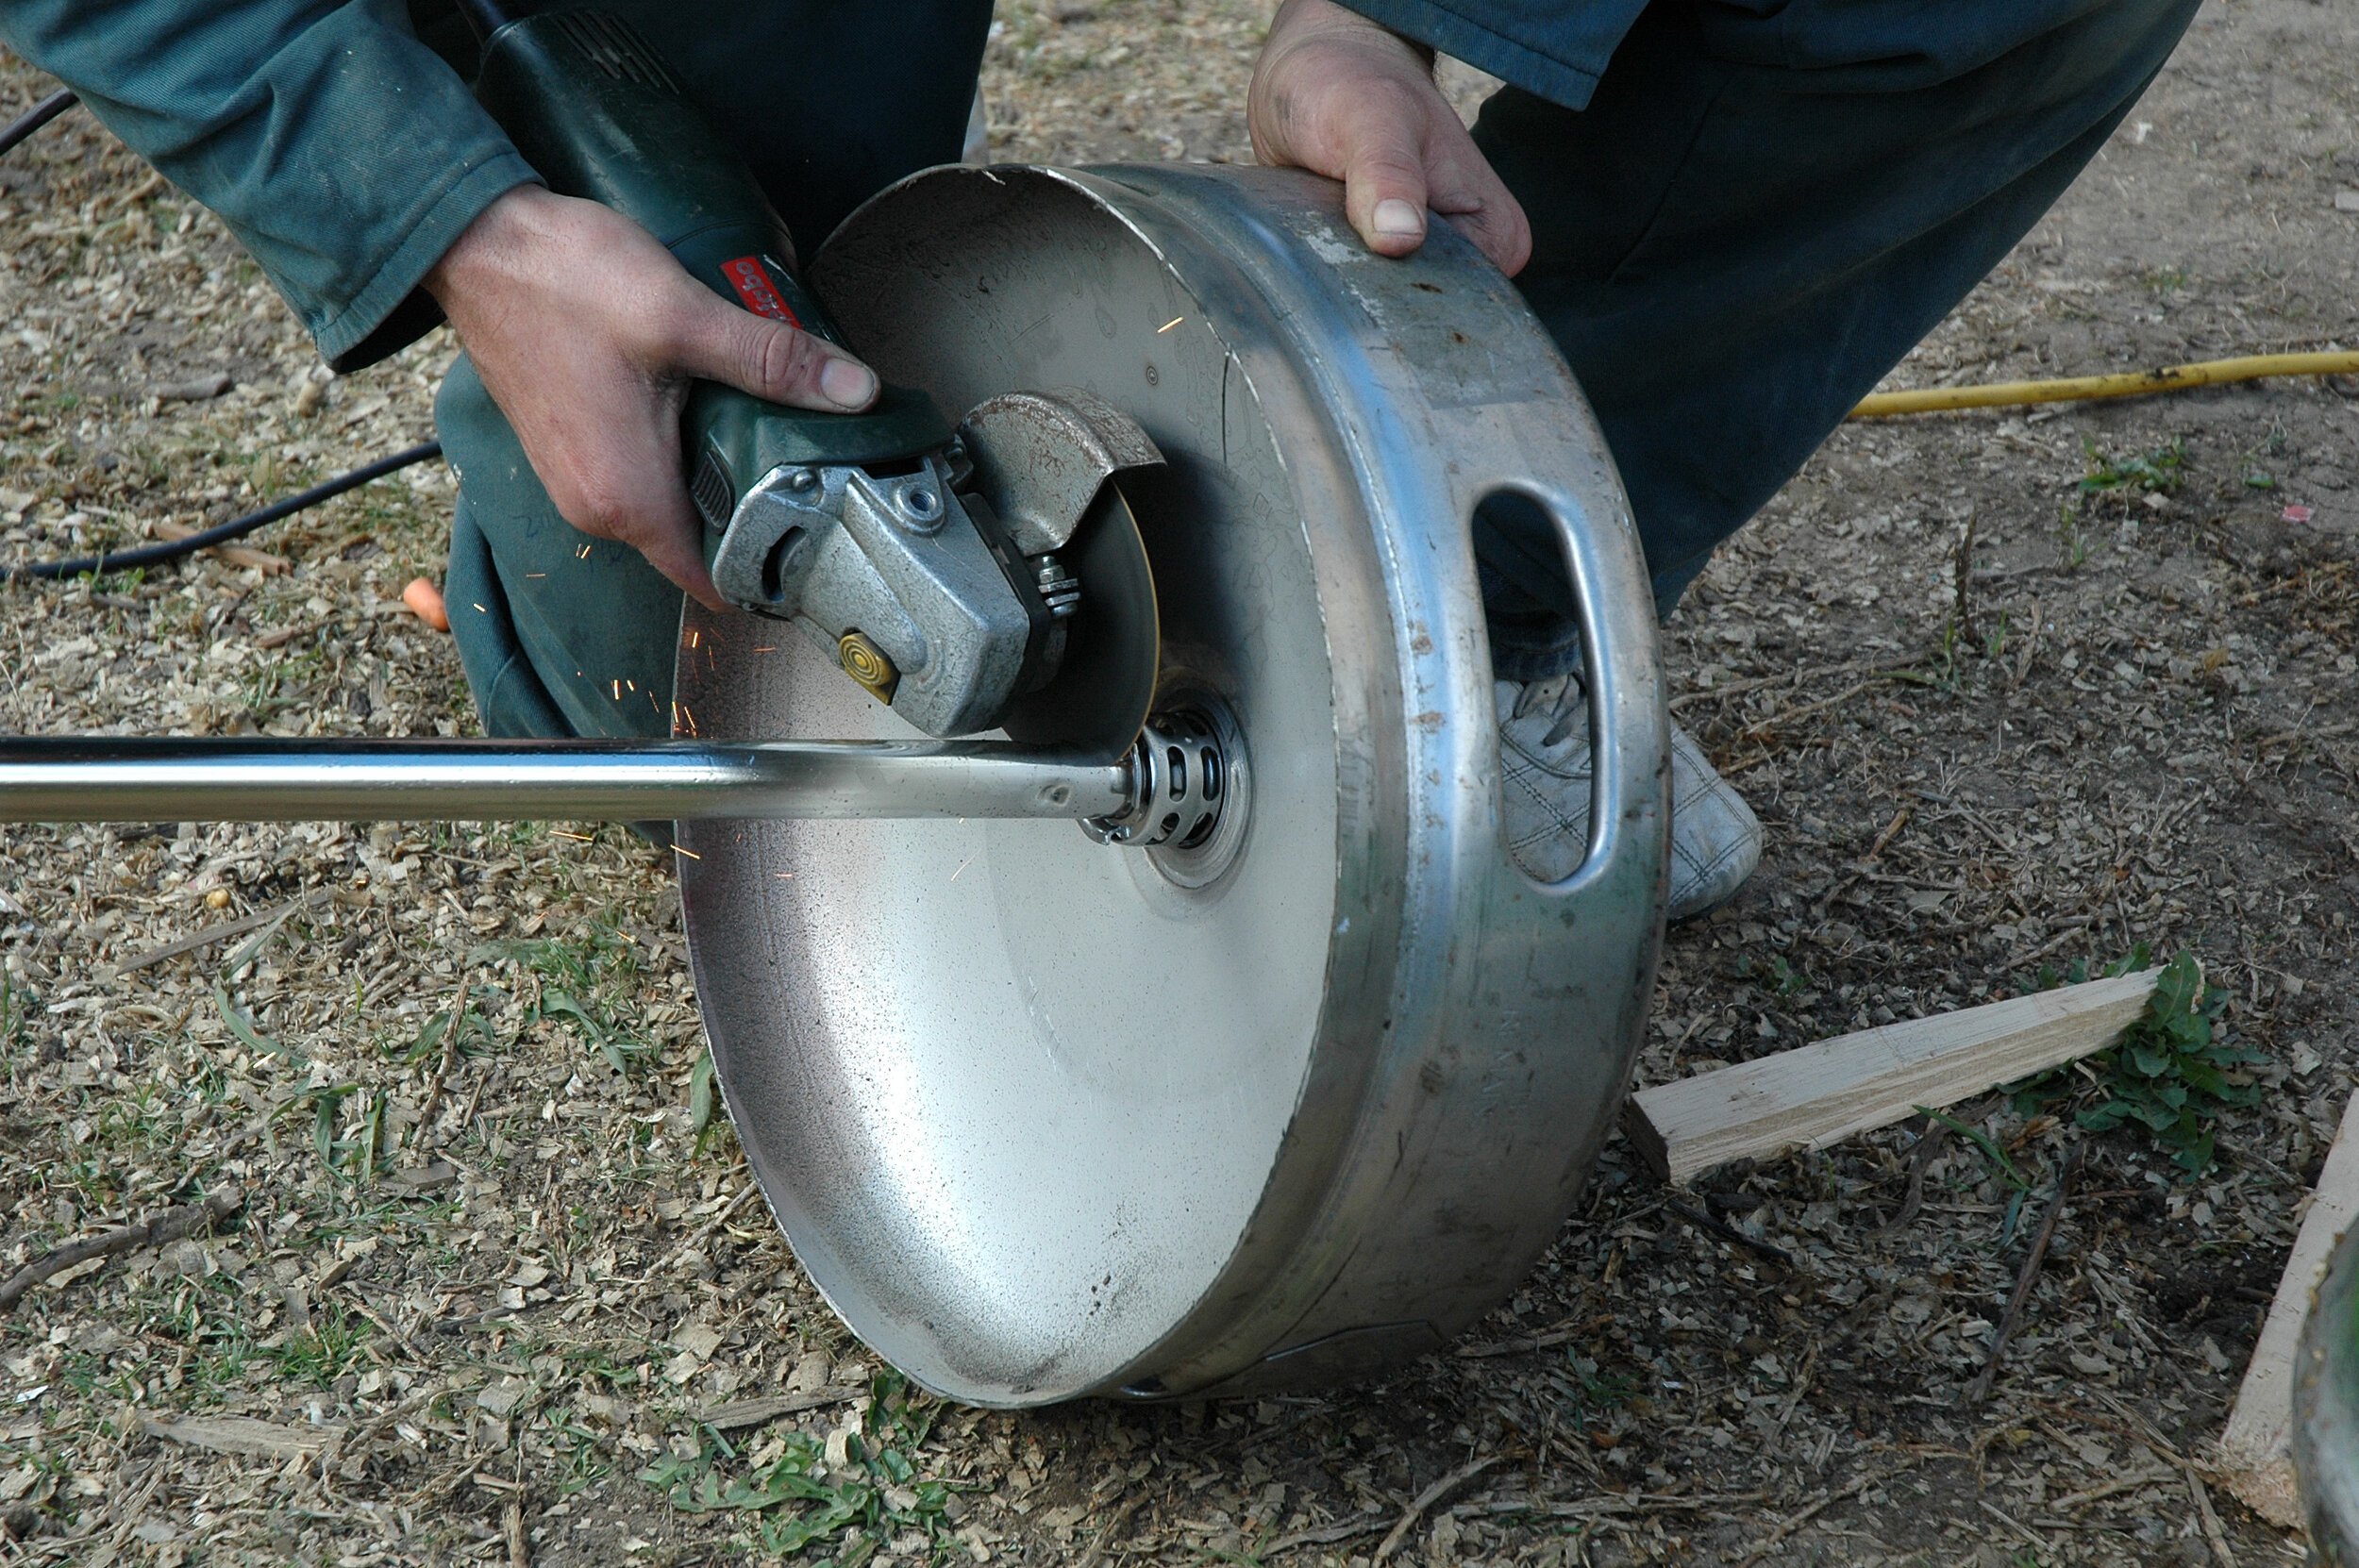
First, we checked that the keg was empty; you don’t really want to cut into one that is under pressure. Stan measured the depth of the keg lip and, allowing for some overlap, marked the line all round where we should cut the keg. Using a thin, stainless steel cutting disc, Colin cut along the dotted line to separate the top. Once the keg was open, it revealed the pressure tube. This tube is long enough so that, when cut suitably close to the valve, it provides the legs for the cooker. Don’t cut into the pressure valve itself; it still has its uses.
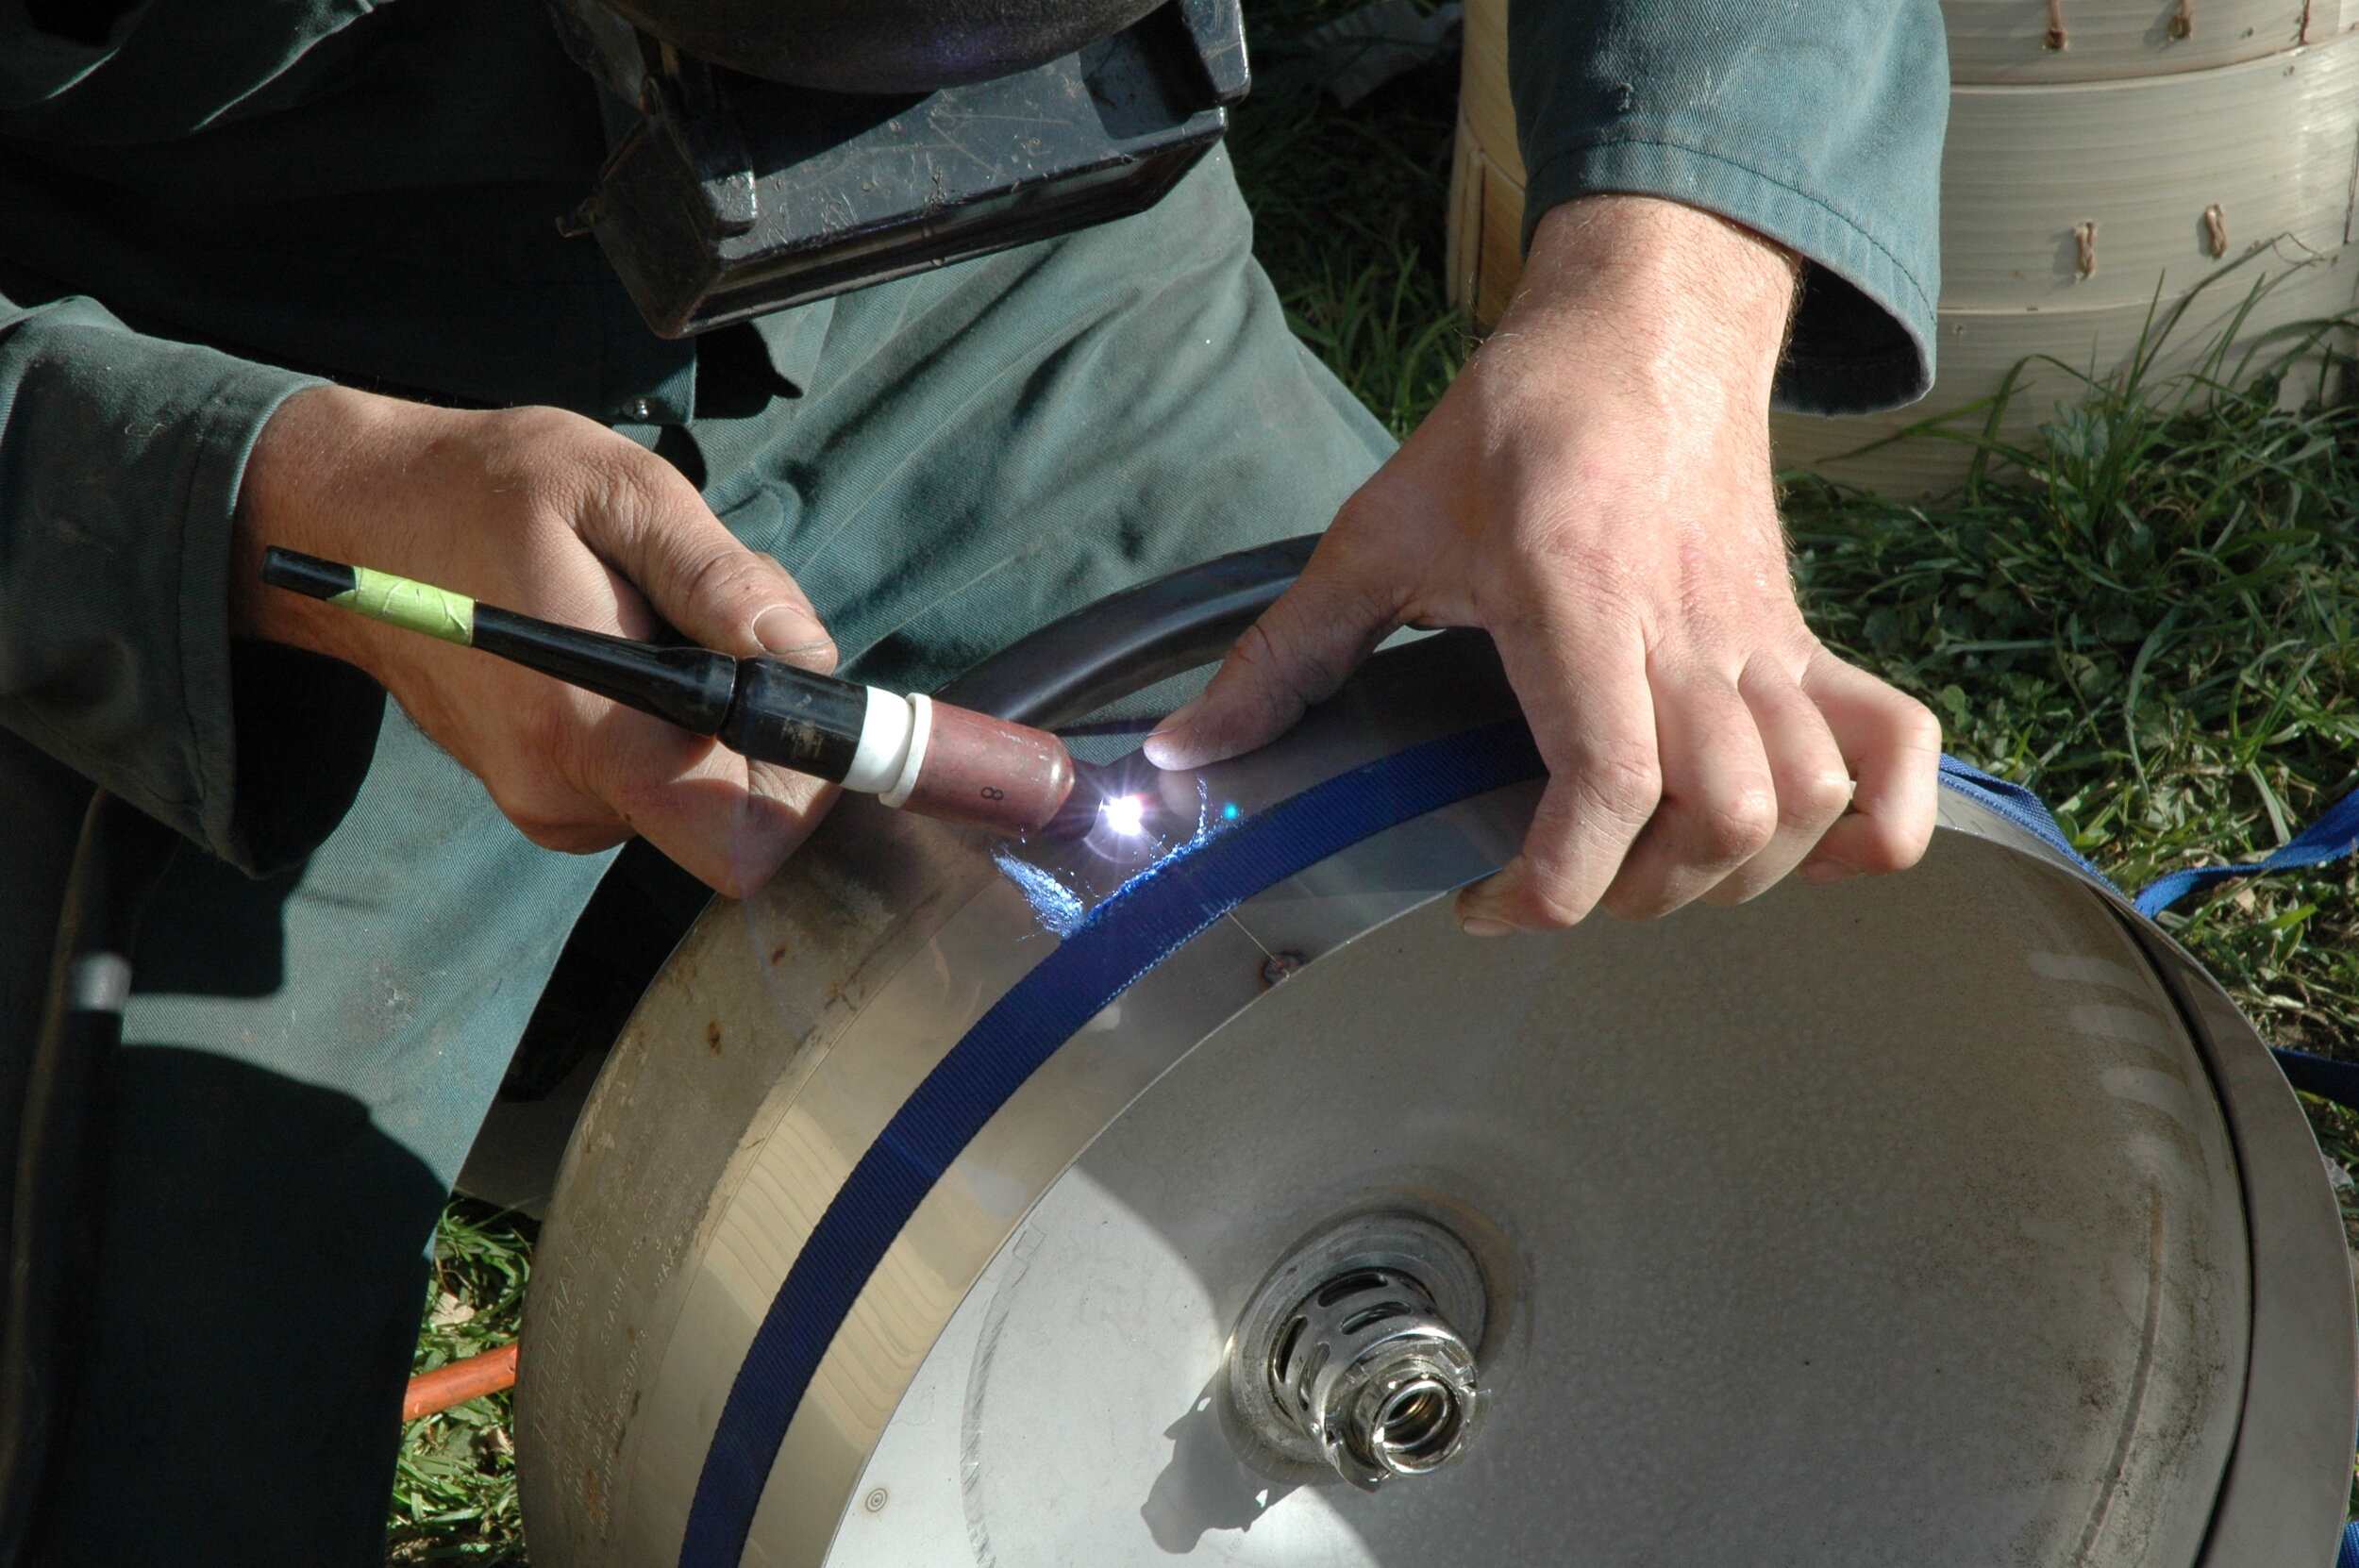
The top piece of the cooker has a skirt welded to it that is the circumference of the larger, bottom section, so it fits over this main section snugly. To measure this skirt, Colin clamped the new piece of stainless steel around the top with a ratchet tie-down and marked where the skirt would join.
After cutting the stainless at the join, he clamped the properly sized skirt section to the top, tack-welded this piece together at the join, and then tacked it into place on the top section. The top was tested to ensure it fitted snugly over the base. If the size of the base circumference makes the fit too tight, the base can be peened a bit smaller.
Cutting the keg
Legs
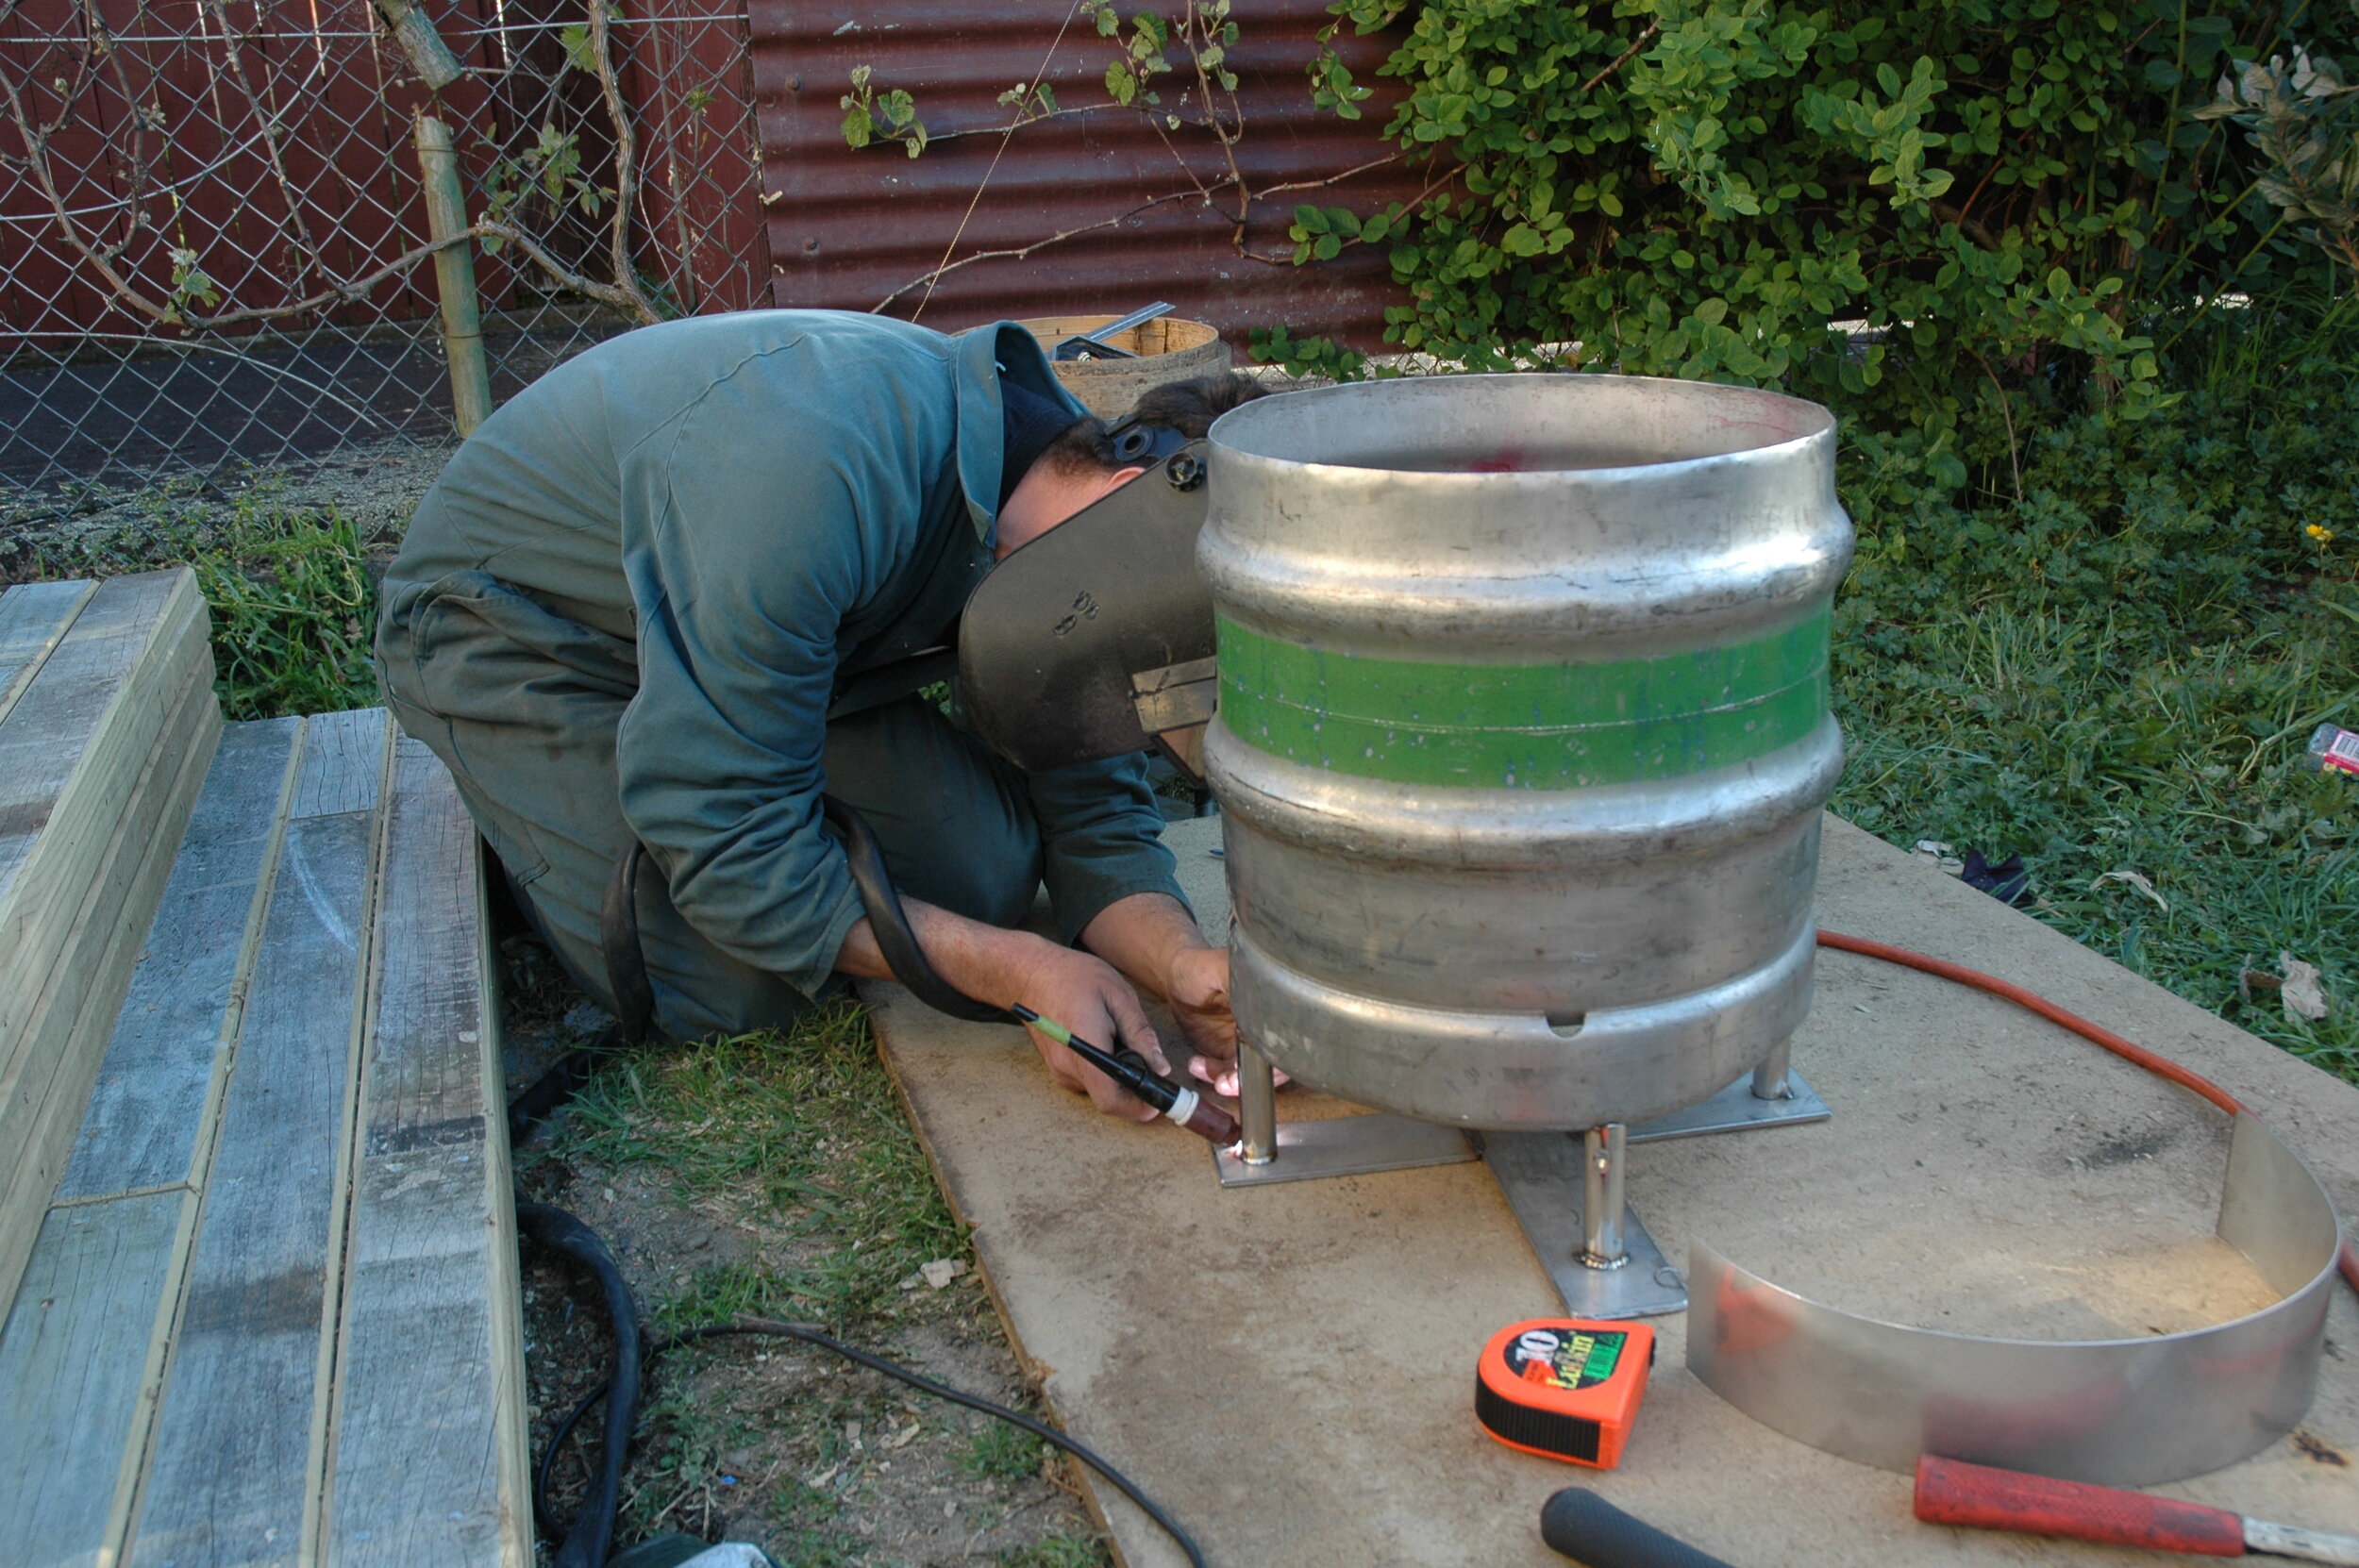
Once the top and base fitted, we cut the legs to size. In this case, we chose a length of about 100mm, giving enough height to fit the available gas ring under the keg.
Colin scalloped the ends of the tube legs with the grinder. This enabled them to fit over the rounded rim of the keg base, and then he tacked them into position. For stability, we made a flat plate base for the legs. We cut three pieces of 6mm x 75mm width plate and joined the two shorter pieces in an X-shape to either side of a longer middle piece.
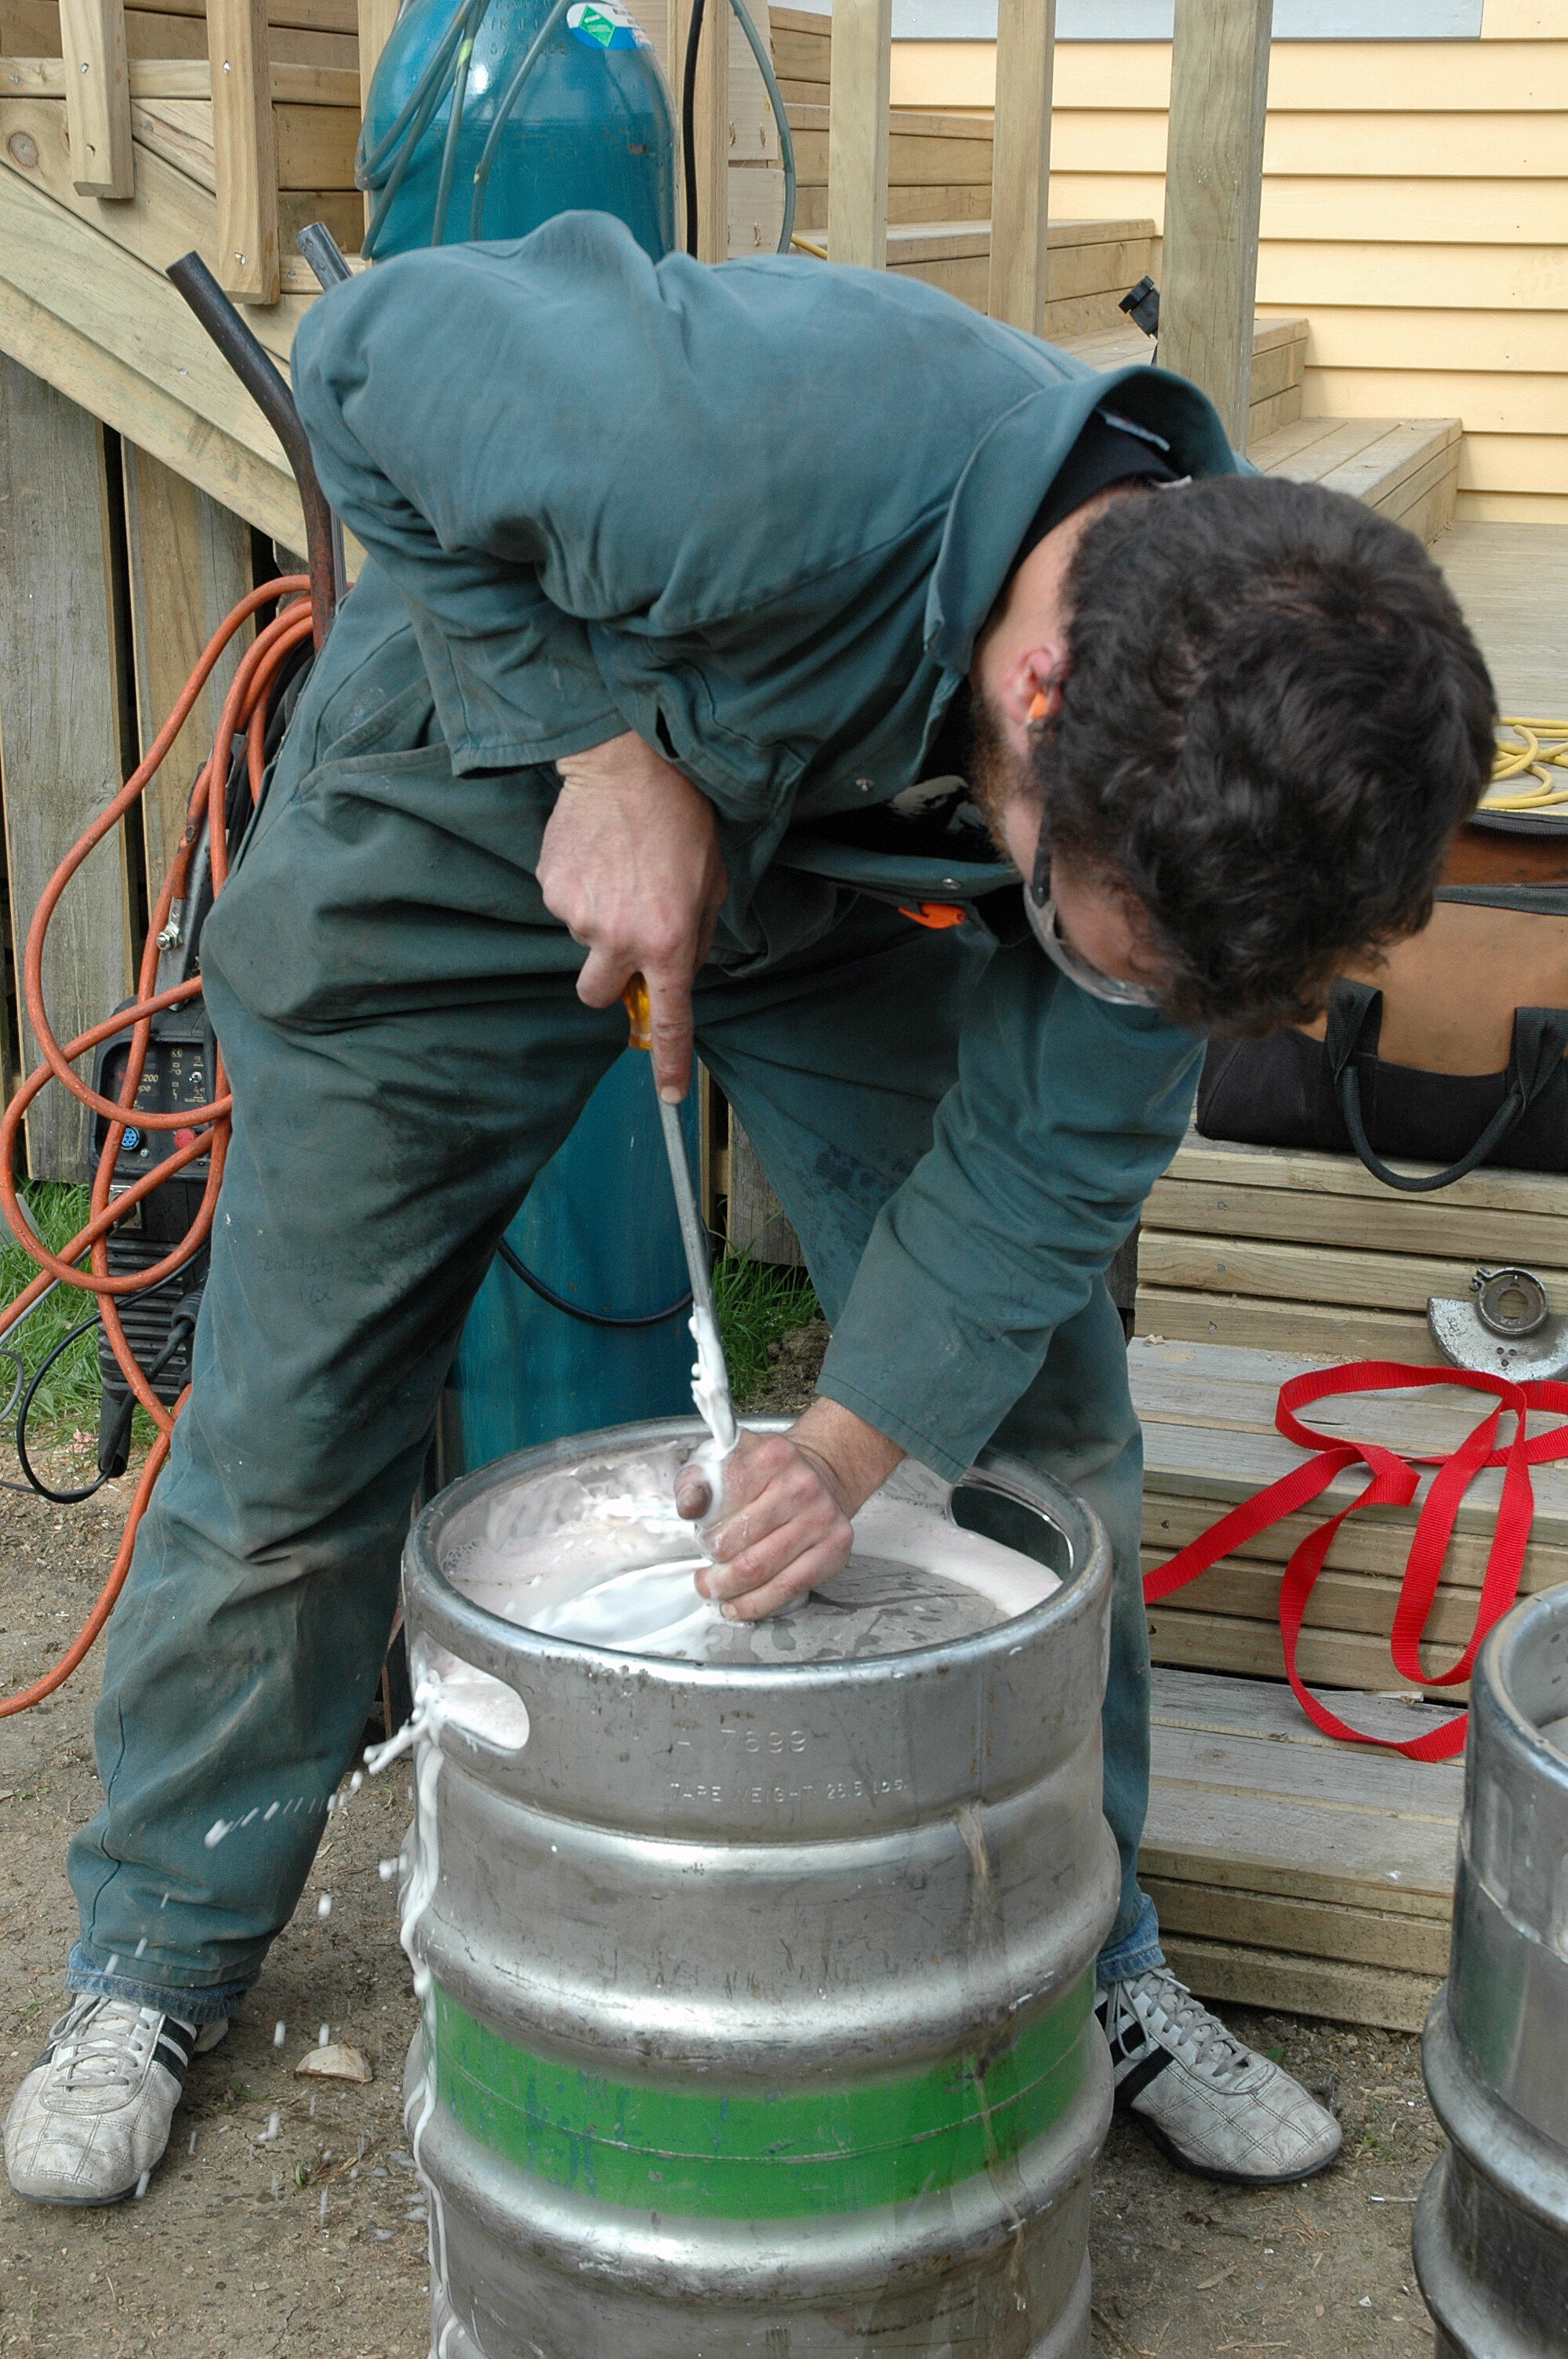
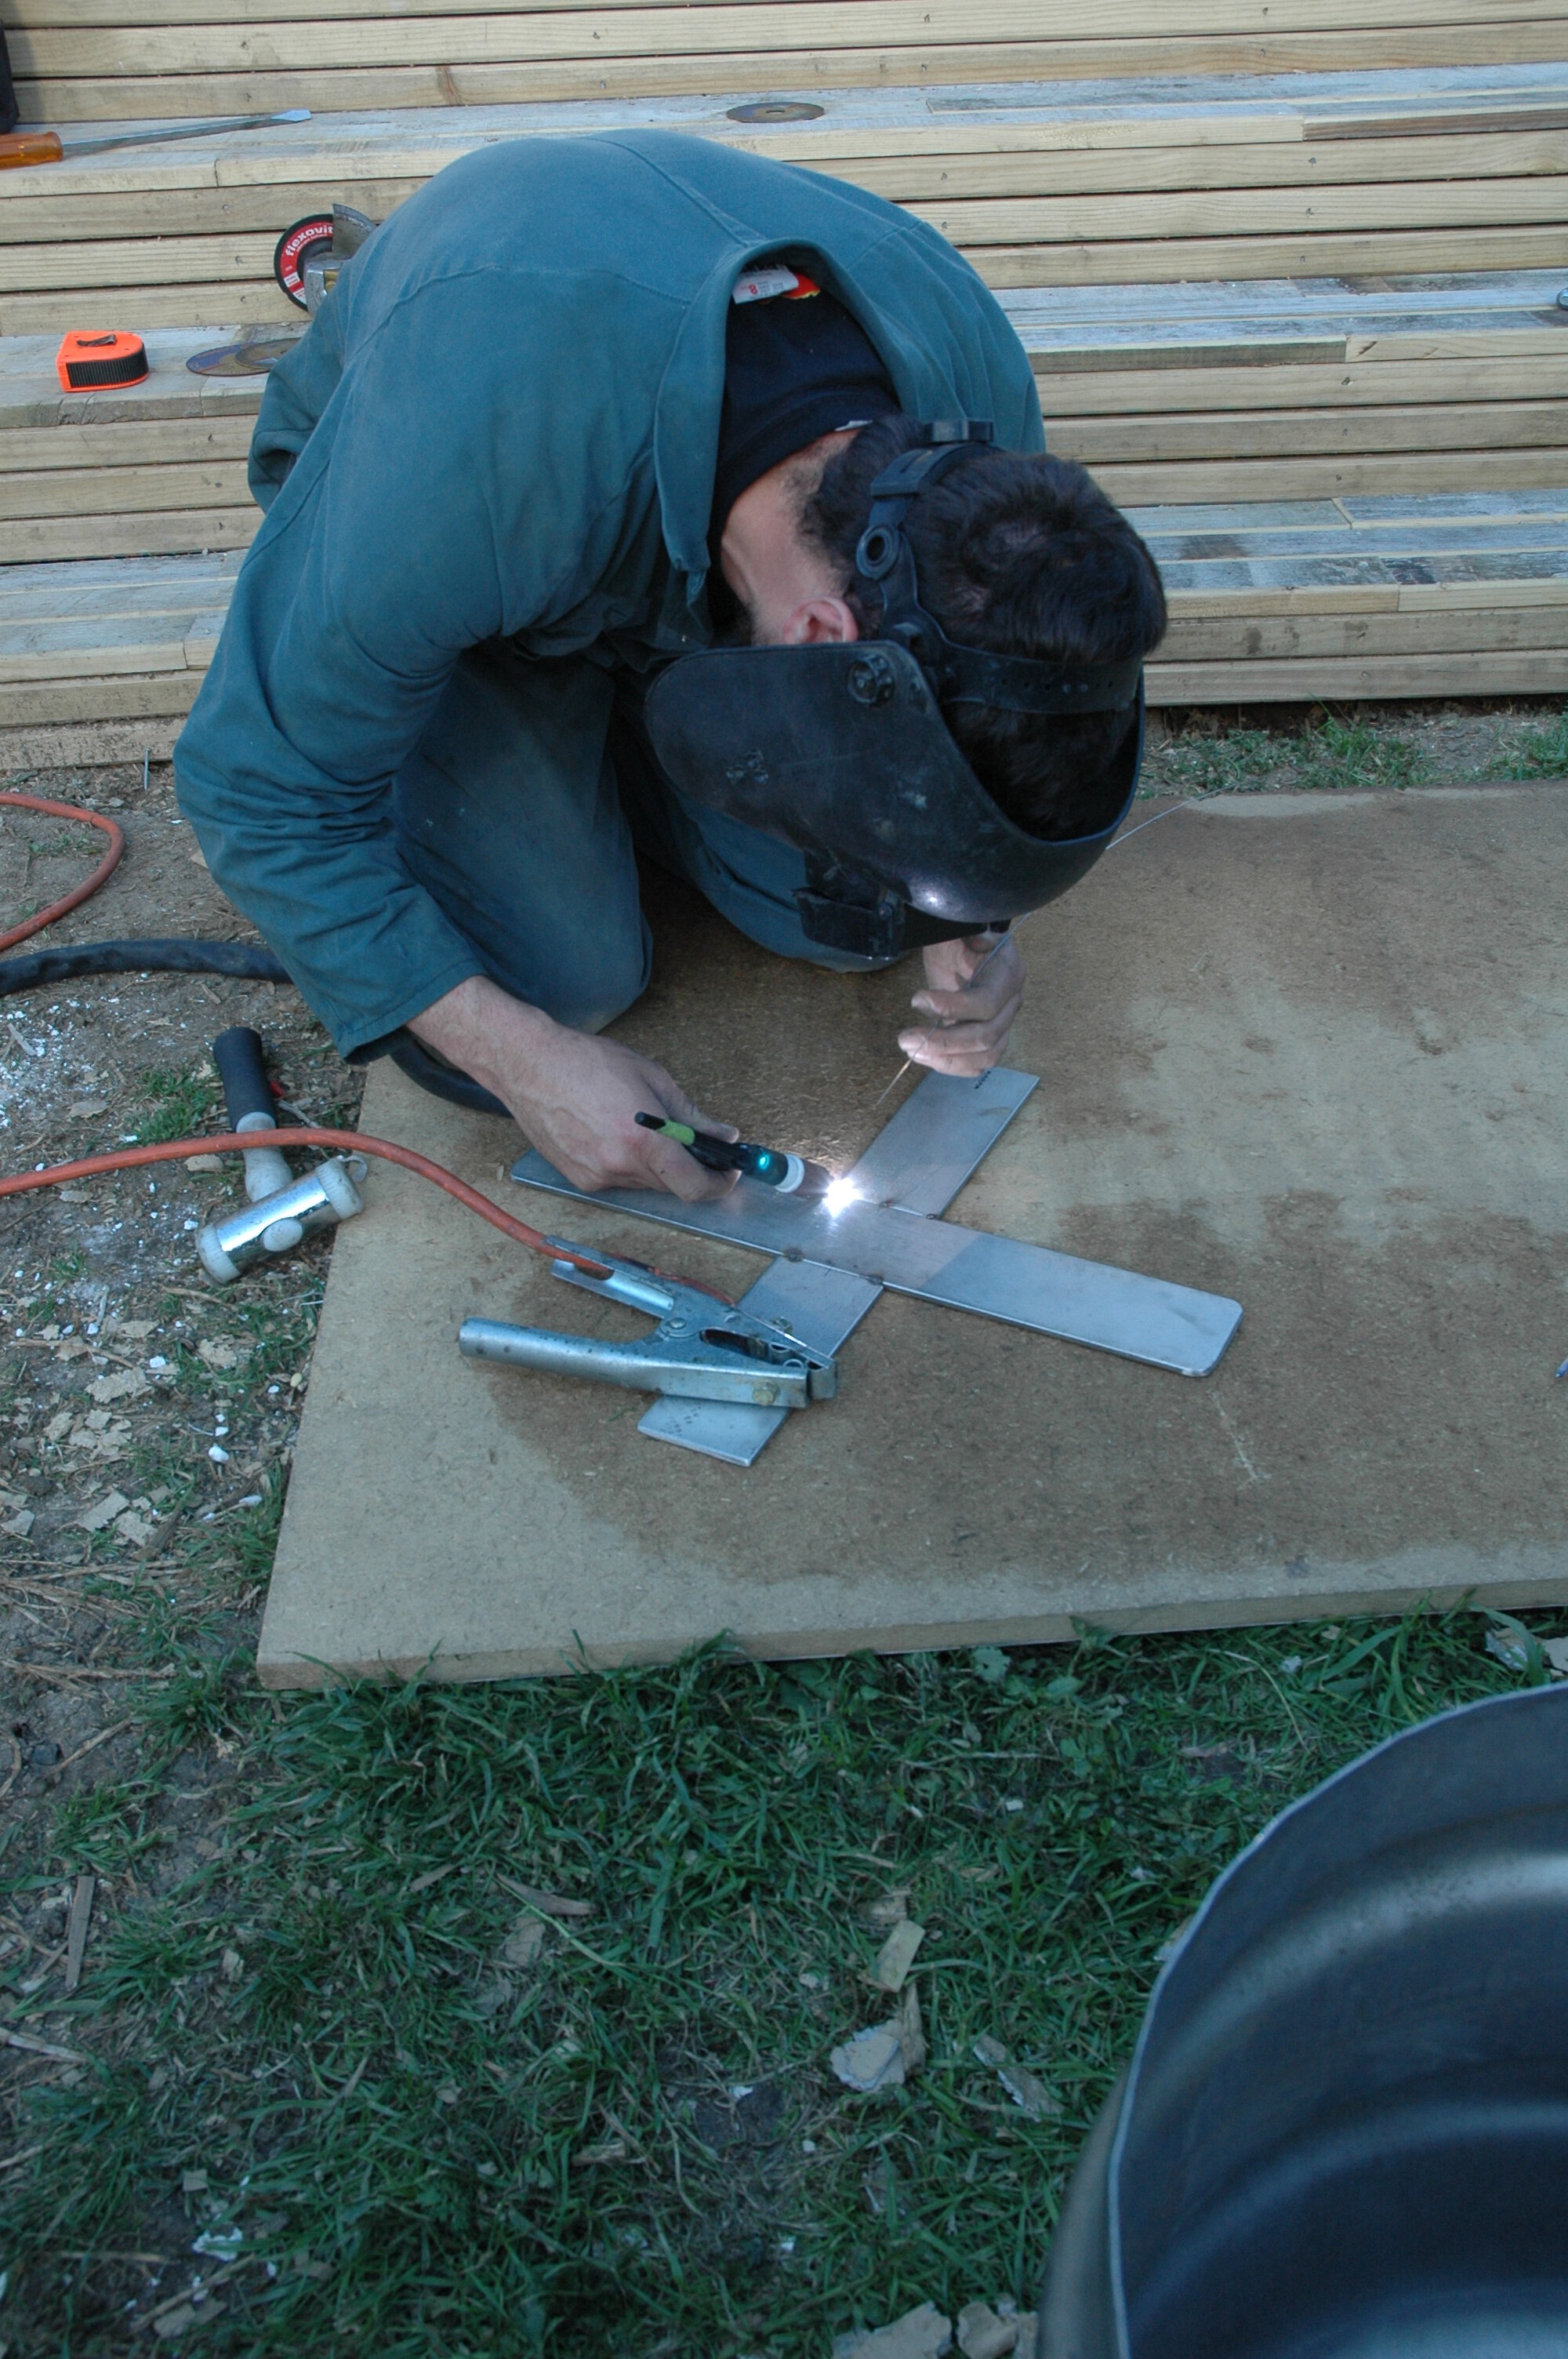
Colin welded legs to three of the endpoints of this X-shape. The base allows the loaded keg to sit flat and stable; it also provides a base and foot purchase to hold the unit while the top is removed after cooking. Next, Colin removed the spring that held the ball valve in place. He drilled a 5mm hole through the centre of the valve ball, and then replaced it with the hole perpendicular.
The hole in the ball allows steam to be released at a controlled rate. When doing this, tack-weld the spring in if necessary. A strip of stainless was leftover from the piece cut for the skirt. It turned out to be just the right length for wind protection when attached to the lower legs.
Welding the valve spring in place
Cooking
Arrange food in the baskets. These baskets do hold a fair amount, but don’t stack them too tightly.
Add about two litres of water inside the base of the portable hangi and stack the baskets on top of each other to the upper rim of the keg base. Place the lid on and light the burner under the keg.
Do not touch the hot keg/hangi and keep children clear.
For vegetables, leave the hangi steaming for around 25-30 minutes, enough time we found to steam potatoes, kumara, pumpkin, and cauliflower. Keep an eye on the steam coming out from the top. If it stops, turn off the heat and check that it hasn’t run dry. Steam may escape from the edge of the lid skirt if it is difficult to make a perfect fit, but when we ran the hangi that seemed no problem. It will take a good strong lift to get the lid off.
Even though the keg itself gets hot, the keg rim handles should be insulated enough to hold comfortably. It may pay to make up some hooks with a handle to lift the baskets out of the steamer, too.
Attaching the legs