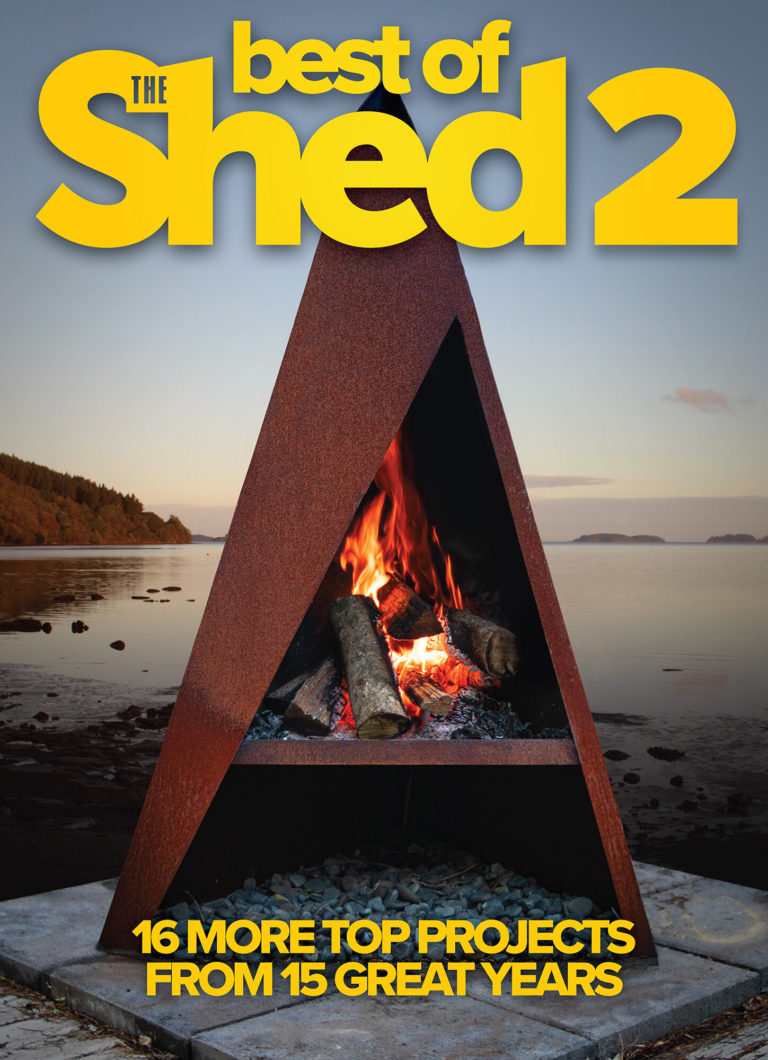
Truck brake drums take on a new life as a brazier
By Bob Hulme
Fuel alert
It is important to be clear that this is essentially a wood burner and is not intended for fuels such as coal or carbonettes. They burn much hotter and, while cast iron can handle these temperatures, mild steel tends to soften and warp so the grate and the centre rolled strip would not fare well with fuel other than wood.
Making a brazier is one of those things that I am sure every sheddie has at the back of their minds to create one day. It’s just that, as we know, “one day” takes its time arriving.
I have to admit that I am no exception to that rule. Even when the component parts presented themselves to me it took a while before I found the time to put into the project. Six truck brake drums that had outlived their useful life were the starting point, donated by the owner of a fleet who only asked that one of the braziers be made for him. Another was to be made for my younger son whose acquaintance the truck fleet owner is and that left one for me. So you can see it’s not been just a project making one brazier, but has been an undertaking bordering on a manufacturing run. That’s one reason why it took me some months to find “one day”. Another is that I have a tendency to procrastinate.
The parts: two brake drums and a disc brake with a rolled mild steel collar
The grate for the fire built sturdily for long life
Brake drums
The main body of these braziers is made from two truck brake drums with their open ends together at the middle.
I had a piece of flat steel rolled to fit snuggly over the diameter where they meet. Conveniently there is a step on the outside of the drums so the rolled strip does not slip down. To hold the strip permanently I welded it to one side with a few runs, not a full weld. This avoids cracking. Welding the strip to just one side means that the brazier can be transported in two halves, then slipped together on site. This is absolutely vital as even one half is amazingly heavy.
The drawback to being so heavy is obviously the difficulty in moving it around. The advantage is that when it’s being used the mass of metal will absorb a lot of heat and hold it for quite some time. These truck components are made from cast iron which is nowhere near as easy as mild steel to weld. It tends to crack right down the middle of the weld. To avoid this, use arc welding rods specifically for the purpose. They are typically highnickel rods and are a lot more expensive than rods for mild steel, but will do the job where others would be a waste of time.
If your auto-welding helmet has an adjustment for darkness, then wind it up to a very dark setting. The nickel rods have a much brighter arc. Often components made from cast iron are preheated before welding and slowly cooled after to minimise cracking, but for a project such as this, it is not necessary to go to those lengths.
I have seen arc rods that are designed for welding stainless steel used on cast iron, but I have not had complete success with those. The rods specifically designed for cast iron and mild steel to cast iron can usually be bought from a welding supplies company individually rather than a full packet lot. For a project like this you will probably need around 12 rods as well as some general-purpose mild steel rods for the grating, chimney and top plate.
Attaching the collar
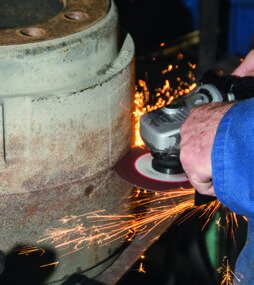
Bob machines the disc surface so that it sits flat on the ground.
Get going
Here is the sequence for making the brazier.
Get hold of your brake drums from a truck wrecker or scrap metal merchant or tame truck fleet operator. Look for something to form the base or foot of the brazier too. I used truck disc brake rotors and my son found part of an old pot belly stove. Let your imagination run wild.
Measure the diameter on the outside of the open end of the drums and the width. Calculate the circumference length and subtract how wide an opening you want (or run a tape around the drum).
The purpose of the opening is to make lighting the fire easier and it is good to see the flames. Get your local boiler making company or blacksmith to roll a strip of steel (about 6 mm thickness) to the right diameter and width. This should not cost much. Measure the diameter across the other end of the drum which will be on top and get a disc flame cut (profile cutting is another term) from 16 mm thick steel plate to be the top plate. This thickness should be enough to ensure it stays flat and does not distort with the heat.
Fitting the hinge pin to the lid
Welding the hinge pin in place
The stove plate complete with the handle designed to minimise heat
Grating
Inside the bottom drum you will see a step. This is what the grating can rest on.
Measure its diameter and make a disc that size from plywood, MDF or even thick cardboard. Try it in the brake drum to make sure it drops in and sits on the ledge. This will become your welding jig to make the grate. I used 12 mm diameter steel rod for this spaced at 25 mm centres.
This material could be loosely described as repurposed as I bought it for a job which did not happen. I designed a grating which locked in place under a standard storm-water manhole cover in conjunction with one of my customers, a company that specialises in drainage products.
The purpose is to prevent small children from finding their way into the drains if the manhole cover is lifted off by floodwaters. We made a prototype to prove its functionality and were told that orders would be likely, so ordered in the steel. However, the order never came and we were told that local councils did not want to go ahead. Shame really as I am sure it would have been money well spent to save lives. But I digress. Draw lines on the plywood disc as guides for where to put the steel grating rods for welding together. The jig will also serve as a measure for how long to cut each rod. MIG welding makes a tidy job of this, but stick-arc welding will do the job too.
Cutting the chimney pieces
High-nickel rods
Weld the rolled ring onto the bottom truck drum with about five runs of weld with the special high-nickel rods. Make each run about 30 mm long. This will keep it on the bottom drum and will make assembly easier.
Welding this ring on before the base or foot is easier because you will be able to rotate the drum around for an easy welding position. If you have found a truck disc-brake rotor, it very likely will have a step worn into its face. This means that it will not sit flat onto the foundation. I am in the fortunate position of having a lathe large enough to machine the face flat, but you could achieve a similar result by attacking the rotor with a disc grinder and grinding back the unworn area to just under flush with the worn face.
These brake rotors are usually the vented type, meaning that there are holes between the two sides of the disc to allow air to move through to provide cooling. These same holes will allow air up into your fire, so there’s no need to pack it up off the foundation to help the fire draw, although a gap between stone or concrete pads could be an easy way of clearing out ash. Centralise the rotor on the bottom drum and weld them together, again using the special nickel-rich arc rods. As before, there is no need to weld completely. Just a series of short runs will do the job. That is the finish of the lower half.
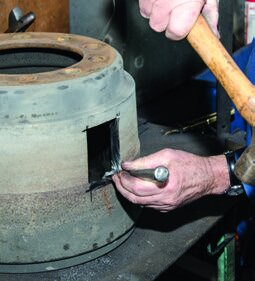
Cutting the chimney opening with an angle grinder. Take care not to get the blade jammed.
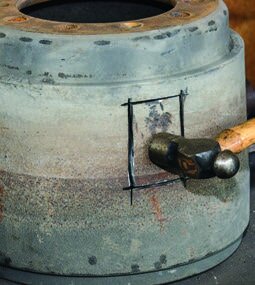
Below: Bashing through the hole is the fastest way to remove the metal and then cleaning up the opening with a cold chisel.
Tricky part
For the top half (top brake drum) the tricky bit is cutting a hole in the side for the chimney. I have used a 65 mm square tube with a 3 mm wall thickness. Why? Well I had some lying around and a rectangular hole is easier to cut into the side of a brake drum than a round one.
Cutting the chimney into the side means that we are able to have a hot plate on top for a pot or as a barbecue plate. Adding another capability makes the brazier more fun to use and more versatile. These iron brake drums have really thick sides even though they are worn out. Safety specifications ensure that they are nowhere near thin enough to break in service, but this means that it is a mission to cut a hole in them.
The size of the hole is the same as the square tube side to side, but top to bottom must be more due to the angle of the tube coming into the side of the brake drum. I chose a 45-degree angle and calculated this dimension as being 92 mm using trigonometry. You could also establish this by tilting a piece of the tube and measuring the distance. Mark the rectangular hole with engineer’s chalk, then use a cut-off wheel in an angle grinder to make cuts into the side of the brake drum following the chalk lines. The chalk lines will remain easy to see because they are not as affected by heat from the cutting as lines made using a felt marker or similar and, being white, they stand out better.
Now obviously to cut the rectangle completely it would be necessary to overshoot the corners by quite a lot due to the curved cut from the cut-off blade. This would look a bit rough. So, I elected to overshoot the corners by a maximum of around 10 mm. This meant that the corners were not cut through, but I was able to knock the centrepiece out with a hammer and trim any remaining pieces with a chisel. Cast iron is quite brittle so it did not take too many blows before I had the hole I needed.
The chimney angle. The gap is intentional so the chimney can be adjusted after tacking
Cleaning up the weld
Welding the chimney piece
Welding the chimney to the brazier
Hot plate and chimney
To complete the top half we need a chimney and a hot plate.
The hot plate is made from the profile-cut disc mentioned above. Make a peg to be an easy fit into one of the stud holes in the brake drum. Drill the hot plate disc to line up with a stud hole and weld the peg in so that it sticks out one side of the disc and is flush with the other. This will mean the hot plate can be swung to one side so more wood can be added to the fire. A handle will also be needed to do this. I drilled a hole in the outer edge and welded a 6 mm diameter rod into it with a turned handle welded to the end of that—the theory being that not too much heat would be conducted along a thin rod and the turned handle had grooves in it to help cooling.
It’s a bit like the fins on the cylinder of an air-cooled motor. I used a part-off blade to cut these in the lathe. However, in reality, it still got too hot to touch after the fire had been going for a while, so an addition will be a wooden removable handle that slips over the top of that steel turned one.
The chimney is made from 65 mm sq RHS x approx 1.5 meters long. I cut it about 200 mm in from one end at an angle of 22 degrees so that when you turn one of the pieces around you have about a 45-degree bend. The short end will then go into the hole cut into the side of the top brake drum at 45 degrees to vertical. When welding the two pieces together, leave a small gap between them. This gives room to adjust the position after a little tack weld. If the parts are hard together they can be made to open out but will not hinge inwards. Once happy that it looks straight, fully weld the chimney joint. A “hat” on the top end of the chimney is a good idea to stop rainwater getting in. I used a scrap of angle section I had, but anything could work. Just leave plenty of space so that airflow is not restricted.
Position the chimney into the hole in the side of the brake drum and tack weld with one of those high-nickel rods. Check that the chimney is vertical by eye. Let’s face it—it does not have to be perfect and if it looks good by eye then it should look good by eye to everyone else too. Make any necessary adjustments, then fully weld it into the brake drum with those special rods. Don’t forget to tack along those overruns done when making the hole with the angle grinder.
It may be necessary to fill some gaps between the hole and the chimney. Do so with short runs and allow the weld area to cool a little between those short runs. This avoids holes happening. The weld might not look pretty, but don’t worry. Run over it with a grinding wheel in the angle grinder and it will look fine. Doing this will also help expose any flaws in the welding which may need to be welded over again.
The bottom half of the brazier awaiting the other drum with the chimney
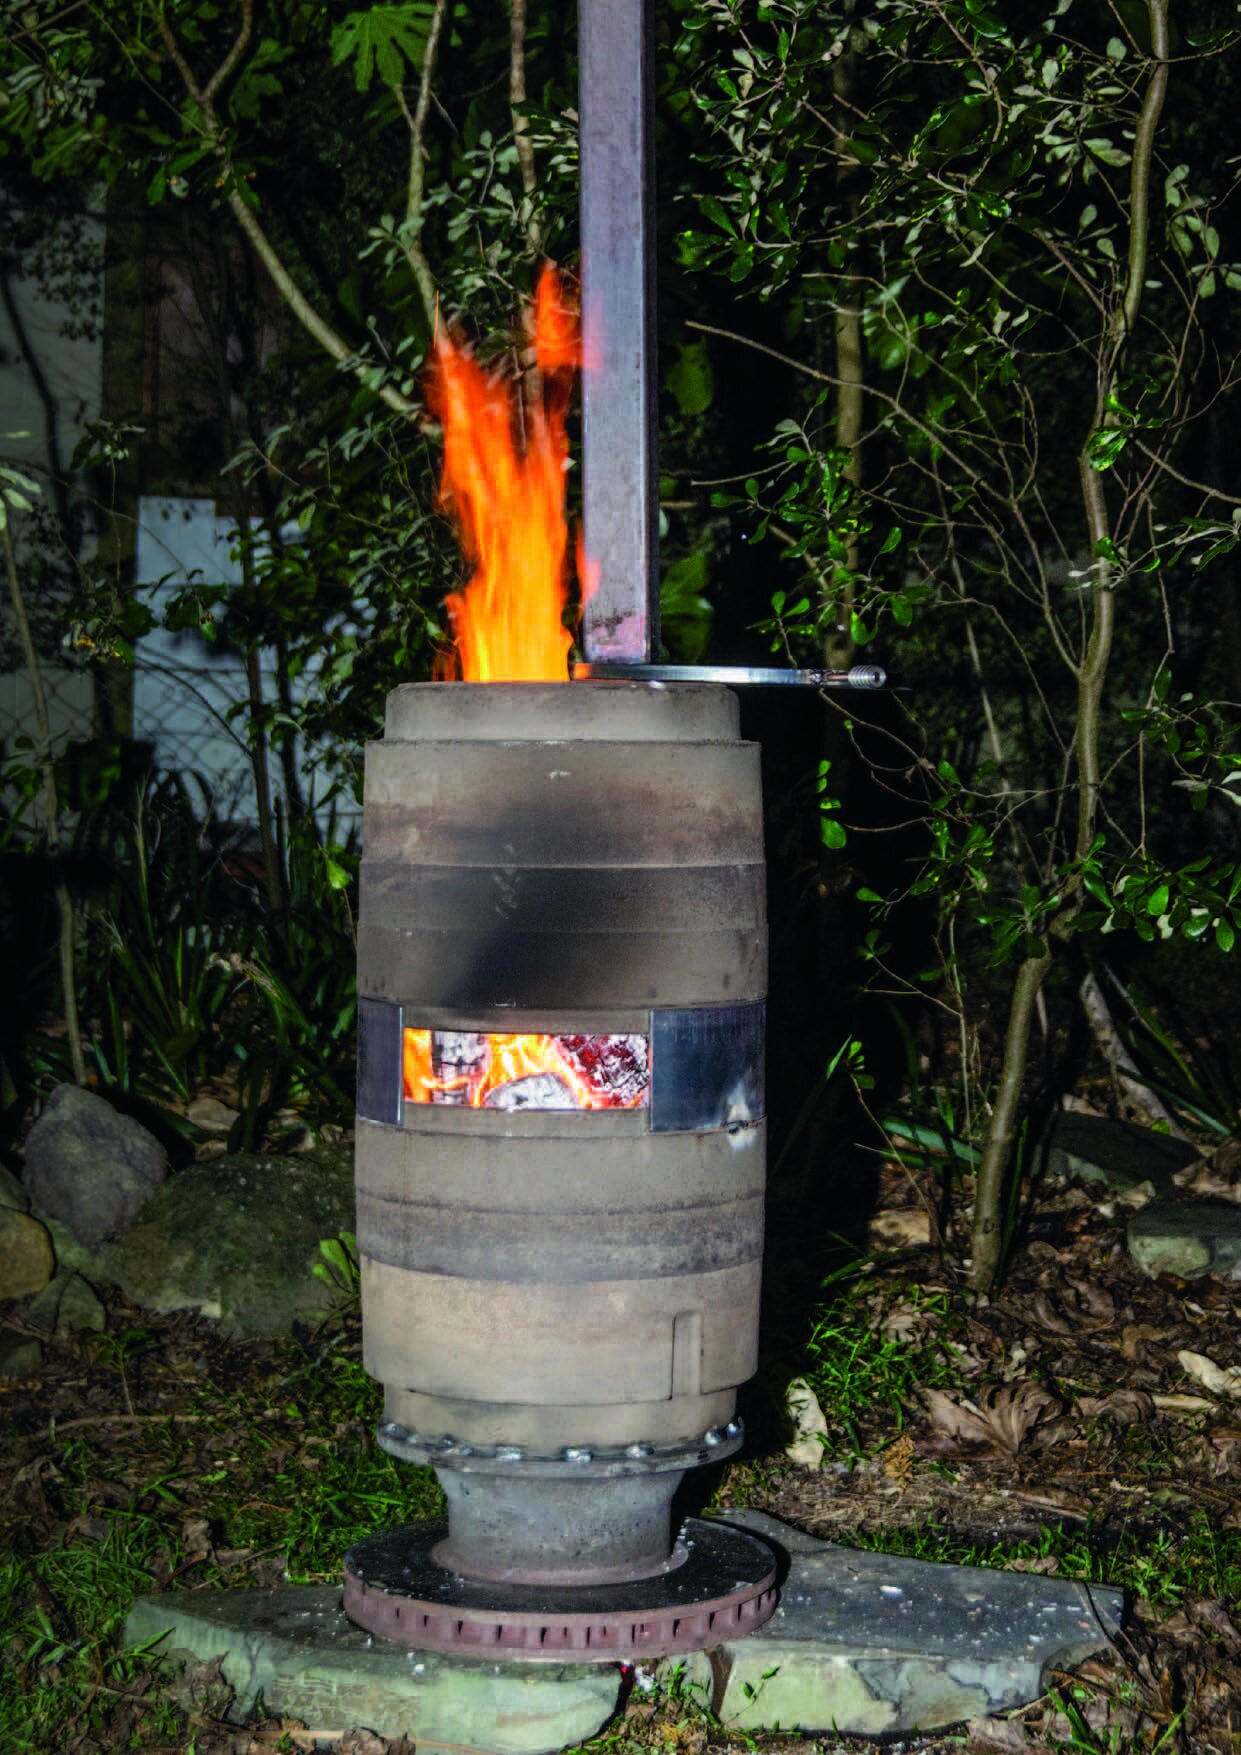
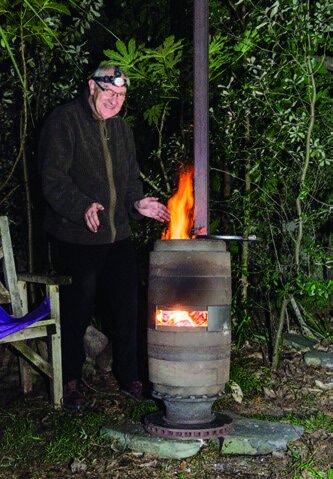
Ready to go
Now there are two completed halves and the tough work is about to start. Both halves are very heavy as you can imagine. The bottom half is easily the heaviest which is fortunate as it is the top half that must be lifted the highest when putting it all together.
Get your site ready by putting stone slabs or concrete paving slabs on a leveled patch of ground. Don’t even think about putting the brazier on a wooden deck. It gets far too hot for that. Then get a mate to help you lift the bottom half into place (or better still, two mates, then you can just give directions). Make sure it is sitting evenly and not rocking. Put the grate in place now. You don’t want to forget that step because if you do you will have to take the top half off again later. Once the grate is settled in, lift the top half up and lower it onto the bottom half so its edge fits inside the rolled ring. This is definitely a two-person job. Drop the hot plate on and there you are—one “Repurpose Brazier” waiting for a fire to be lit in it.
Cast iron and mild steel—what’s the difference?
Pure iron (Fe) is not very strong and is not used in its pure state. In fact it is difficult to produce in its pure state due to so much carbon being involved in smelting the iron from iron ore.
Steel is iron with other elements added (alloyed) to it. Typically these are carbon, manganese, vanadium, chromium, nickel, tungsten, etc. Each different alloy of steel is formulated to perform particular tasks. Some are formulated to be able to be heat treated to very high hardness while others are formulated to be tough. Mild steel is iron with carbon 0.14 to 0.2 percent and manganese 0.6 to 0.9 percent. It is easy to work and machine and has reasonable strength and toughness. It welds easily.
Cast iron differs from steel in as much as it has much more carbon in it and to such a degree that the carbon is not fully alloyed or joined into the iron molecules, so the cast iron is speckled (microscopically) with carbon. Typically cast iron has up to 2 percent carbon. Cast iron is brittle but flows well when molten, so is easy to cast into sand moulds. It is difficult to weld.
There are some different types of cast iron such as malleable and ductile iron developed for improved properties. Another difference between cast iron and mild steel is corrosion resistance. Cast iron will put up with a lot of weathering and not rust anywhere near as much as steel. In fact, it used to be a practice of car manufacturers to put iron engine block castings out in the weather for months before bringing them into the factory for machining as the weathering actually improved the material. What helps is to wipe it over with a coat of “stove black” every now and then as well as leaving some sausage fat from cooking on the hot plate to be a protective barrier. Enjoy an extended outdoors season with your brazier.