Get the most of your e-bike and years of happy cycling with regular servicing
By Rex Thorley
Let’s face it e-bikes are everywhere and they are here to stay. If the thought of extra complications and potential breakdowns are putting you off buying one then you’re not alone. Would you like an e-bike that you can build and maintain yourself?
Something that goes better than most, is easy to service and diagnose with readily available parts and plenty of support is becoming a priority for a lot of people looking for an e-bike that won’t end up as landfill in a few years’ time.
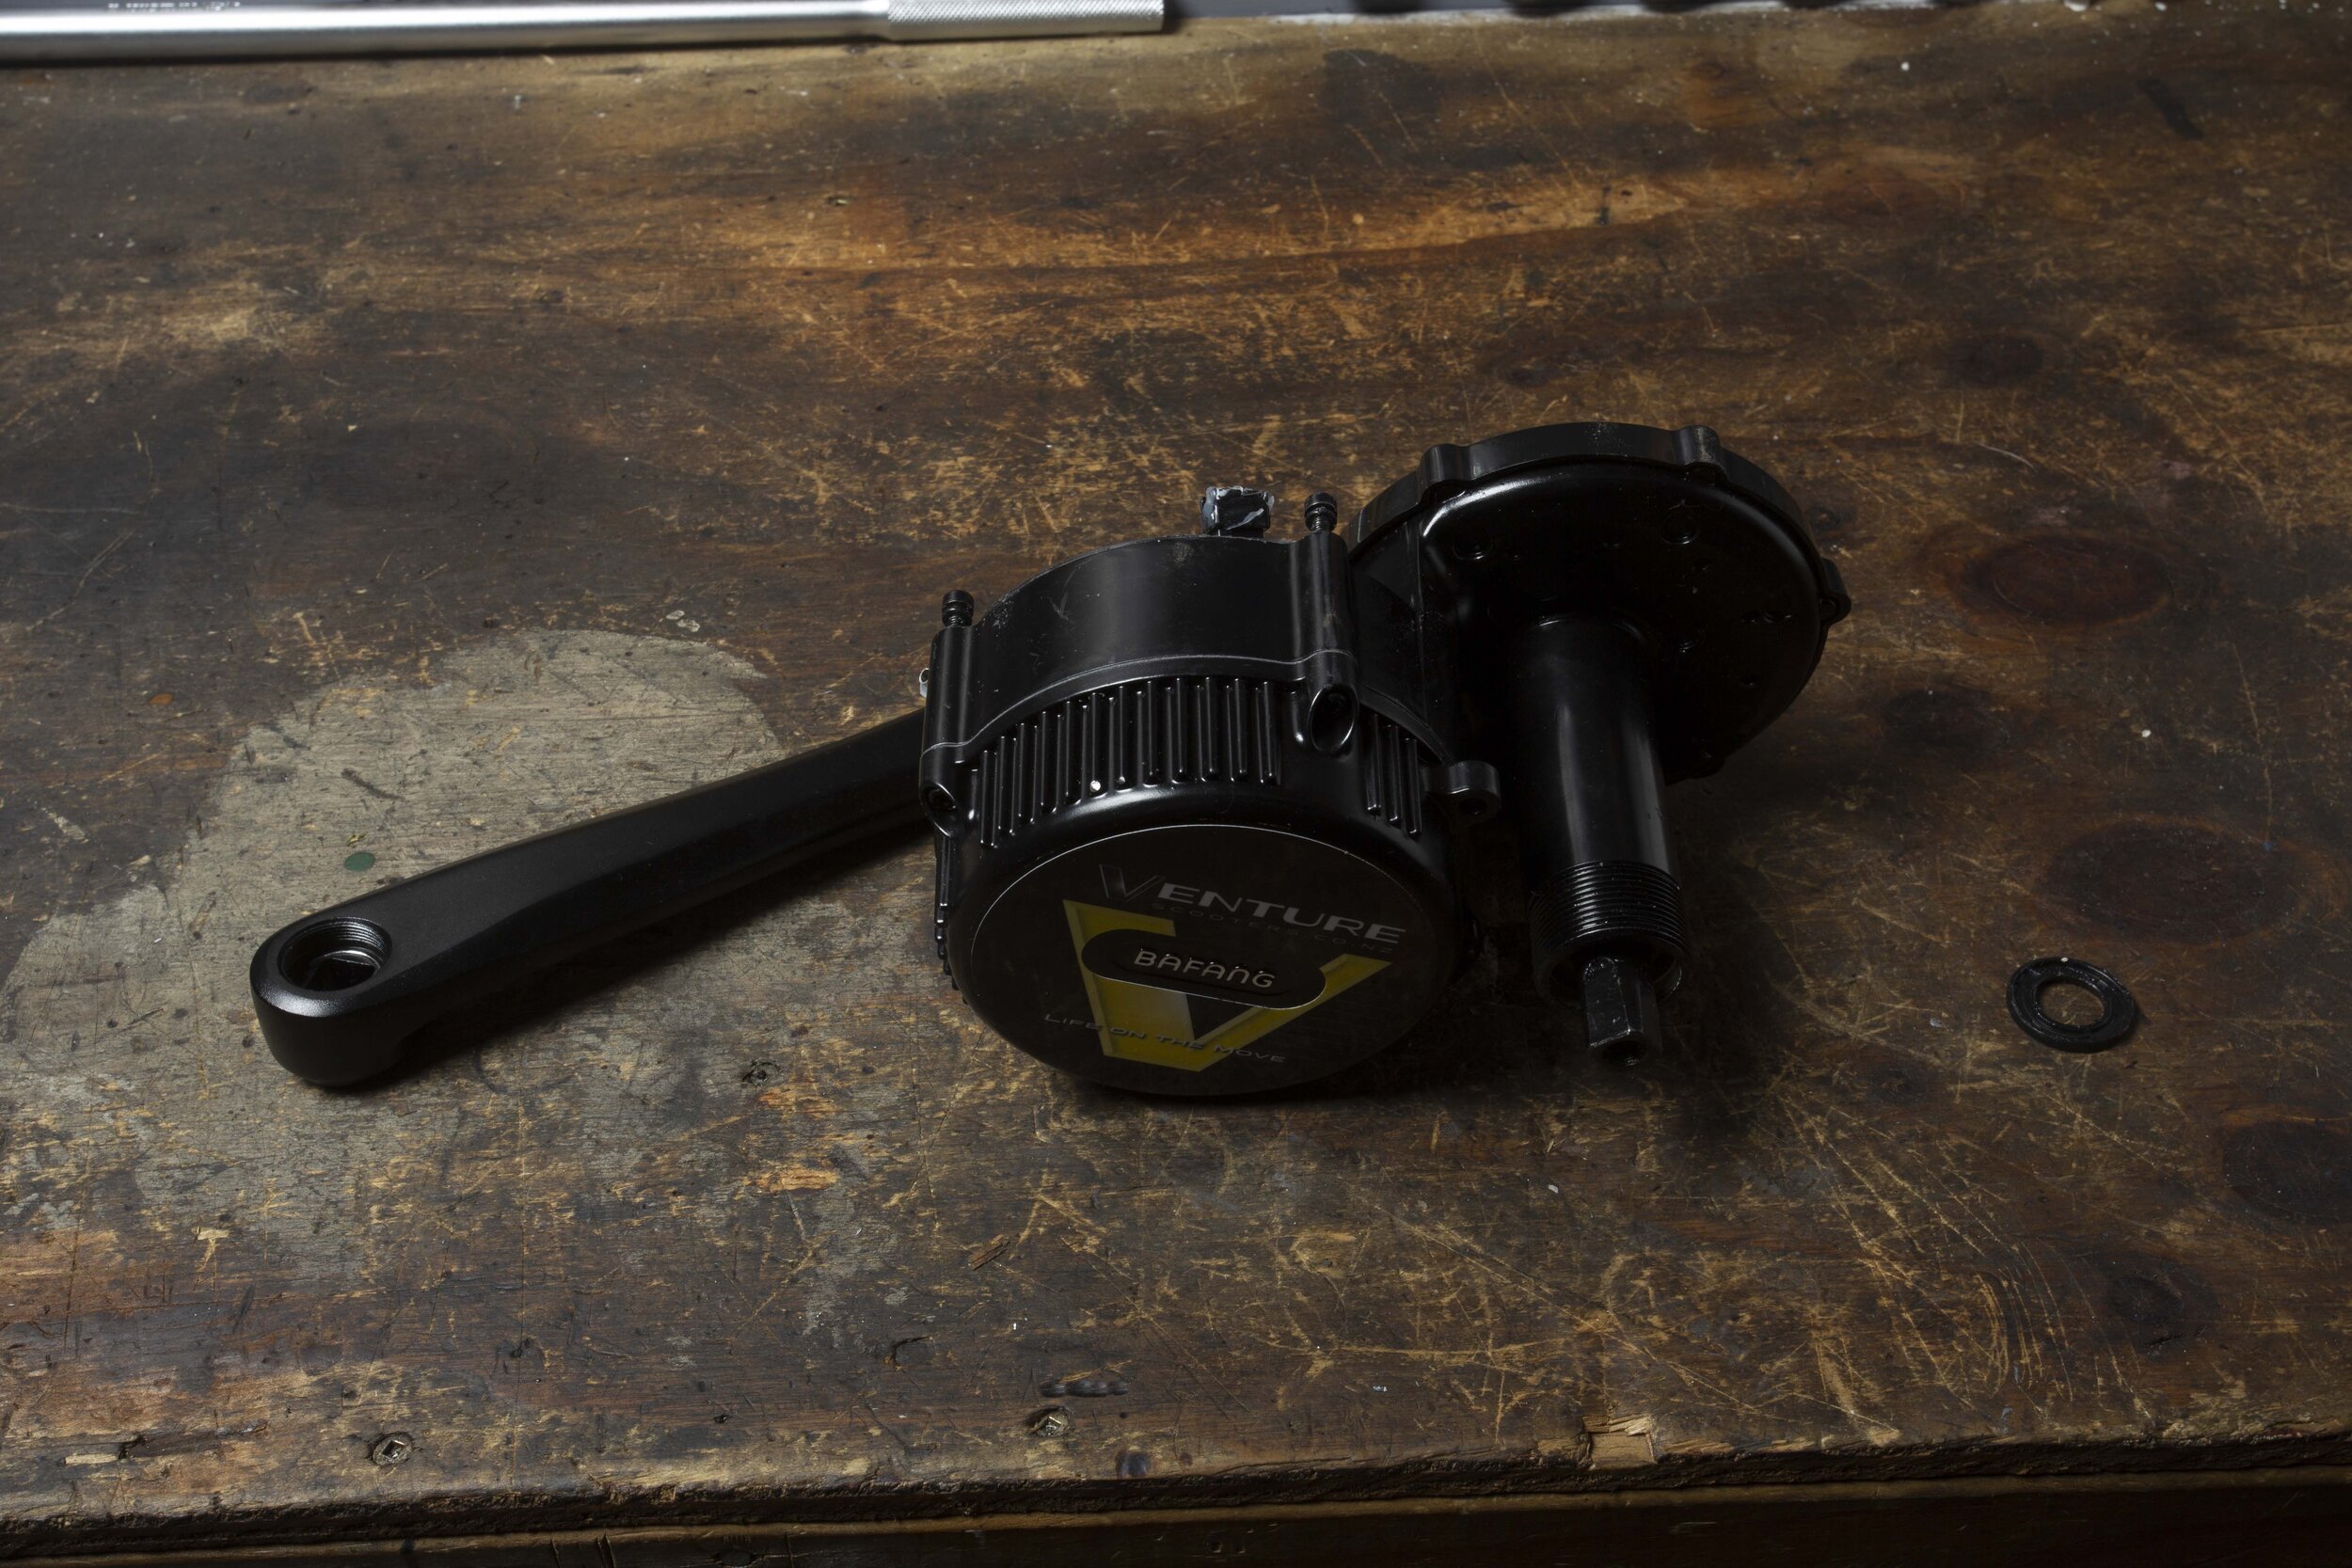
There are quite a few different types of drive systems available these days and most of them go well but they are all made differently so it is impossible to cover them all. This article focuses on maintaining and overhauling the Bafang BBS range of mid-drive motors. This is the same motor that was featured in last year’s September/October (Issue 86) edition of The Shed on how to convert your existing bike to electric. They are renowned for being a tough and reliable unit and make a great option for someone with some mechanical skills — in other words, you.
Motors can get stressed
All e-bikes require extra long-term maintenance and these motors are no different. Luckily they are relatively straightforward to service and overhaul.
The best way to make any mid-drive e-bike last is to let it rev. All electric motors like to rev and the way to do that is to turn your legs at a reasonable speed. A lot of riders presume that because they have a motor helping them that they can ride in top gear while giving their legs a holiday. This results in a low pedaling speed or cadence which puts extra stress on the motor and electrical system. It also wears out your chain and gears prematurely, costing more money when servicing.
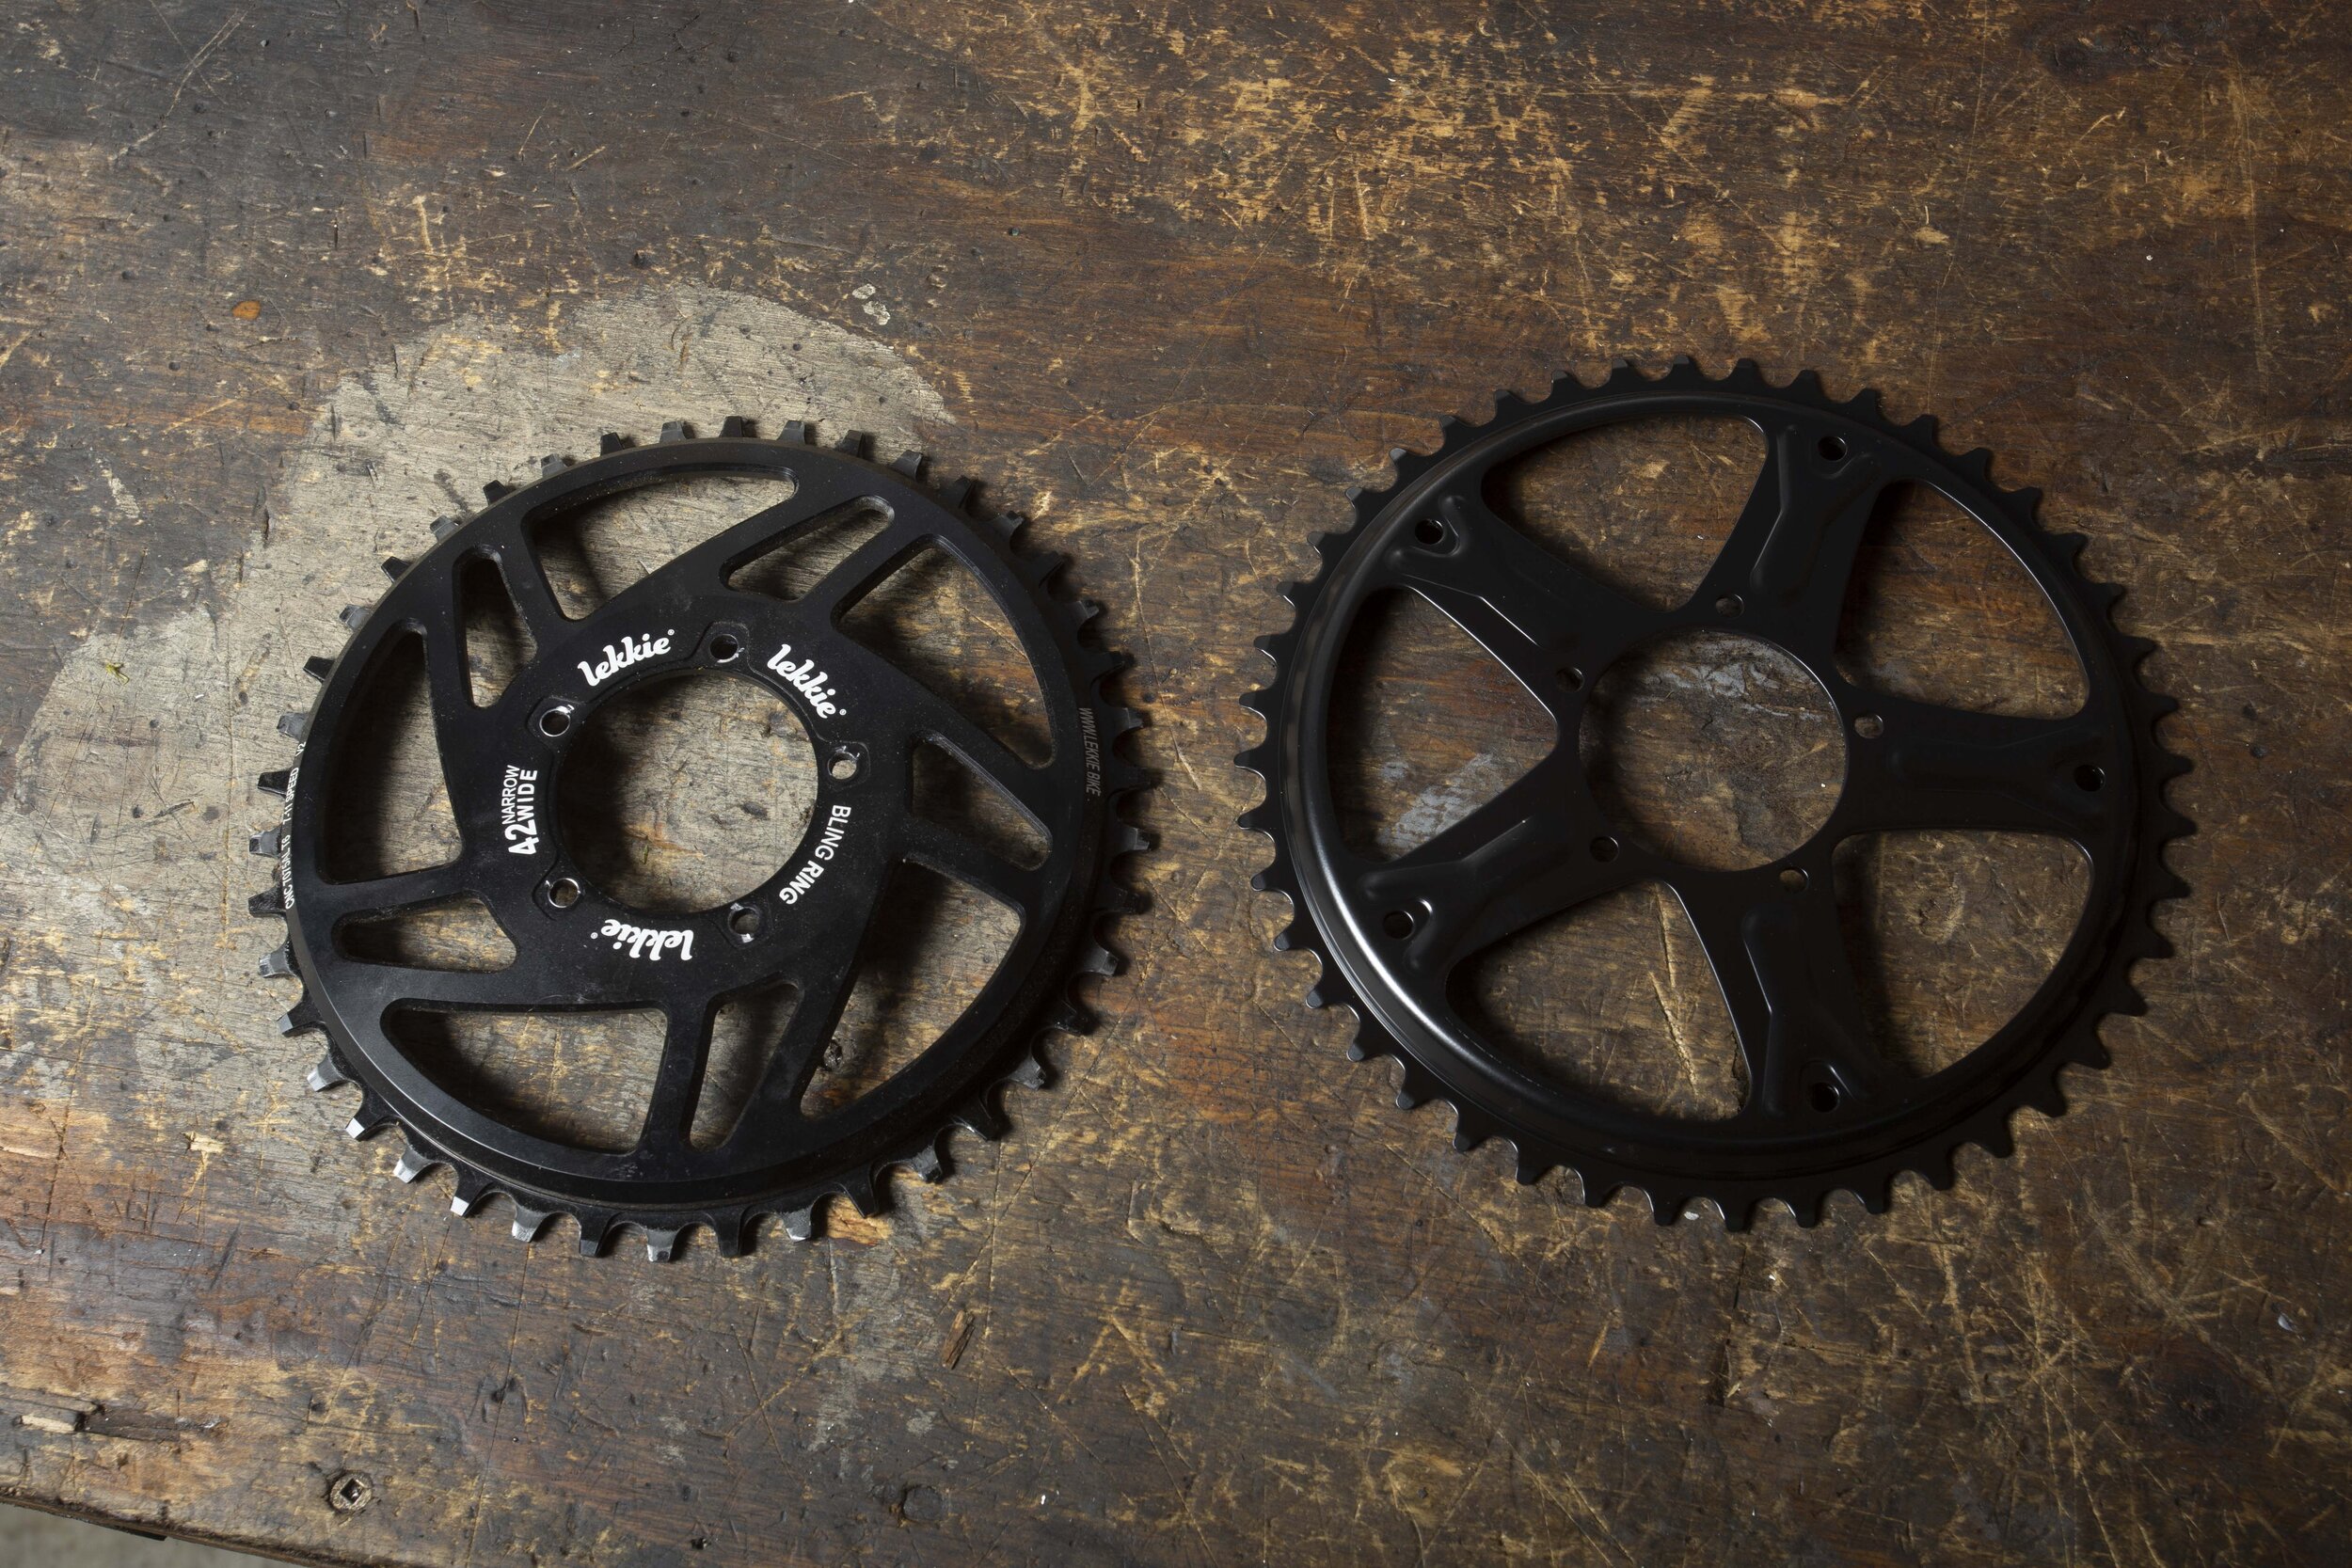
The Bafang BBS range of motors come in 250watts through to 1000w, however, the basic steps covered here are very similar for all models.
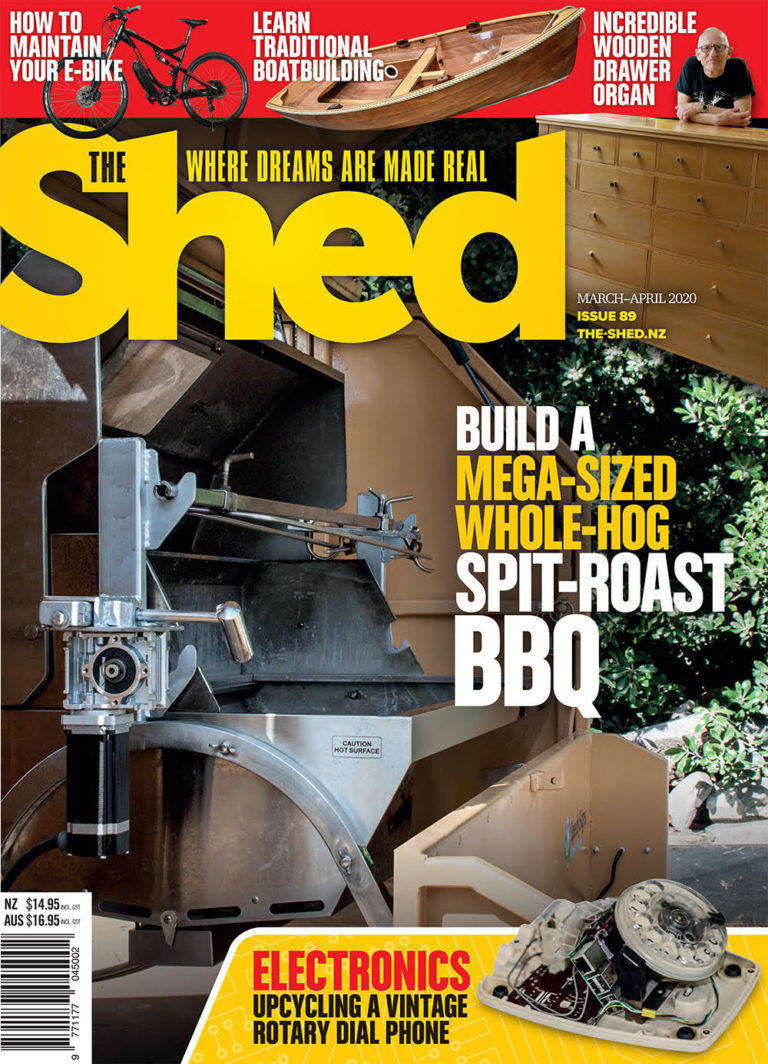
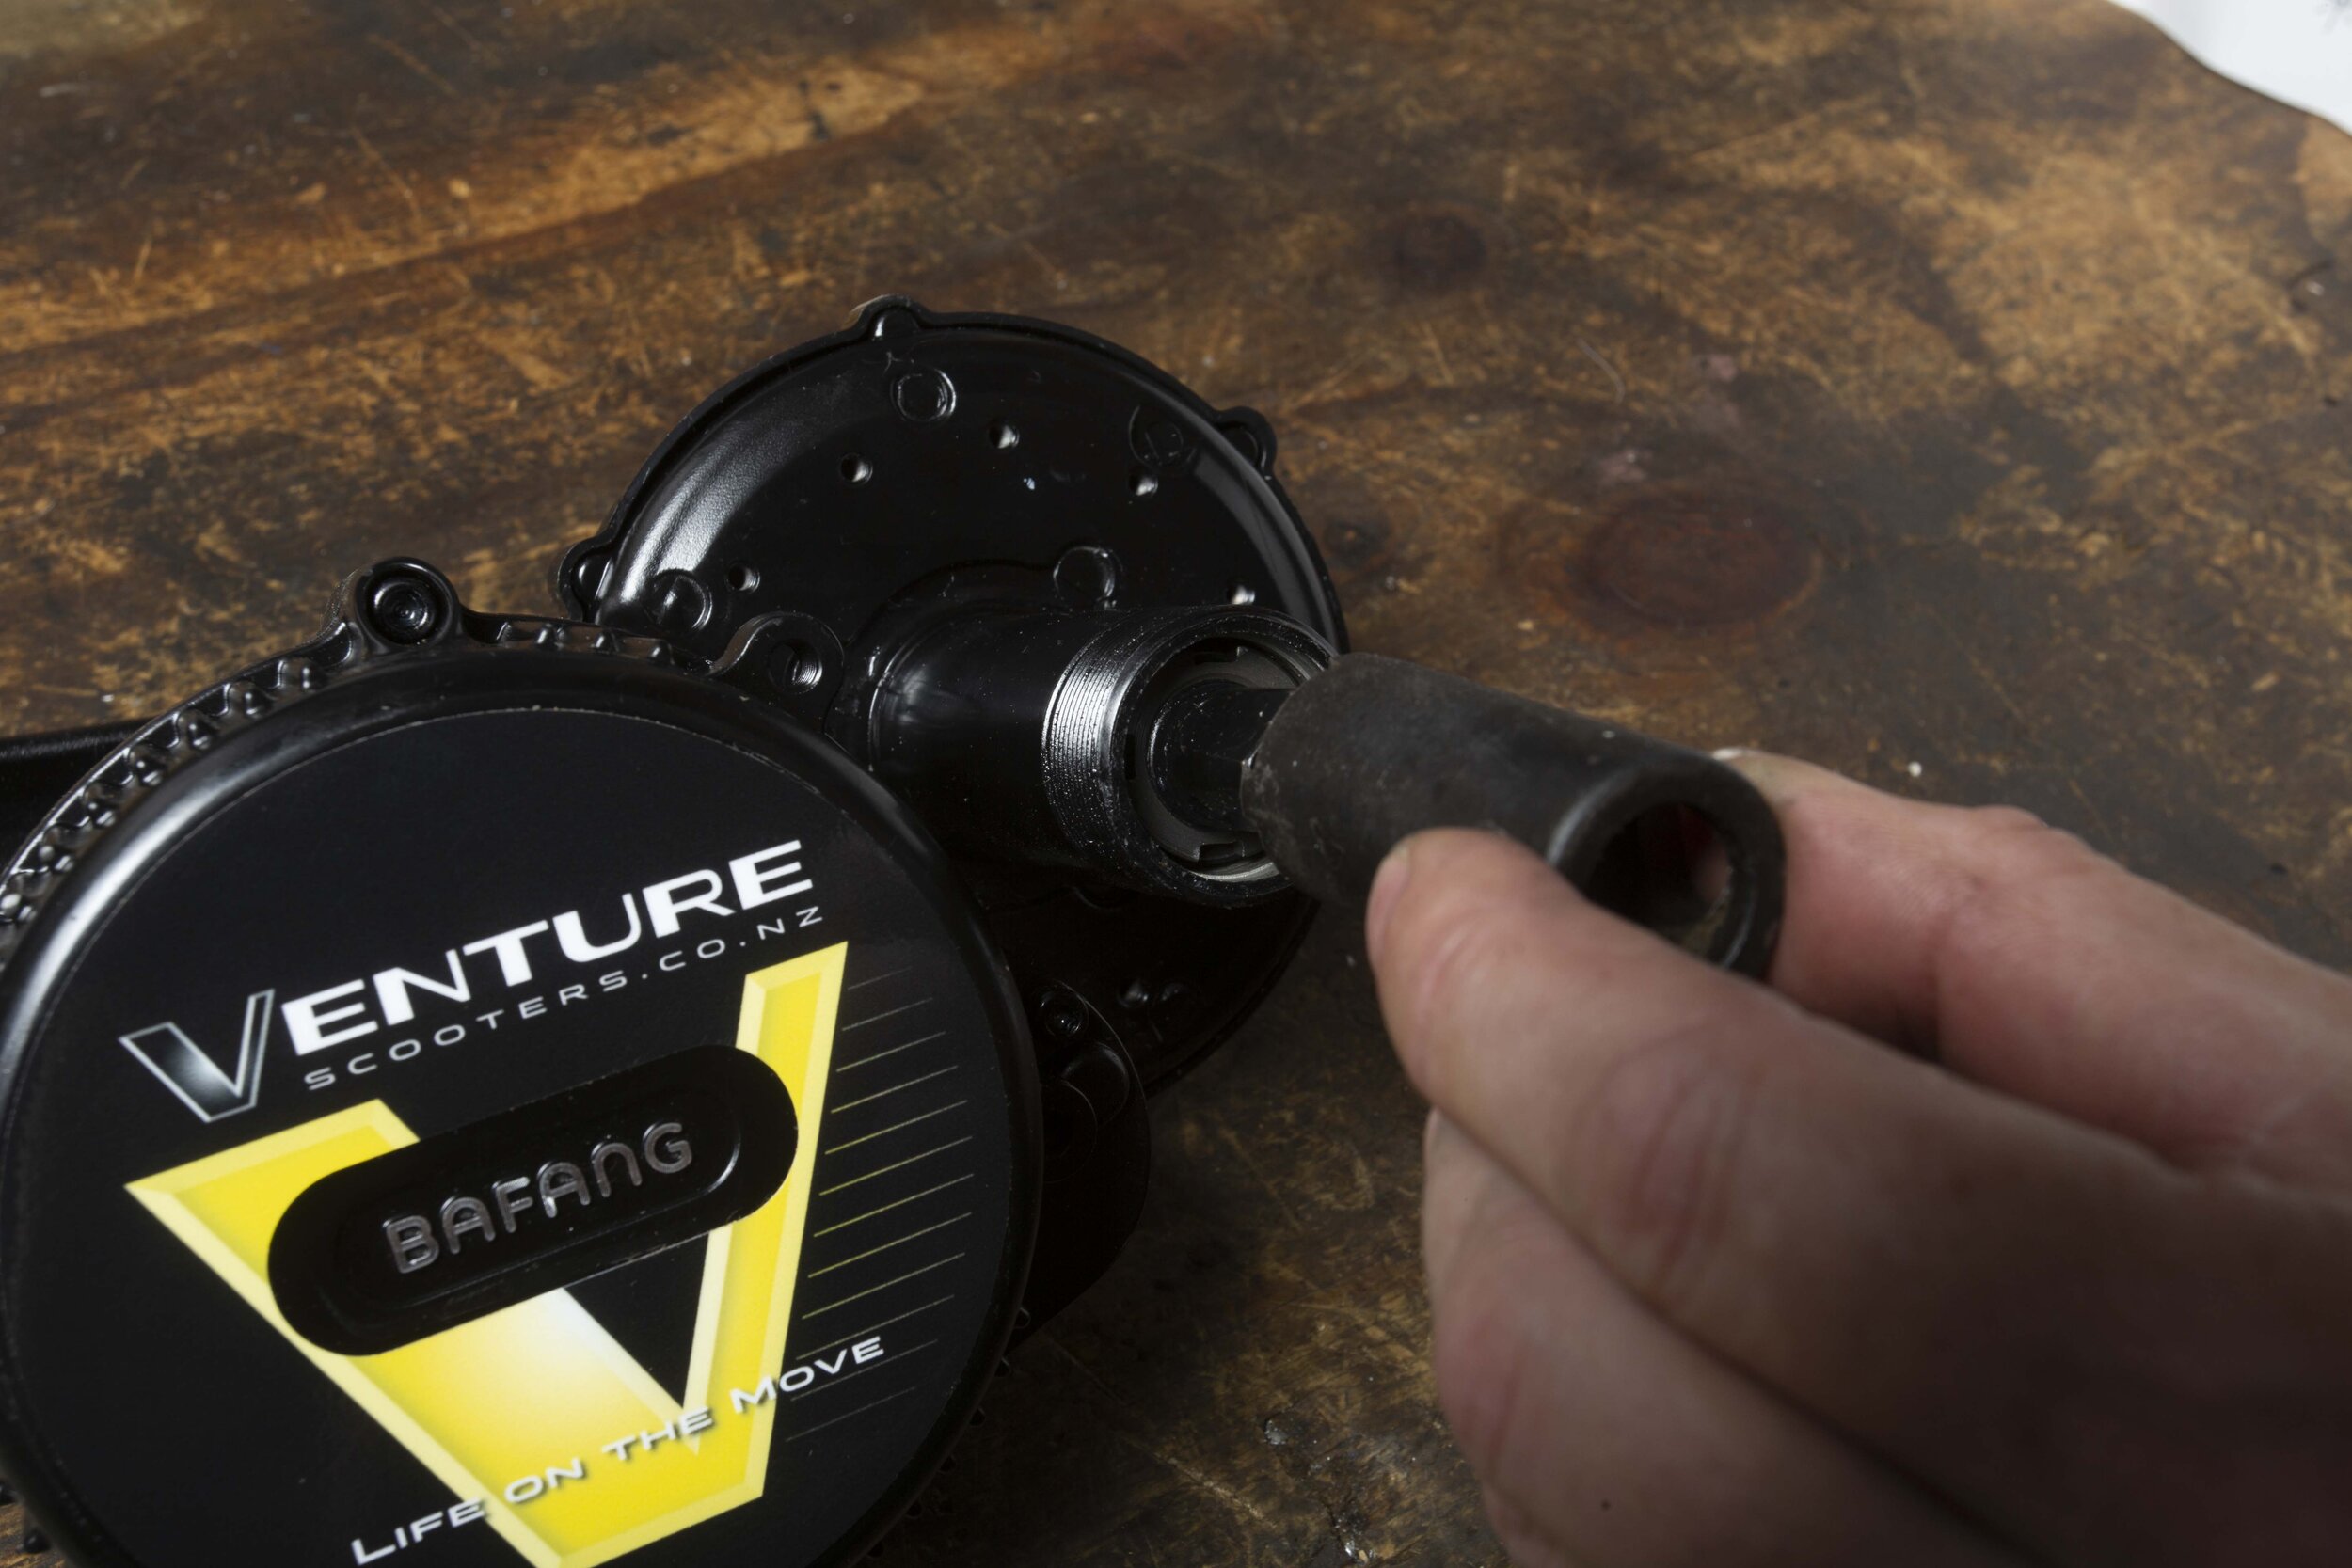
Crank puller in action, make sure it’s all the way in before using
Main mounting nut needs to be tight
Step one
Rechecking motor mounting hardware after 300-400km:
The main motor mounting nut needs to be done up tight. They can loosen after a while when everything is new so need to be checked and retightened after 300-400km. If these come loose the motor will drop down and rattle which will cause wiring damage.
The left-hand crank has to be removed and to do this you will need a crank puller tool. These are available from kit resellers and bike shops. Make sure the nuts are really tight. They can take a lot of torque so don’t be afraid to crank them up. I use a special socket and a 600mm long 1/2” bar which bends when the nut is tight.
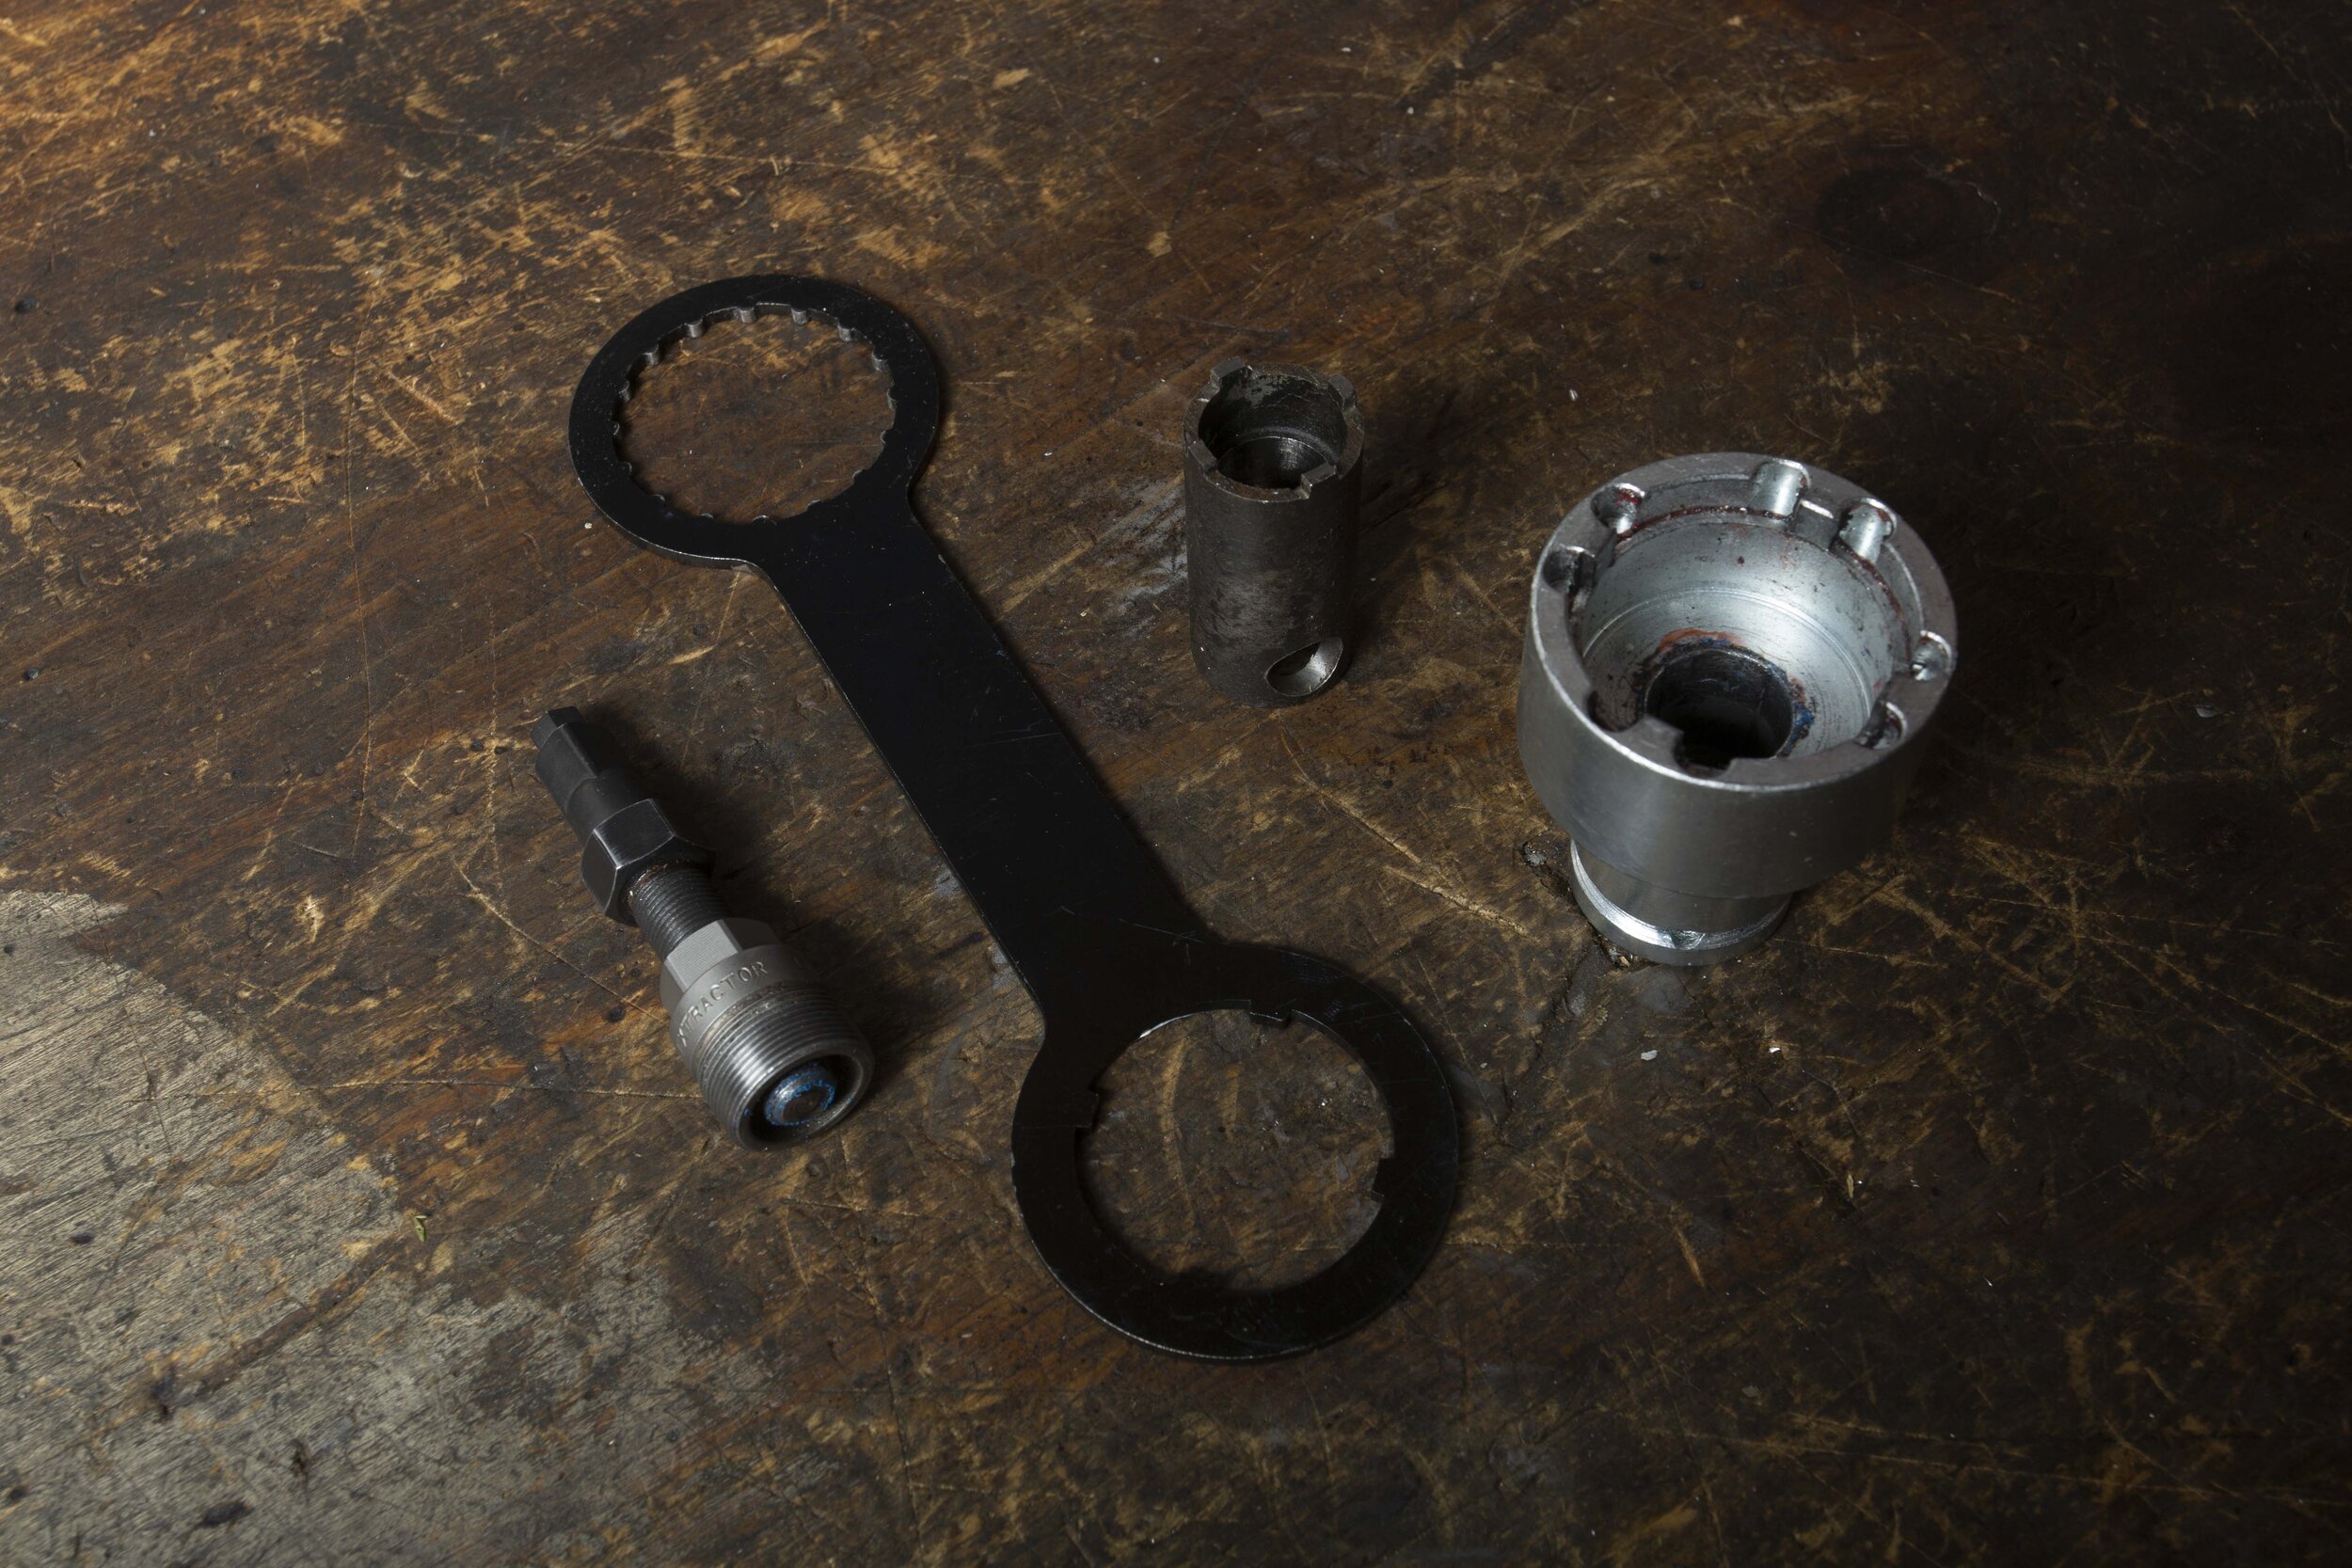
Remove seal by outside lip
Step two
Checking motor seals 3000-5000km:
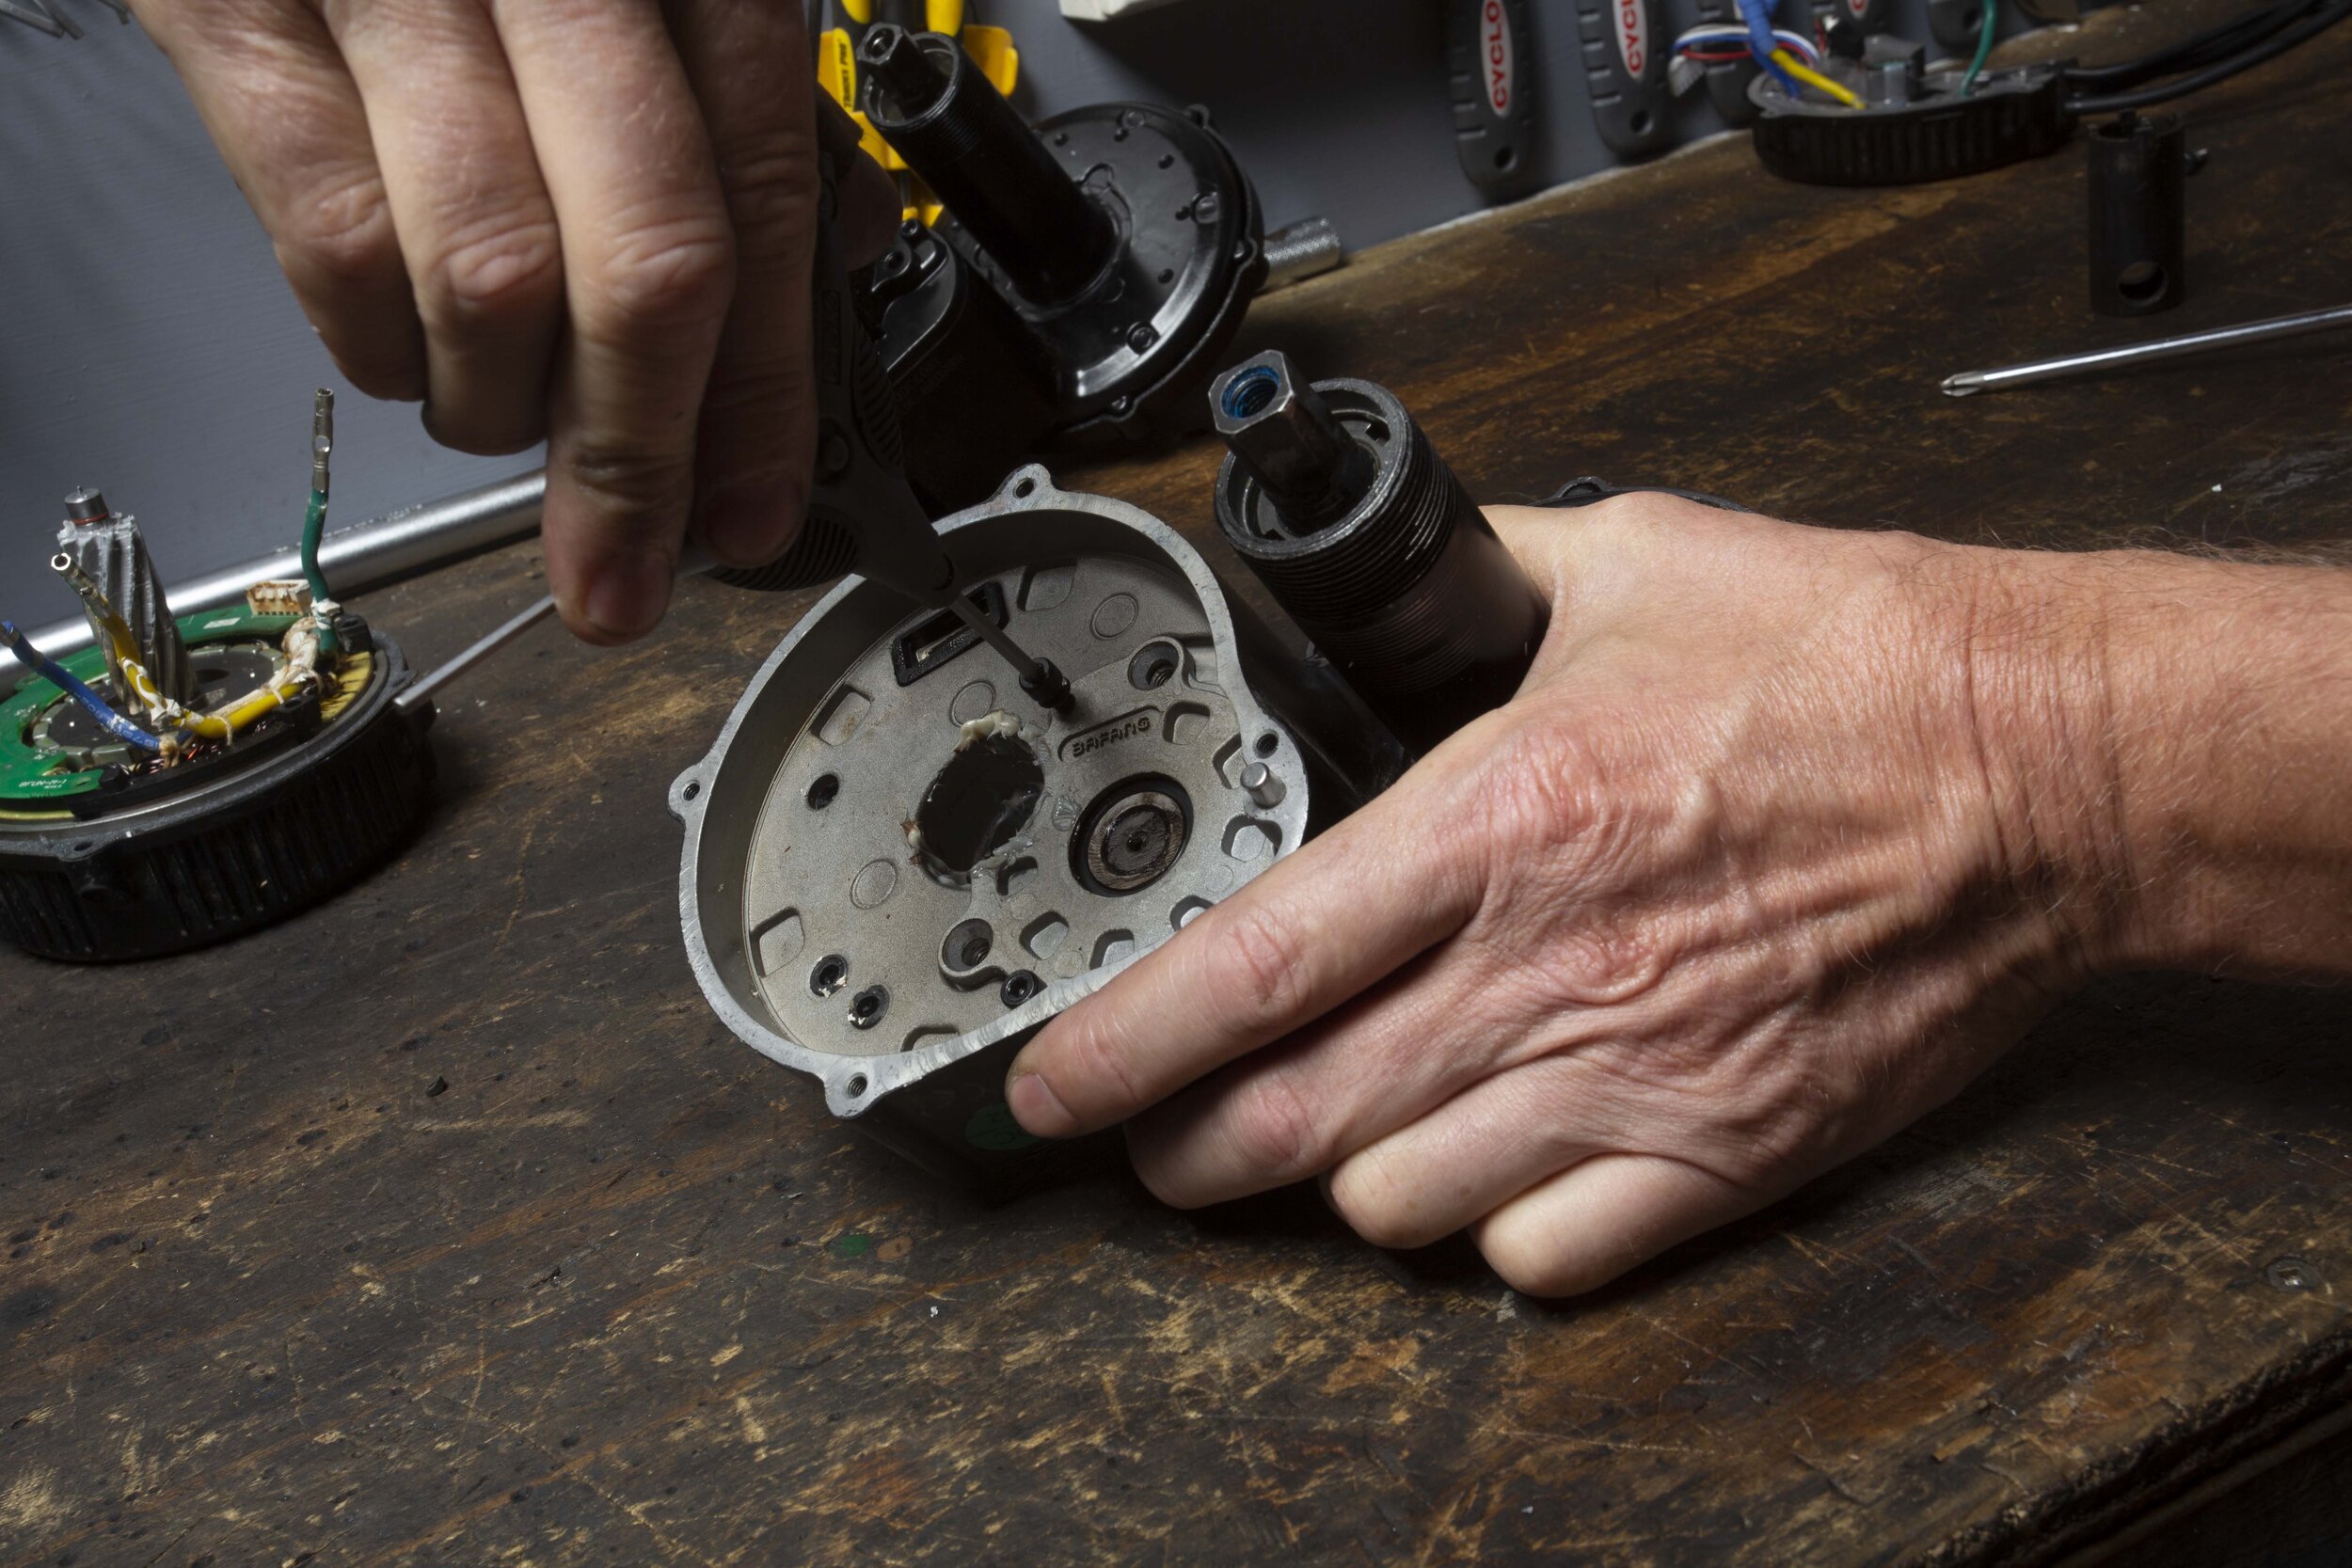
You will need the crank puller for this job too. Remove both cranks, front chainring, and the plastic gear cover that is held on with seven small Phillips screws. Inspect the gears and casing for any sign of moisture or dirt.
Make sure there is still sufficient grease around the gears and add some good- quality gear grease if necessary. Don’t get too carried away with this as they don’t require a huge amount. I also add a small amount of high-quality oil stabilizer from Moreys or Lucas as this helps the grease stick to the gears and not get pushed to the side. The original gear cover is more of a dust shield so if you intend getting your motor wet often I would suggest an aftermarket cover which is more effective for keeping anything nasty out.
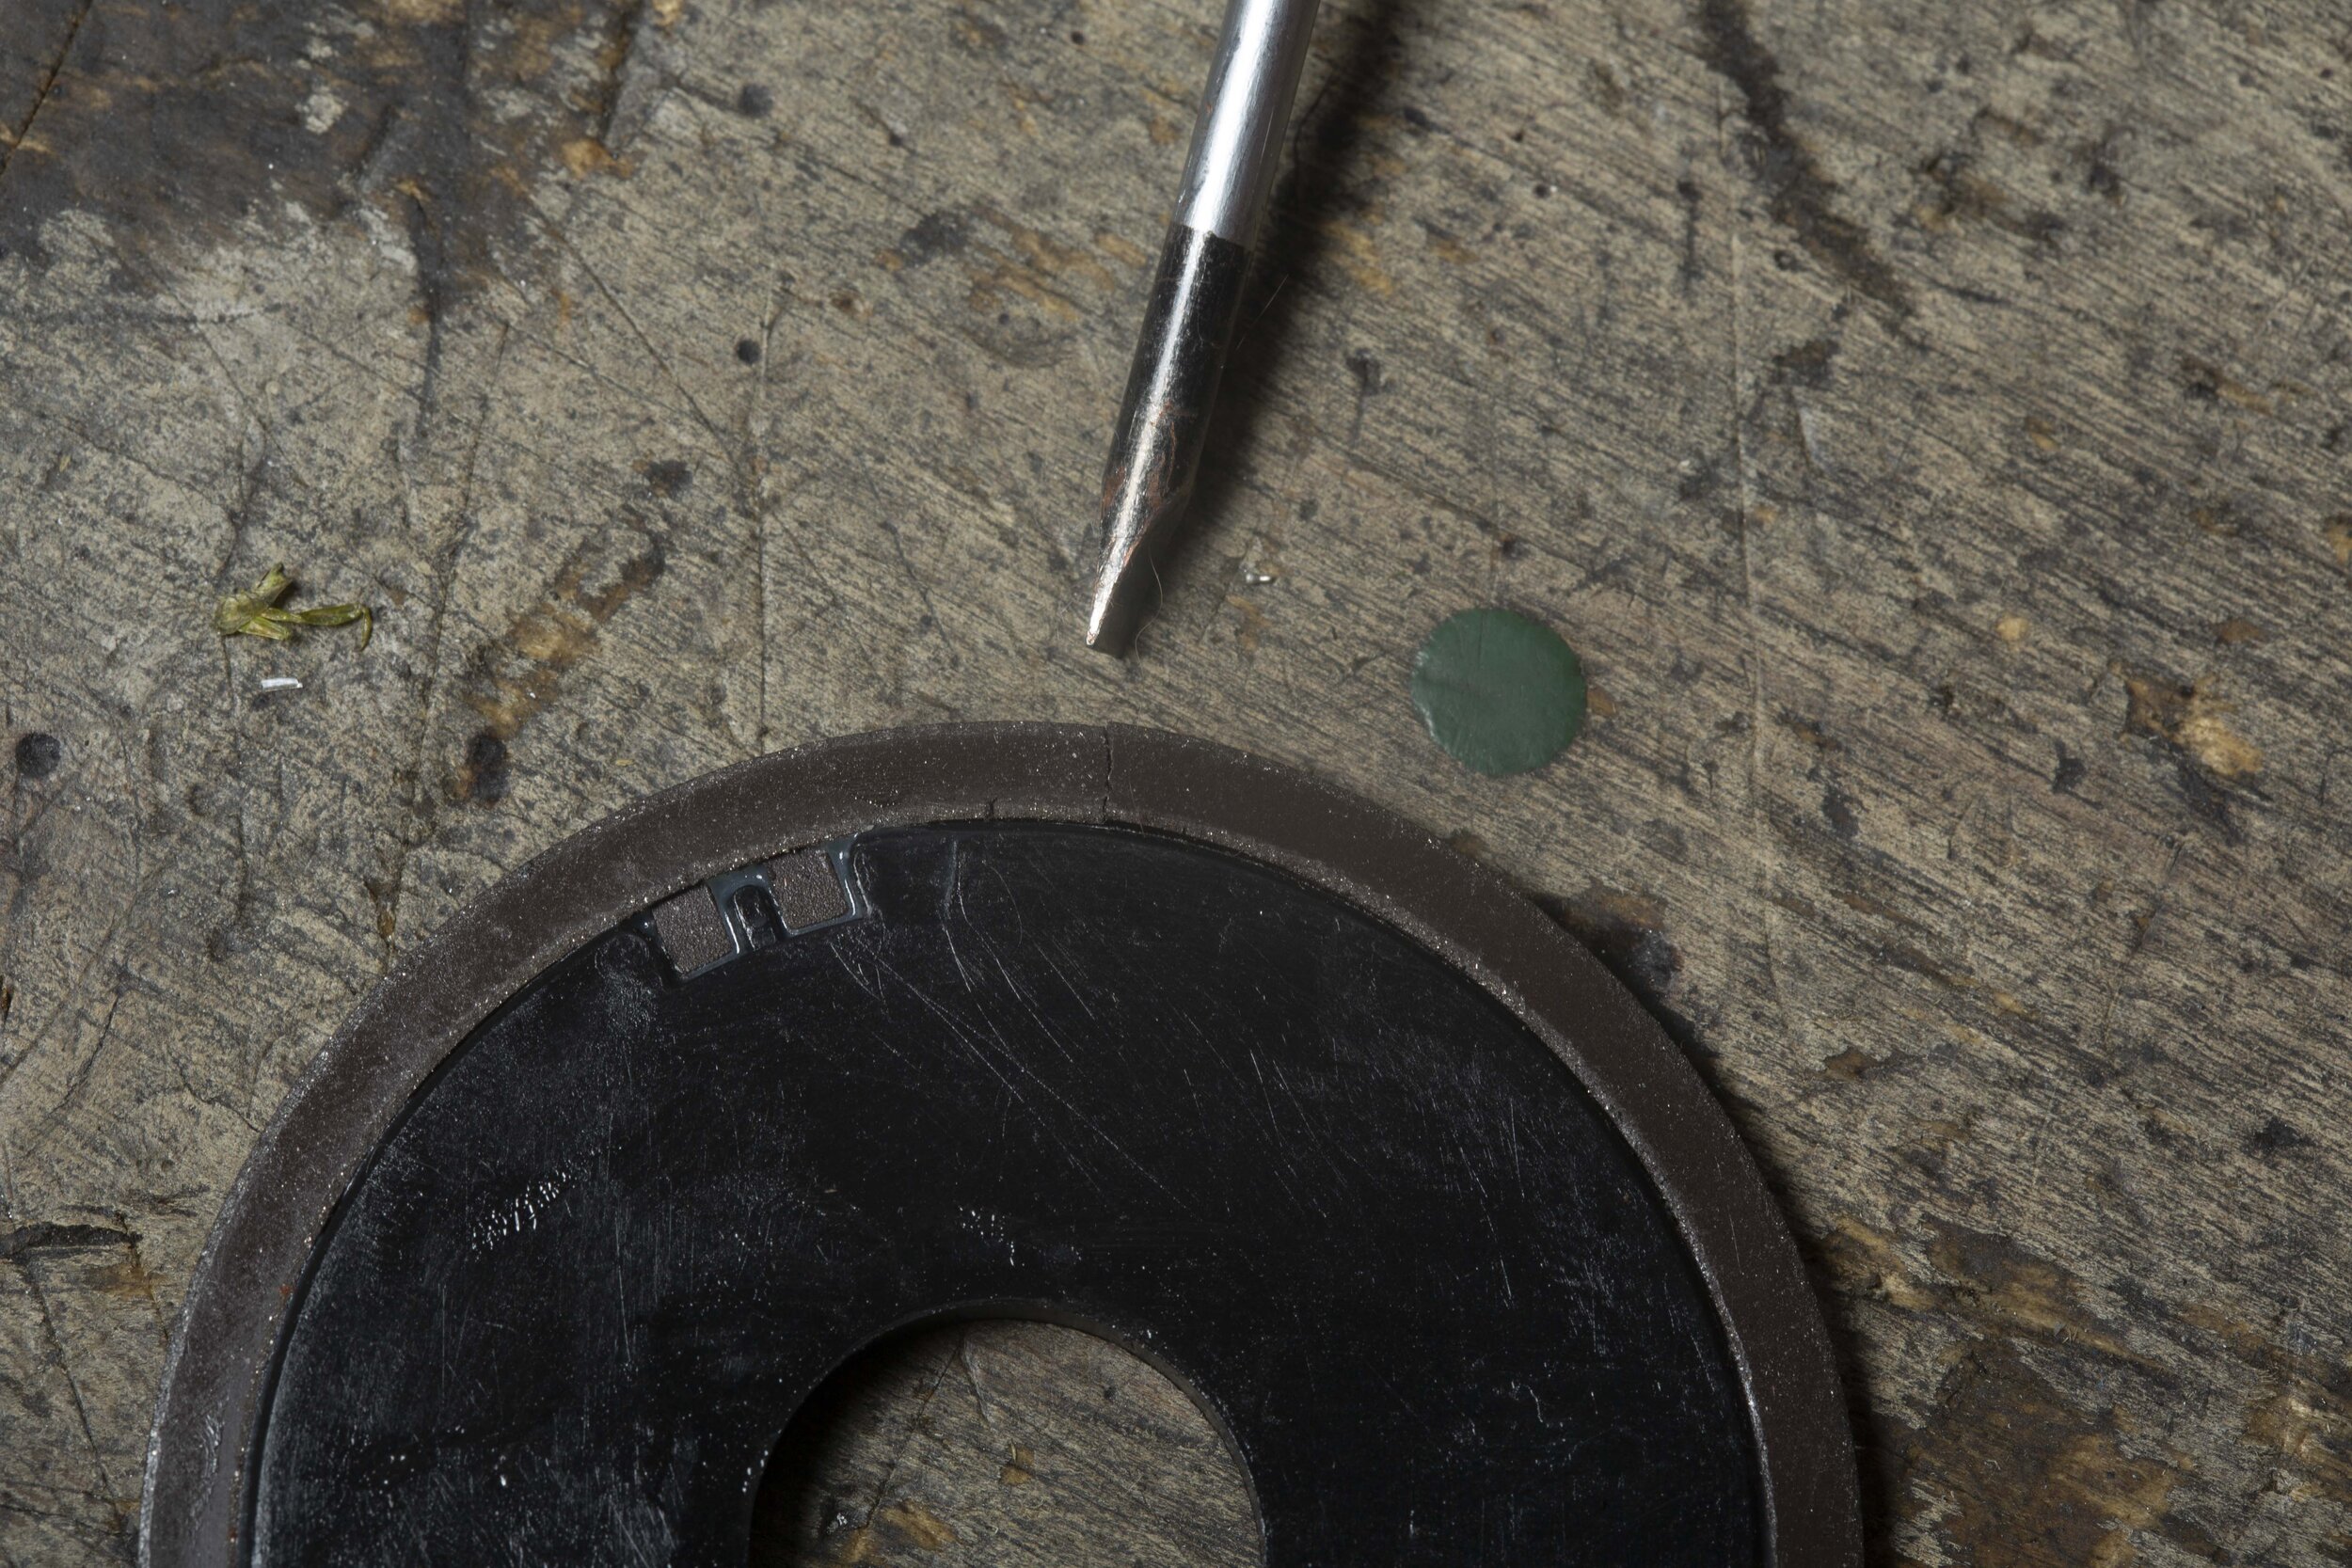
There is a seal on the left side of the motor which can be removed and refitted without destroying it. You will need a small, sharp-edged flat screwdriver for this. The trick is to prize the seal out by the outside lip, not the inside as normal.
If you take your time the seal will pop out undistorted and you can check inside for any moisture. If all is good pour a few drops of the oil stabilizer in the motor while it’s sitting on its side and refit the seal with your fingers. The seal should pop back into its notch and sit evenly without too much pressure.
Seal should go in by hand
Removing right-hand wire cover
Step three
Inspect controller housing 3000-5000km:
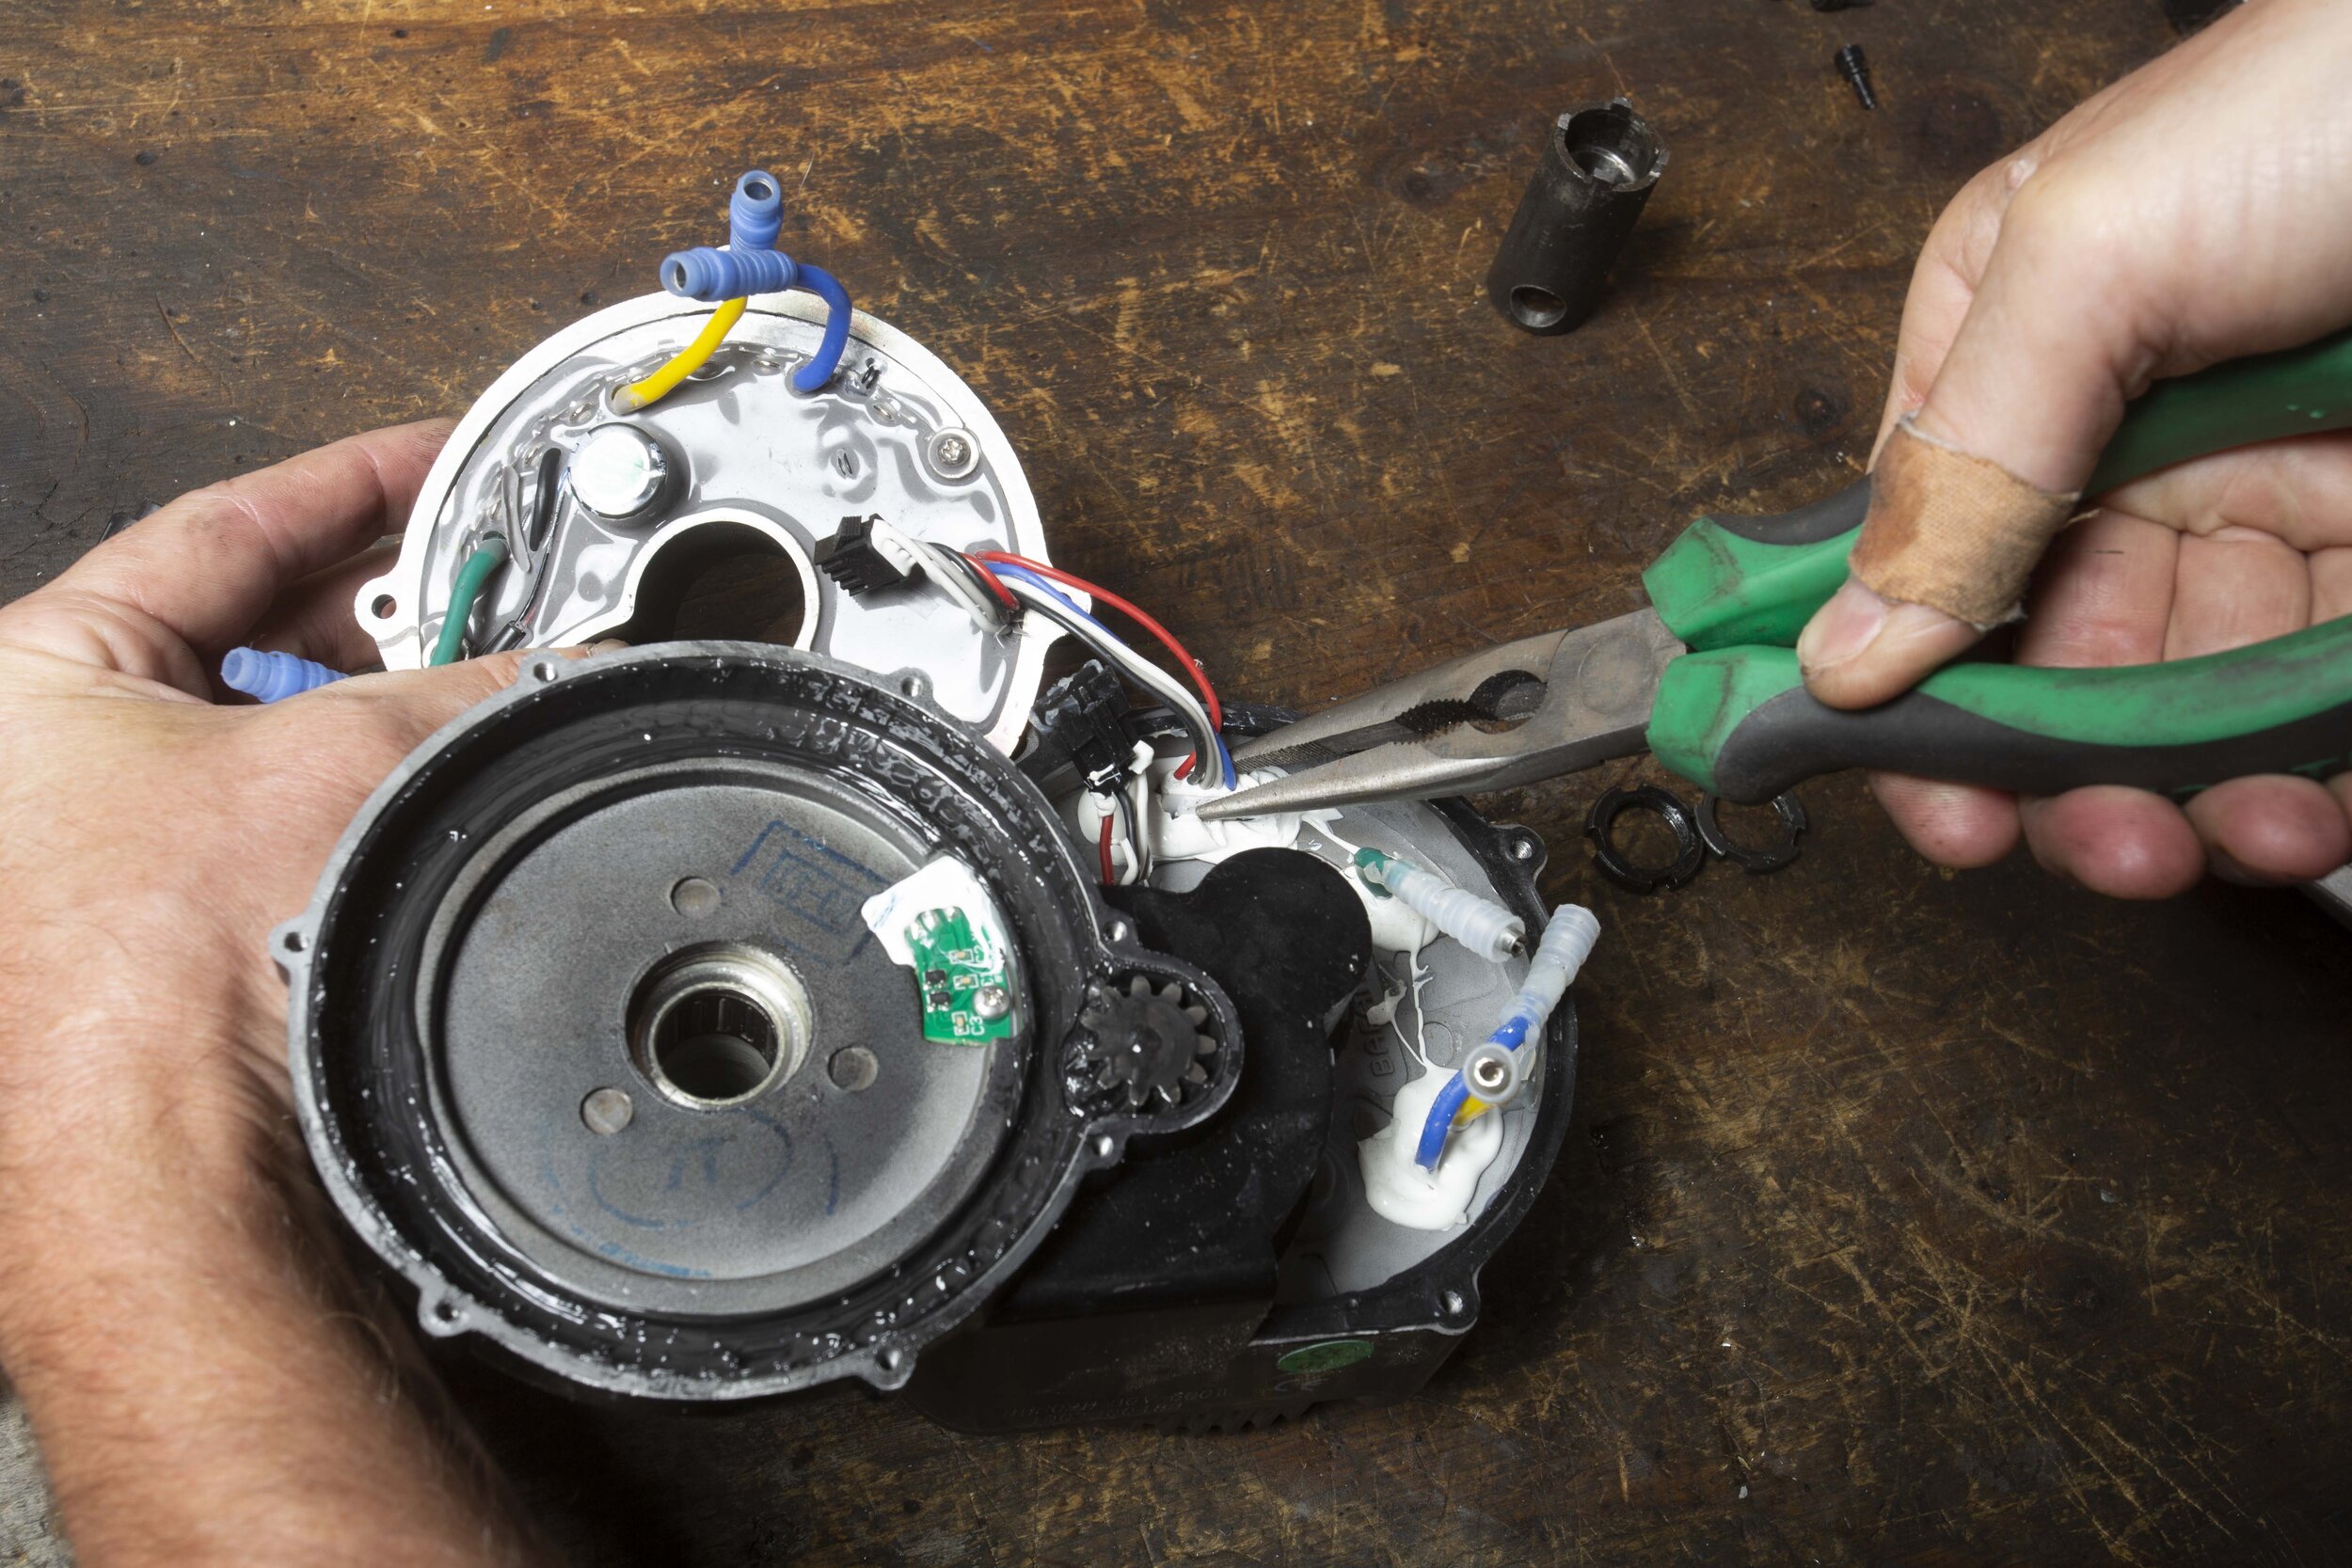
You need to have the gear cover off to remove the controller so now is the time to check inside the housing to make sure there is no water lurking. Remove the three Allen head bolts that hold the controller on and carefully start to remove the controller. They have a rubber gasket that seems to stick to both sides, so you will need to use a small screwdriver or similar to unstick it from one side, usually around the mount areas so that you don’t break it.
Once the controller is free check the area for moisture, etc. Because motors are always going from cold to hot they can draw in moisture over time which will settle in the bottom of the housing. If you do have to clean up anything, hold the controller up with a bungee or similar so it isn’t hanging by its wires. Apply a thin layer of grease to the gasket to reassemble and make sure the gasket is sitting correctly with no humps or hollows. Be careful not to pinch any wires when refitting. Tighten down the three bolts evenly to ensure the gasket is sealing correctly.
Disconnect the battery and main loom connectors and check for moisture.
Check your tyre pressure. This can be a big factor in getting less range than normal and thinking that your bike isn’t going like it used to. Check them every month.
Make sure the chain is lightly oiled.
Make sure you read the section here on how to look after your battery. It’s worth the time.
Removing right-hand gear cover
Stripping down the motor
If your motor has done 5000km and never been serviced then there’s a good chance it could need an overhaul. It’s best to remove the motor to do this.
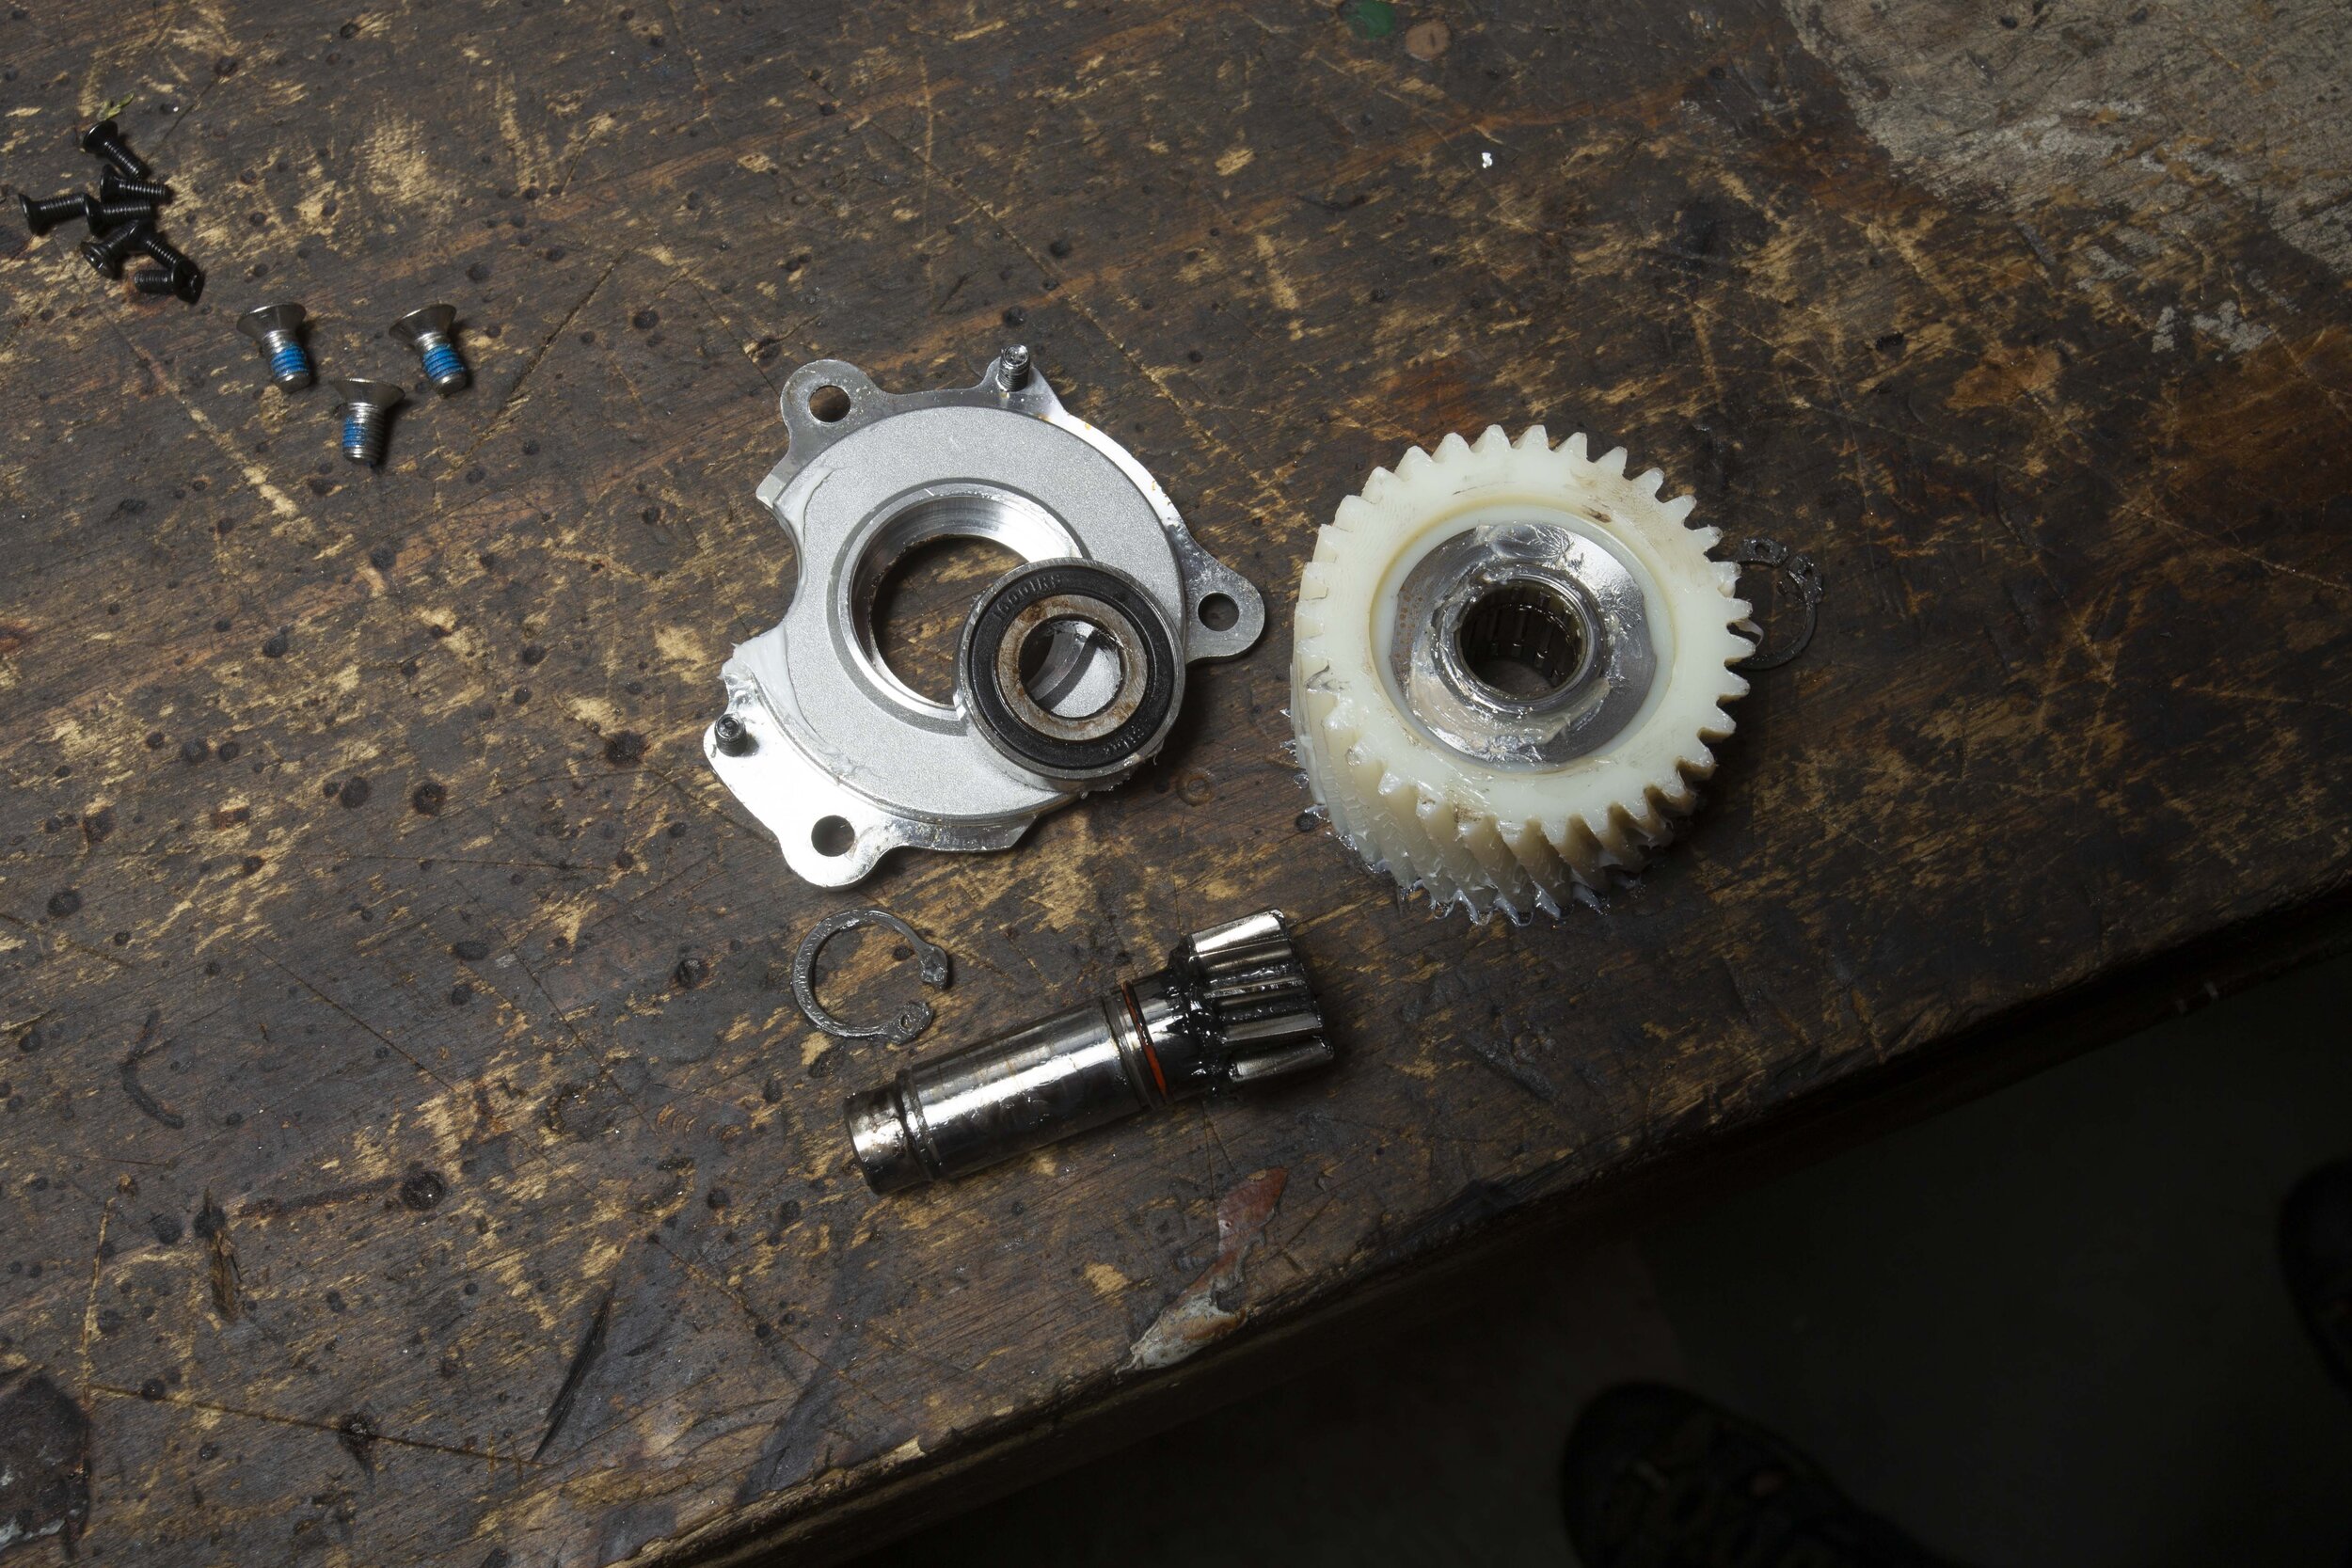
If it’s been abused and needs parts replacing and cleaning out you will need another special tool to remove the main axle nuts. They aren’t super tight and once removed allow you to remove the complete axle/gear assembly. There are two needle roller bearings and two sets of thrust bearings that will need to be inspected or replaced for the axle. If they have had water in them then they will definitely need to be replaced.
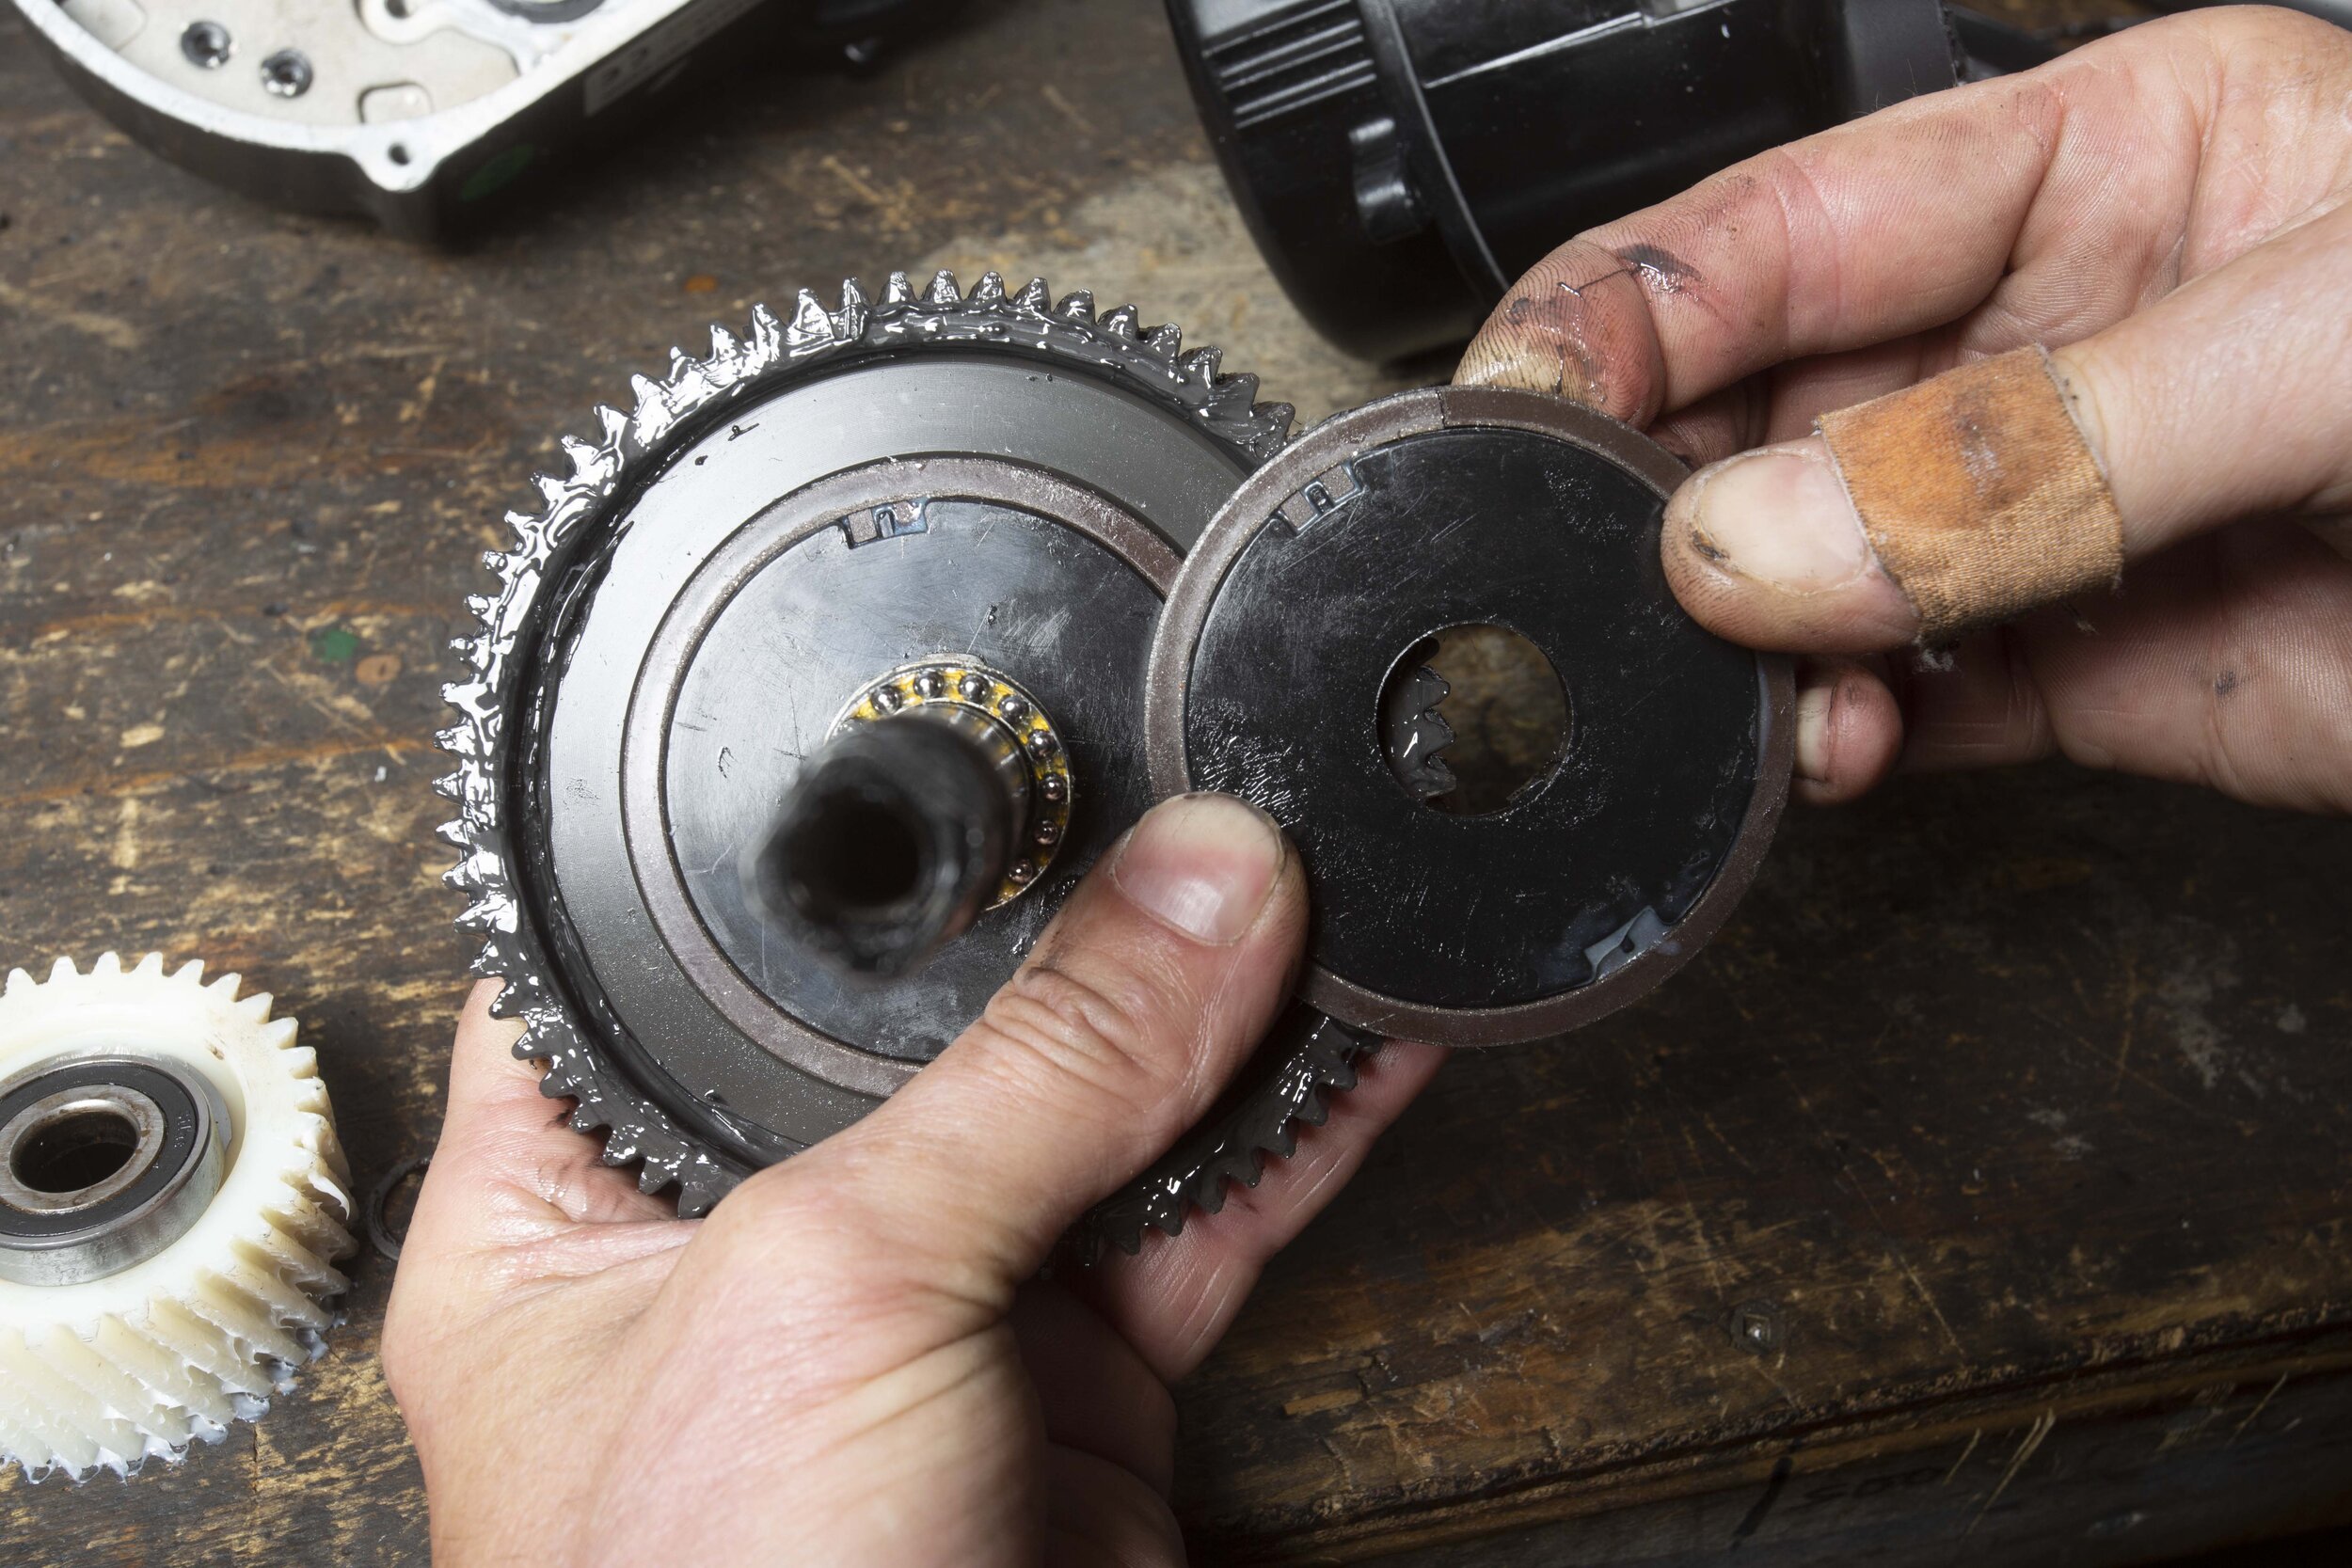
On the back of the large gear, there is a magnetic plate that tells the controller when you are pedaling so it can provide power. Sometimes these plates can crack and create an intermittent on/off power supply which won’t show up as a fault code on the Speedo. There is also a one-way clutch inside the back of the gear. These don’t give much trouble and the chances are that if water has got into this as well then it’s probably better looking at a new motor.
These motors have throttles fitted which is a great thing but in the hands of the wrong person or someone who hasn’t been told how to use them they can burn out motor windings.
There is a lot of heat generated in an electric motor so if the throttle is used when the e-bike is in the wrong gear and it can’t rev high enough then all that heat can burn out the windings or melt the nylon gear that goes between the motor shaft and main reduction gear. The same can happen if you use the highest power settings in the wrong gear. You wouldn’t take off in top gear in a manual car without ruining the clutch and the same applies to mid-drive e-bikes.
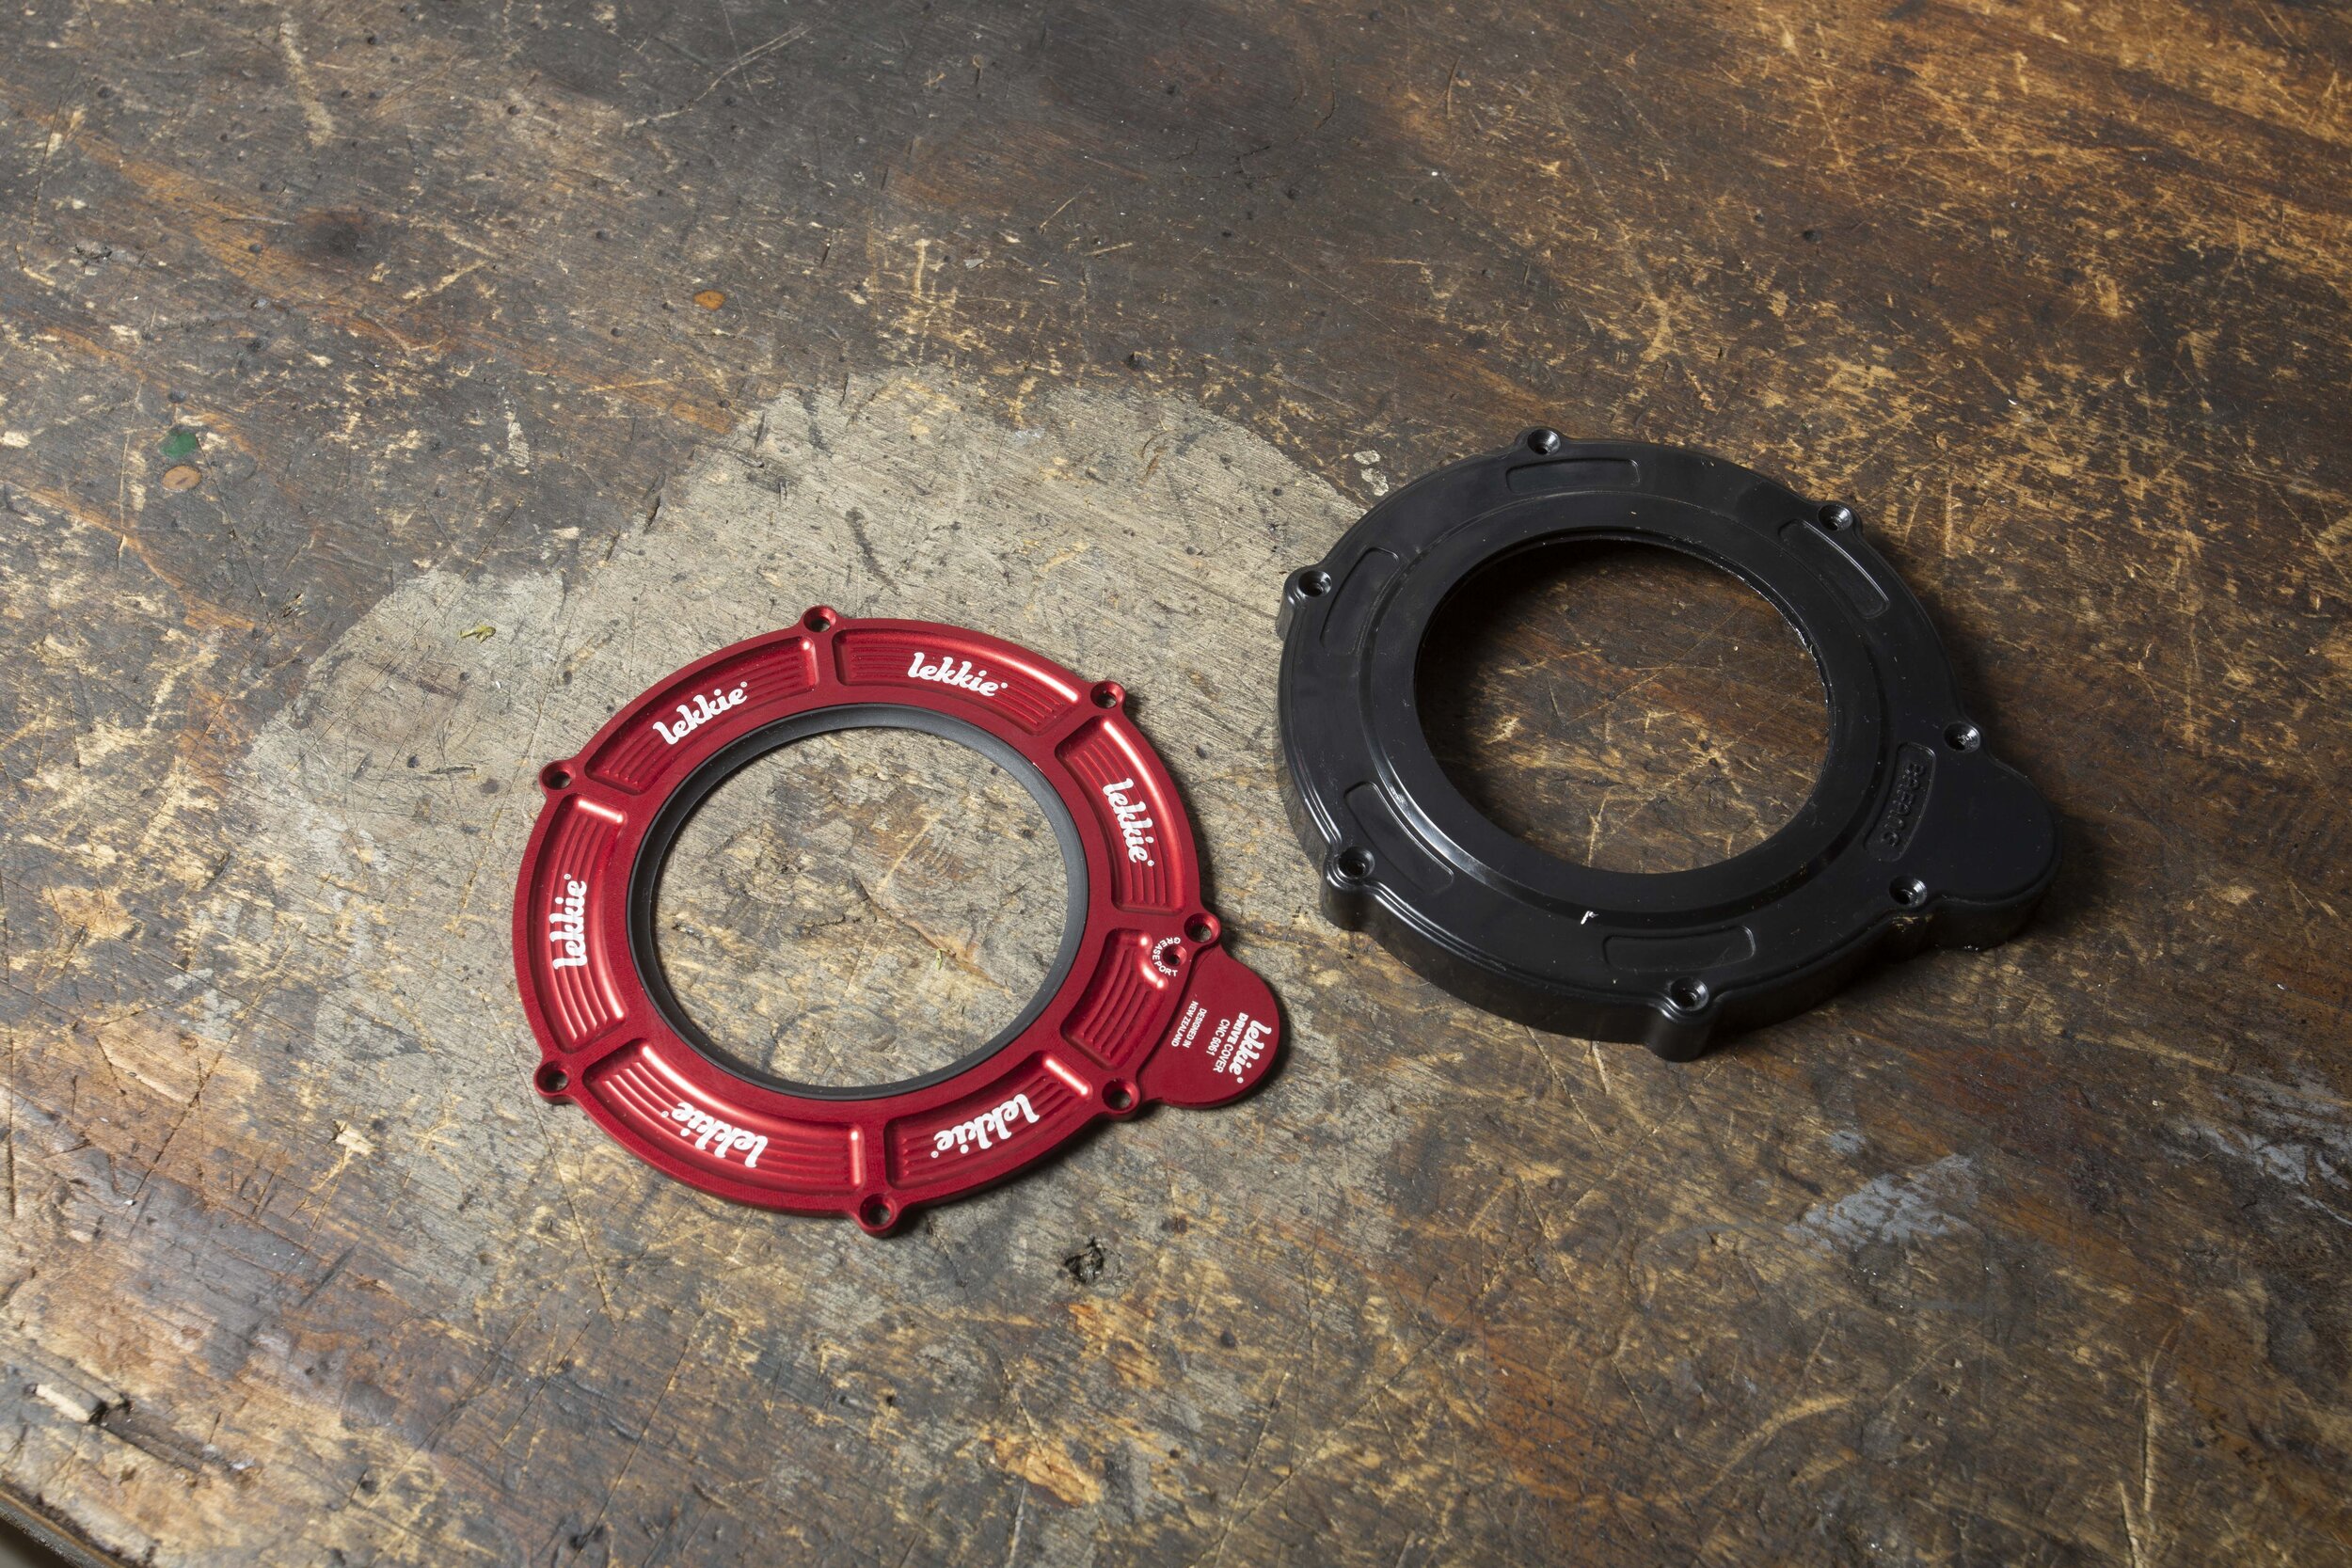
Removing the motor housing
Before removing the motor housing you will need to disconnect all the controller wiring.
This is straightforward but the main rectangular plug in the top of the housing will be covered in silicone. Carefully cut through the silicone and take your time. The plug will pull out with a pair of long-nosed pliers. You will also need to free the three motor phase wires from their silicone to allow the motor housing to come off.
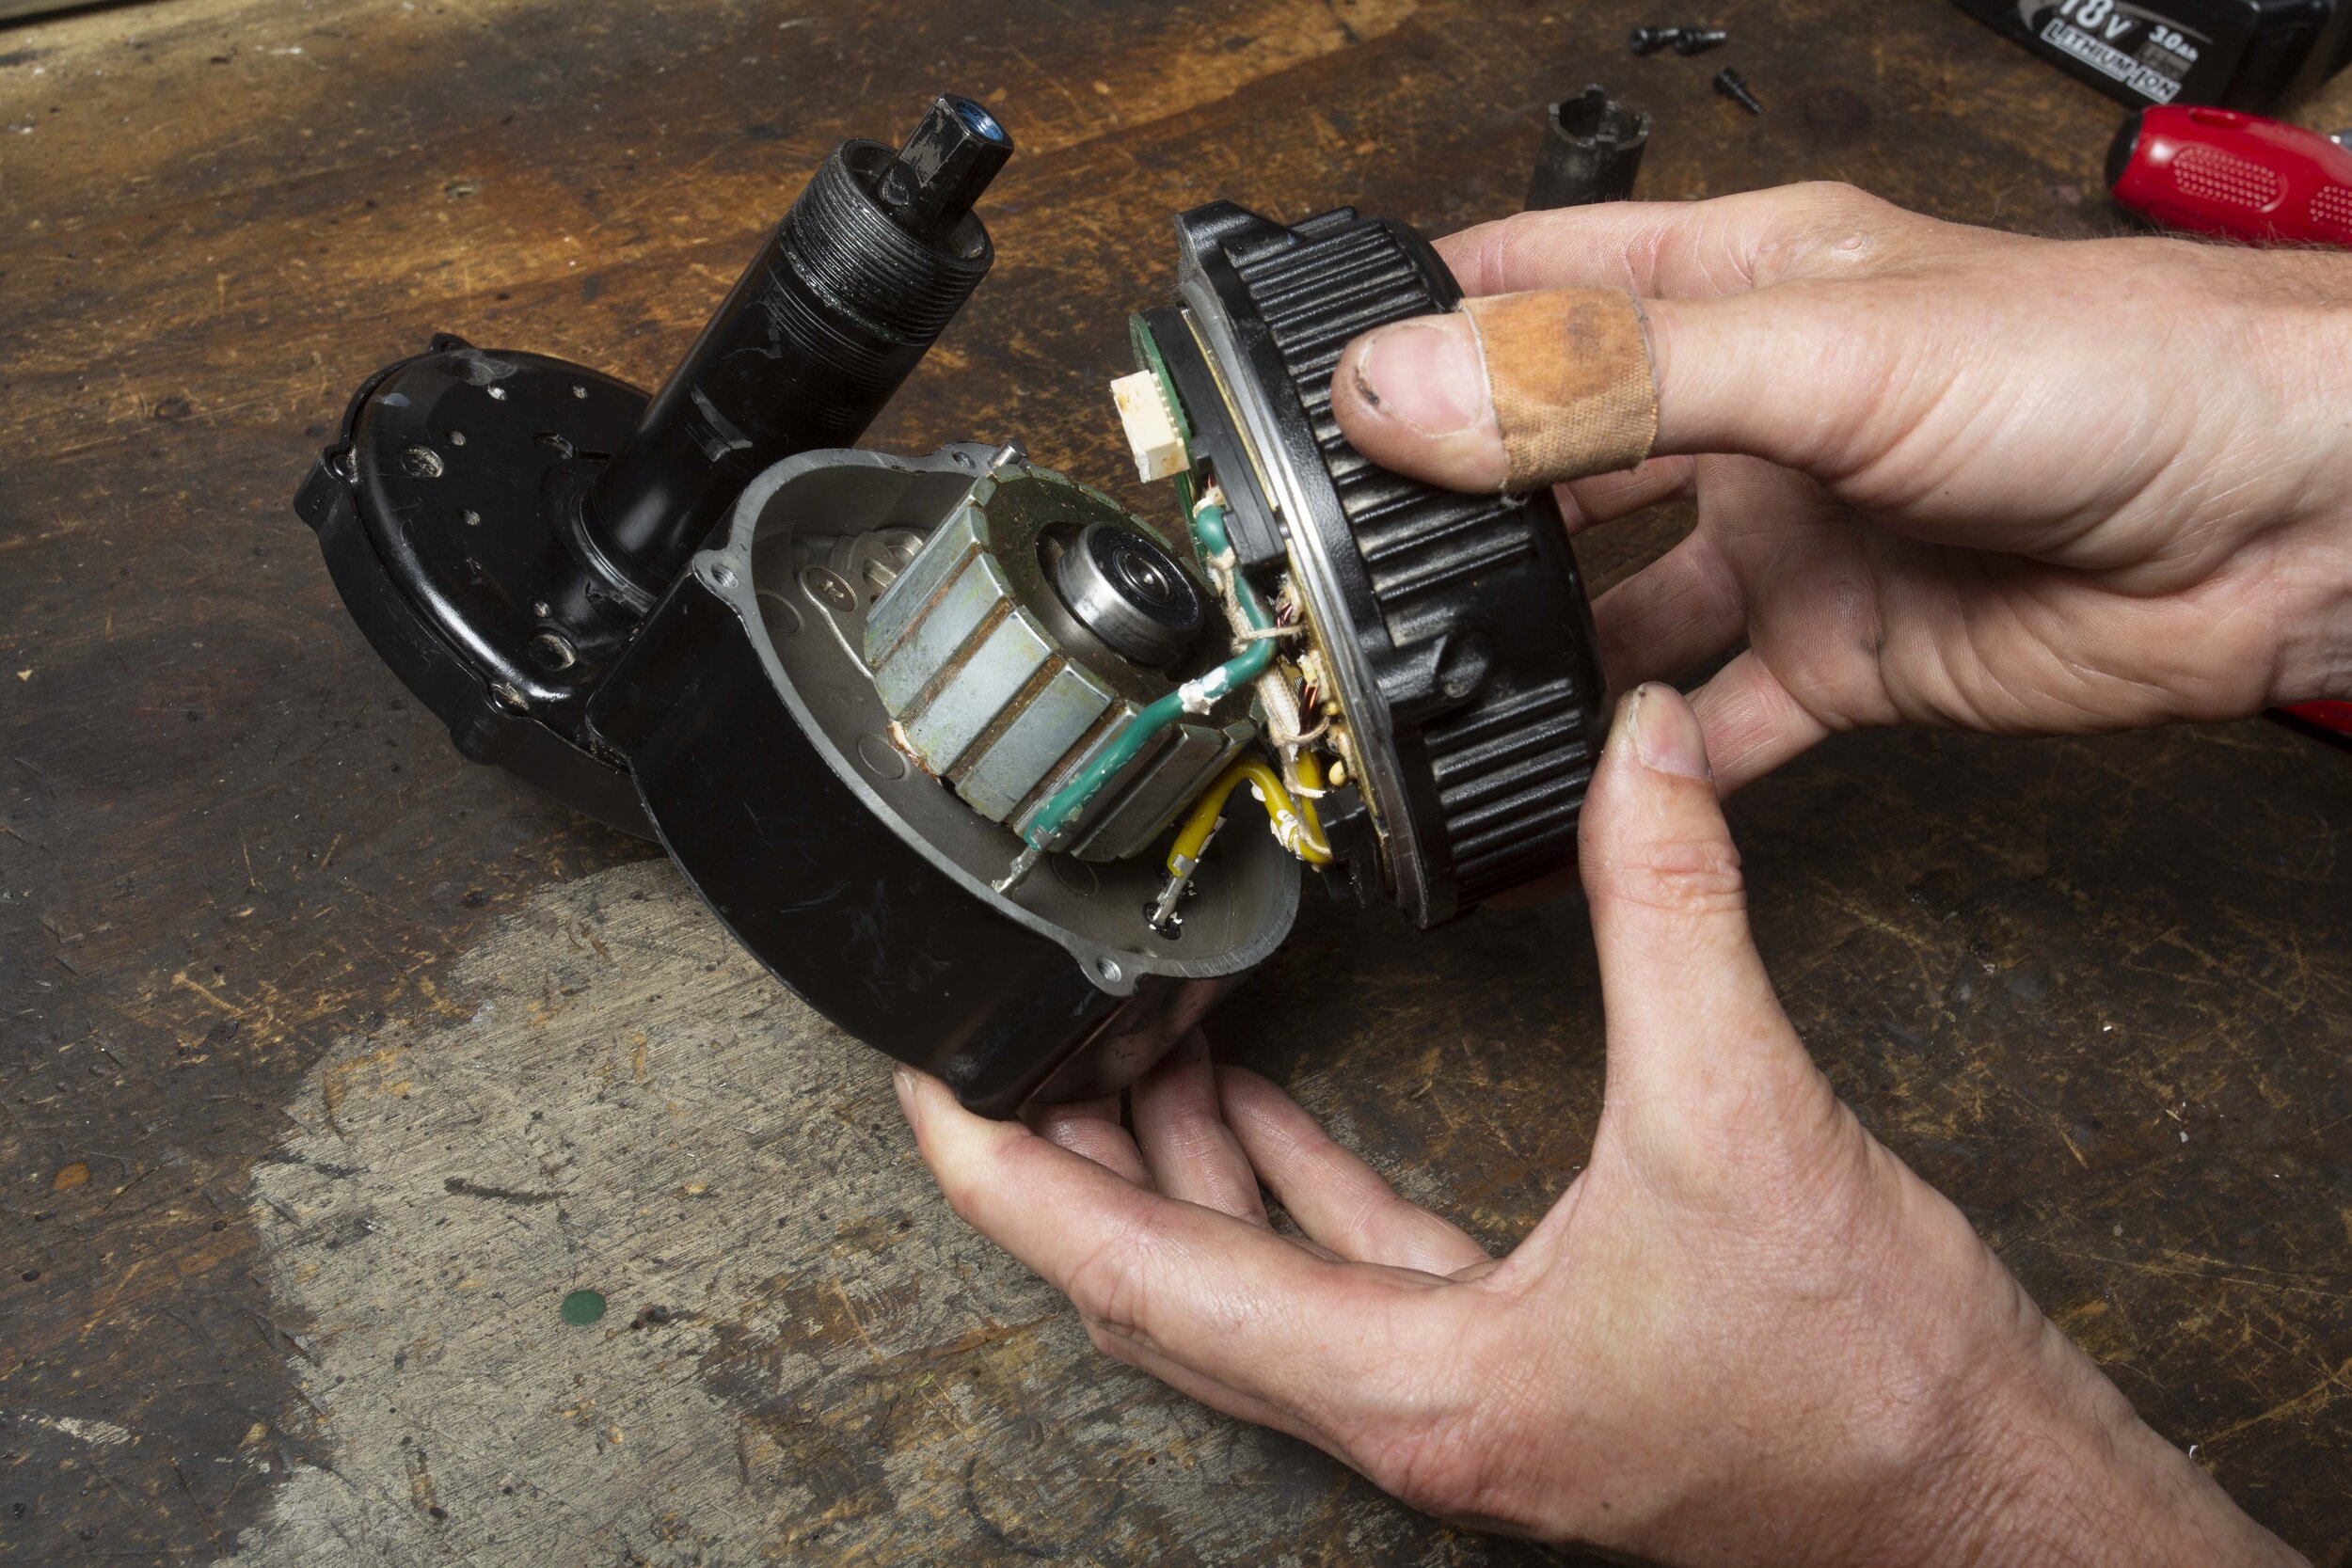
To remove the motor housing there are four mounting bolts. The housing can be hard to remove depending on whether the armature stays in the controller end bearing or not. The magnets are really strong and create a lot of resistance, so take your time.
The windings should be a nice copper/orange colour. If they appear dark brown and you can smell that ominous burnt electrical smell then they are history.
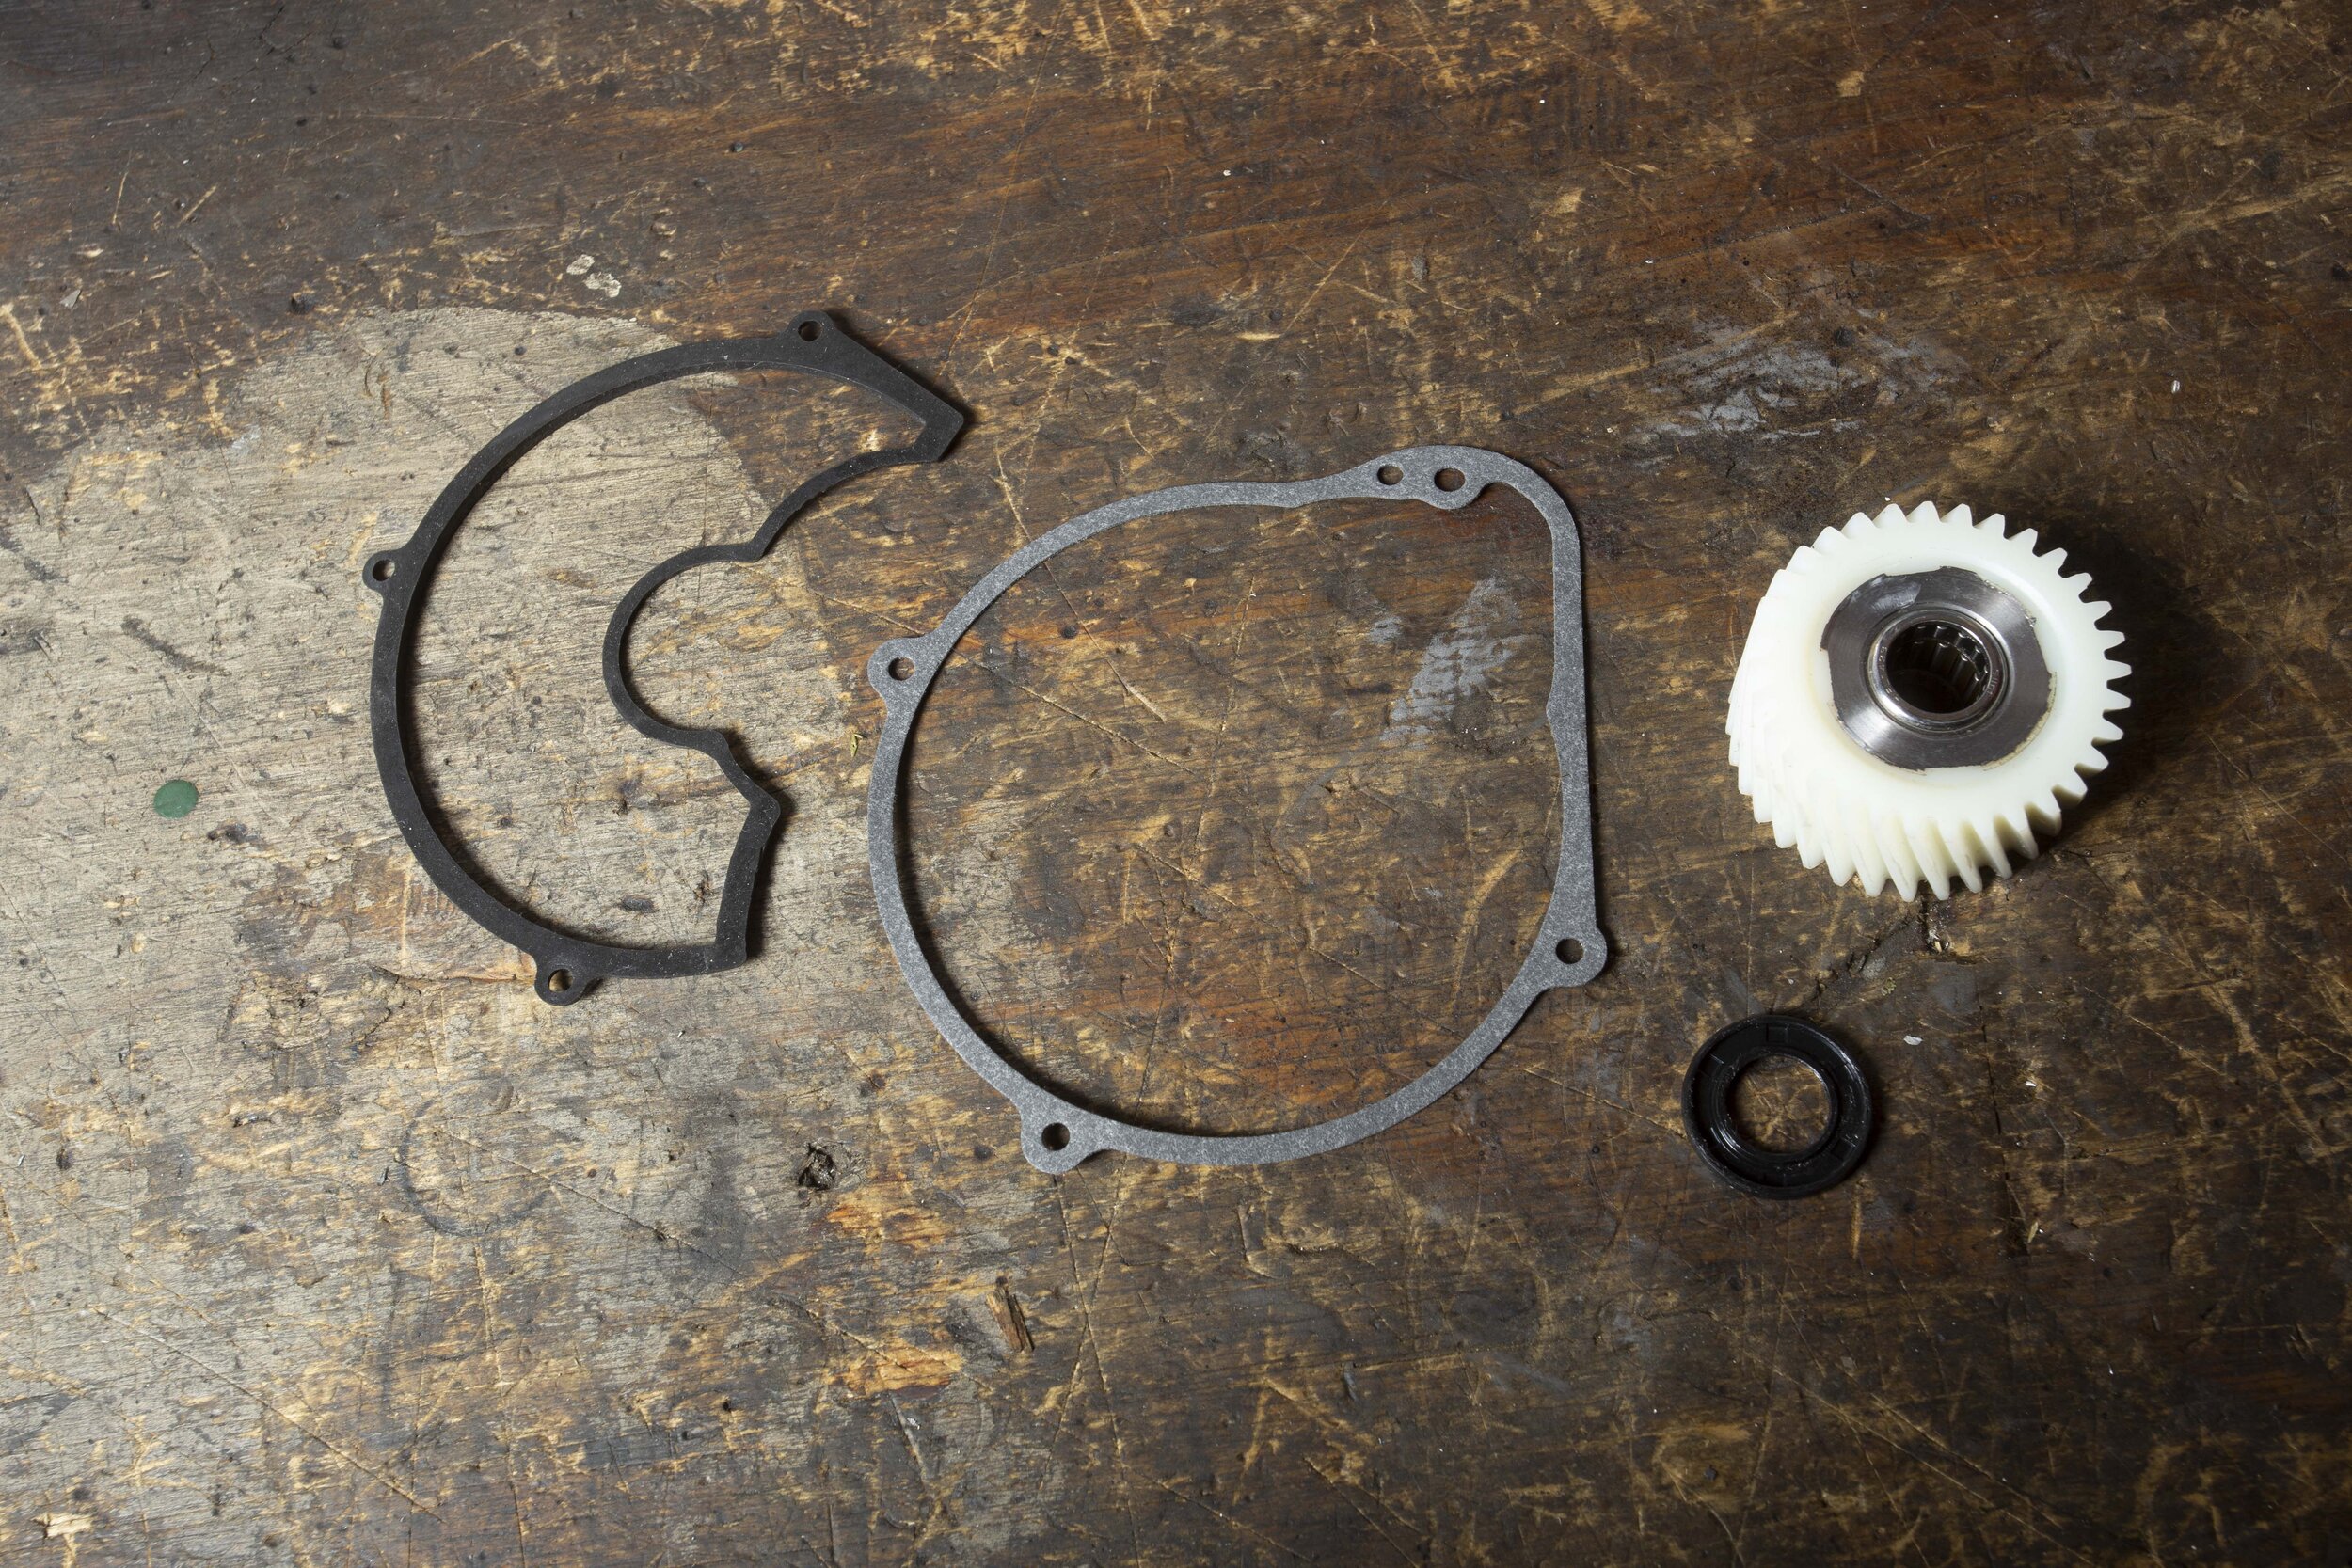
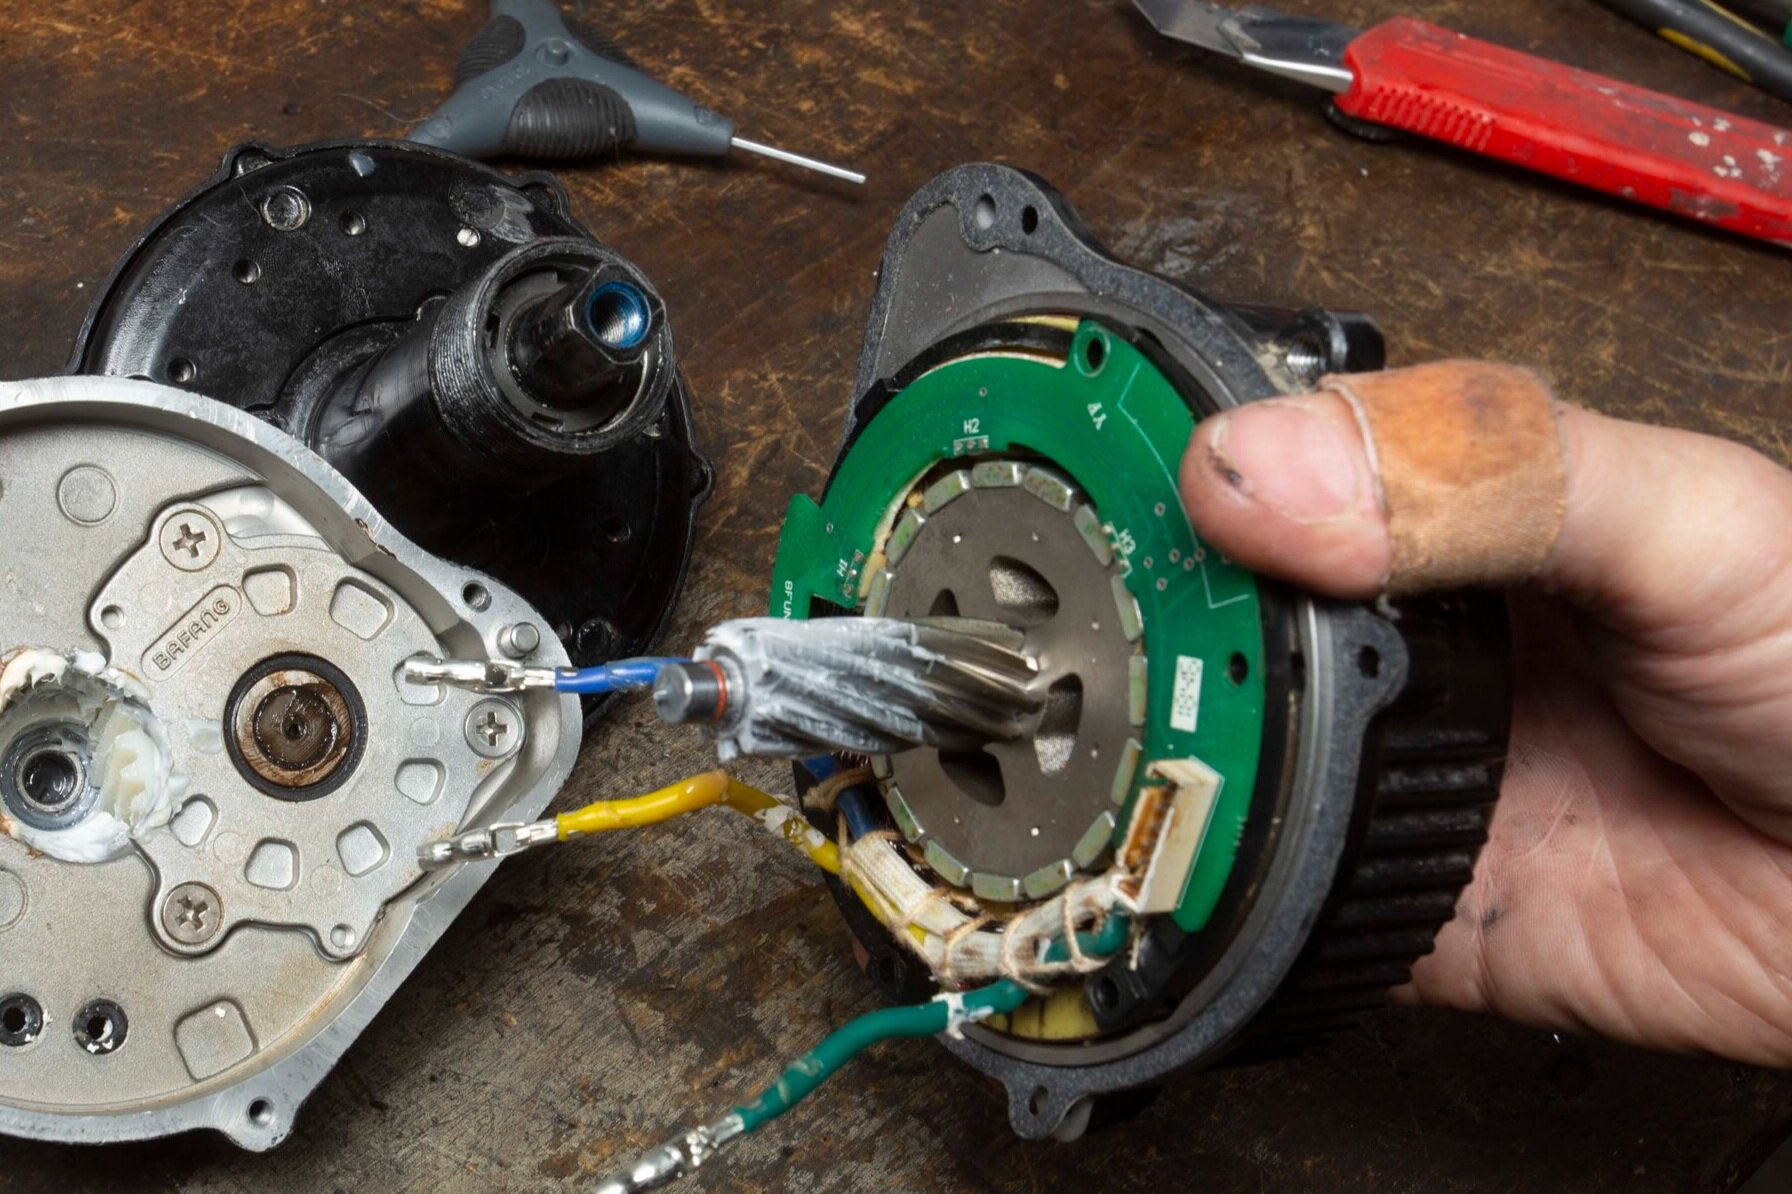
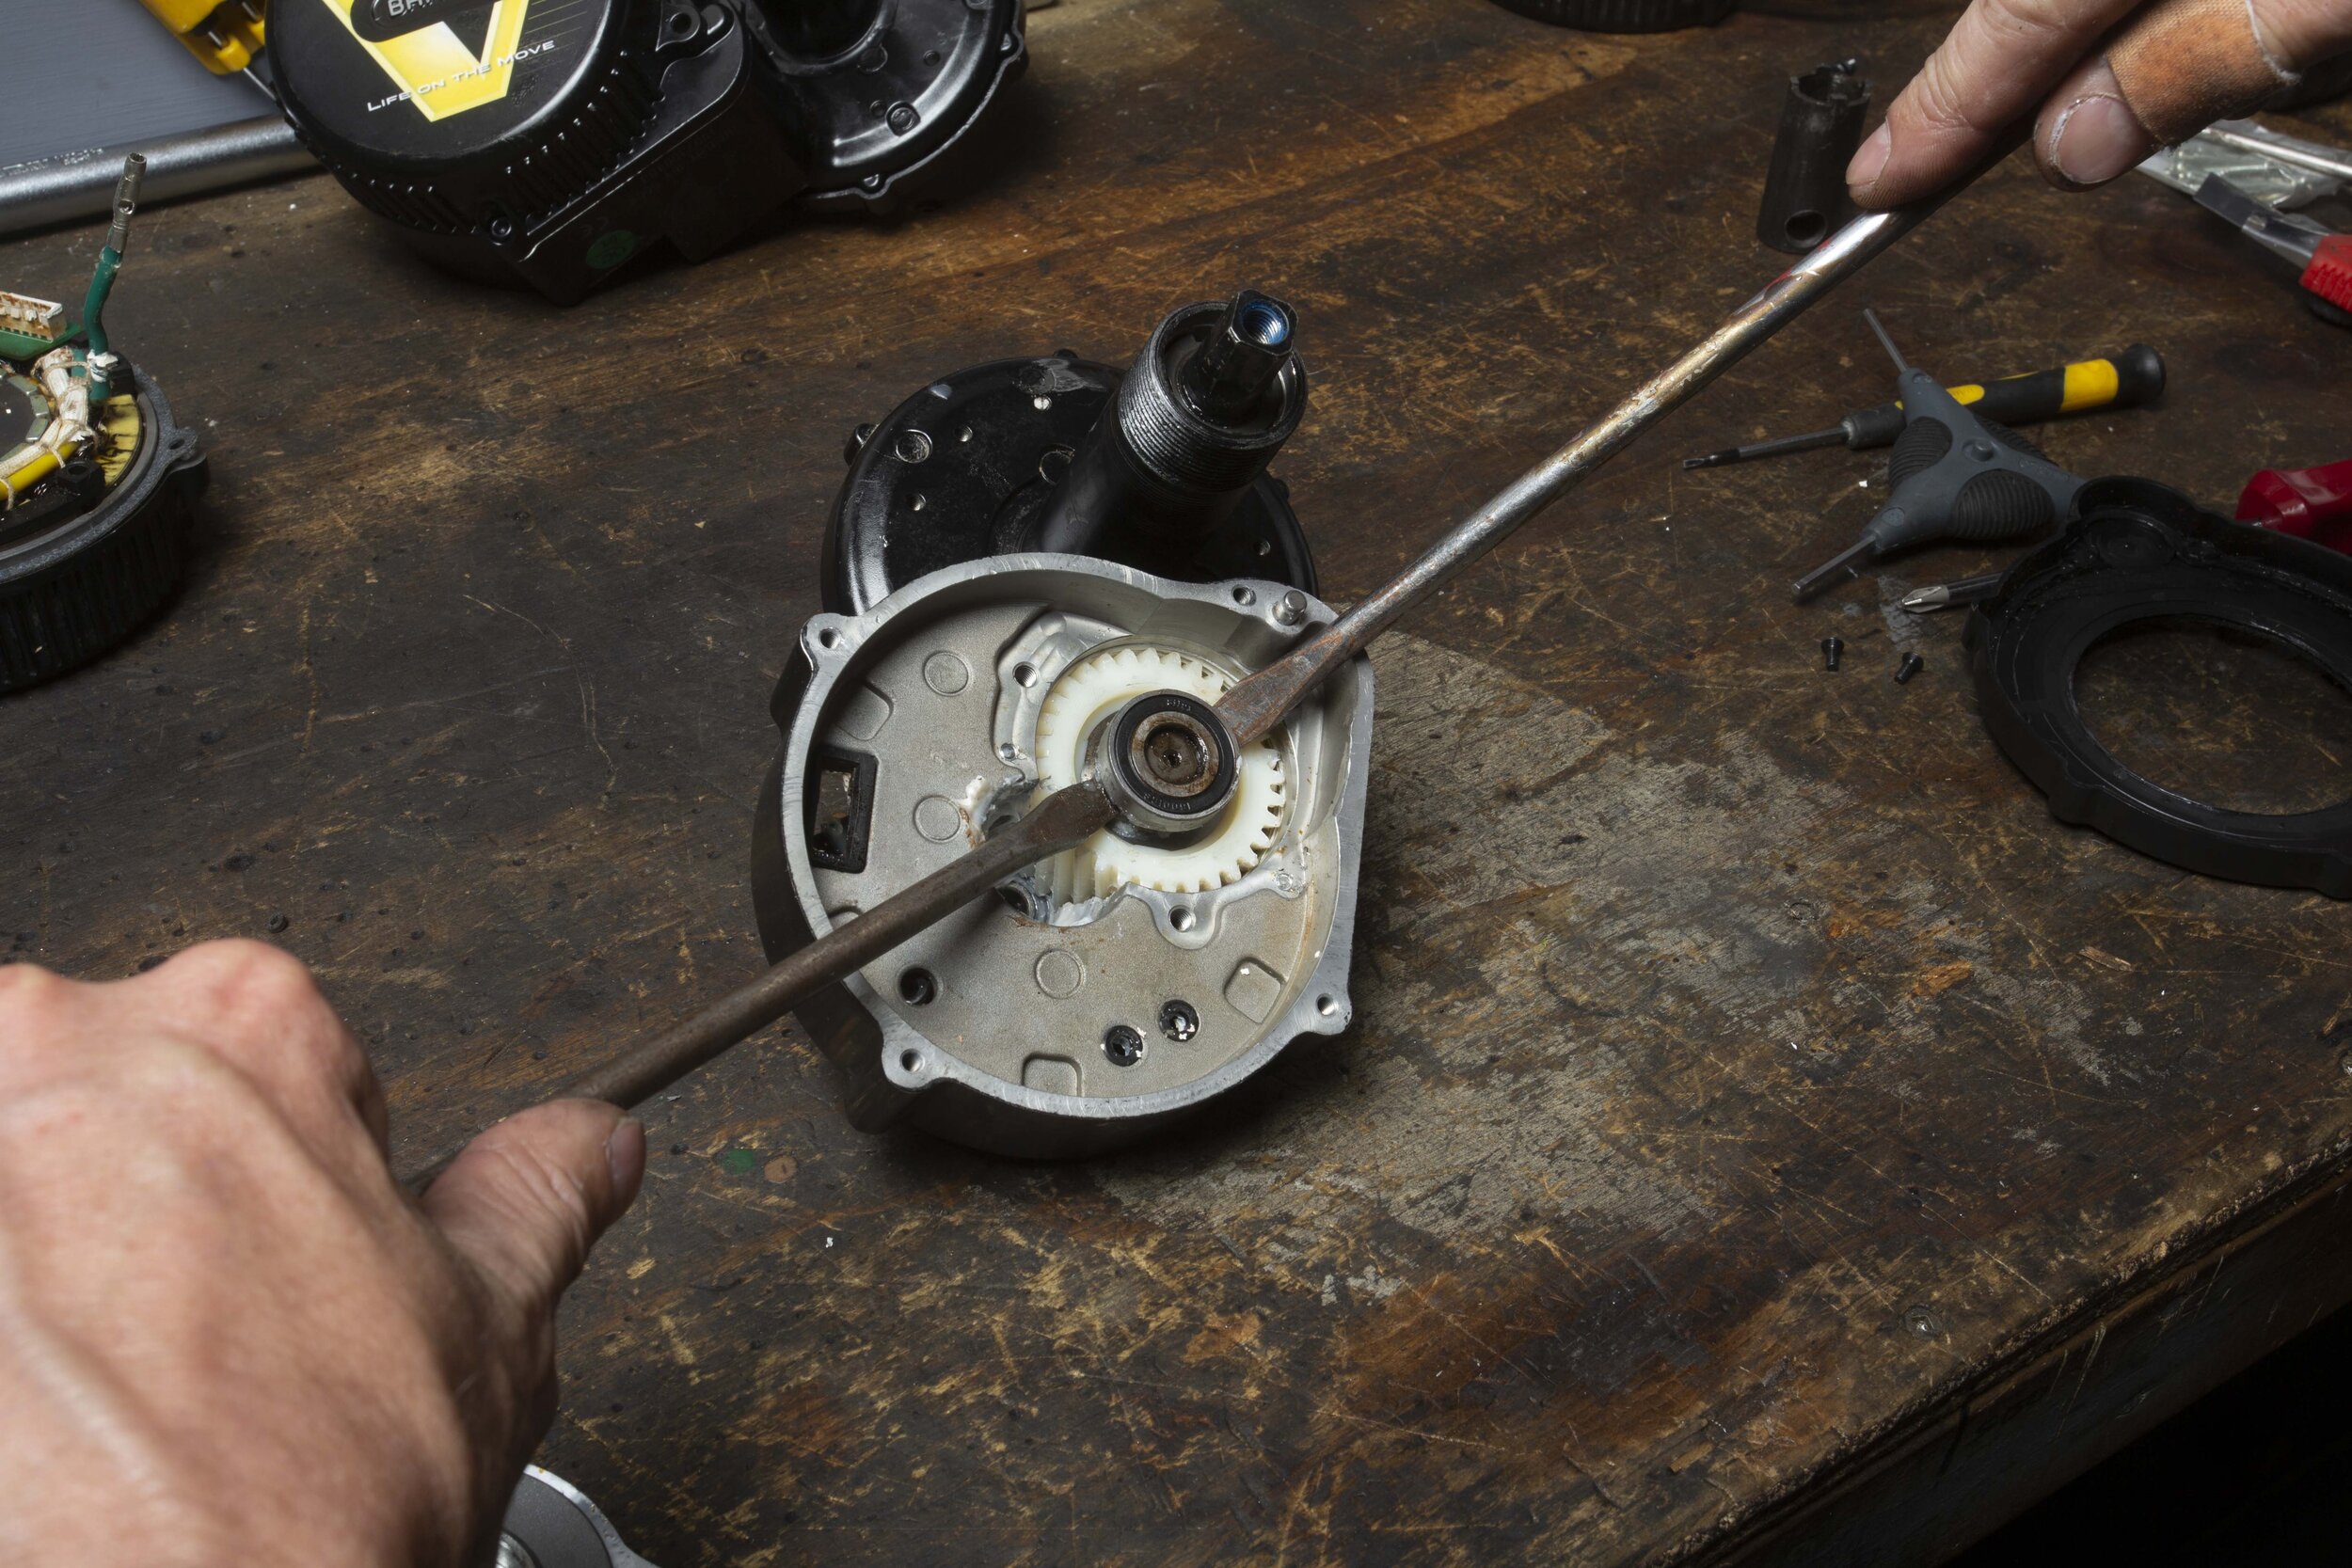
The last thing to remove is the nylon gear and bearing housing. You will need a pair of good-quality external circlip pliers with small ends for this. There is a bearing cover plate held down with three screws. Remove the screws.
The cover has two small threaded holes which are used to remove the cover. Take two of the controller mounting bolts and thread them into these holes. Tighten the bolts evenly and the cover will lift up. It usually lifts up on an angle so take your time and give the cover a wiggle, it will pop off with a bit of persuasion. Remove the circlips and the gear assembly will slide out along with the gear shaft. The nylon gear should be surrounded by a nice white grease. If the gear is even slightly worn it will need to be replaced as it won’t last long if reinstalled. It has a one-way sprag clutch built into it so if this isn’t working it’s time to replace the gear.
Obviously, all the bearings need to turn smoothly and be free of any debris.
Remove controller housing
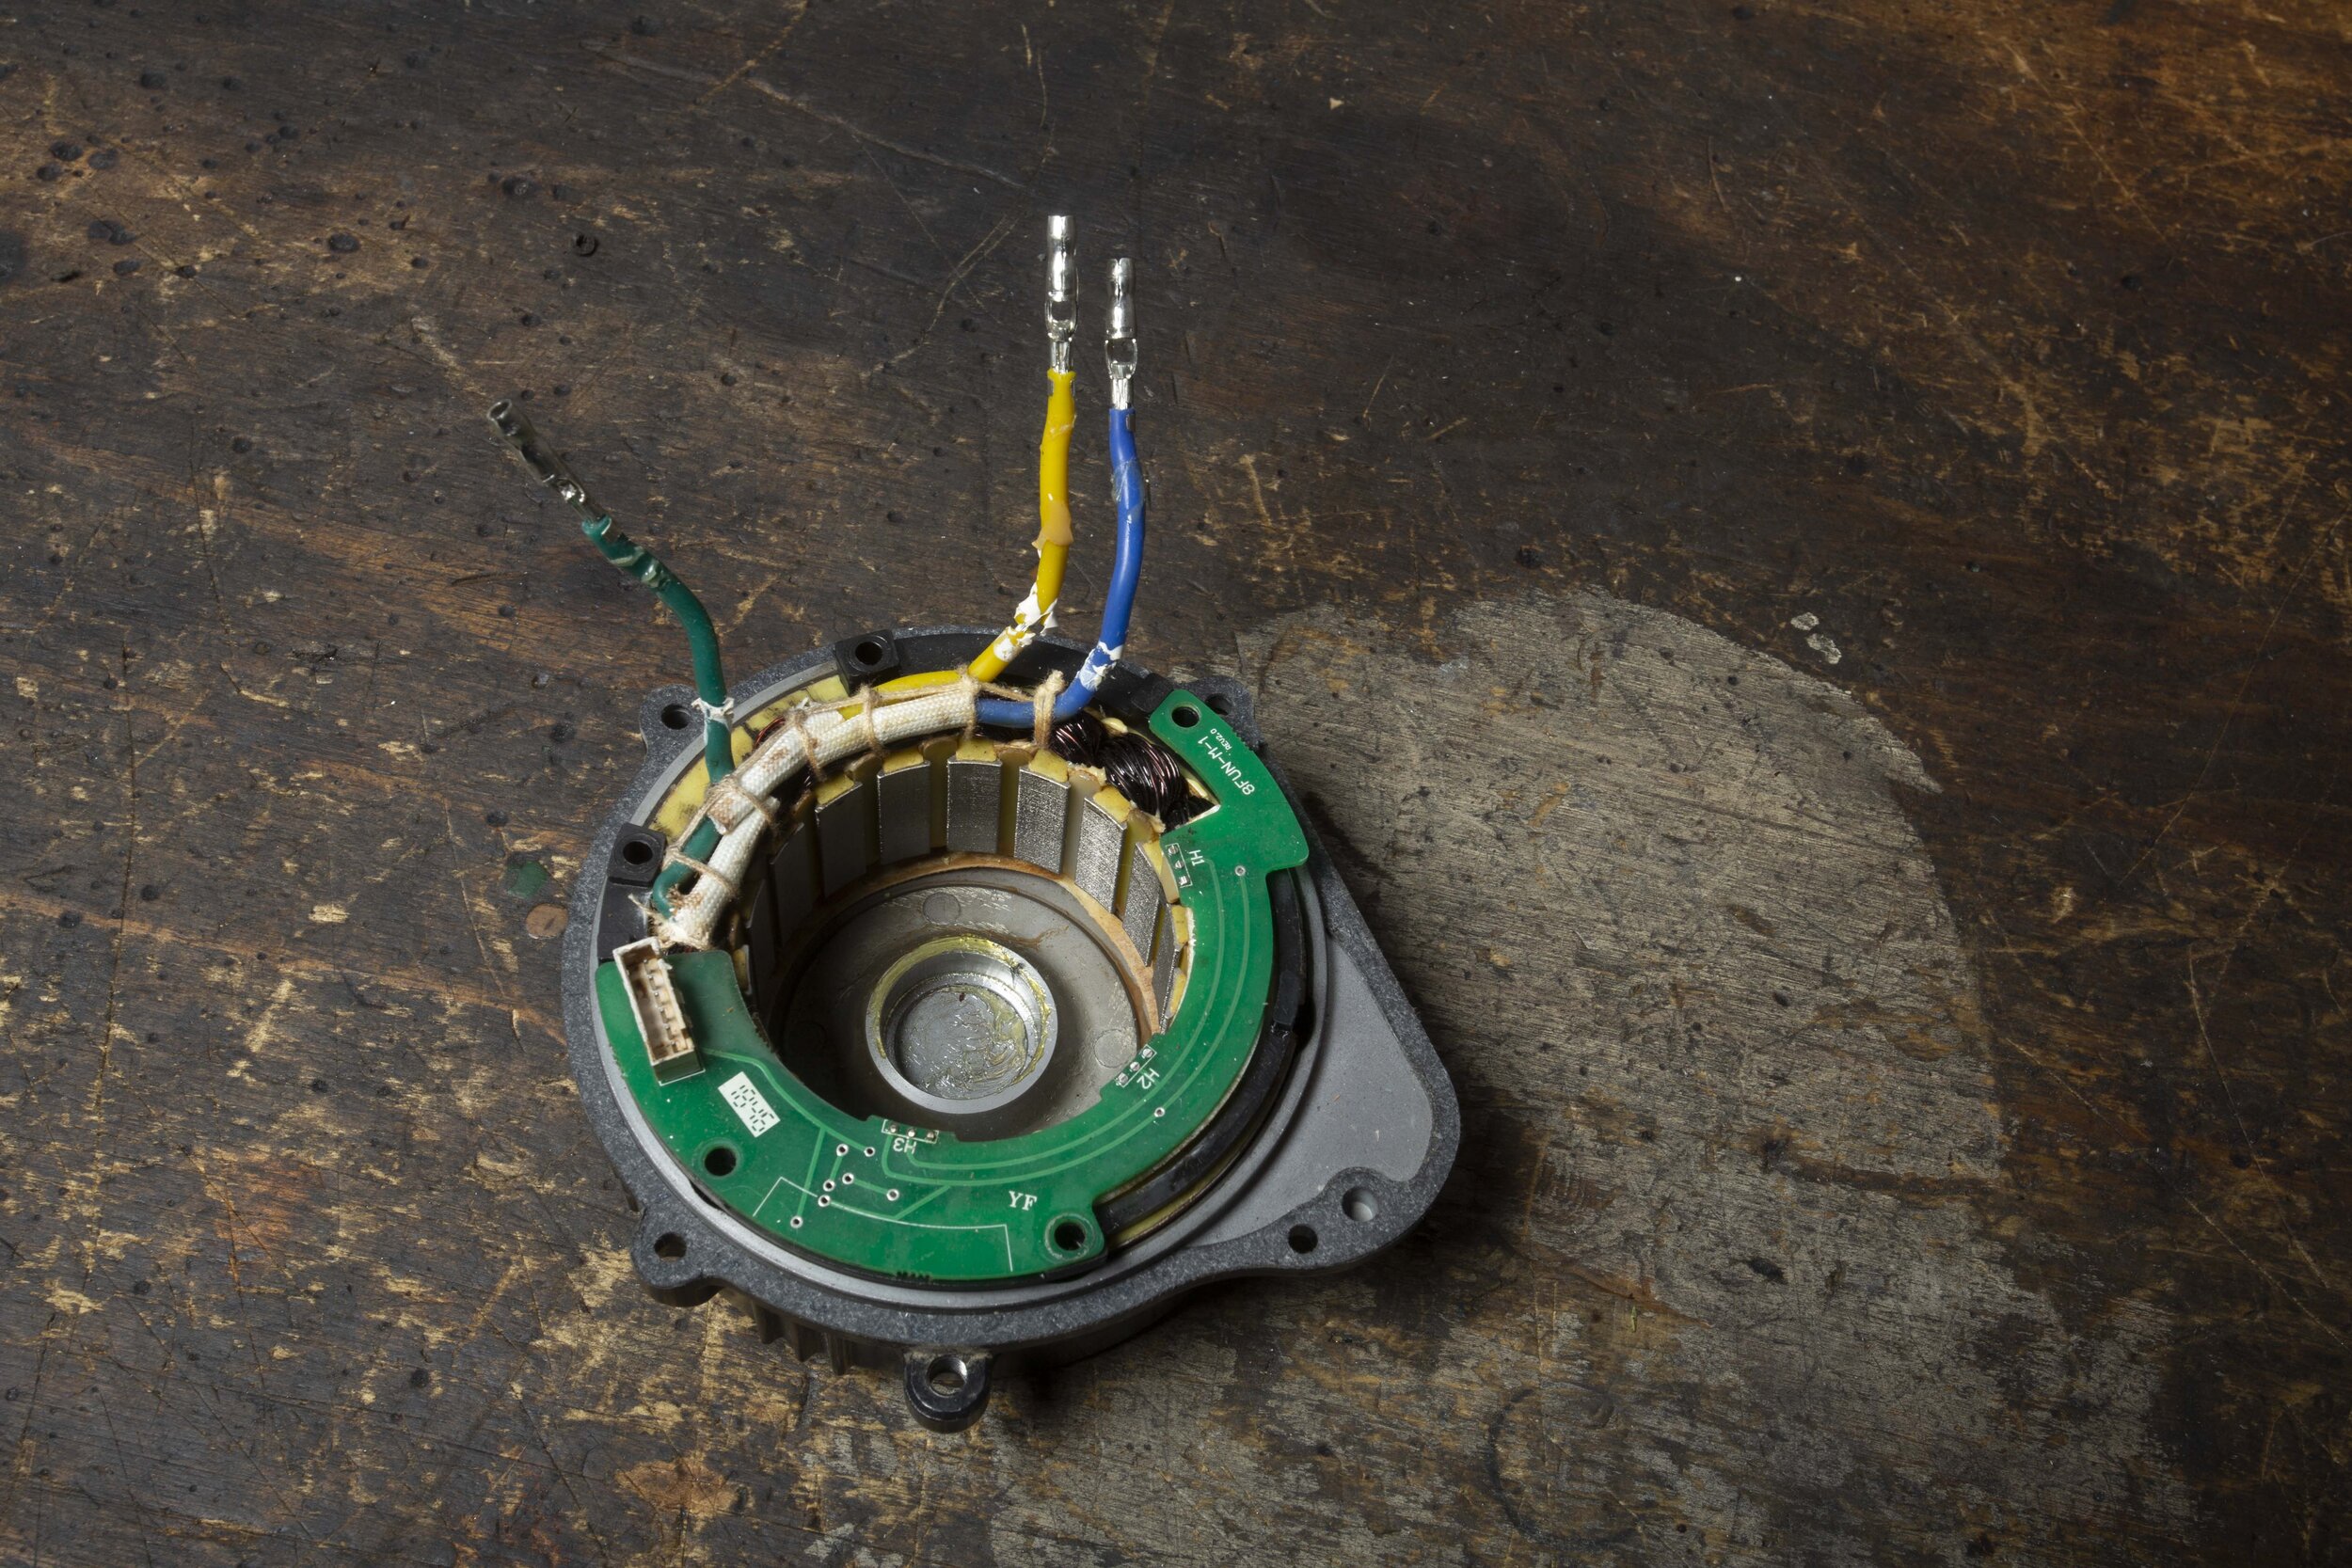
Controller with water damage
Removing axle and and main drive gear
Axle nuts and seal
Retrace your steps for reassembly
Reassembly is just the reverse of disassembly. As always make sure everything is clean and use good-quality greases. Make sure you apply some fresh silicone to the controller plugs. When it comes to doing the two nuts up on the left side of the axle make them snug — not too tight and not loose. The axle should turn freely without any stiffness and have no sideways play. The first nut provides the adjustment and the second nut locks it in place.
So there you have it. These motors can be maintained and serviced by anyone with some mechanical know-how and patience. Parts are readily available and don’t cost a fortune.
Looked after correctly these Bafang BBS mid-drive motors will give you years of trouble-free service and will outperform most other e-bikes on the market.

Getting to the guts of the motor
Lithium-ion battery care for e-bikes
Quality cells
Keep your batteries at room temperature
That means between 20-25°C. The worst thing that can happen to a lithium-ion battery is to have a full charge and be subjected to elevated temperatures. So don’t leave or charge any lithium-ion battery in your bike if it’s hot out or in direct heat. Heat is by far the largest factor when it comes to reducing lithium-ion battery life.
Performance and range will also decrease in cold temperatures. Avoid charging your battery in sub-zero temperatures. Fortunately, New Zealand’s climate, in general, is favourable for keeping a battery in a healthy state.
The bigger the battery the better. The more watt-hours the better
Batteries deteriorate over time, whether they’re being used or not. The bigger capacity or amperage battery you can afford or get with your bike the better.
You can work out the watt-hour size of your battery by multiplying the volts x amp hour rating. For example, if your battery is 36v and 17.5ahrs then 36×17.5 = 630 watt-hours. This is considered the start of the bigger battery sizes in the e-bike world. You will get more range and have peace of mind that you won’t be pushing that fancy e-bike up the last hills. The battery will be less stressed under higher loads and should last longer than a smaller battery when cared for correctly. It’s important to remember the aging characteristics when purchasing batteries. Make sure to ask for ones with the most recent manufacturing date.
Quality cells make a quality battery that lasts
Batteries are the one thing you can’t afford to skimp on. If the battery seller cannot confidently tell you the brand of cells, the capacity, and the charge/discharge rating of each cell then are they really the experts they claim to be? E-bikes can draw a lot of current and it’s not enough just to have a branded battery pack as there are various types of cells within each manufacturer’s range and not all are suitable for e-bike use.
Less power equals more life
E-bikes are fun. For a lot of people, it’s more fun when there’s more speed, especially uphill which also means demanding more power from the motor and battery. This isn’t a problem as most bikes and batteries have inbuilt safeguards to protect themselves but it can shorten the life of your battery. Even though these batteries are capable of producing high current and power for extended periods they prefer to discharge at a more sedate rate.
When pushed hard they create more internal heat which can lead to the premature ageing of the cells. The same applies to charging. Most batteries come with a 2 or 3 amp charger which is fine. Please avoid attempting to fast charge your battery with a larger charger as this also creates heat which can damage the cells.
Only charge your battery just before you need it
For years we have been told that we have to keep batteries fully charged to make them last. This is not the case with lithium-ion batteries. They prefer to sit in a semi-discharged state somewhere between 40-70 percent. So unless you are riding the next day please avoid the temptation to put it straight on charge after use and wait until the night before to charge if practical.
Allow partial discharges and avoid full ones (mostly)
Unlike NiCad batteries, lithium-ion batteries do not have a charge memory. That means deep-discharge cycles are not required. In fact, it’s better for the battery to use partial-discharge cycles. There is one exception.
Battery experts suggest that after approximately 30 charges, or approximately 1000-1500km, you should allow lithium-ion batteries to almost completely discharge. Continuous partial discharges create a condition called digital memory, decreasing the accuracy of the device’s power gauge or the speedo’s ability to judge battery charge correctly. So let the battery discharge to the cut-off point and then recharge. The power gauge will be recalibrated.
Avoid completely discharging lithium-ion batteries if you can help it
Lithium-ion batteries can deteriorate when left stored in a completely discharged state and this can lead to what seems like a dead battery.
They may be able to be rescued but only by an expert with the correct equipment. So you should run your pack to exhaustion, then recharge it as quickly as possible to at least 50 per cent charge.
They don’t like being left stored fully charged either and prefer to sit in a mid-charged state
For extended storage, discharge a lithium-ion battery to about 40 per cent and store it in a cool place. It is not recommended to store lithium-ion batteries fully charged. In this state oxidation of the lithium-ion is at its highest rate and premature deterioration will occur.
Storing lithium-ion batteries at approximately 40 per cent discharge and in the refrigerator (not freezer) is recommended if practical for extended periods.
Final thoughts
Lithium-ion batteries are a huge improvement over previous types of batteries. Getting 500 charge/discharge cycles from a lithium-ion battery is not unheard of. Just follow the above guidelines and you will get the most from the battery.