By Bob Hulme.
This story comes about because of a mishap with my trusty car ramps which I had for more than 20 years. They were a clever pressed-steel design, a product of Spedding Ltd, one of the country’s original importers and wholesalers who took on manufacturing as a response to the import restrictions and import licensing laws of the time. I was the factory manager and car ramps helped to fill the seasonal gap in our aluminium-boat manufacturing. Spedding Ltd did not survive a Brierley-style takeover and split. My beloved car ramps didn’t survive either, to some degree due to automatic transmission.
Your friends will borrow the ramps for oil changes
Automatics
I love a car with a manual gearbox and loathe those automatics, al-though one day when I am really old and feeble I may change my mind. However, I was being help-ful for a friend and guiding a car up my ramps to do some regular maintenance. Halfway up the slope the car stopped. The logical thing in that situation is to give the car a bit more loud pedal, which is what the driver did.
Unfortunately, with automatic transmissions it is not so easy to back off if you give it too much. Once the wheels made it to the top of the ramp, the car was like a wound-up rubber band and tried to drive right over the stops at the end. The result was the ramps tipped sideways and were crushed under-neath. Pressed steel ramps are light and strong, but once they are bent you cannot straighten them and expect them to be as robust.
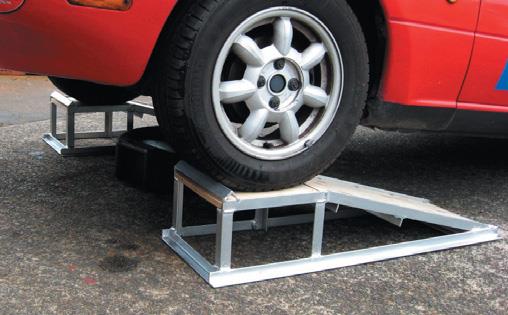
It was a chance to make a better pair of new ramps. As it was, the old ramps had become too steep for modern cars with lower bodywork such as spoilers and more over-hang. Friends and family will no doubt want to borrow your new ramps and you will be able to trade favours. Owning ramps can save you money by enabling you to do your own oil changes and other under-car maintenance. I like to use good quality oil and a new filter at every oil change. To drain deposits from the engine with the old oil, I use a flushing additive added before the oil is drained with the engine left to idle for 5 to 10 minutes. You can recycle your old oil to collection centres or ask your local mechanic if he will take it. Most garages have a regular pick-up service for recycling oil.
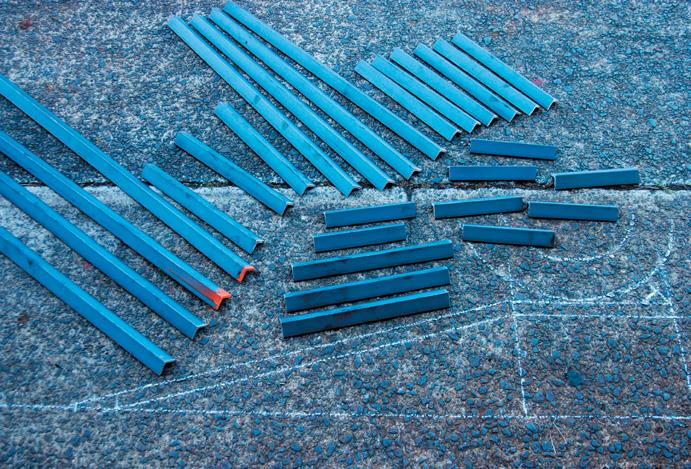
Destroyed steel ramps
Material
I decided to use 30 x 30 x 5 mm angle iron for the framework and a 15 mm-thick construction ply-wood top surface. Angle iron is easy to work with, is rugged, easy to weld and not too expensive. Ply-wood is also easy to work with and is very strong for its size. Care must be taken, though, as plywood does deteriorate over time if not cared for.
I have used a 15º angle for the ramp slope. If you have a particularly low car, 11º should work work better. I bevelled the bottom end of the ply slope to ease the tyres on and pre-vent the ramp being pushed for-ward by the car. Each ramp is 370 mm wide, including the angle iron frame, and a metre long in total. The top platform where the tyres rest is a 300 mm square of ply, a width that suits wider tyres. Use angle iron for the stop. Shorter cross-pieces are de-signed not to stick out beyond the edge.
I like to draw a design in detail on paper first, but you can mark it out with chalk on the concrete floor. Make a cutting list and cut all the pieces of angle iron first, then lay them against your chalk outline to check sizes and evaluate the structure. Any angled ends can be cut by marking them once you do a layup of the pieces so that the best joints will be achieved. In my design, only the top edge of the sloping side-rails needs to be cut on an angle. Cutting the angle iron by hand with a hacksaw can be laborious. A local engineering business might supply the material cut-to-length. Or it may be time to invest in either a small power hacksaw or one of those saws with an abrasive wheel. They are not ex-pensive and save a lot of time.
Cutting angle iron
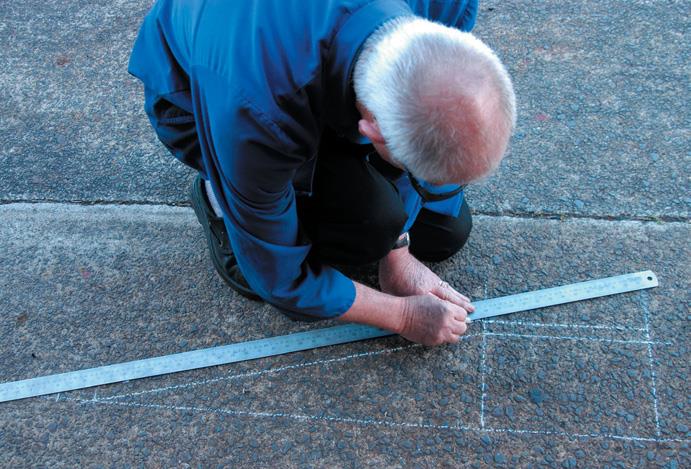
1: Draw chalk outline 2: Cut pieces laid out
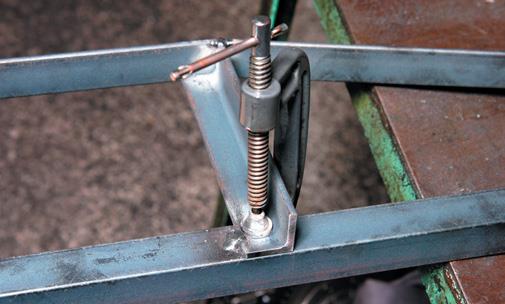
Tack weld
For this job, I preferred stick weld-ing because of better penetration. I am using a 2.5 electrode to show it can be done with that. I would normally use a 3.2 electrode but not every home workshop or shed Top platform stop.
has a powerful enough arc welder. Use a rafter square and a G-clamp to position the various pieces ready to tack weld. To help space the ramp sides correctly apart, position and clamp the cross-member across while fixing the ends.
A tack weld is a small weld that is easily broken or at least allows parts to be adjusted for squareness with a light tap with a hammer. Tack-weld a complete ramp together before doing any full welds so that you can check the alignment and sizes first. When you have made any necessary adjustments, start doing the full weld runs at the joints using G-clamps to minimise the effect of movement caused by contraction of the hot weld.

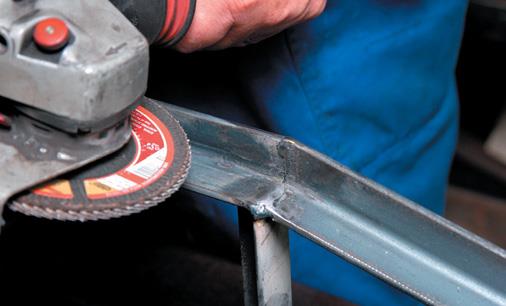
1: Clamp for tack welding 2: Grind welds smooth 3: Test against layout
Extra cross-members
When I started this project, I de-signed each ramp to be made from one six-metre length of angle iron. But when the completed ramps were tried with a medium-to-heavy car on them, the deflection of the plywood was more than I expect-ed. Consequently I have added two more cross-members and these are now included in the plan. The job needs 6500 mm of angle iron. One cross-member goes under the top square of plywood at its edge where it meets the sloped ply ramp. The other cross-member is about 40 mm away from that to support the top end of the sloping ply.
These cross-members need to be cut at their ends in such a way that they “check in” to the side members and are hard up against the underside of the plywood panels to give full support. The crossmember that is positioned under the sloping ply about halfway down its length could also be checked-in to give better support. Cutting the ends to give the shape for checking in can be done with a hacksaw, bandsaw or with a cut-off wheel in an angle grinder.
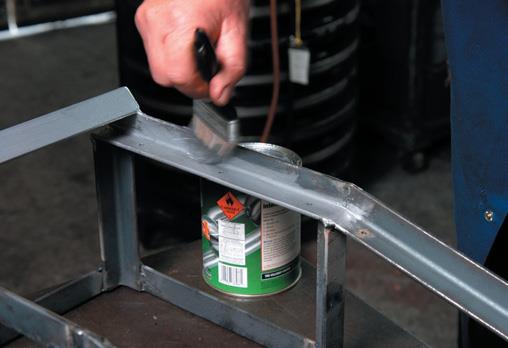
After welding and before fitting the plywood surface, give the structure a good coat of paint so the ramps are easily cleaned, don’t go rusty and stay looking good. I used Wattyl Kill Rust paint. It can be used directly on bare steel and gives a tough coating which will take a lot of knocks. This is okay instead of galvanizing for these ramps as you would probably use them only in dry conditions and store them in-side.
Top platform stop
Paint preparation
Preparation is the key to any good paint job. Wire-brush any surface rust off and ensure the welding slag is cleared away. When you are using stick arc-welding rods, the slag which sets on top of the weld should be broken off with a chip-ping hammer before you paint the metal. Otherwise, it will certainly come off on its own in the future to expose an unpainted weld area. Removing the slag also allows you to inspect the weld to make sure it is a good one.
Before painting, smooth all sharp edges and corners. Paint does not like sticking to sharp edges so a better coat-ing will be achieved by filing or otherwise smoothing off edges. An angle grinder with a grinding wheel will grind off an edge but leaves its own sharp edges. A flap wheel in an angle grinder is much more effective. Equally important, round off the corners of the exposed angle iron so you don’t catch yourself or your clothes while working with the ramps.

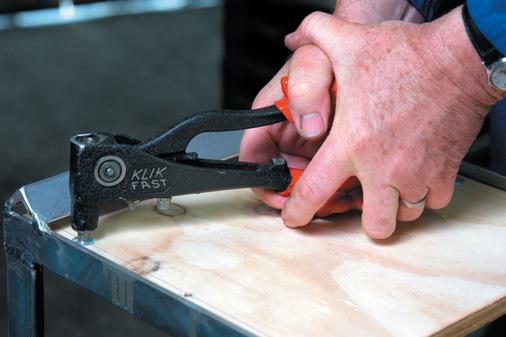
1: Use anti-rust paint before attaching ply 2: Drill through ply and metal 3: Rivet on ply 4: Use large-flange rivets
Fixing
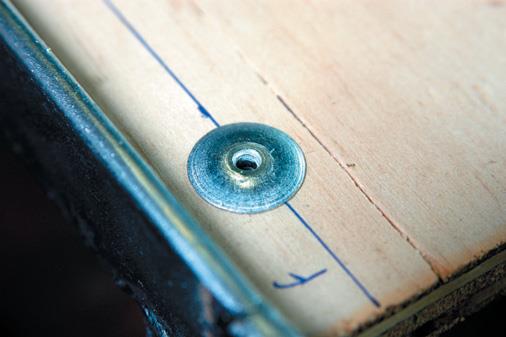
You could fix the plywood to the ramps using gutter bolts, counter-sunk screws or rivets. My choice is blind rivets with a large flange head. They remain tight and are effective as is proven by their popular use for holding plywood decks on trailers. I have put three rivets each side of the top and five in each side of the sloping plywood.
Your car tyres should grip the ply-wood well enough when driving up the ramps but if not (or if you are likely to use the ramps in wet conditions) use some of your left-over paint on the plywood surface. Just sprinkle some sand on the paint before it dries to give a grippy surface.
Finished ramp with extra reinforcing at slope apex
Cutting List:
Angle iron 30 x 30 x 5mm
Each Ramp:
2 x 1000 mm base rails
2 x 700 mm sloped side rails
4 x 300 mm top platform sides and cross-members
4 x 180 mm vertical supports
3 x 310 ground cross-members and wheel-stop
1 x 250 mm
15 mm construction ply
1 x 296 mm x 300 mm
1 x 296 mm x 725 mm
Timber Ramps
I have seen ramps made from timber planks that are probably 50 x 250 mm. The pieces are simply stacked on top of each other and secured together. The sloping part is formed by cutting the ends of the pieces of timber on an angle. The advantage is that they are completely solid so cannot collapse and are simple to make. However, if you buy the timber especially for the ramps, the cost becomes significant. It works well if you have off-cuts left from a building project.
Using your car ramps
You must know that it is wrong to crawl under a car supported only by a jack. A raised car should be supported securely on axle stands. You can also feel secure under your car when it is up on the ramps. Here are a few tips to help you use ramps safely:
1. They are intended for use with a car, not a truck or large 4WD;
2. Line the ramps up carefully with the car wheels before driving on. Preferably, have someone watching to guide you on;
3. Use ramps only on level, stable ground, preferably a concrete or sealed surface;
4. Apply the handbrake and chock the wheels that are not on the ramps.