ROBUST, OLDER DRILL PRESS WORTH SAVING
By Bryce Clifford
Bryce and his refurbished drill press,
Over a holiday period, I happened to come across a very old Tanner drill press in a second-hand shop. It was in very poor condition with several broken parts, various drill holes and damage to both the base table and the vertical sliding table. It came with a ½ hp motor but that too looked in very sad condition.
Some years ago I owned one of the old Dyco drill presses but I decided to pass it on after I had an opportunity to buy a 12-speed Asian imported model with a table that was able to be lifted by crank. I regretted losing the Dyco as it was quite clear the newly acquired, imported machine was nowhere near the quality. I bought the Tanner because I had an idea to build a small vertical slotting machine to cut small keyways and splines inside gears for my old motorcycles. I had made up a rather ugly prototype for a slotter as a proof-of-concept test which seemed to work OK. But a very good friend of mine had recently built such a unit using an old unwanted drill press so this was the main motivation for the purchase. (Many thanks, Bryan Thomas, for your magnificent mentoring skills and not inconsiderable help.)
The drill press as it was, prior to refurbishment
Rebuild
After unloading the Tanner at home and inspecting it, I concluded at first that it didn’t look like a smart buy and was worse than I thought. I wasn’t too concerned, as I did get it to cannibalise and use for something else. But the more I looked at it, the more I realised how tough, heavy and robust it was; my imported replacement was rather light and rattly in comparison.
I finally made a 180-degree turn in direction and decided that the Tanner would be rebuilt for my drilling work and the import model would donate its organs to my slotter project.
The Tanner did have the disadvantage that the table had to be lifted manually by hand up or down the vertical column. I thought this may be able to be overcome by the use of a small bottle jack as the table is extremely heavy. This needed some out-of-the-box thinking so I decided to tackle this problem later in the rebuild.
After completely stripping the Tanner and identifying what needed to be done, I started the rebuild. I gave all the parts a complete strip-down and clean with a wire wheel and a good soak in kerosene overnight.
I drilled extra holes into the lower base as the rear lug had broken off. Any unrecoverable items I threw out in the bin. Sadly, this meant that the ½ inch-capacity drill chuck which had broken teeth was dumped. As luck would have it, I did have a keyless chuck from an old lathe and that fitted the taper spindle on the drill perfectly.
Manual lift table…
…repowered with bottle jack
Motor
The existing ½ hp motor was also dumped as it appeared to surge on starting. When I took it apart, I found it had burnt-out points and lots of loose concrete in the windings. The motor was obviously a replacement unit and probably off a cement mixer. Interestingly, it also ran backwards so it was never going to drill any holes unless one owned a set of left-handed drills. I had a very tidy 1/3 hp motor under the bench from another past project and as I had no intention of drilling out any bridge rivets in the near future I thought that it would be fine to use. The Tanner was only a 4-speed model (400-4000 rpm) and not 12-speed as in the earlier imported model. However, in all the years I have owned the import, I have only ever had to change speeds once and tend to run the drill at a medium-to-slow speed.
I found a switch in my scrap bin and removed, cleaned and checked all the bearings in the spindle. Only one bearing was replaced as all the others felt fine; with new grease they should last me another 50 years. A nice thing about such a locally made machine is that the bearings are all very commonly available sizes and very reasonably priced for replacing.
Another improvement was to the quill lever, which I found cumbersome. I made up a three-levered option which works much better than the original idea. The locking clamp on the rear of the sliding table was also quite awkward to get to, so I made a new one that is a lot more robust.
Three-lever quill option works better.
Up and down
On final assembly, it all seemed to go together very well but I still had to fit a suitable small bottle jack to raise the table up and down. The jack I bought covered the range of travel and I bolted this in place to the lower base as I still had vertical movement only on the upper table. I still couldn’t rotate the sliding table about the column which turned out to be a major disadvantage. On starting the machine, I was really pleased with its performance. It’s heavy, stable, accurate and above all not a rattle anywhere. The entire project cost about $180 including the $150 cost of the drill which I didn’t think was too bad. I still had the imported drill press set aside for the vertical slotter project.
Sad condition ½ hp motor dropped…
…for tidy 1/3 hp motor.
Vazey table
The arrival of the Aug/Sep 2013 Shed magazine with its bonus Tool Guide, however, gave me some minor problems with my completed design. I was quite taken with the new Vazey drill press table in the Tool Guide. I really liked the idea that I could drill through solid metal and tube using the inbuilt vee in the table to hold the workpiece. Before, I had to set up a vice and vee blocks etc. and often still didn’t always get a concentric hole in both sides of the material being drilled which was really frustrating.
I sent off for a Vazey but when it arrived, I found out that it wouldn’t fit my fixed-table Tanner. My own fault for not reading the fine print. The Vazey works well on those imported drill presses with the outrigger arm and the ones where the table rises up on a toothed rack, but not in these older models like my Tanner.
Anyway, the Vazey sat on the workshop floor for a few days while I cogitated on the problem. I wasn’t going to send it back. It’s a very nice concept and we all need to support our local inventors and innovators. I needed to find a suitable solution so that I could install the Vazey table onto my fixed table and also find a way to allow my fixed table to rotate around the column and rise up and down.
Vazey table sits…
… on steel sleeve (split for clamping) welded to steel plate
Simple
The solution was quite simple really. I turned up a steel sleeve (47 × 60 × 60 mm long), split it so that it would clamp and welded it onto a small section of 5/16 inch-thick steel plate. This can be bolted down to the fixed table. I have allowed it to slide fore and aft on the table so that it can be centralised or adjusted as needed.
I could now install the Vazey table into the sleeve, clamp it up and centralise it with the drill chuck. I made up a small section of steel bar which fits into the centre index hole in the Vazey table and then clamps into the drill chuck. A quick rotation of the Vazey then centralises the table and it’s then bolted down. It is very solid when all snugged up firmly.
That being sorted, the next problem was to allow my fixed drill table to fully rotate on the column.
This was quite an easy fix—all I did was make a sort-of offset shoe arrangement which I fabricated from several separate pieces of steel. It’s a semi-circular arc or ring around the diameter of the vertical column of the drill press so that it supports the top table of the drill press. I welded this fabricated fitting onto the top of the bottle jack ram. The bottle jack was also bolted down to the lower drill table to prevent it rotating and falling over.
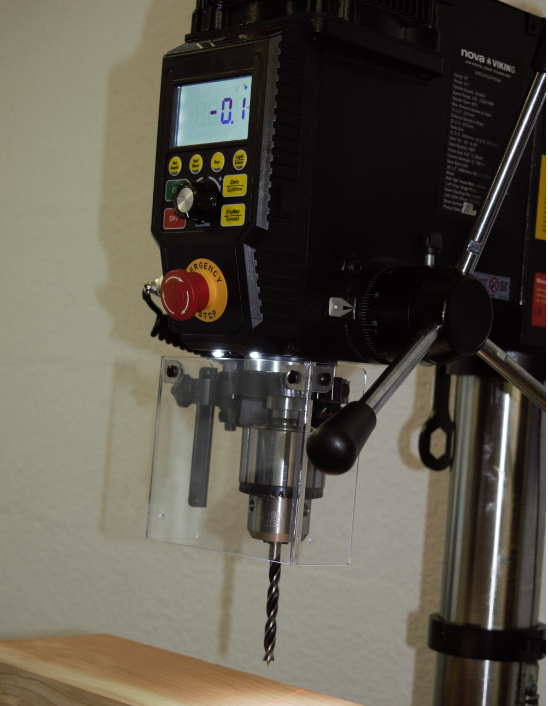
The final arrangement
So now that the Vazey is fitted, it’s free to rotate a full 360 degrees in its own sleeve and it can be clamped anywhere. Both tables are also able to rotate around the central drill column as well. I’m really very happy with the entire arrangement and it’s a very useful addition to my workshop. I intend looking around for another shorter bottle jack so that I can extend the vertical rise and fall but for the meantime the whole unit works really well. Also, I would like to buy one of Mr Vazey’s adaptation units that allow his table to fit to an older drill press, as mine is a work-in-progress and quite agricultural.
The old imported drill press will be the donor machine for a small vertical slotter. So there you go, making a silk purse out of a sow’s ear is certainly possible and us sheddies need to keep our eyes open and reclaim and use all this old equipment that is heading off to our scrap yards and rubbish dumps at an alarming rate.