A western saddle’s many stages
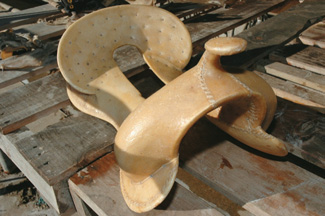
The completed hide cover
Graeme Savill, wife Jane and daughters Amy and Haley run bulls and 50 horses on their Seaview Ranch in Katikati. Graeme is a keen horse wrangler who understands horses well, having studied them intensively. He is all for making a horse comfortable and willing to respond to the rider which he does by communicating with horses in the same way that wild horses do in a herd. He is able to ride a wild horse within ten minutes of capture and is in demand to break in and retrain problem horses. It works so well all his horses are ridden in a halter instead of a bridle and under a western saddle. He has also become a sought-after western saddle maker, a trade he fell into by accident in 1991. The tree (frame) in his father’s saddle broke, “and I was too jerry to pay for it,” he says. Not liking what was available, Graeme decided to make a complete saddle as a replacement. It was no surprise he would take to saddle-making as he can turn his hand to anything. At that time, his own saddle was also in pieces because the sheepskin needed replacing. Mending it gave him an insight into what had to be done on his father’s saddle. He set about teaching himself then spent two half-days with western saddlemaker Warren Wright of Ohauiti to learn the finer points. Graeme says Wright’s work is some of the best in the world. Wright also makes saddle trees, so-called because cowboys once used the fork off a tree as a saddle base. Today the “trees” may be made out of Oregon pine. “These trees will last 100 years if looked after, there’s nothing to match them.”
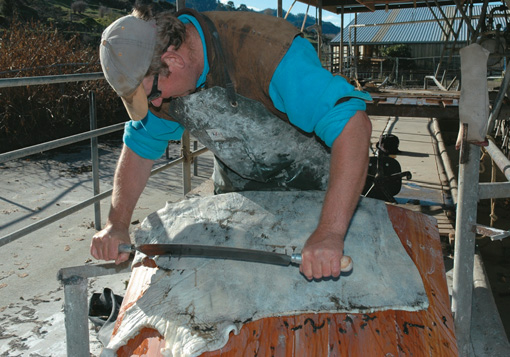
De-hairing the hide
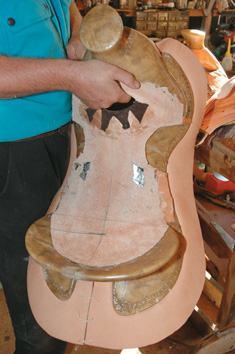
The ground seat
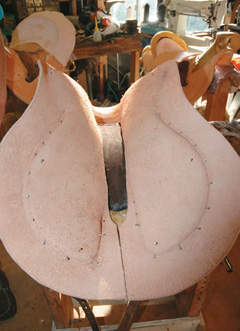
Hide tacked under the saddle
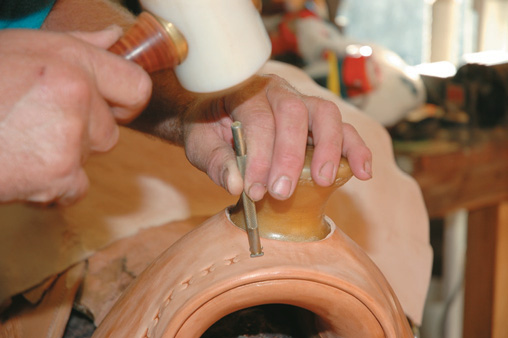
Applying patterns
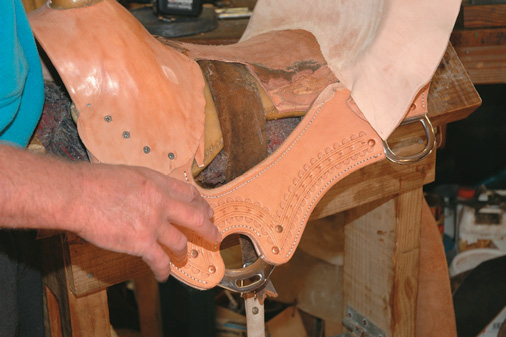
The rigging
Hand-sewn
Graeme sewed everything by hand, a long and laborious task to complete his first saddle. His work didn’t go unnoticed and in 1992 he received an order for eight western saddles. “I made them for cost, that was basically my apprenticeship,” he says. To speed up the process he bought a sewing machine. When Wright decided to concentrate solely on making trees two years later, he had the confidence in Graeme’s ability to put orders his way.
Four years later, Graeme fitted 85 horses with trees made by Wright, recorded the name, breed, category, age, diagrams and the comments on how each fitted so that it was comfortable for the horse.
His detailed notes caused Wright to commend him. “Graeme has been around horses all his life and rides in country that would make goats nervous. He ropes wild horses and most other things that get in his way on the ranch. He has more insight into the whole area of tree-saddle fit than most any other ‘experts’ I’ve met.” High praise indeed, but as Graeme says, “As much as I can, I’ll go and look at the horse.” This way he makes sure of a perfect, fitting saddle.
Export, rawhiding
To date, he has made 232 saddles on a part-time basis and is well known nationally and internationally for his excellent work, with orders being exported to Sweden, United States, Japan, Australia and Switzerland. As clients select the designs they want, each saddle is unique Graeme sources as much raw material as he can locally and from his own farm, preferring to use Hereford and Angus hides “not dairy.” Although he does use bull hides, he says steer and cow hides are the best as they are a lot more even.Graeme selects a tree and prepares his materials. “You build a saddle, you don’t make it,” he says and “because the Americans work in inches” he works in imperial measurements. In his now defunct milking shed, he throws a wet hide onto a purposemade Douglas fir tanning beam, “a copy of one in a tannery in the US.”
Then he begins the process of rawhiding. He makes it look easy but it is hard physical work as he de-fleshes and de-hairs each green hide. He can de-hair a good hide with the scraper in just half an hour.
He places patterns for the “bars” (the under-part of what will be the saddle) on to the wet hide which he scores then cuts out.
Pulling more hide across the tree, he cuts out a seat. “One hide will cover four to seven trees,” he says. It takes Graeme about three to four hours to hand-sew these pieces onto the tree using goat or deer-hide strips. This is left to dry where it tightens up and clings to the tree. Then he paints on an undercoat to help stop cracking and prevent moisture getting in, lets that dry and applies a coat of lacquer for waterproofing and to keep out bugs.
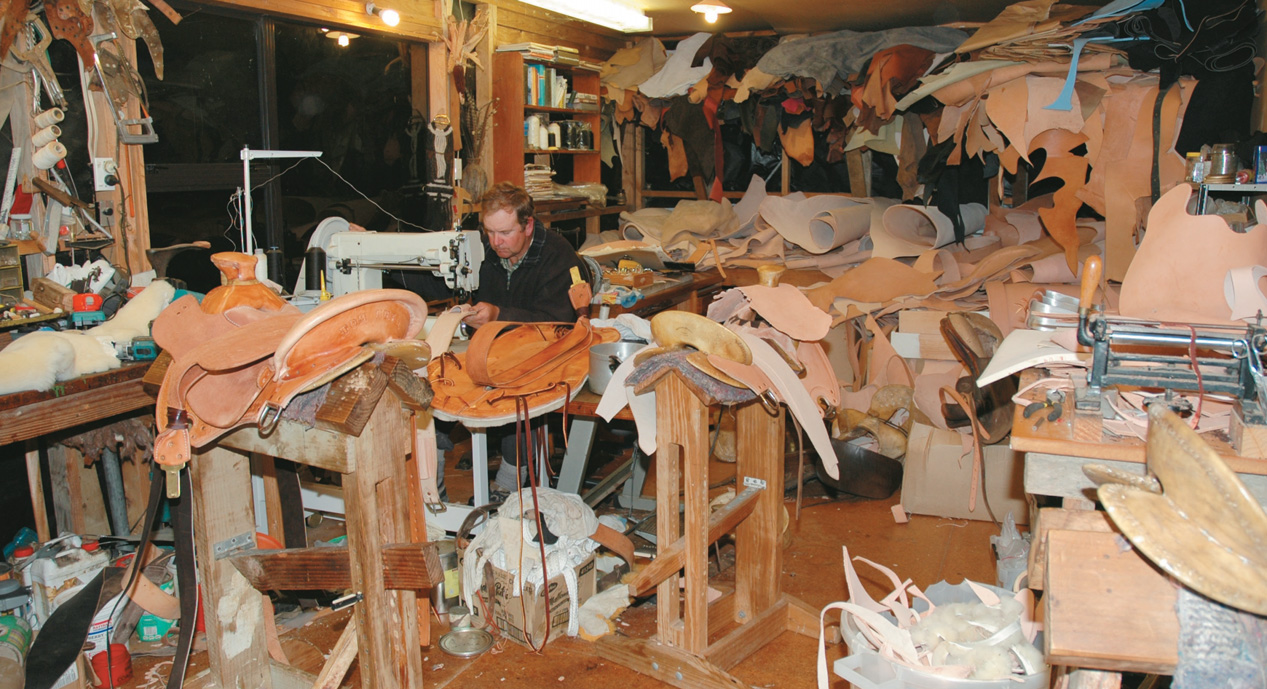
The shed
Graeme carries out the rest of the work in his shed surrounded by hundreds of tools of the trade, stacks of many types of leather, sewing machines, books on his craft, old saddles up to 100 years old, tiny sample saddles and work in progress. It looks like chaos but is a “treasure trove” and he knows exactly where everything is.
He insists on working with clean hands as sweat and grease from them can mark the leather. To begin building up the saddle, he makes the ground seat in tin, covers it with leather and carves it to shape. “It’s a fine line between comfort and not” for horse and rider.
He positions wet hide over the fork gullet and the cantle bar (back of the saddle seat) and glues and screws it to the frame. After tacking more hide onto the skirt (underneath the saddle) Graeme attaches stainless steel Ds (they can be brass) and rigging plates to the rigging, fixes that to the tree then glues and screws the fork cover on. Correct spacing for patterning is important, so he measures carefully.
He “cases” or wets the front of the saddle. When it is almost dry, he patterns this with a “single creaser” or “tickler” to embed lines either side of the pattern. “It’s all done by ‘eyecrometer’,” he says with a straight face. He adds further patterning and buffs the work while it is still damp with a “leather smasher.” Every tool has its own specific purpose and meaning.
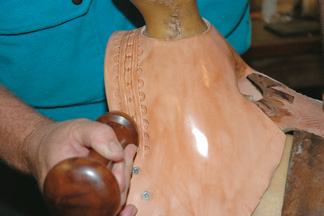
Buffing with a leather smasher
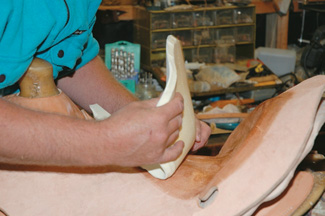
Centring the latex
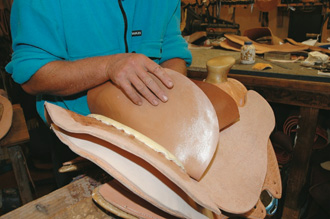
Roughout seat eased onto the latex
Seat and padding
The next step involves Graeme cutting out a leather seat, moulding it to the tree and marking where the latex rubber padding will be placed. Galvanised nails hold the latex on to the tree while he marks out the pattern with an HB2 pencil, “The pencil lead is softer and makes marks easier,” he says. “It’s quite an art to get it right.”
He removes the latex and folds it in half to make sure his markings are even. “Latex is hard to cut,” he comments, as he uses a sharp knife to bevel cut around the edges. “It saves getting an edge under your butt.”
Using this padding as a pattern, he cuts out a leather seat. This will be a “roughout” saddle where the wrong side of the leather shows. “You don’t sweat on it and it’s got good grip.”
He glues the seat section of the frame, the latex padding which sits there and the “roughout” seat which goes onto the latex, marking and waiting in stages for the glue to become tacky. “You get one chance at it,” he says. Then he straps it down to ensure a good bond. By the time Graeme finishes a saddle of more than 100 pieces, he will have used a litre of glue.
Sewing machine , 1930
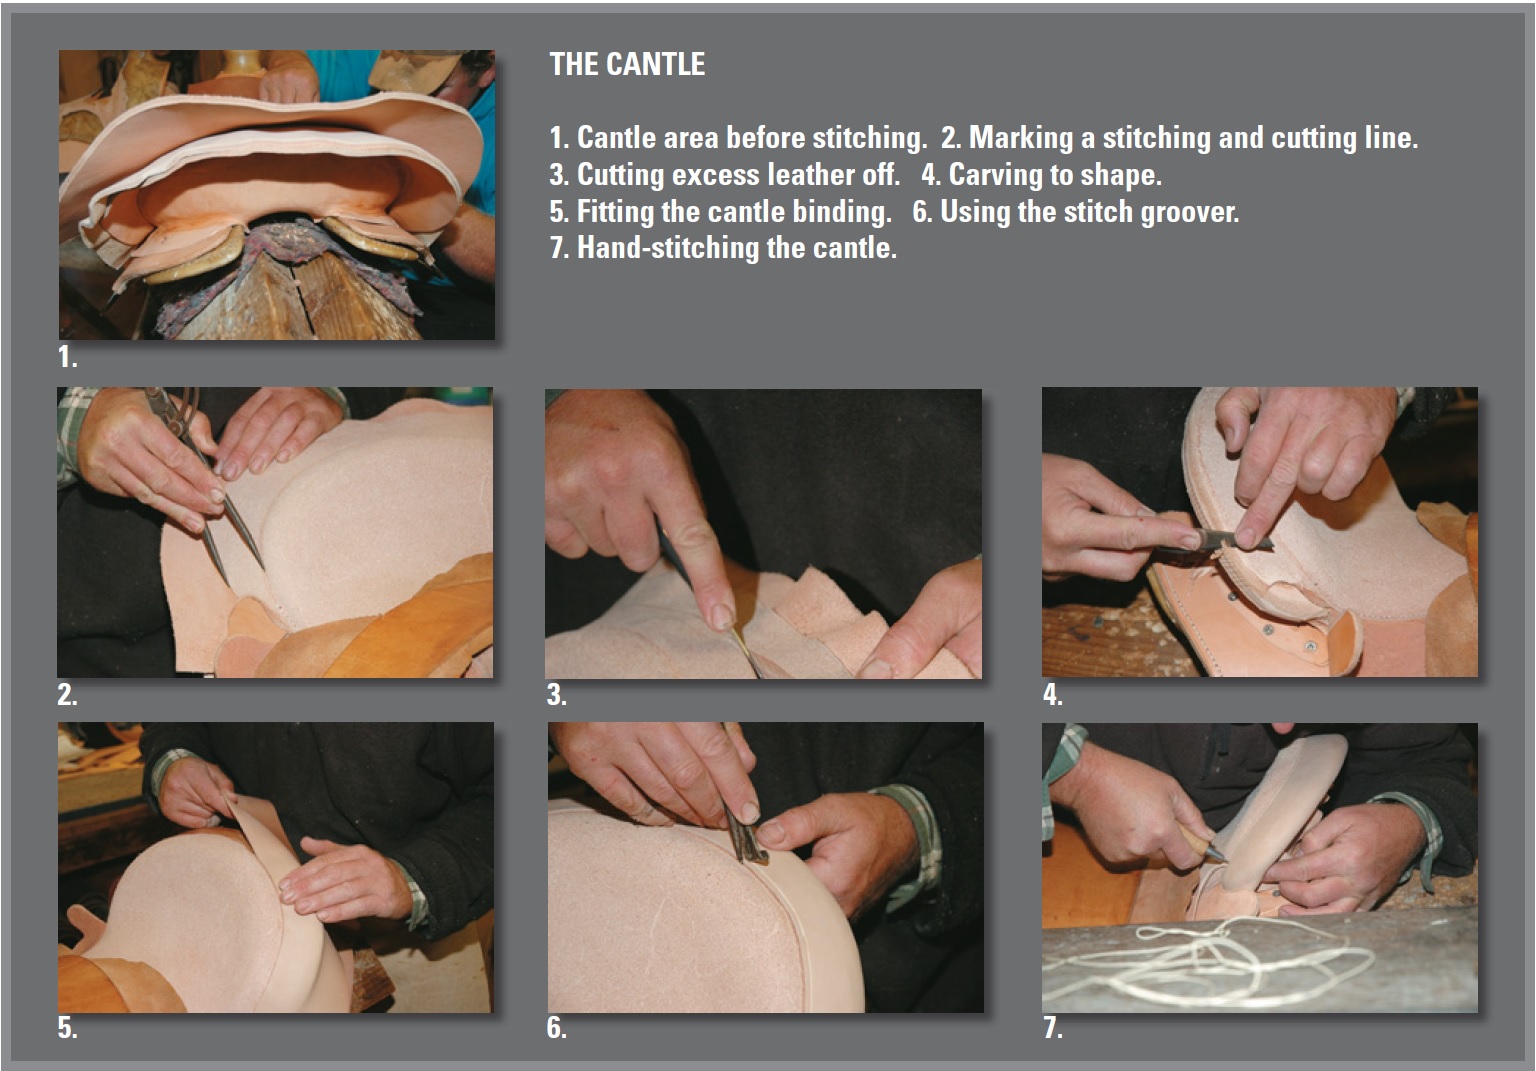
When the seat is ready he marks a stitching line and using a 1930 hand-operated Pearson No 6 sewing machine, sews the seat sides. He feels carefully for the edge as he makes one stitch at a time, trims the excess, and melts the polyester thread to stop it from fraying. This leaves four layers of the cantle area (back of the saddle) unstitched. As he works, he explains that every millimetre in leather thickness adds two kilograms weight to a western saddle. They usually weigh from 12 – 20 kilos each, although he has made one which weighed just nine kilos. After glueing the underside of the seat, Graeme moulds it onto the tree. He uses a hair dryer to heat and soften the glue which bonds the cantle layers together ensuring a better bond as he works at it with a smasher until it dries, “Give it a good hiding — beat it,” he says.
Then he marks the stitching line, cuts the excess off, smashes it down and slices off leather piece by piece to give the back of the saddle a nicely rounded shape, stopping often to sharpen the knife, “A lot of this stuff you have to go by feel and by eye,” he says as he runs his fingers over the edges. Using a French edger tool, he carves off excess leather underneath, feeling after each cut to get it perfect.
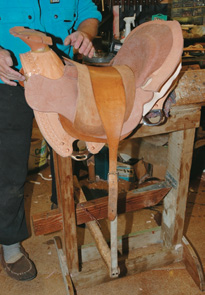
Latex and roughout seat strapped to bond
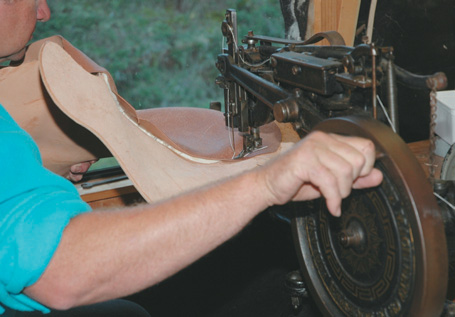
Sewing seat sides
Horn
The horn which sits on the front of the saddle can vary in style and be made from gunmetal, bronze or timber. He glues a piece of leather around this particular wooden horn, cuts slits and fans it out. He glues leather on the top, smashing it to ensure a perfect bond and then hand-stitching around the oval shape.
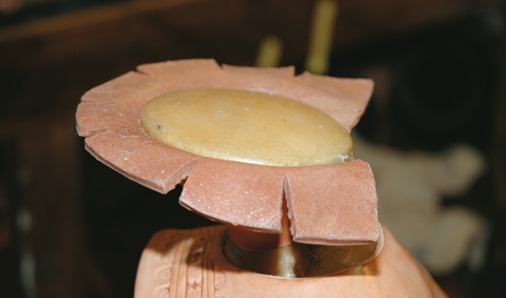
Fanning the horn cover
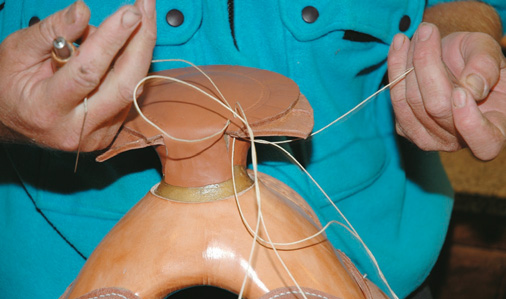
Pulling threads through on the horn
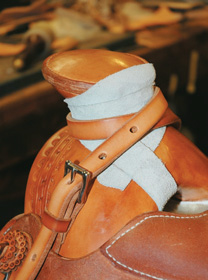
Mule-hide wrapped horn and rope strap
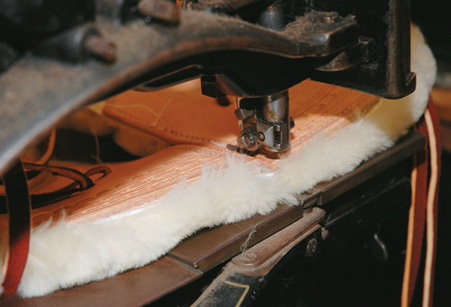
Joining both skirts
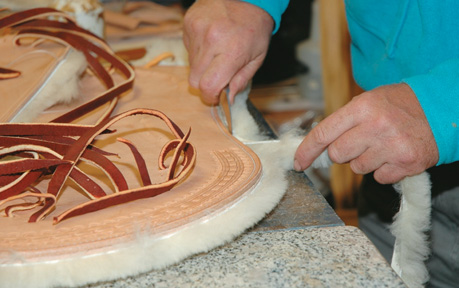
Trimming excess wool from the skirt
Hemp thread
Graeme draws out and twists off six single strands of a length of hemp. “I make my own thread up from propagated hemp plant from Ireland,” he says as he pulls the fibres taut, waxes them with beeswax, rolls them into a single strong thread, and waxes again.
“You rub it until you burn your fingers. It melts the wax into the thread,” Graeme demonstrates. To finish, he rolls the thread to put a twist in but keeps the ends feathered so he can insert them through the eyes of two sewing needles—one at each end. Using an awl to make a hole into the leather on the stitch line, he pushes a needle through from the top using his fingers underneath as a guide (they can get pierced or calloused from this process) and draws the under-needle through to the top, pulling both threads through until they are tight. When he is finished, he trims off the excess leather.
“A good saddler should have the stitching as good underneath as it is on top,” Graeme says, and his stitching proves to be perfect.
Cantle binding
The cantle binding is next so he cuts, glues, fits the leather and presses it on by hand, until he gets a smooth fit. “You just have to keep working at it until you get it right.” Using a Patent Leather Stitch Compass, otherwise known as a Stitch Groover, he makes a groove around the cantle binding to mark the sewing line then runs an overstitch marker over the groove which marks the stitch length. It is timeconsuming as once again Graeme sews by hand. “Taking your time and doing it right is the key,” he says.
Stirrup leathers
He cuts stirrup leathers from the best part of the hide, wets and stretches them six inches (150mm) on a stretcher where they are left for a couple of days; leather has a “memory” so they will retain this length. He drills holes into the saddle to attach the saddle strings which are cut from latigo hide using a leather plough.
Skirts
Next are the skirts which Graeme cuts out and marks for patterning. There’s a real art to getting the right moisture content after casing and before applying stamps. If the leather is too wet, the imprint will be mushy. He punches holes in the skirt to match those in the saddle. He glues packers to the skirt which he pulls into shape so it sits well on the horse. Anything raised he pares back and trims and smoothes the edges. He wets then rubs wax on the edges to seal it and to stop the oils coming out, then buffs it to a shine.
Elbow grease
“You use good old elbow grease to get a nice-looking edge. It makes all the difference.” Every saddle has an identification number and Graeme stamps this on where it won’t wear off.
To stop the saddle blanket moving on a horse’s back, merino sheepskin padding is used. Graeme cuts this out using the skirt as a pattern. He pulls strings through the holes in the skirt, hammers them flat underneath, then glues and presses the sheepskin and skirt together. A piece of rawhide acts as a joiner between the sheepskin and one skirt at the back. He machine-sews it in place and continues sewing around the piece. The other side is also sewn to the rawhide joiner. The backs must be even and the completed skirt is trimmed of excess wool. “When I first did this I used to hand-sew the sheepskin to the skirt. It took me three hours.”
Fenders
Graeme cuts out the roughout fenders, takes the stirrup leathers off the stretcher, bevels the edges, cases and polishes them. He punches holes in the leathers and fenders, inserts a Blevins buckle between, joins them with copper rivets and sews the side edges. Both leathers are cased before Graeme puts a twist into them near the Blevins buckle and binds each with a strip of leather, a very important step for the comfort of the rider.
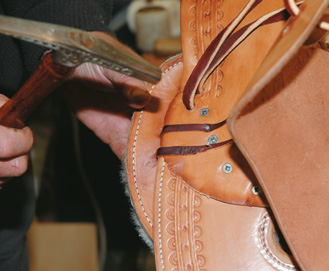
Nailing skirt ties to the tree
Back cinch
The back cinch he makes of New Zealand hide, two-layers thick, glued together with buckles attached at each end and with keepers sewn on. Graeme scores a stitch line into each edge before stitching through all thicknesses.
After machine-marking a pattern in the centre of the cinch, he grooves and stitches that too. “These back cinches get a fair hiding,” he says, explaining the cinch is curved to the contours of the horse’s stomach.
Oil
He rubs pure neatsfoot oil, “as hot as you can stand it,” onto the skirt to lubricate the leather fibres.” You have to make sure you use the right amount,” then he seals it with beeswax so the dirt cannot get in, which would create a sandpaper effect to wear out the leather.
Graeme hand-makes and patterns leather buttons which Jane oils. “We oil everything (including the rough seat) before we put it together,” she says. After pulling all the strings through the skirt, Graeme nails the skirt to the tree through the skirt ties.” This is the traditional way of doing it. Most of the modern saddles don’t use these,” he explains.
Meanwhile Jane has been oiling and greasing the fenders which will carry the stirrups. The stirrup leathers are always used roughside out, so the dressed side doesn’t get stressed and break. The couple work as a team, pulling the leathers through beneath the skirt on each side and attaching them.
Stirrups
Graeme has already made stirrups out of thick aluminium, shaped with typical kiwi ingenuity using a gatepost from which he had removed the cowshed gate. After using boiling water to heat up the aluminium strip for the stirrup, he placed it between the gudgeon and the gate post “and just swung it around. I’ve done it for years like that,” he says.
On the bottom of these, he places a leather tread, drills holes into the stirrup tops to thread a bolt through, places a keeper on the leathers, attaches the stirrups, and adjusts the working length. He puts a bar through the stirrups which now hang beneath the saddle, tightens up the wooden draw-down horse which the saddle sits on and leaves the stirrup leathers to stretch overnight. This sets the twist which keeps the rider’s feet in the correct position.
Between the skirt and the cantle sit the back jockeys. Graeme cuts them out of leather, tries them for fit, adjusts where necessary and patterns them.
He attaches prepared leather “billets” to the saddle. They hold the back cinch and stirrup keepers to the twisted stirrup leathers to keep them in position.
After screwing down the seat, he attaches the latigo holder, D ring and button cover, pulls the strings through and screws it all down. He threads a smaller button on to the strings over the top of the larger one to cover the screws, pulls them tight, makes small cuts in each string and threads them through each other to leave a nice finish.
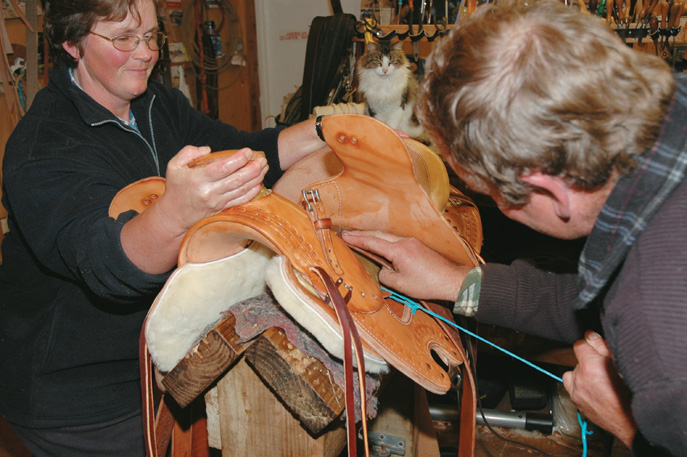
Jane helps as Graeme pulls leathers through beneath the skirt
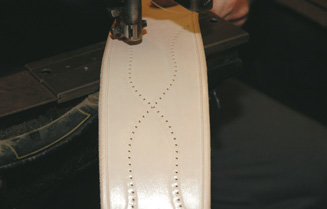
Centre cinch pattern
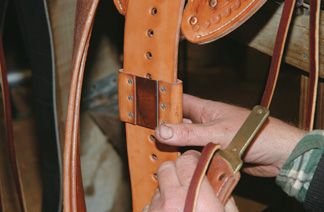
Placing a keeper on a leather
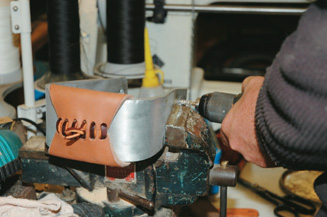
Drilling holes in stirrups
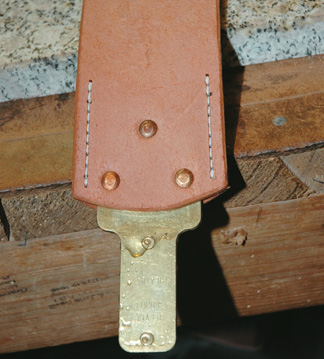
Riveted, sewn and cased leather, fender and Blevins buckle
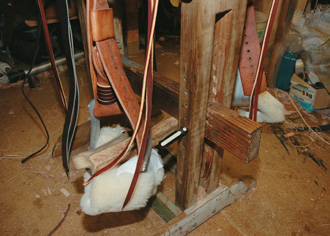
Placing a bar through the stirrups to set the twist in the leathers
Comfort
Graeme leaps on the saddle and tries it out for comfort. “It’s not too bad, there are no lumps in it,” he proclaims.
While sitting on the saddle he wraps the horn with chromed leather mule-hide. This can be burned off if a rope is wrapped around it when a rider is working, so it is made to be replaced easily. He attaches a leather rope strap to the right-hand side of the saddle just below the horn, winds it around the horn and buckles it down on the left-hand side. It is reversed if the rider is lefthanded.
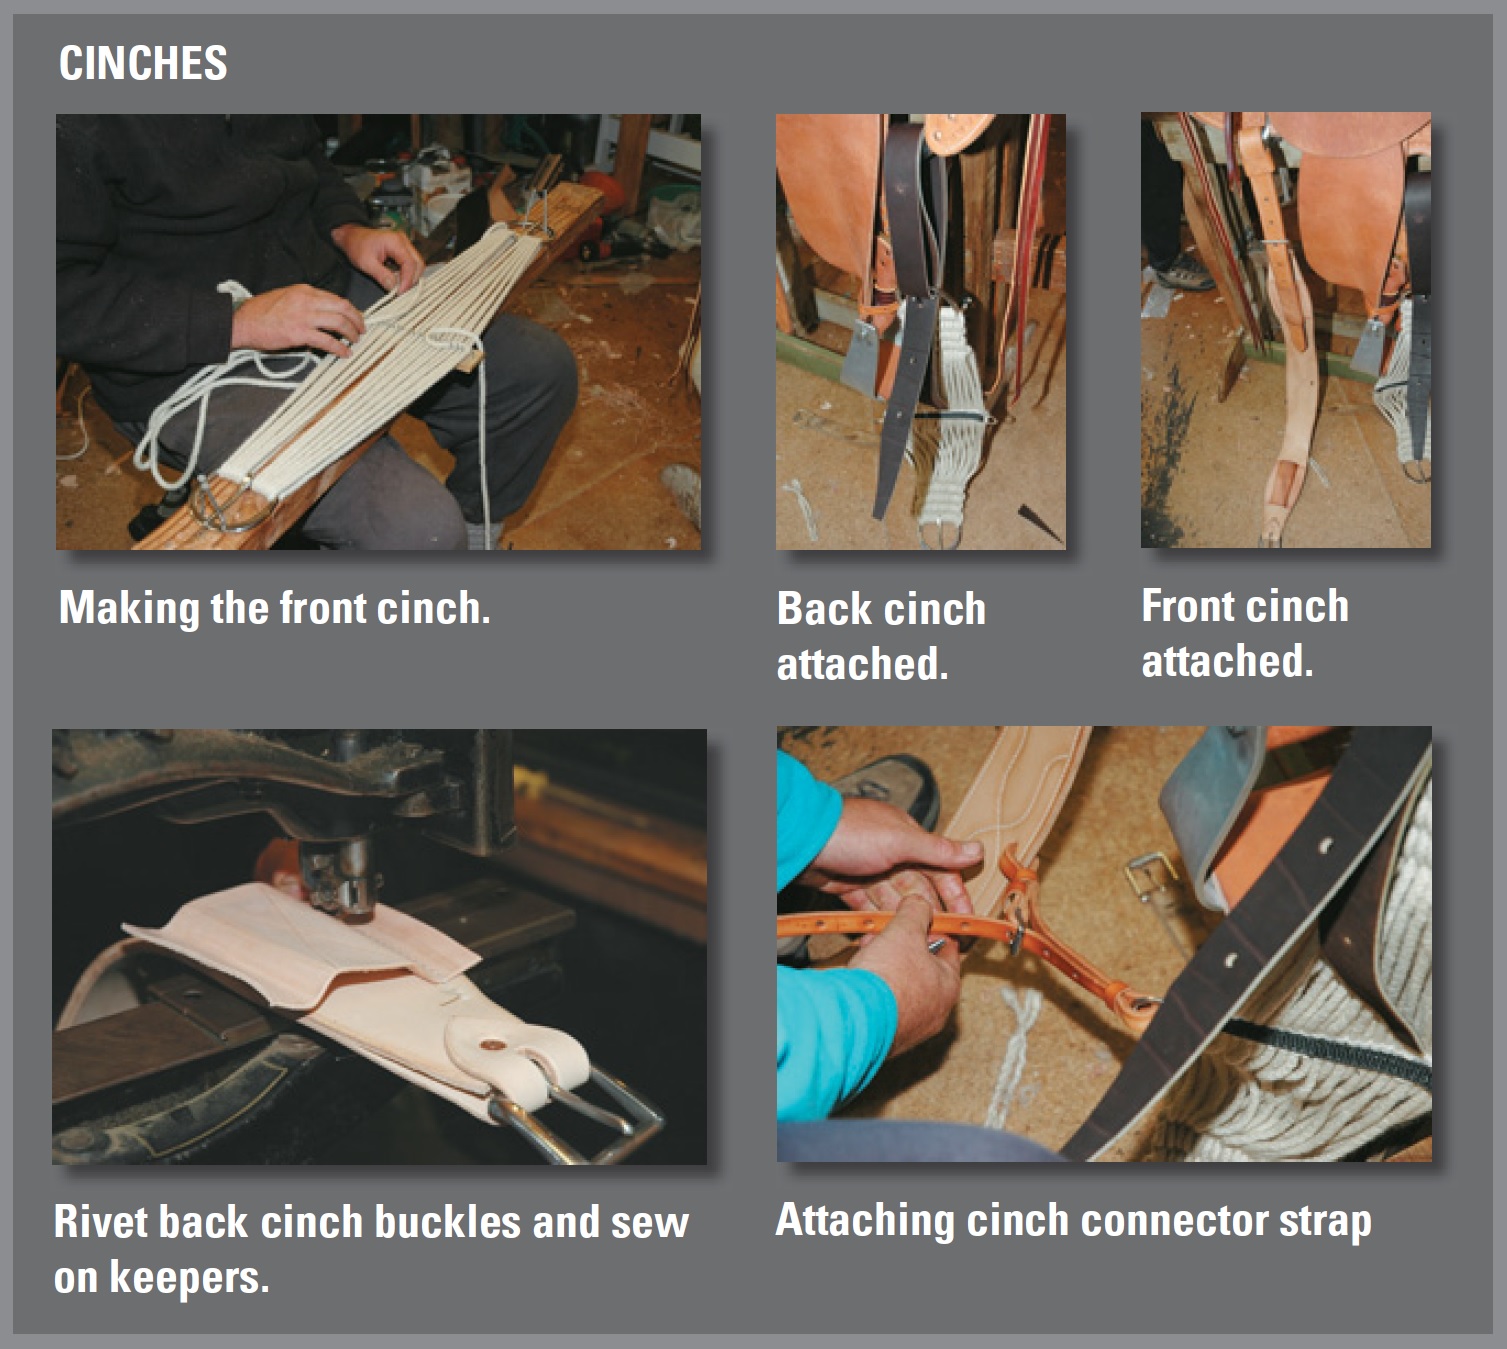
Using mohair rope “because it breathes,” Graeme begins making the front cinch in the traditional way. Measuring out the required length and using a spacer board, he places a buckle at each end then winds and weaves the rope, and finishes it by stitching a piece of webbing across the middle to keep it in the correct position.
He returns to the dried back jockey, punches holes in it so strings from the saddle can be pulled through, attaches a hobble holder underneath it, nails the back jockey to the saddle, pulls the strings through and fastens them all tightly with buttons.
Cinches joined
Latigo straps hold the front cinch on to the saddle. Graeme punches holes along their length, laces them to the front rigging ring and attaches the cinch. He fastens the back cinch to the rear flank cinch billet which is attached to the rigging ring, then joins both cinches in the middle with a cinch connector strap to keep them in position.
To join O rings to each end of the breast plate he rivets them on with a piece of leather, and using a saddler’s vice to hold the breastplate in place, hand-sews through the three-quarters of an inch (19mm) of leather “A machine might just handle it,” he says, but by hand sewing he ensures it will be stronger.
When he first started making saddles, Graeme used to make all his own D rings, O rings and buckles in brass or stainless steel. These days he buys them in to save time. He sews straps to the breastplate, then oils, greases it with dubbin and polishes it.
Bucking rolls, if required, are the next addition. It takes about an hour for Graeme to make these by hand and stuff them firmly with wool. To finish, he asks clients to sit astride the saddle so he can fit the rolls in position.
An extra is saddlebags, again made by Graeme, plain or patterned to suit. They fit over the back jockey and he laces them together at the back join, before attaching them to the saddle firmly by strings, “A good fitting set won’t flap when you gallop.”
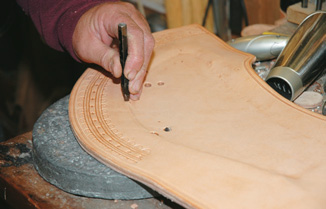
Fitting back jockeys
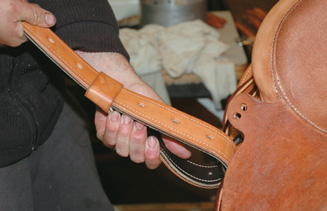
Attaching billets
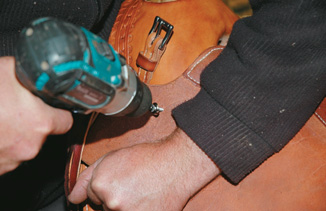
Screwing down the seat
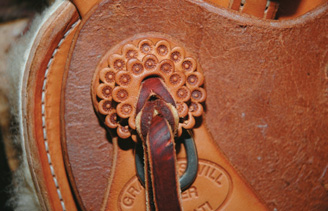
Finished strings and buttons
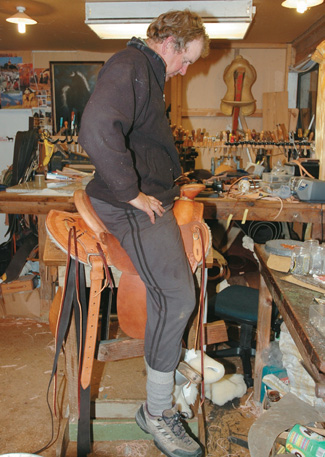
Graeme tries saddle for comfort
Saddle for life
“This particular style, I really do like them, they are very comfortable,” Graeme says of this saddle. His western saddles are practical working saddles and can be taken apart easily to repair if necessary.” If you’ve got a good one, your saddle should last you your working life.”
They hold their value well, grow in value and are very sought-after especially if they have a wide tree. For the next four months Graeme will make one saddle a week, and with about 10 saddles to make for his own horses, will fit these in between orders.
On average it takes him about 40 hours to custom-make a western saddle, but the results speak for themselves
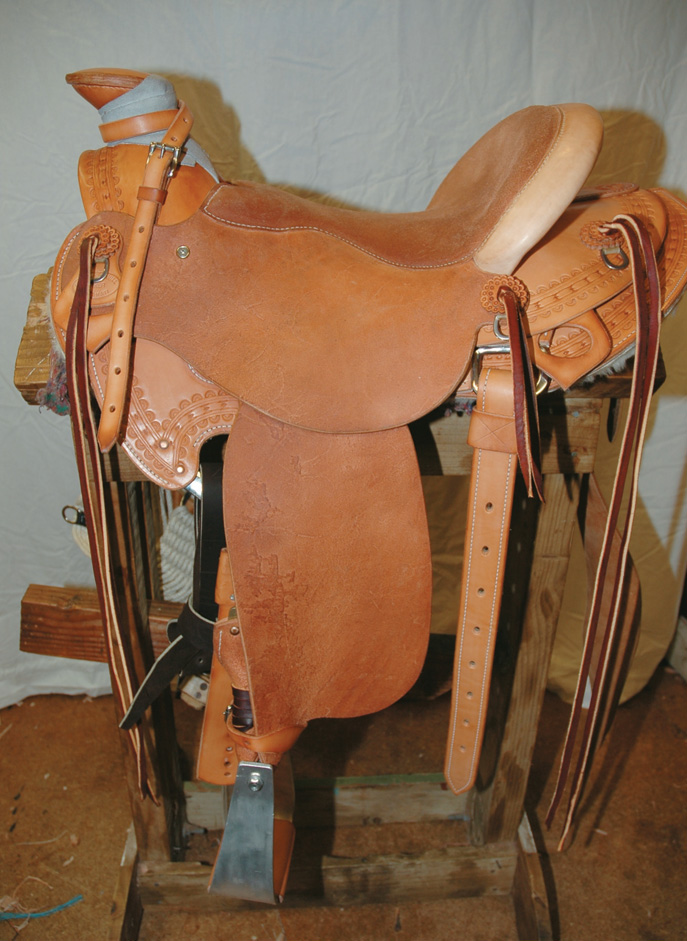
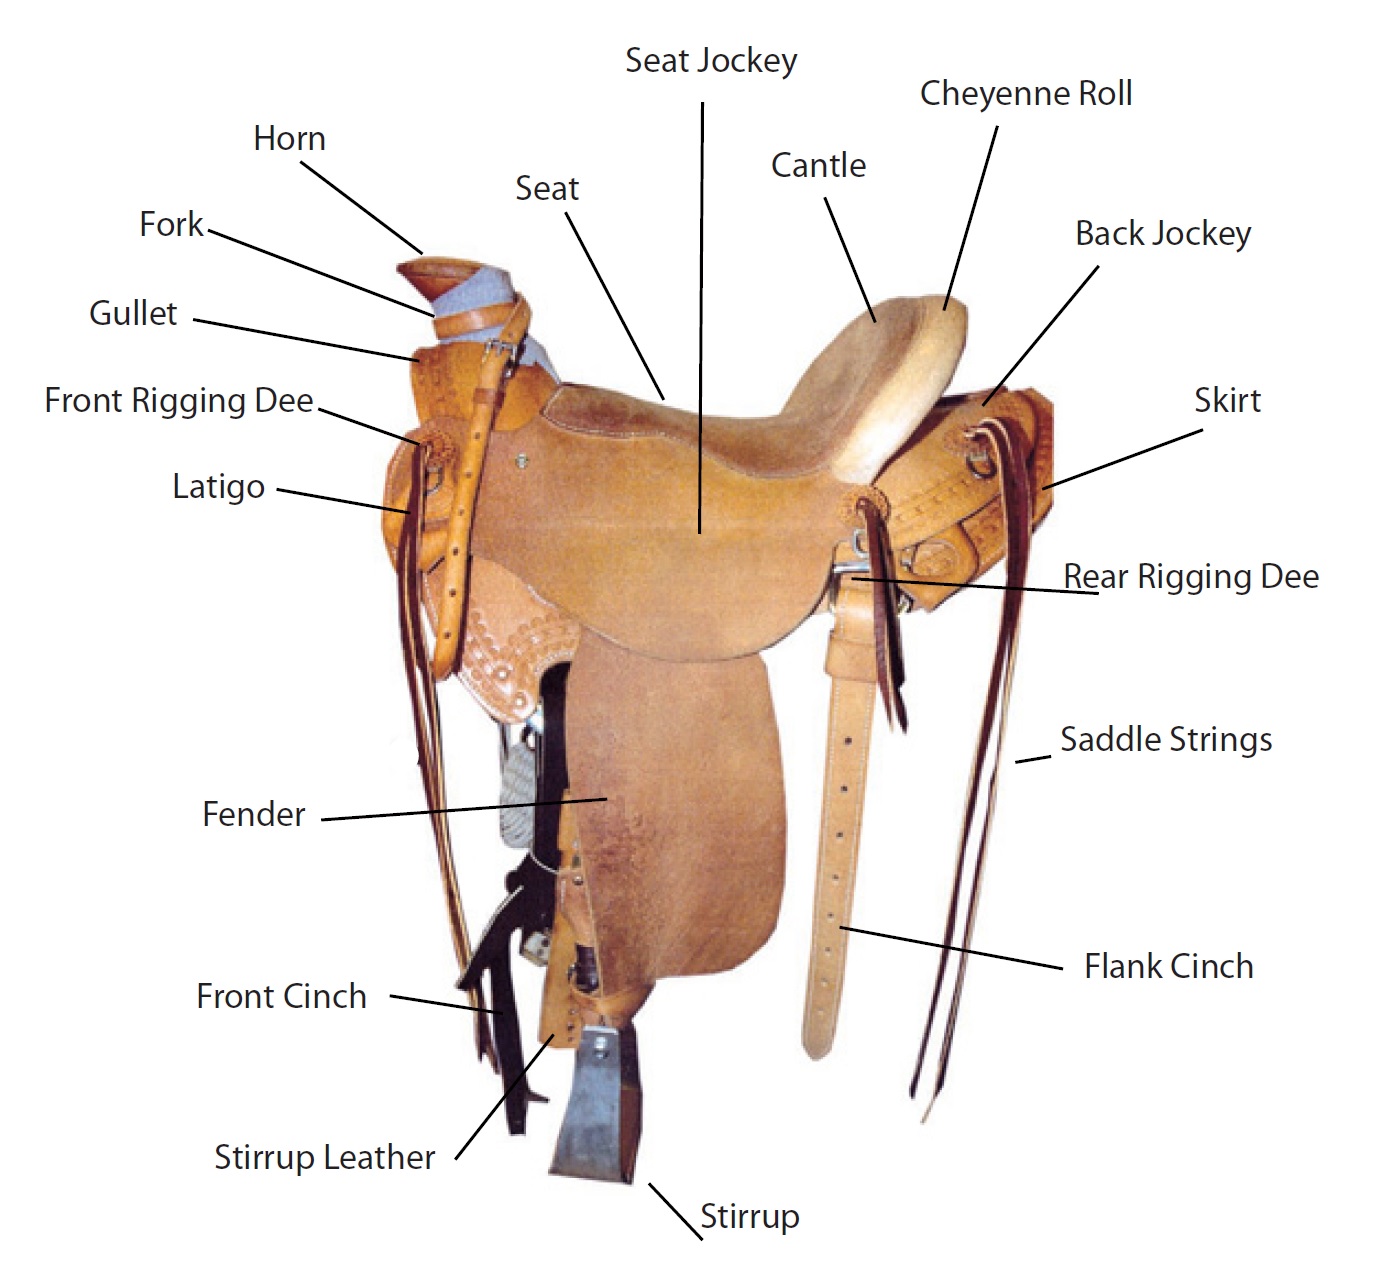
Finished western saddle

