COMPACT PHONE AND TABLET HOLDER ORGANISES THE DESK
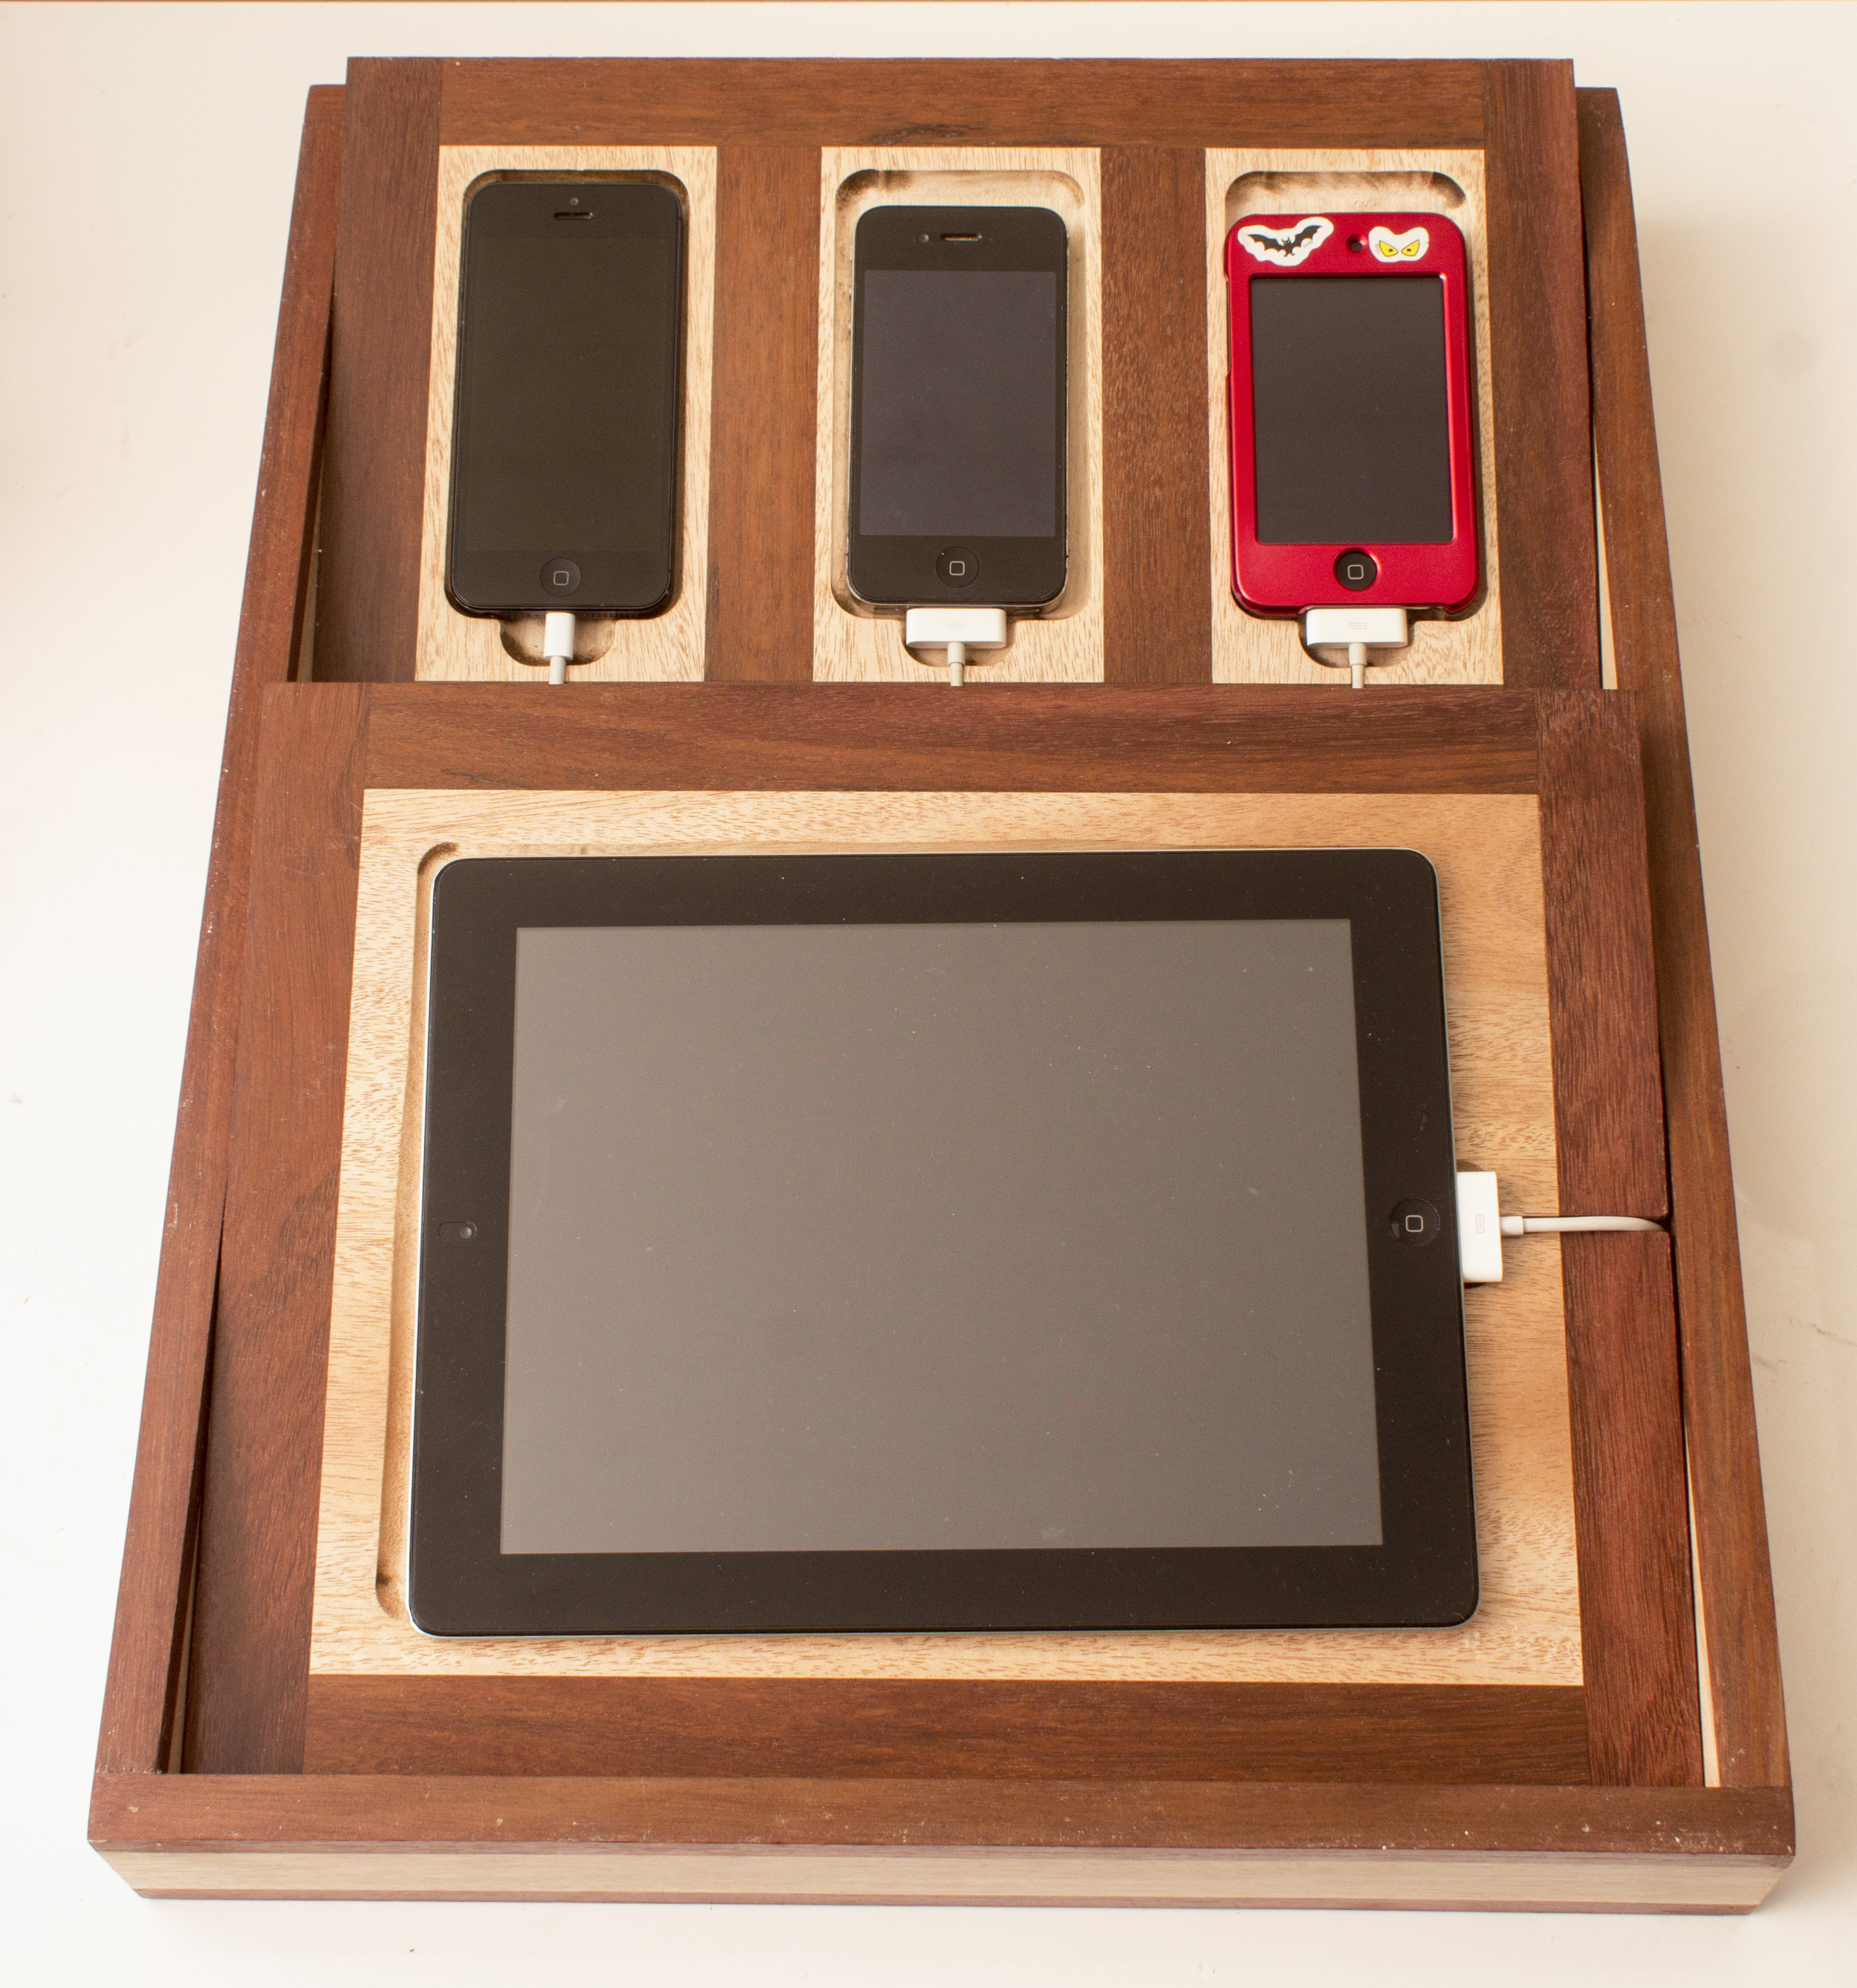
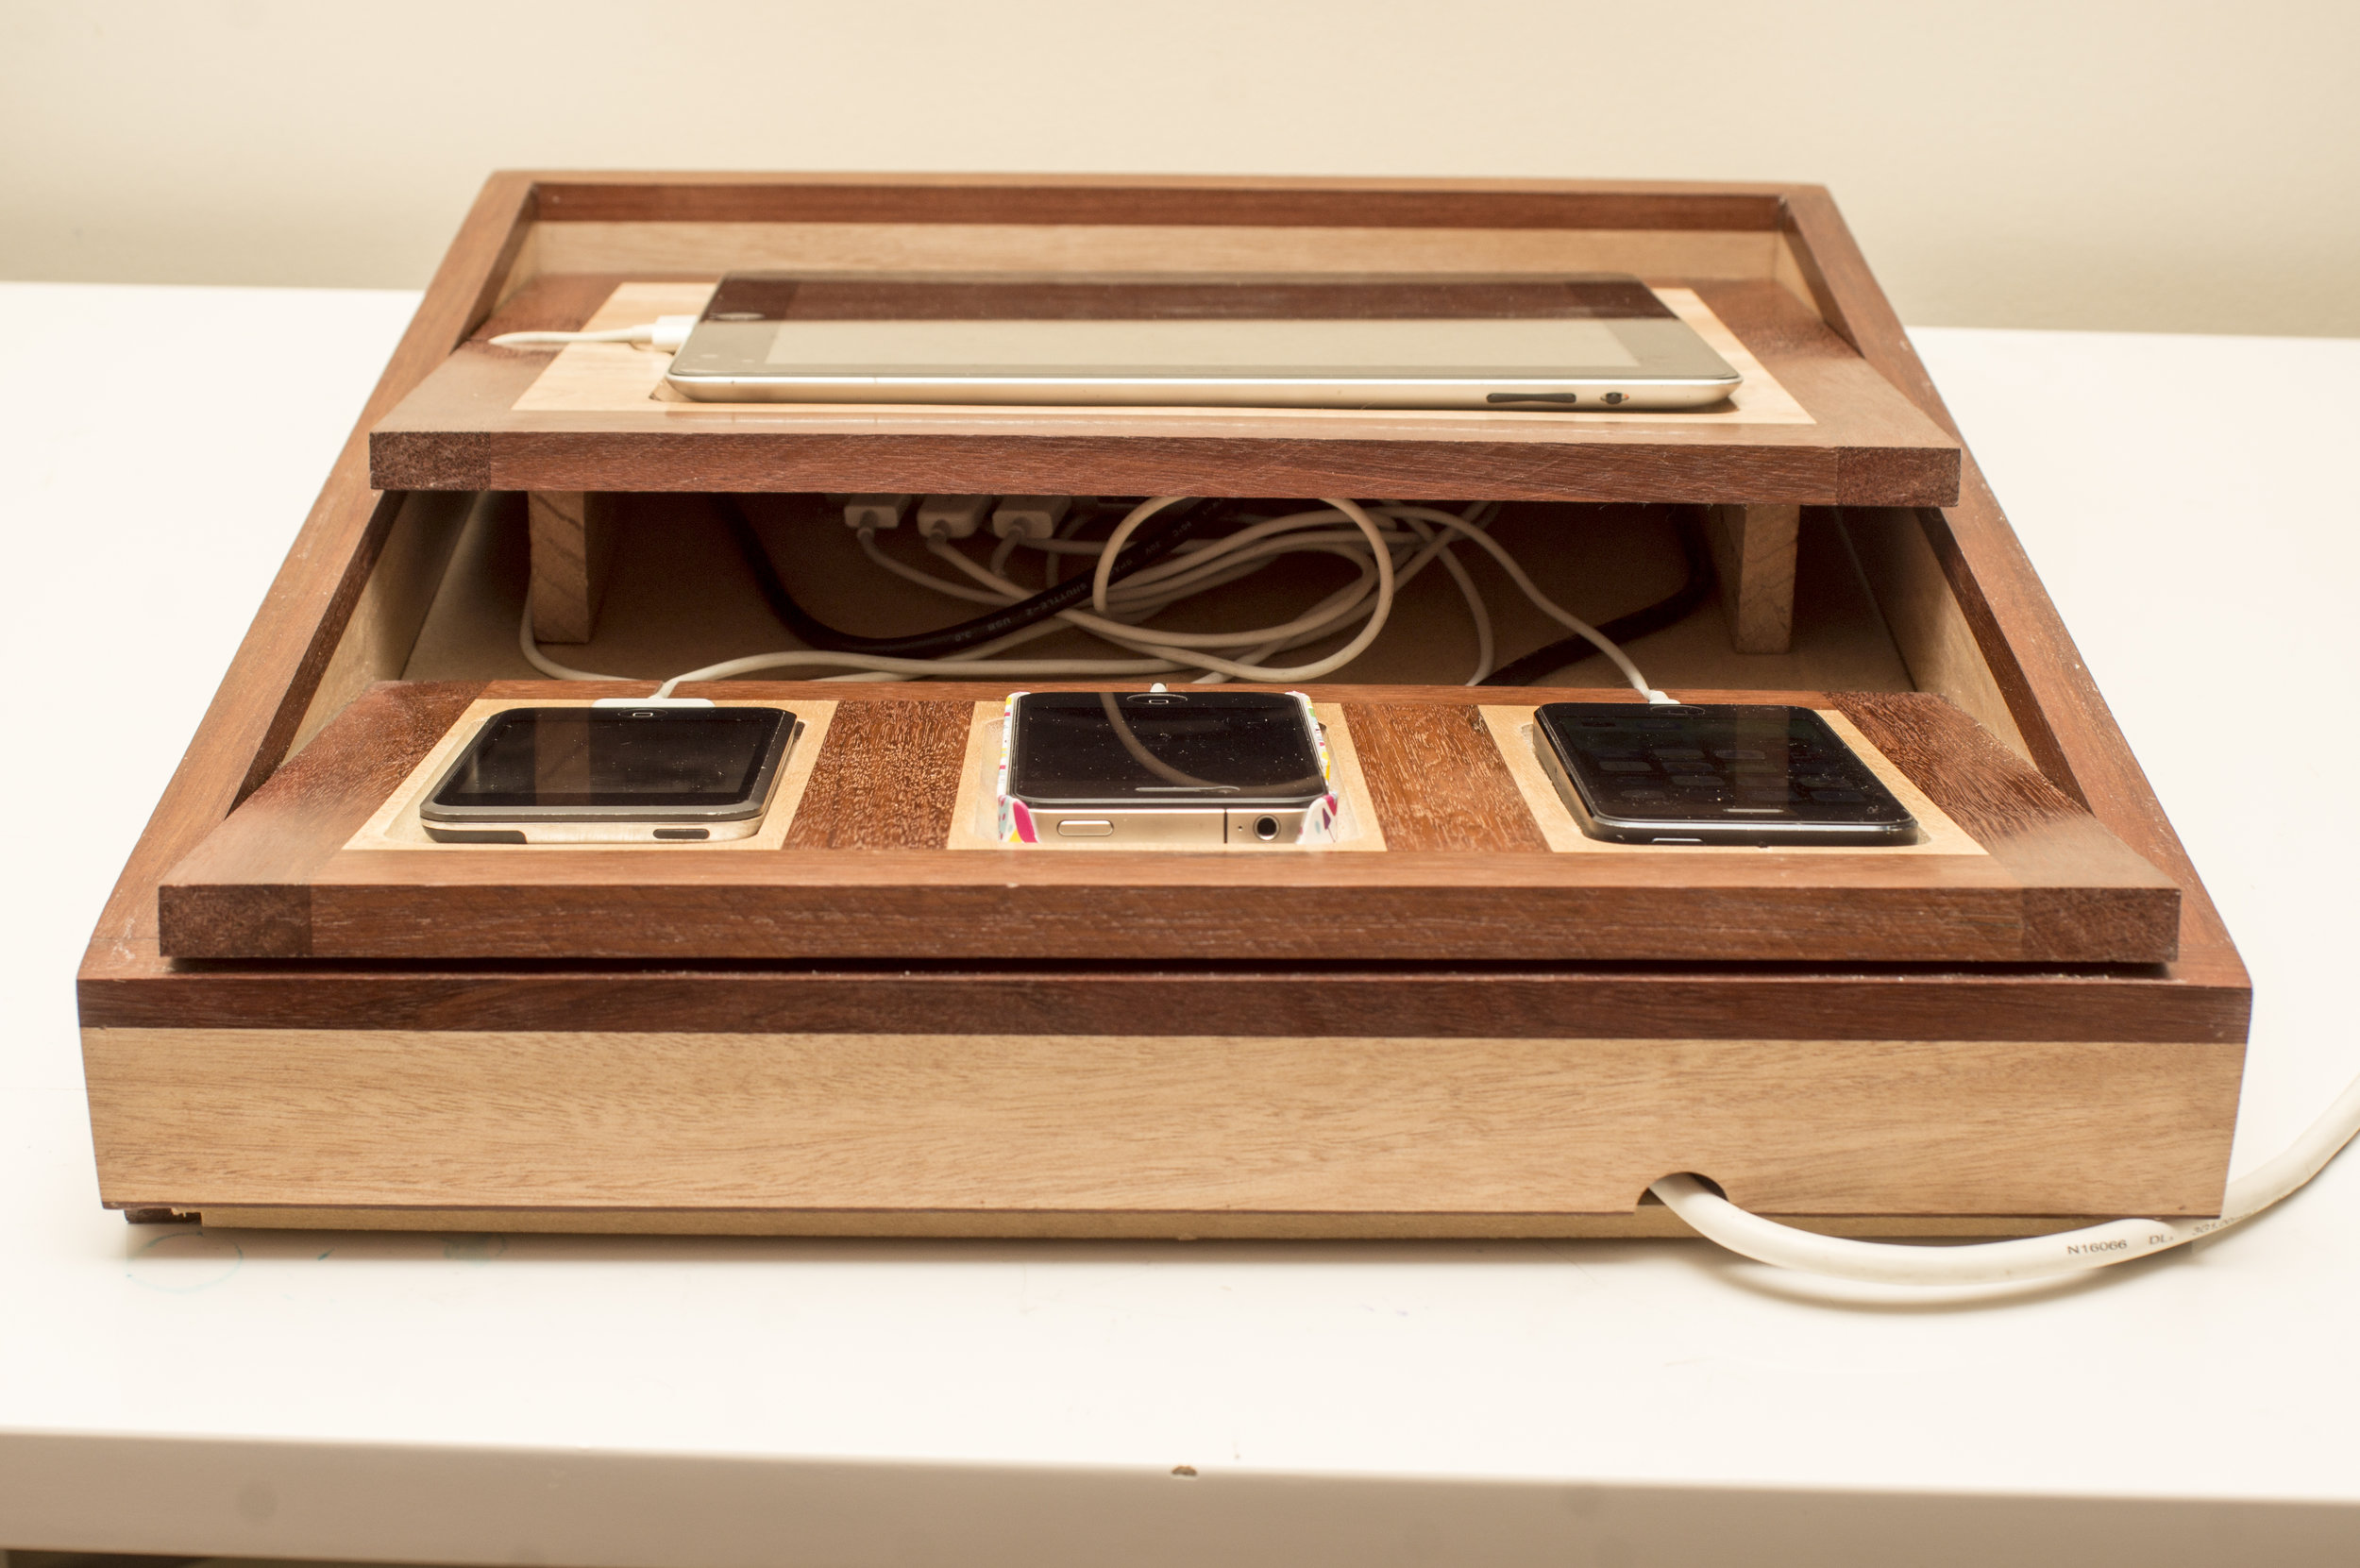
There are two sure things in modern life (and no, not death and taxes): they are technology and cables. Lots and lots of cables. Some are used for interconnecting devices such as HID or human interface devices, a computer mouse, keyboards and the like. In many cases, wireless technology is thankfully removing the umbilical tether. But when it comes to charging our mobile devices, the spaghetti junction is still very prevalent. Until such time as the wireless charging matures into a viable option, disguise is the next best thing. So with this project, I am making a tidy station to charge a couple of iPhones, an iPod Touch and an iPad. This project is a reasonably simple build and you can tailor its complexity (more or less) to suit your skill level. The charging station project can also be scaled to suit the number and type of mobile devices in your household.
Start
To start, lay each of the devices out to work out the proportions of the station needed to accommodate them all. It doesn’t matter what brand of phone or touch-surface device you are making the station for. Next, a visit to the timber store is in order. Ideally, this is either in your workshop or an adjacent shed. I hoard timber, not because I want to collect it specifically but so I have a good selection to choose from for the next project. Some of it has been sitting in my wood store for years, waiting for the right project to arrive. In this case I have chosen an old favourite, jarrah, and a contrasting much whiter timber, Queensland maple. The jarrah in this case isn’t some virgin timber, shipped over from Western Australia. It has already lived a full life as decking timber. I’ve never understood why such a stunning timber is used (and abused) like this. It isn’t as if it was used for its natural beauty, as the layer of paint still evident would have covered up that possibility. Reclaimed timber often won’t have the same yield as virgin timber. The ravages of time and weather can cause splits and warps, while the previously used joining methods (particularly nails) can waste areas around them. In some cases, however, the resulting holes, rust stains and overall patina can add authenticity to the reclaimed nature of the timber. Another significant benefit of reclaimed timber comes from its age. Its moisture content is stable and it doesn’t move much (if at all) when it is cut. It is also rewarding to find such good-looking and functional timber in what most people would throw away, or burn.
Dressing
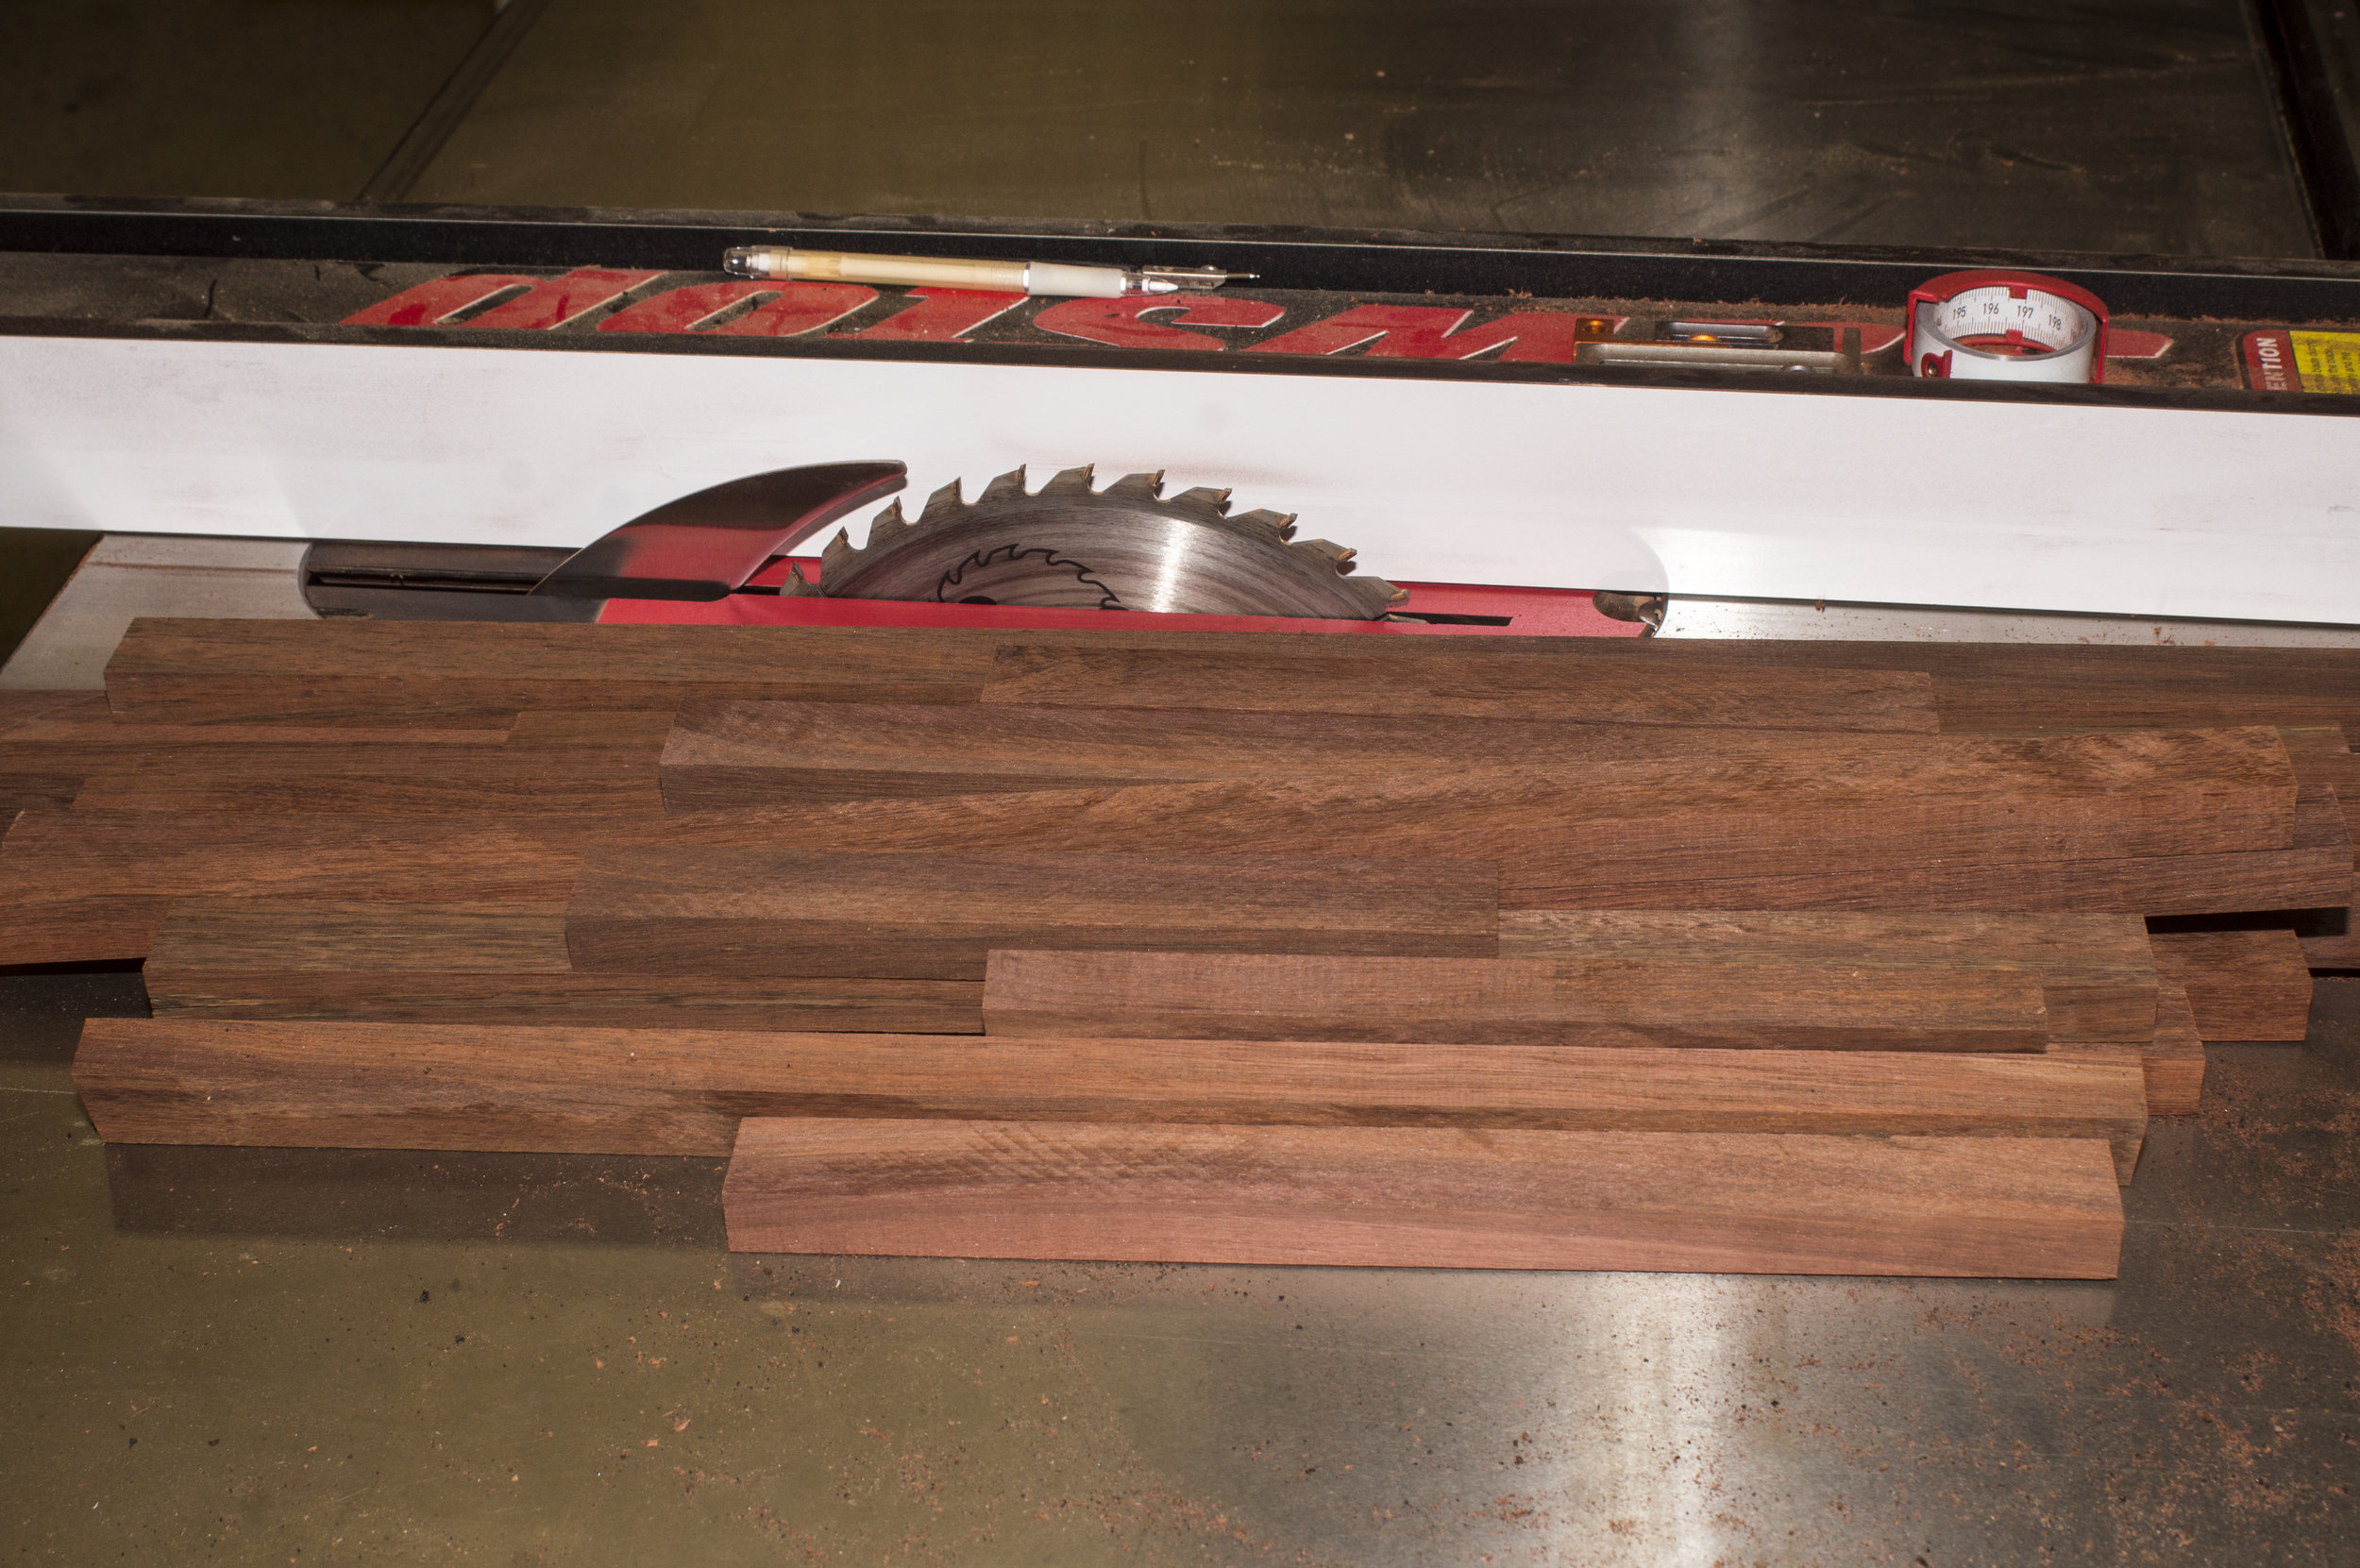
The next step will be becoming a familiar one, as it is common for most projects— dressing the timber. If you don’t start with timber that is straight and true, it is near impossible to achieve a good fit and finish in the resulting project. DAR (dressed all round) timber from the hardware store or timber yard is fine if you are building a house. While a few millimetres here and a bit of a warp there is good enough in that scenario, it doesn’t cut it when making a fine finish with tight joints. So each piece of timber gets passed over the jointer to get a flat side, then again to get the first edge at a perfect right angle to that side. Next, the thicknesser is used to dress the opposite side and to get each piece of timber to a uniform thickness. Finally, pieces are run through the tablesaw to get the final edge straight and the timber to the desired width.

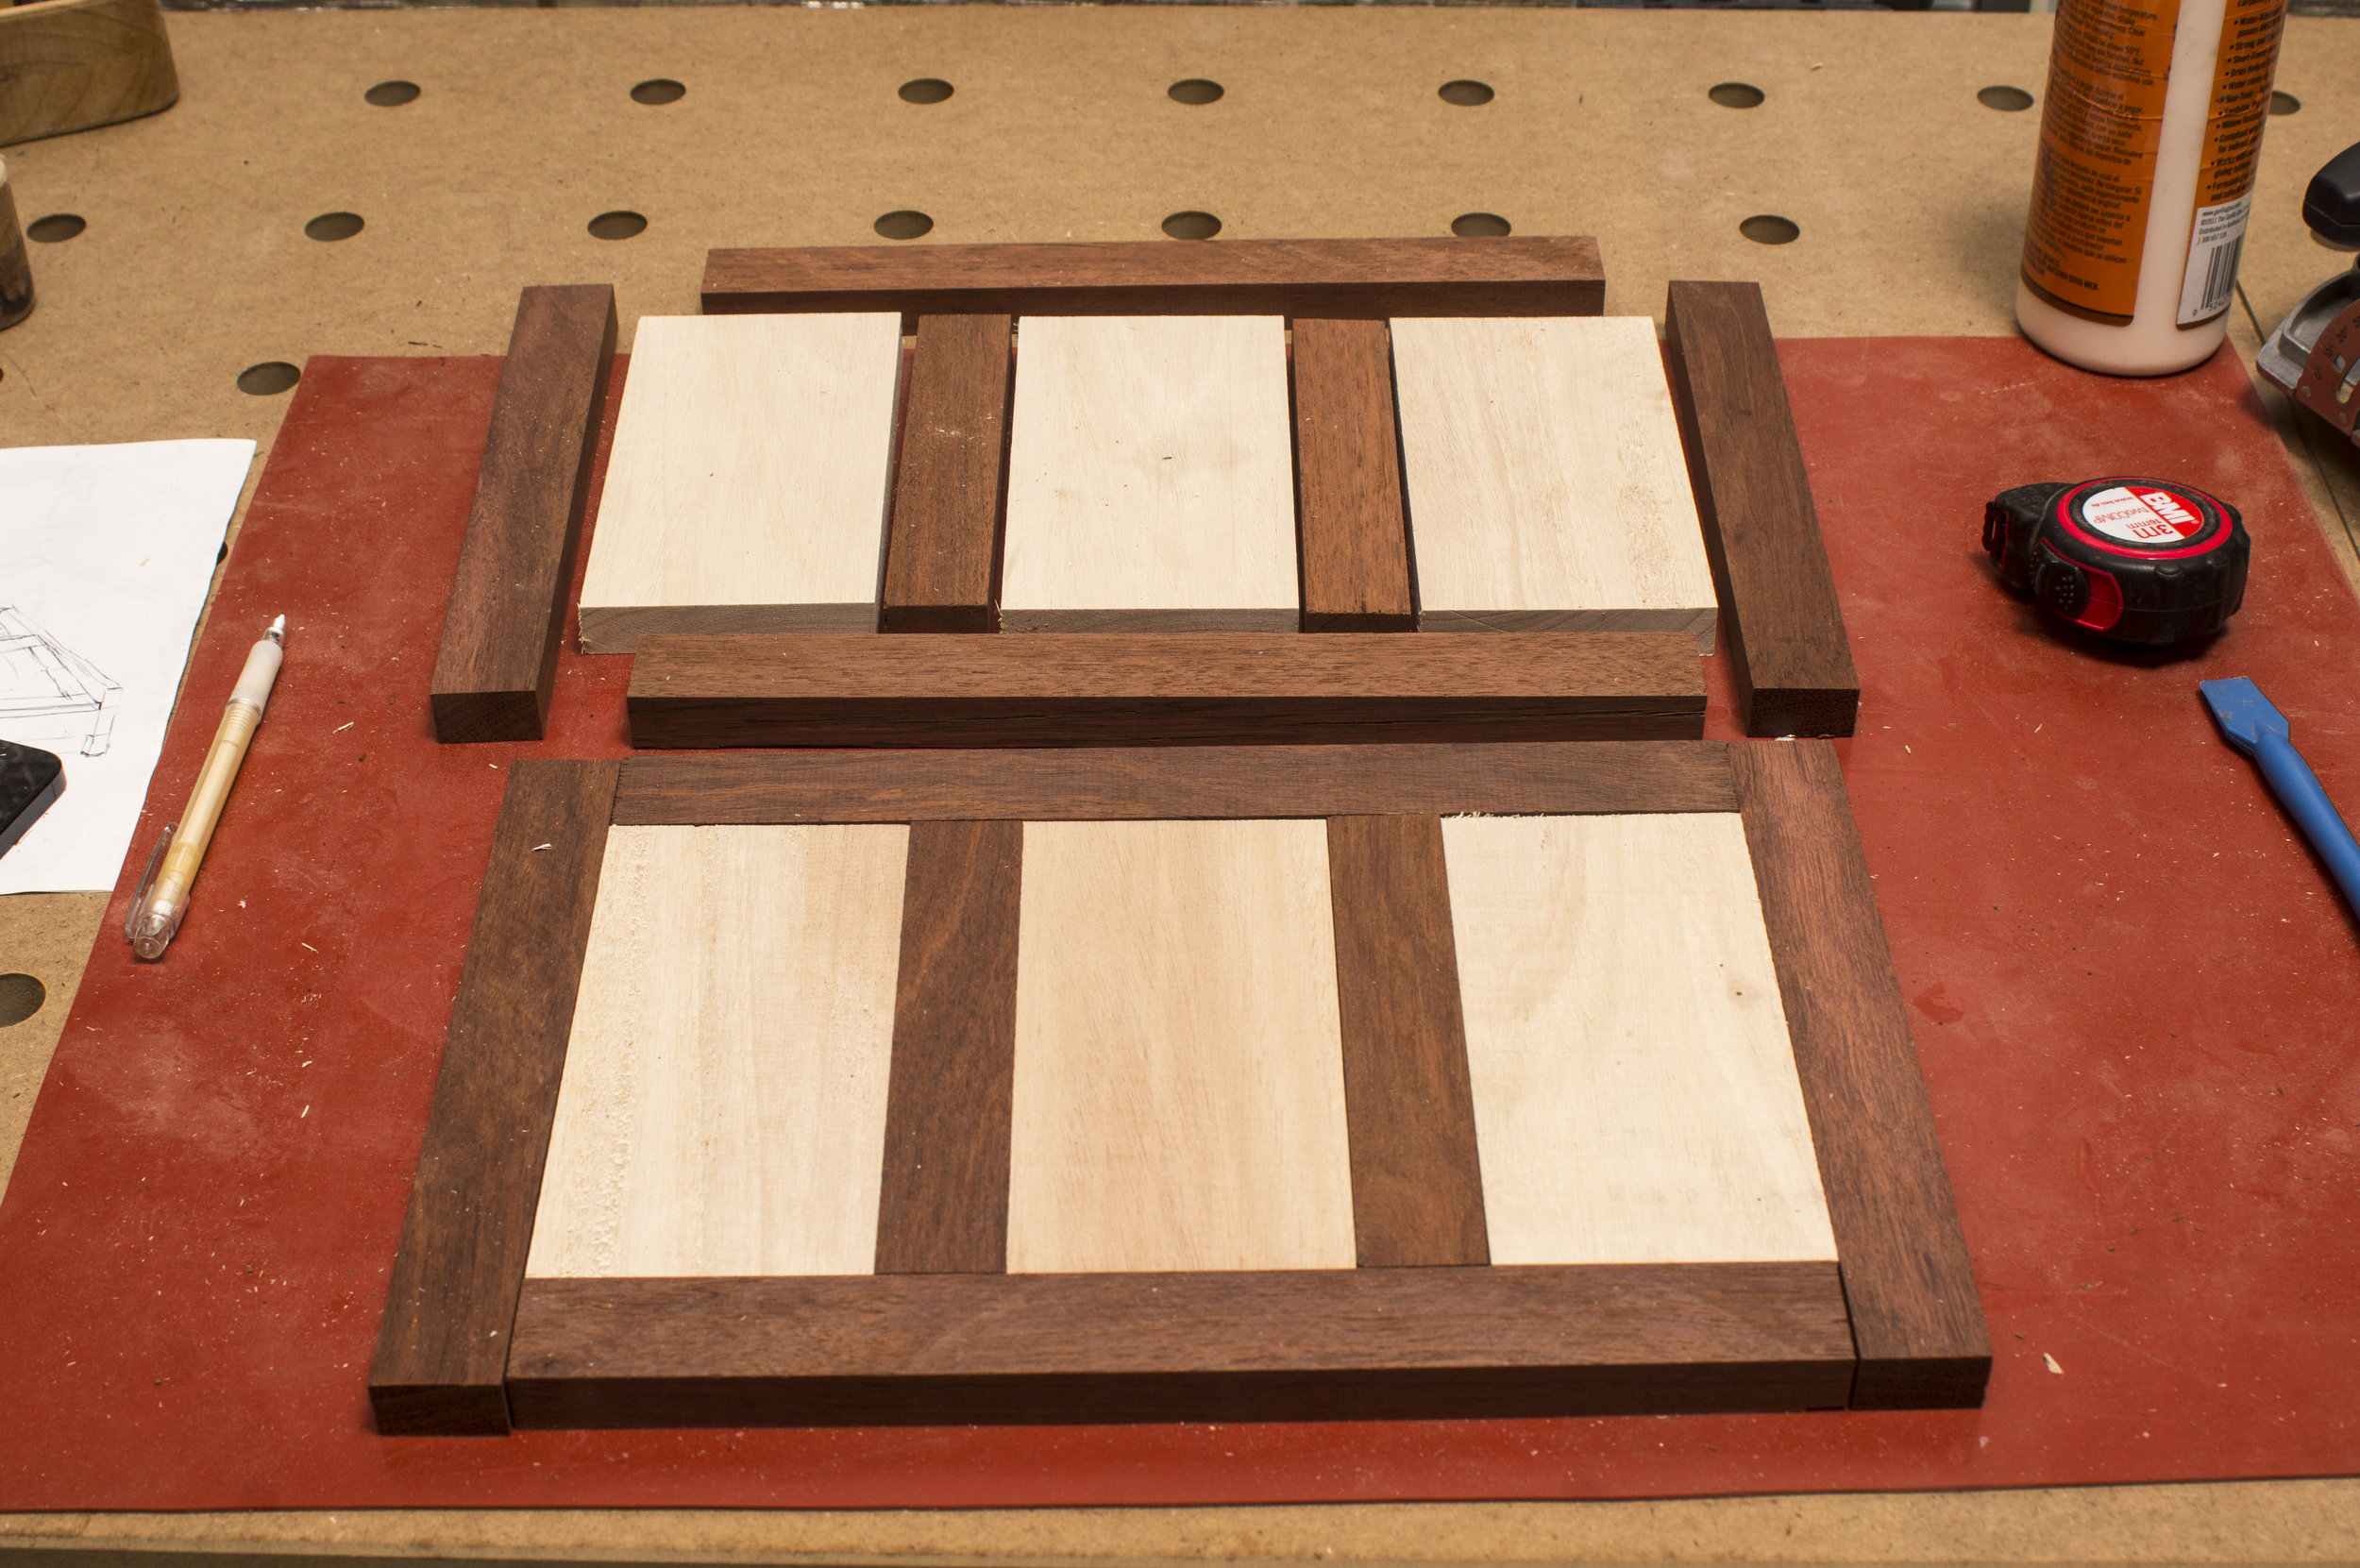
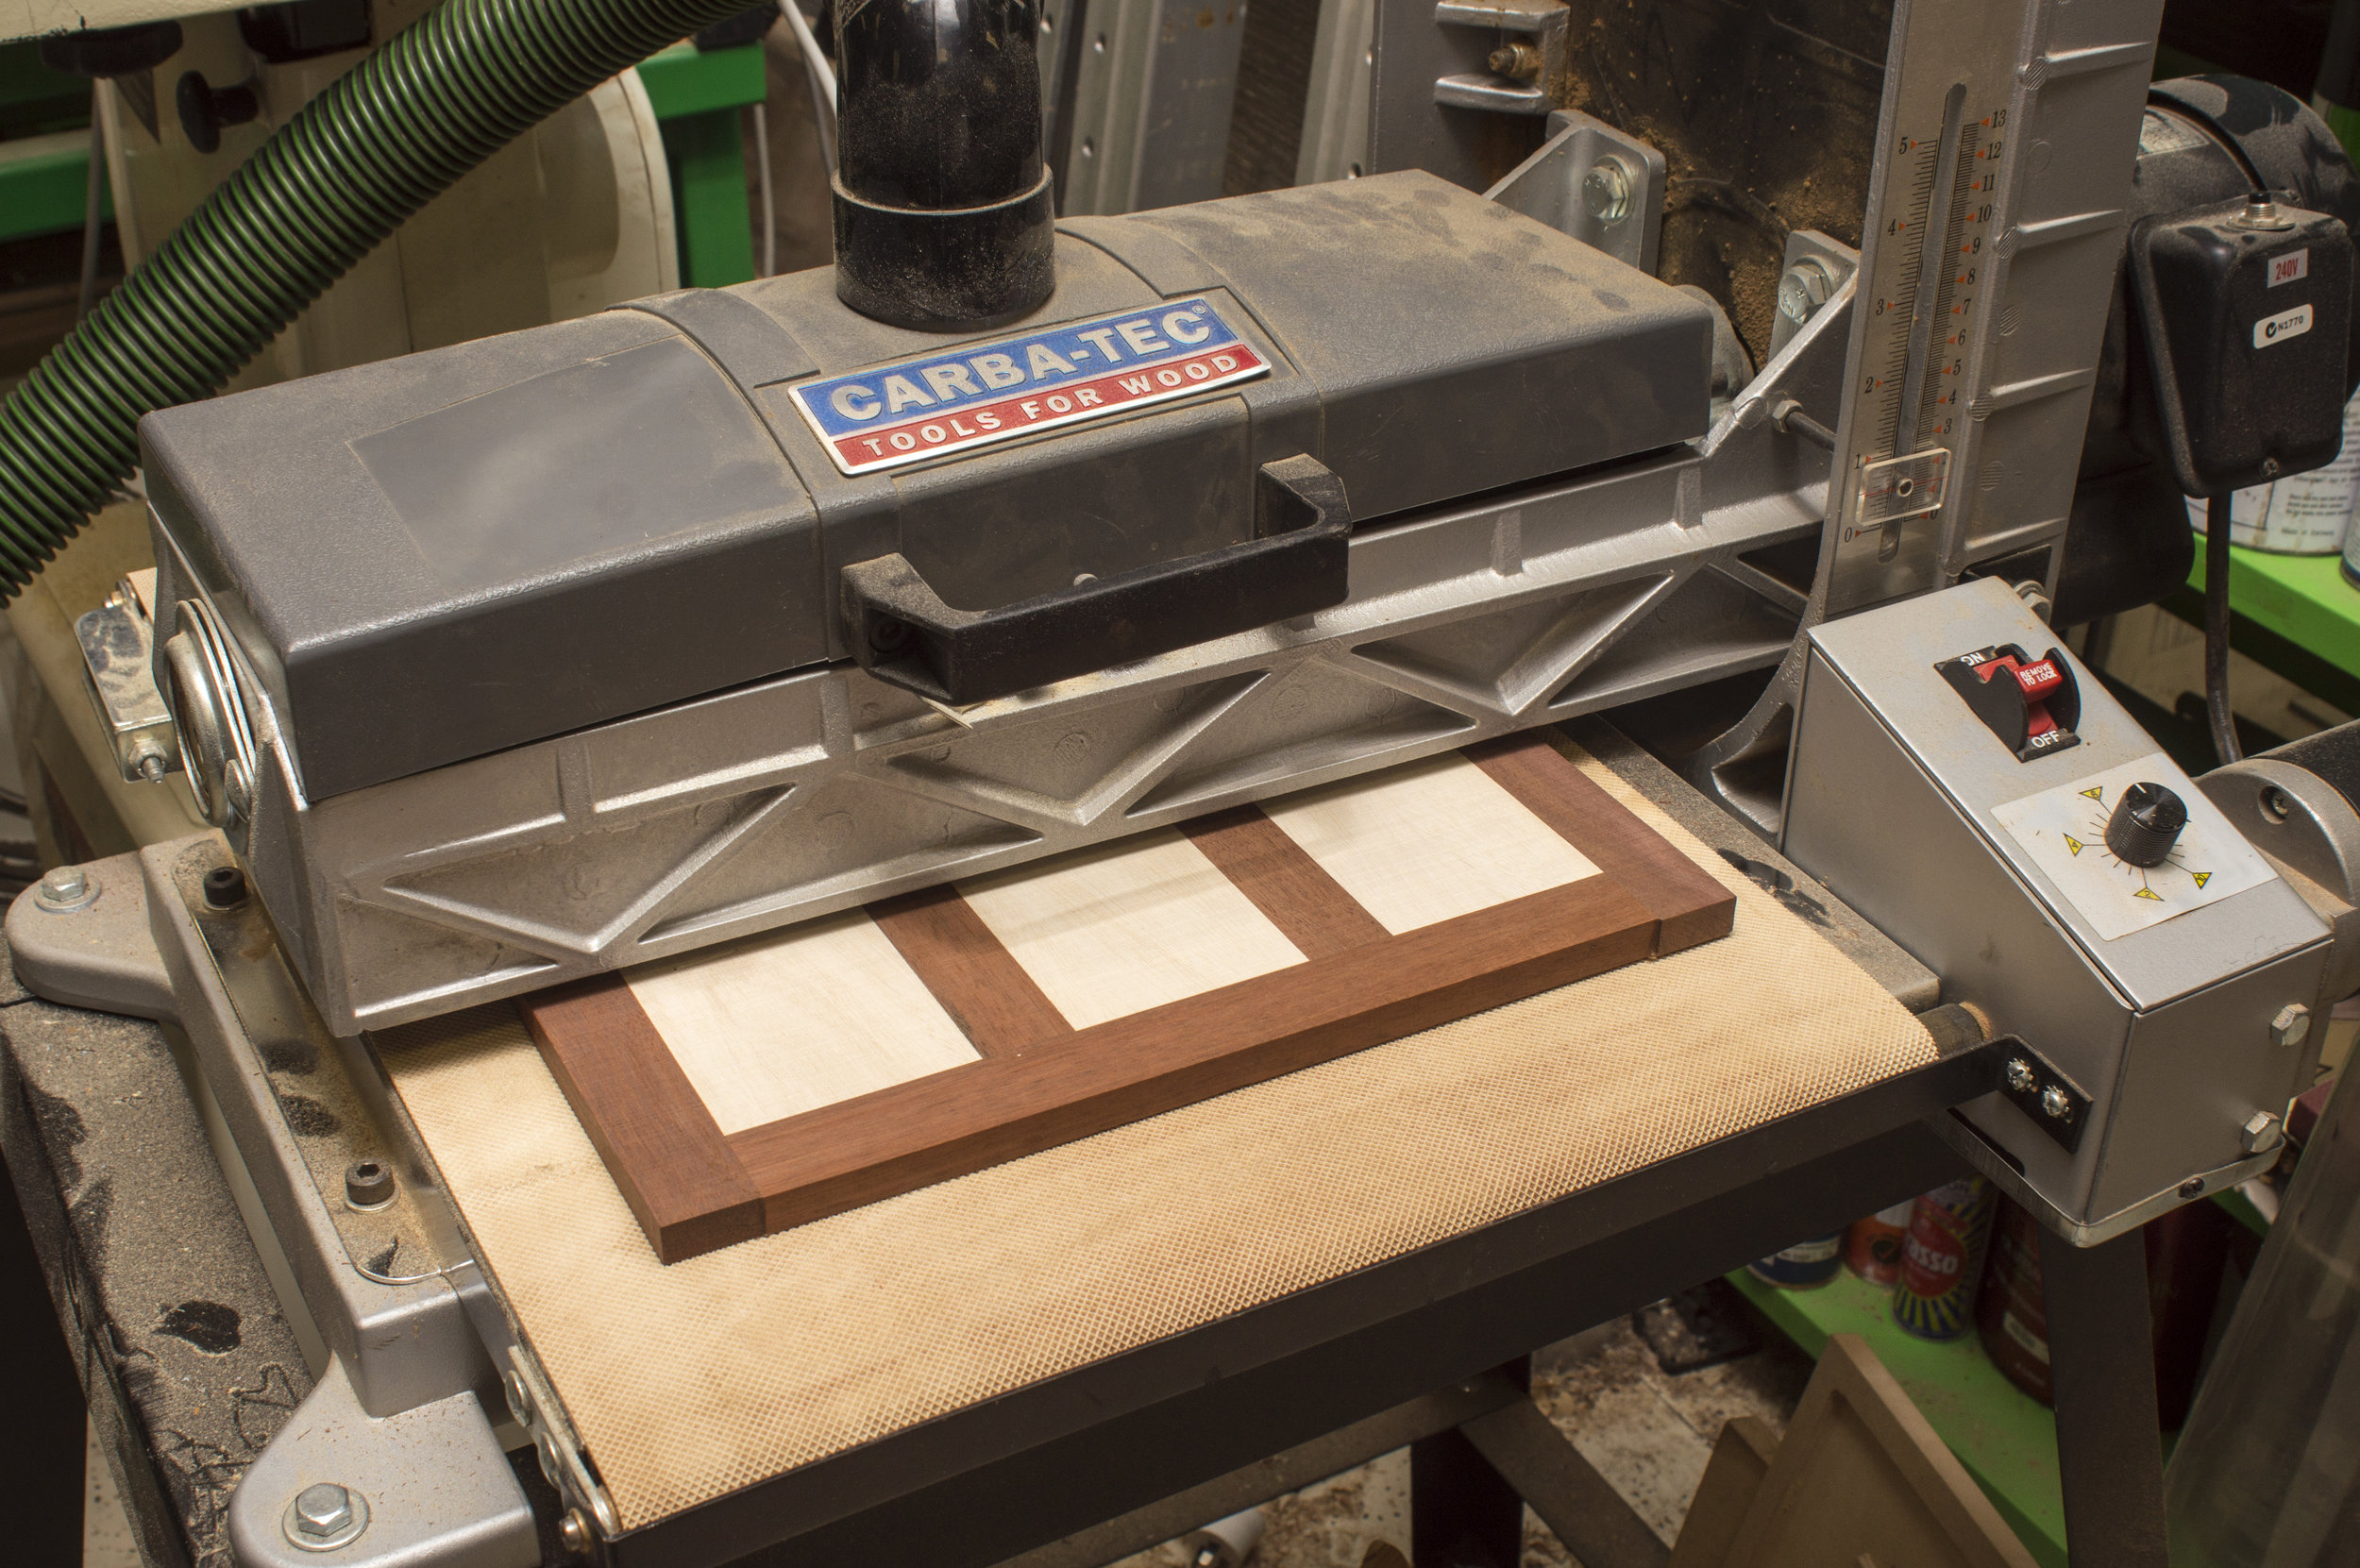
Tops
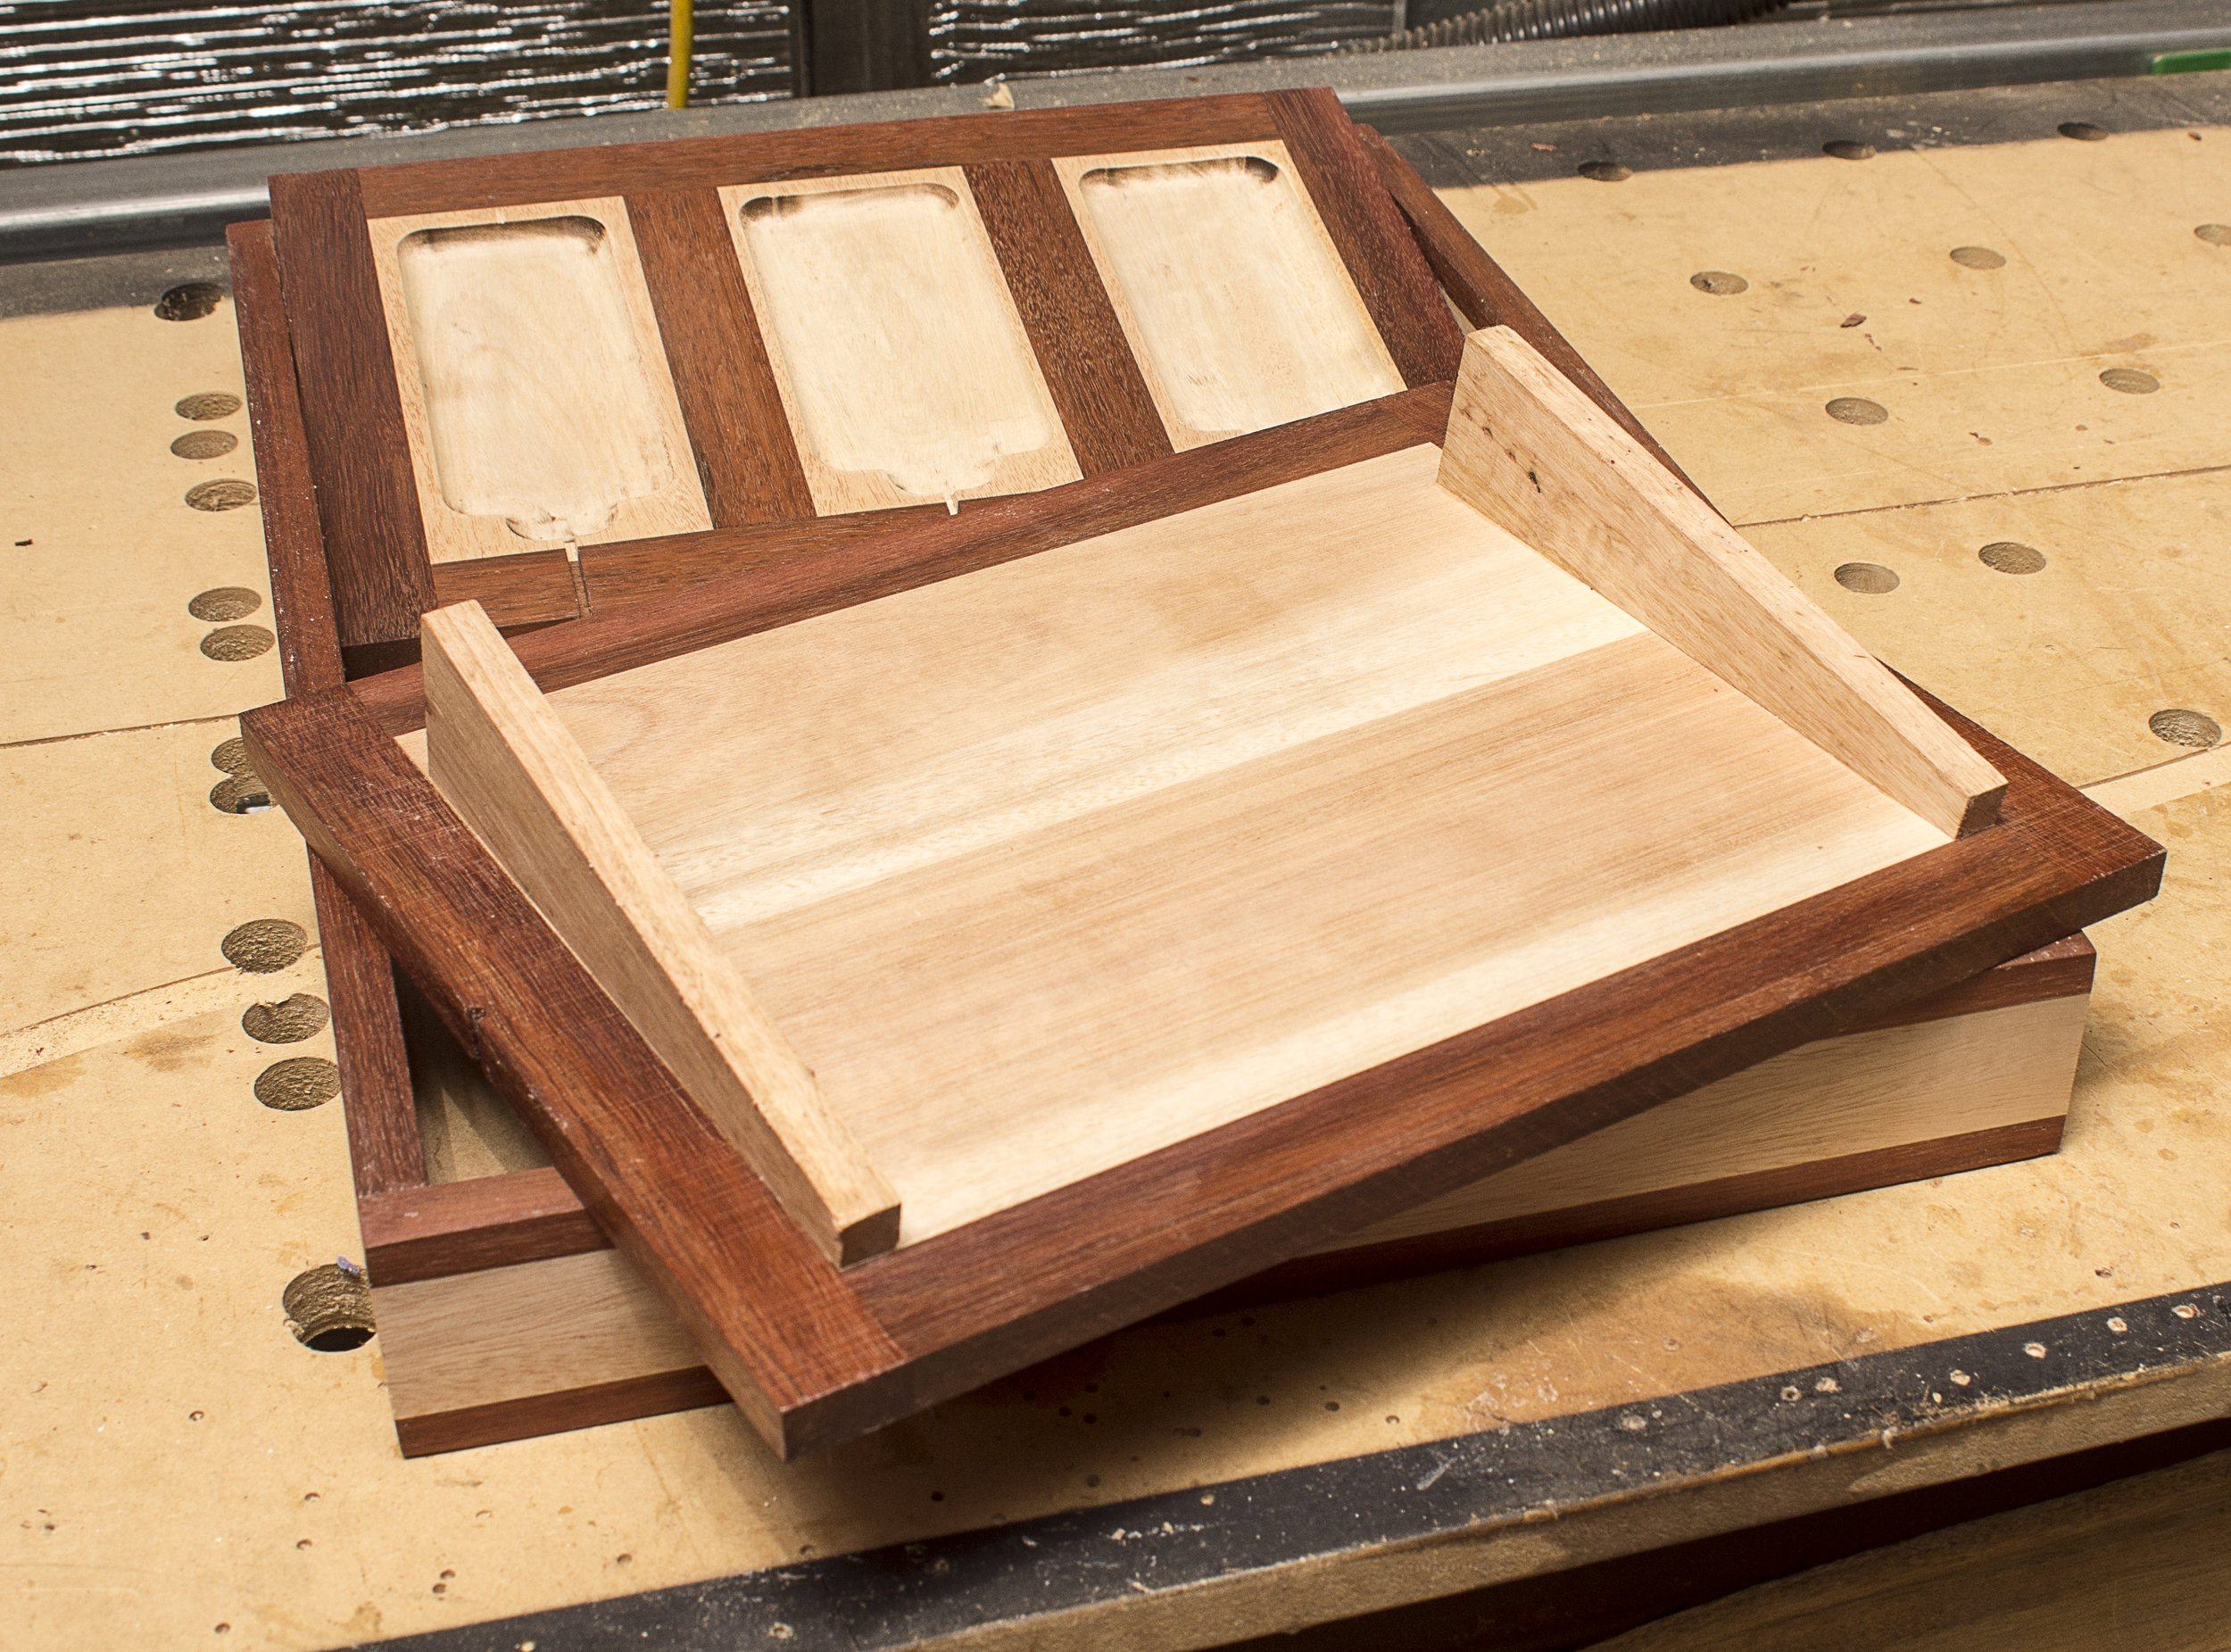
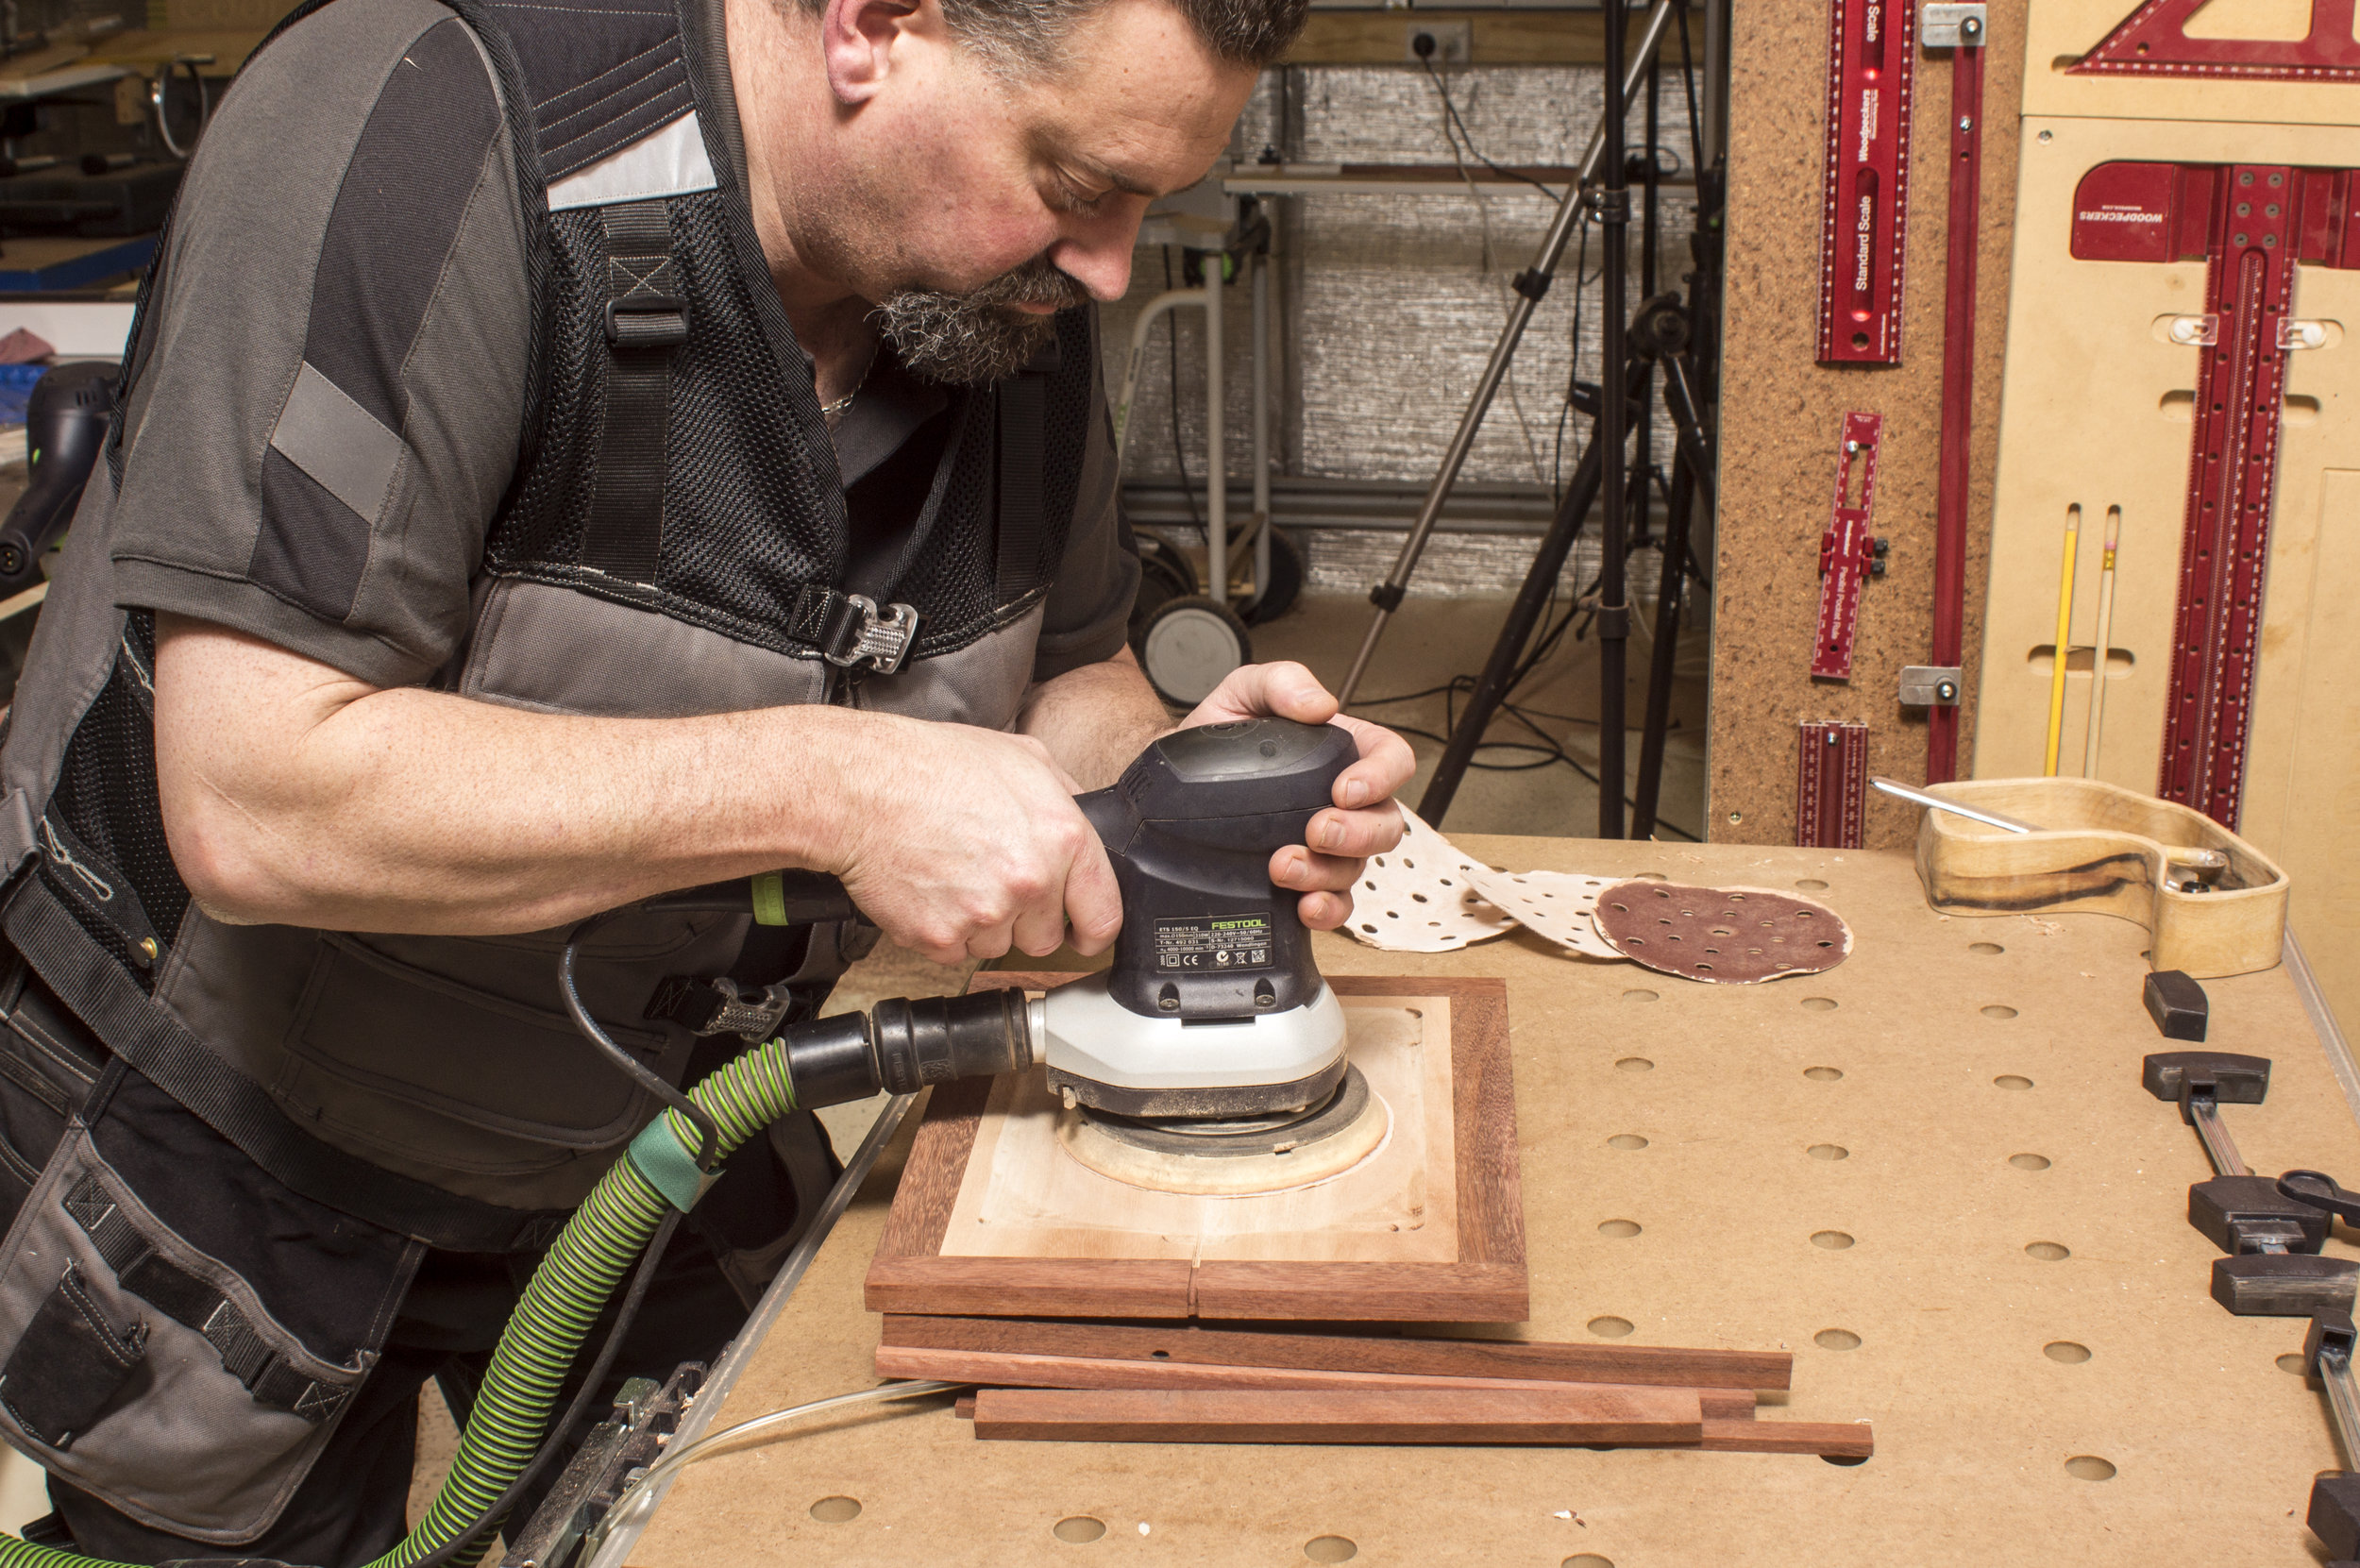
First thing is to assemble the tops where the devices to be charged will sit. I have used dominoes to hold the frame together, providing strength and lining up parts during the glue-up. Although dominoes are an optimum solution, biscuits, dowels or pocket holes are all viable alternatives for assembly. To clean up pieces once they are glued, I have used a belt sander in a previous project. For this one, given the smaller size of each component, another tool makes an appearance: the drum sander. The drum sander is a similar concept to the thicknesser—it has a reference surface upon which the item sits as it travels under a rotating drum that is a set distance away from the reference surface. In the case of the drum sander, the reference surface is also a motorised belt that carries the work through, past the abrasive-wrapped (rather than bladed) drum. The glue squeeze-out is first scraped away, then the pieces fed through. This is still a machining step rather than a finishing one. Although sandpaper is used in this step, finishing is best achieved with a random orbital sander (ROS) that disguises the sanding marks.
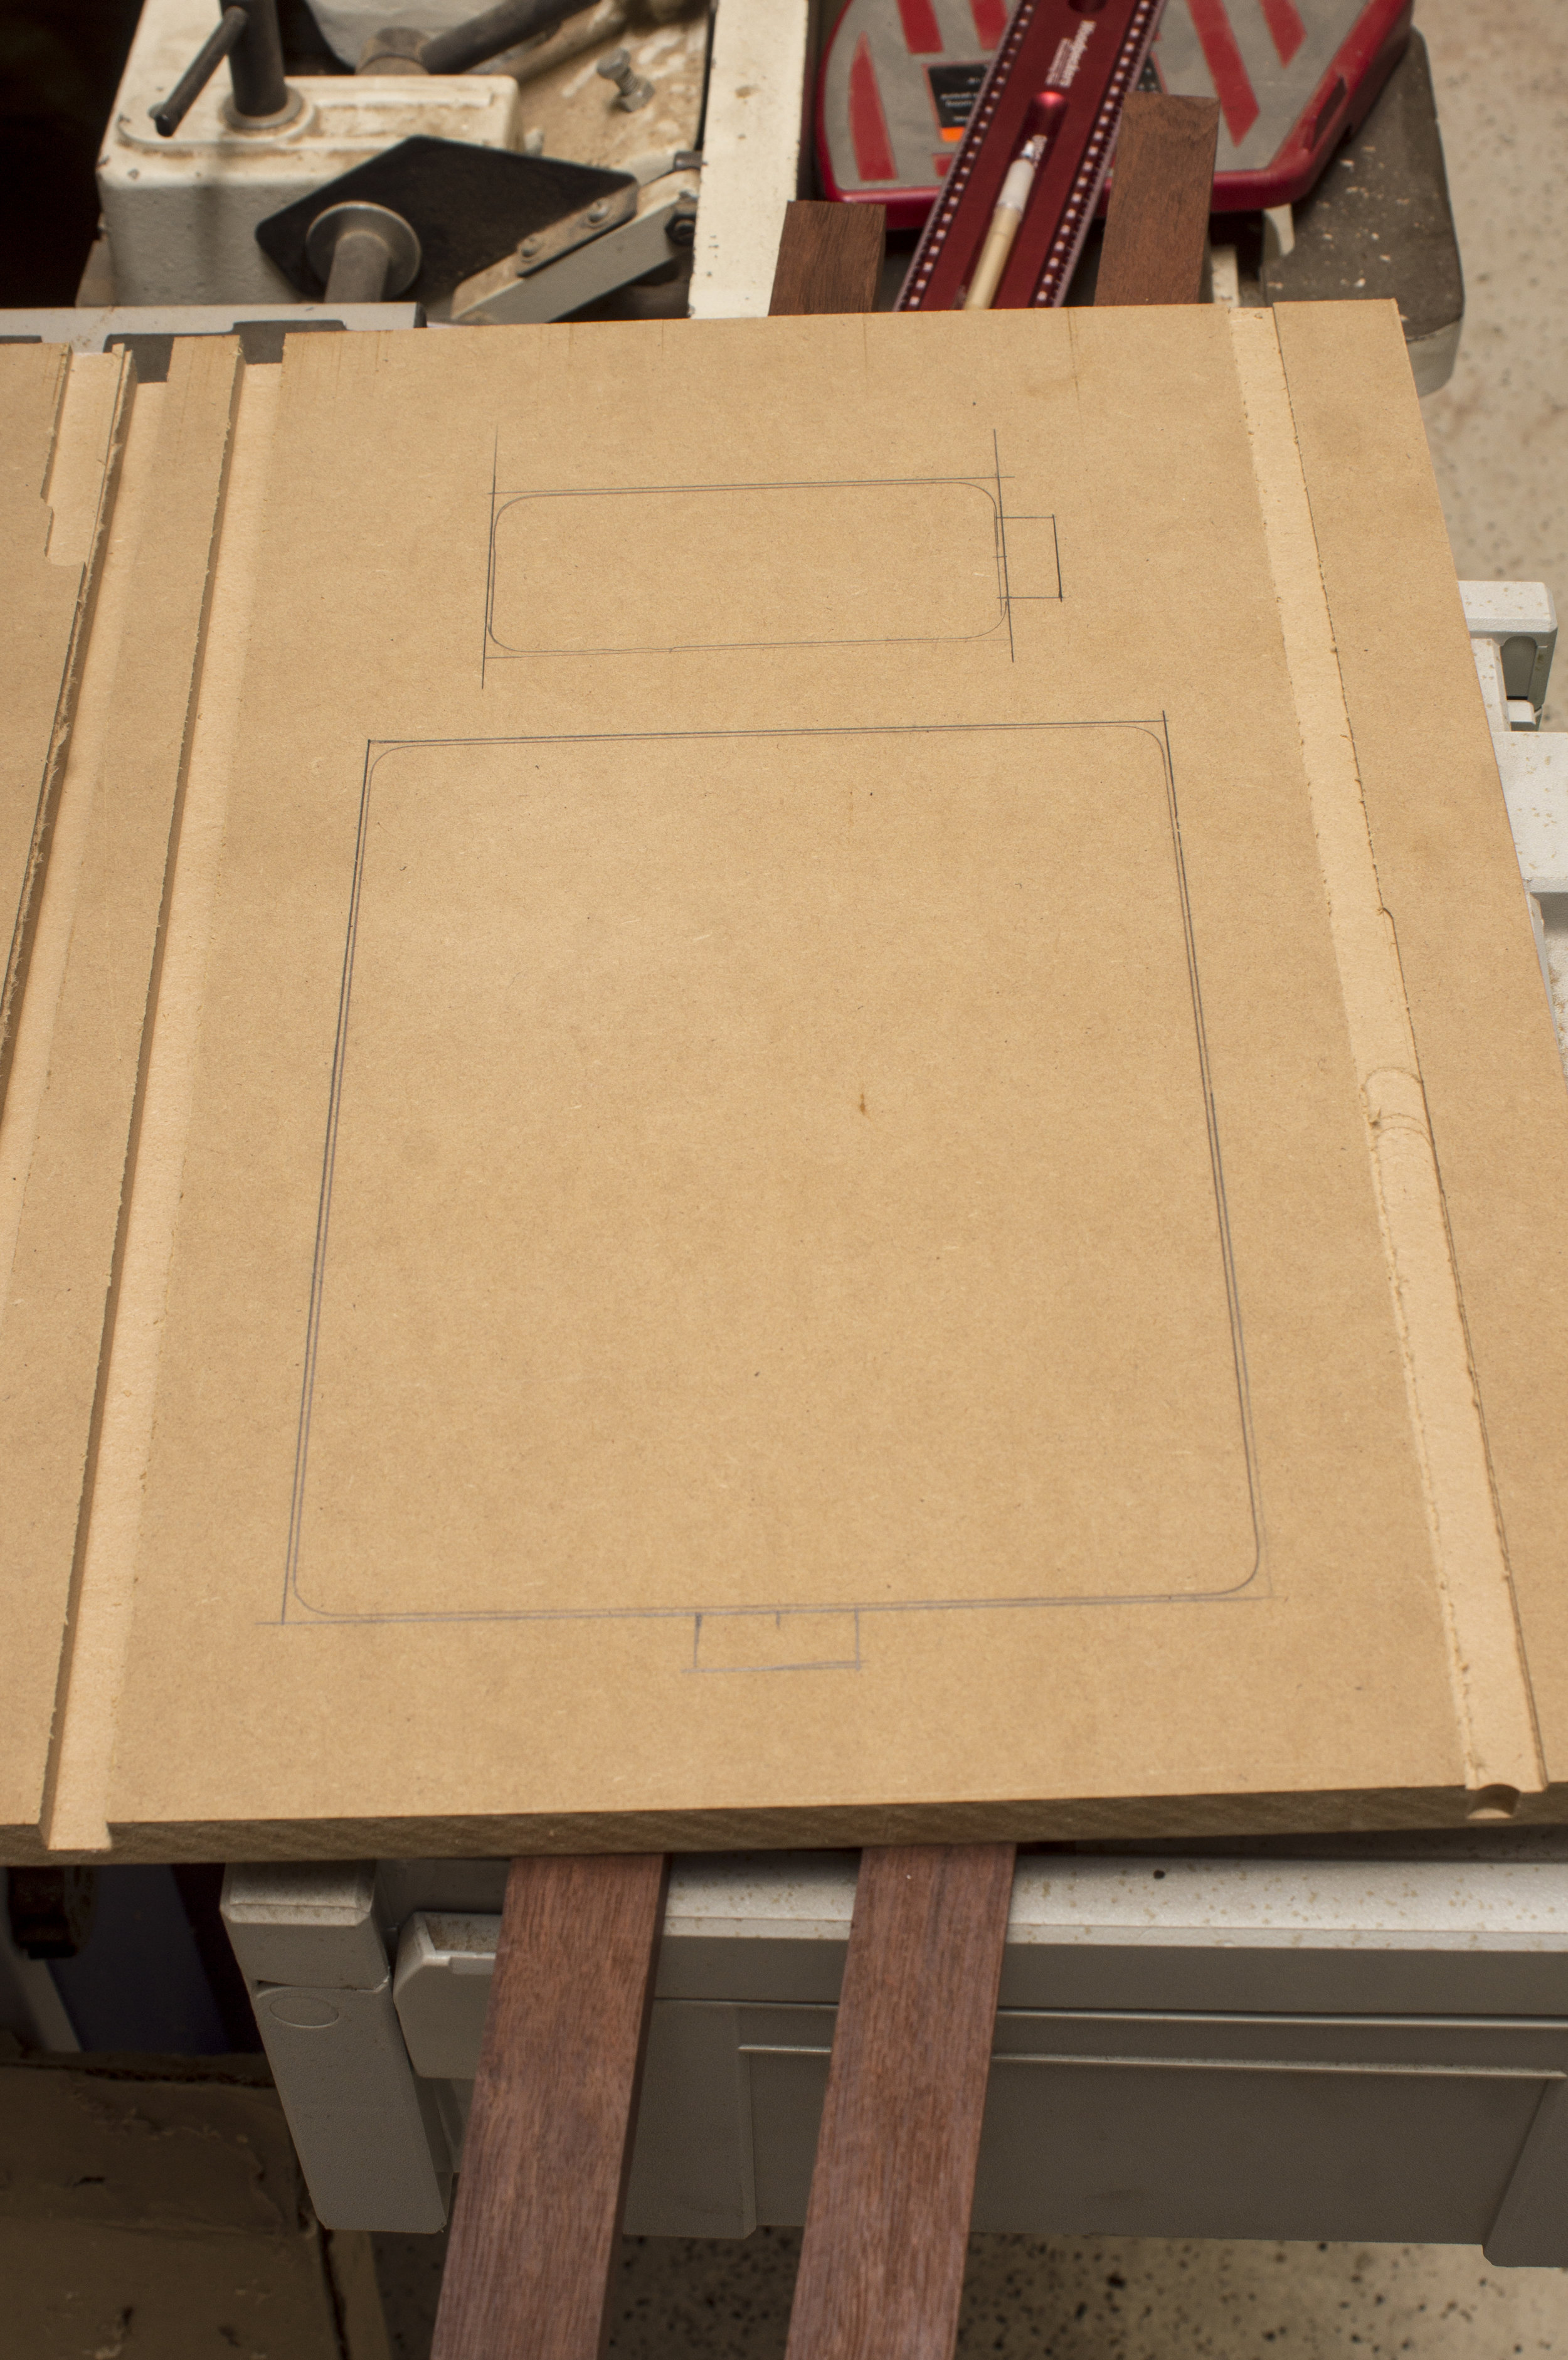
Template
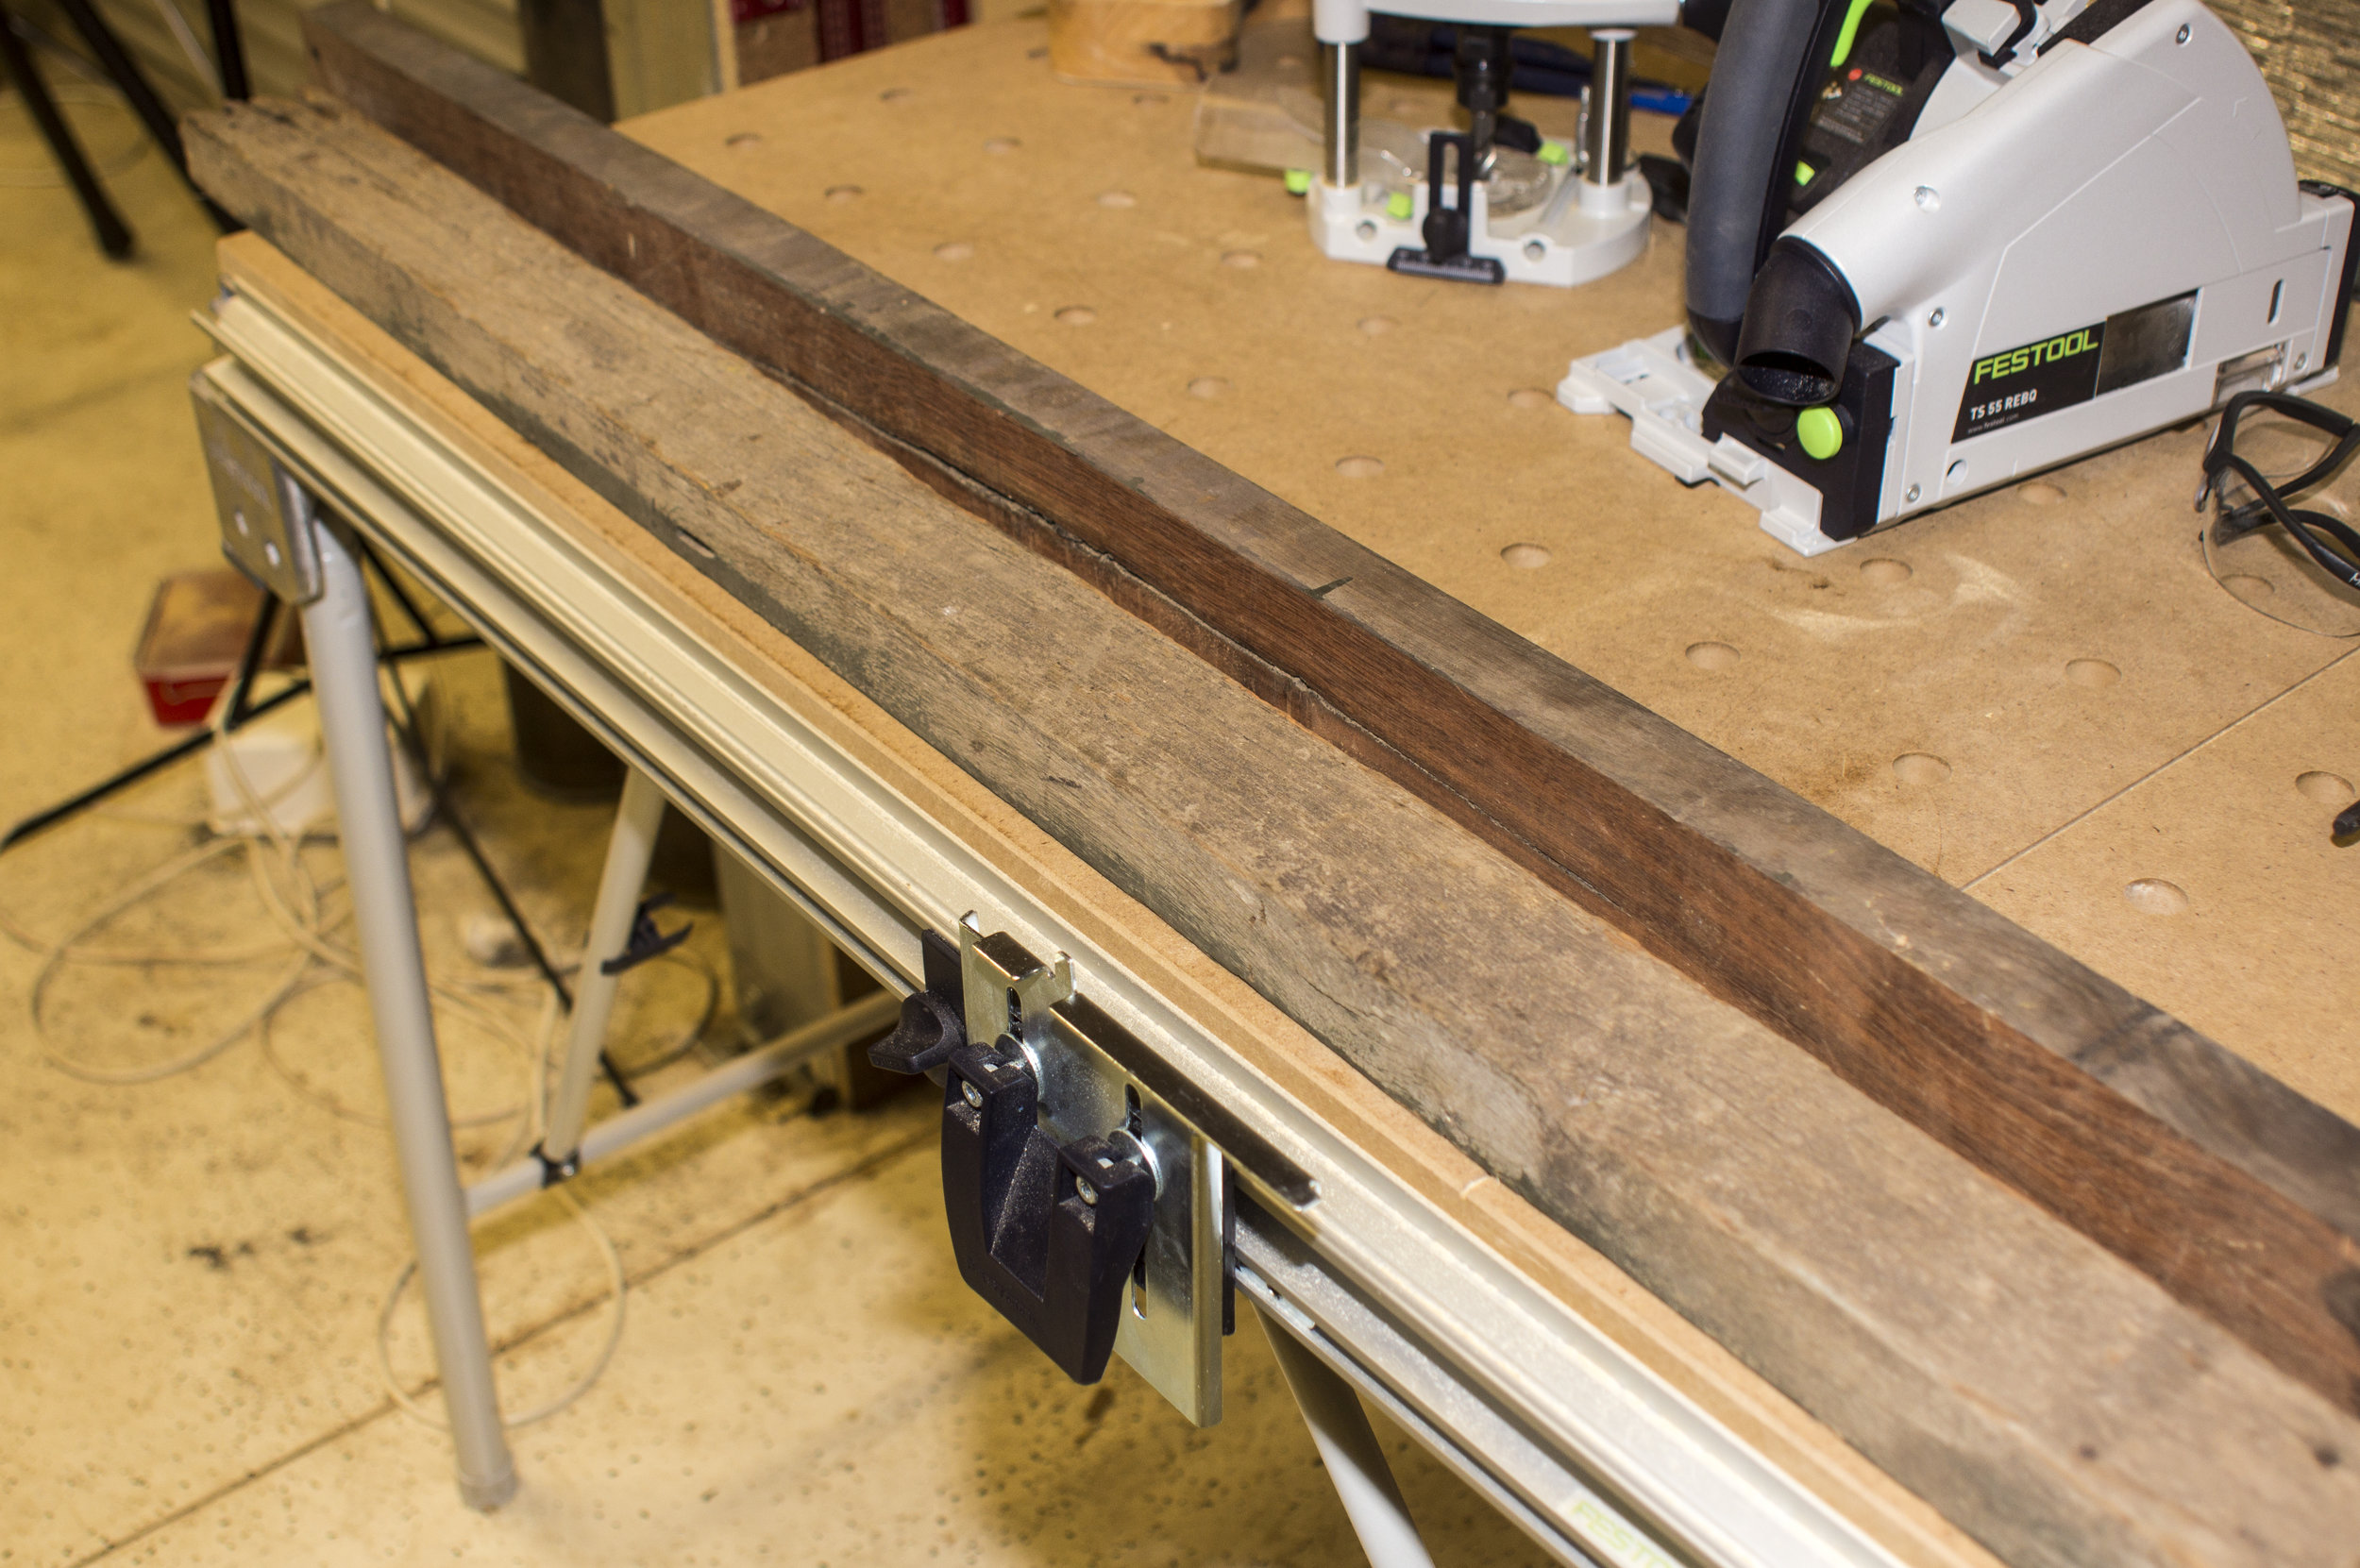
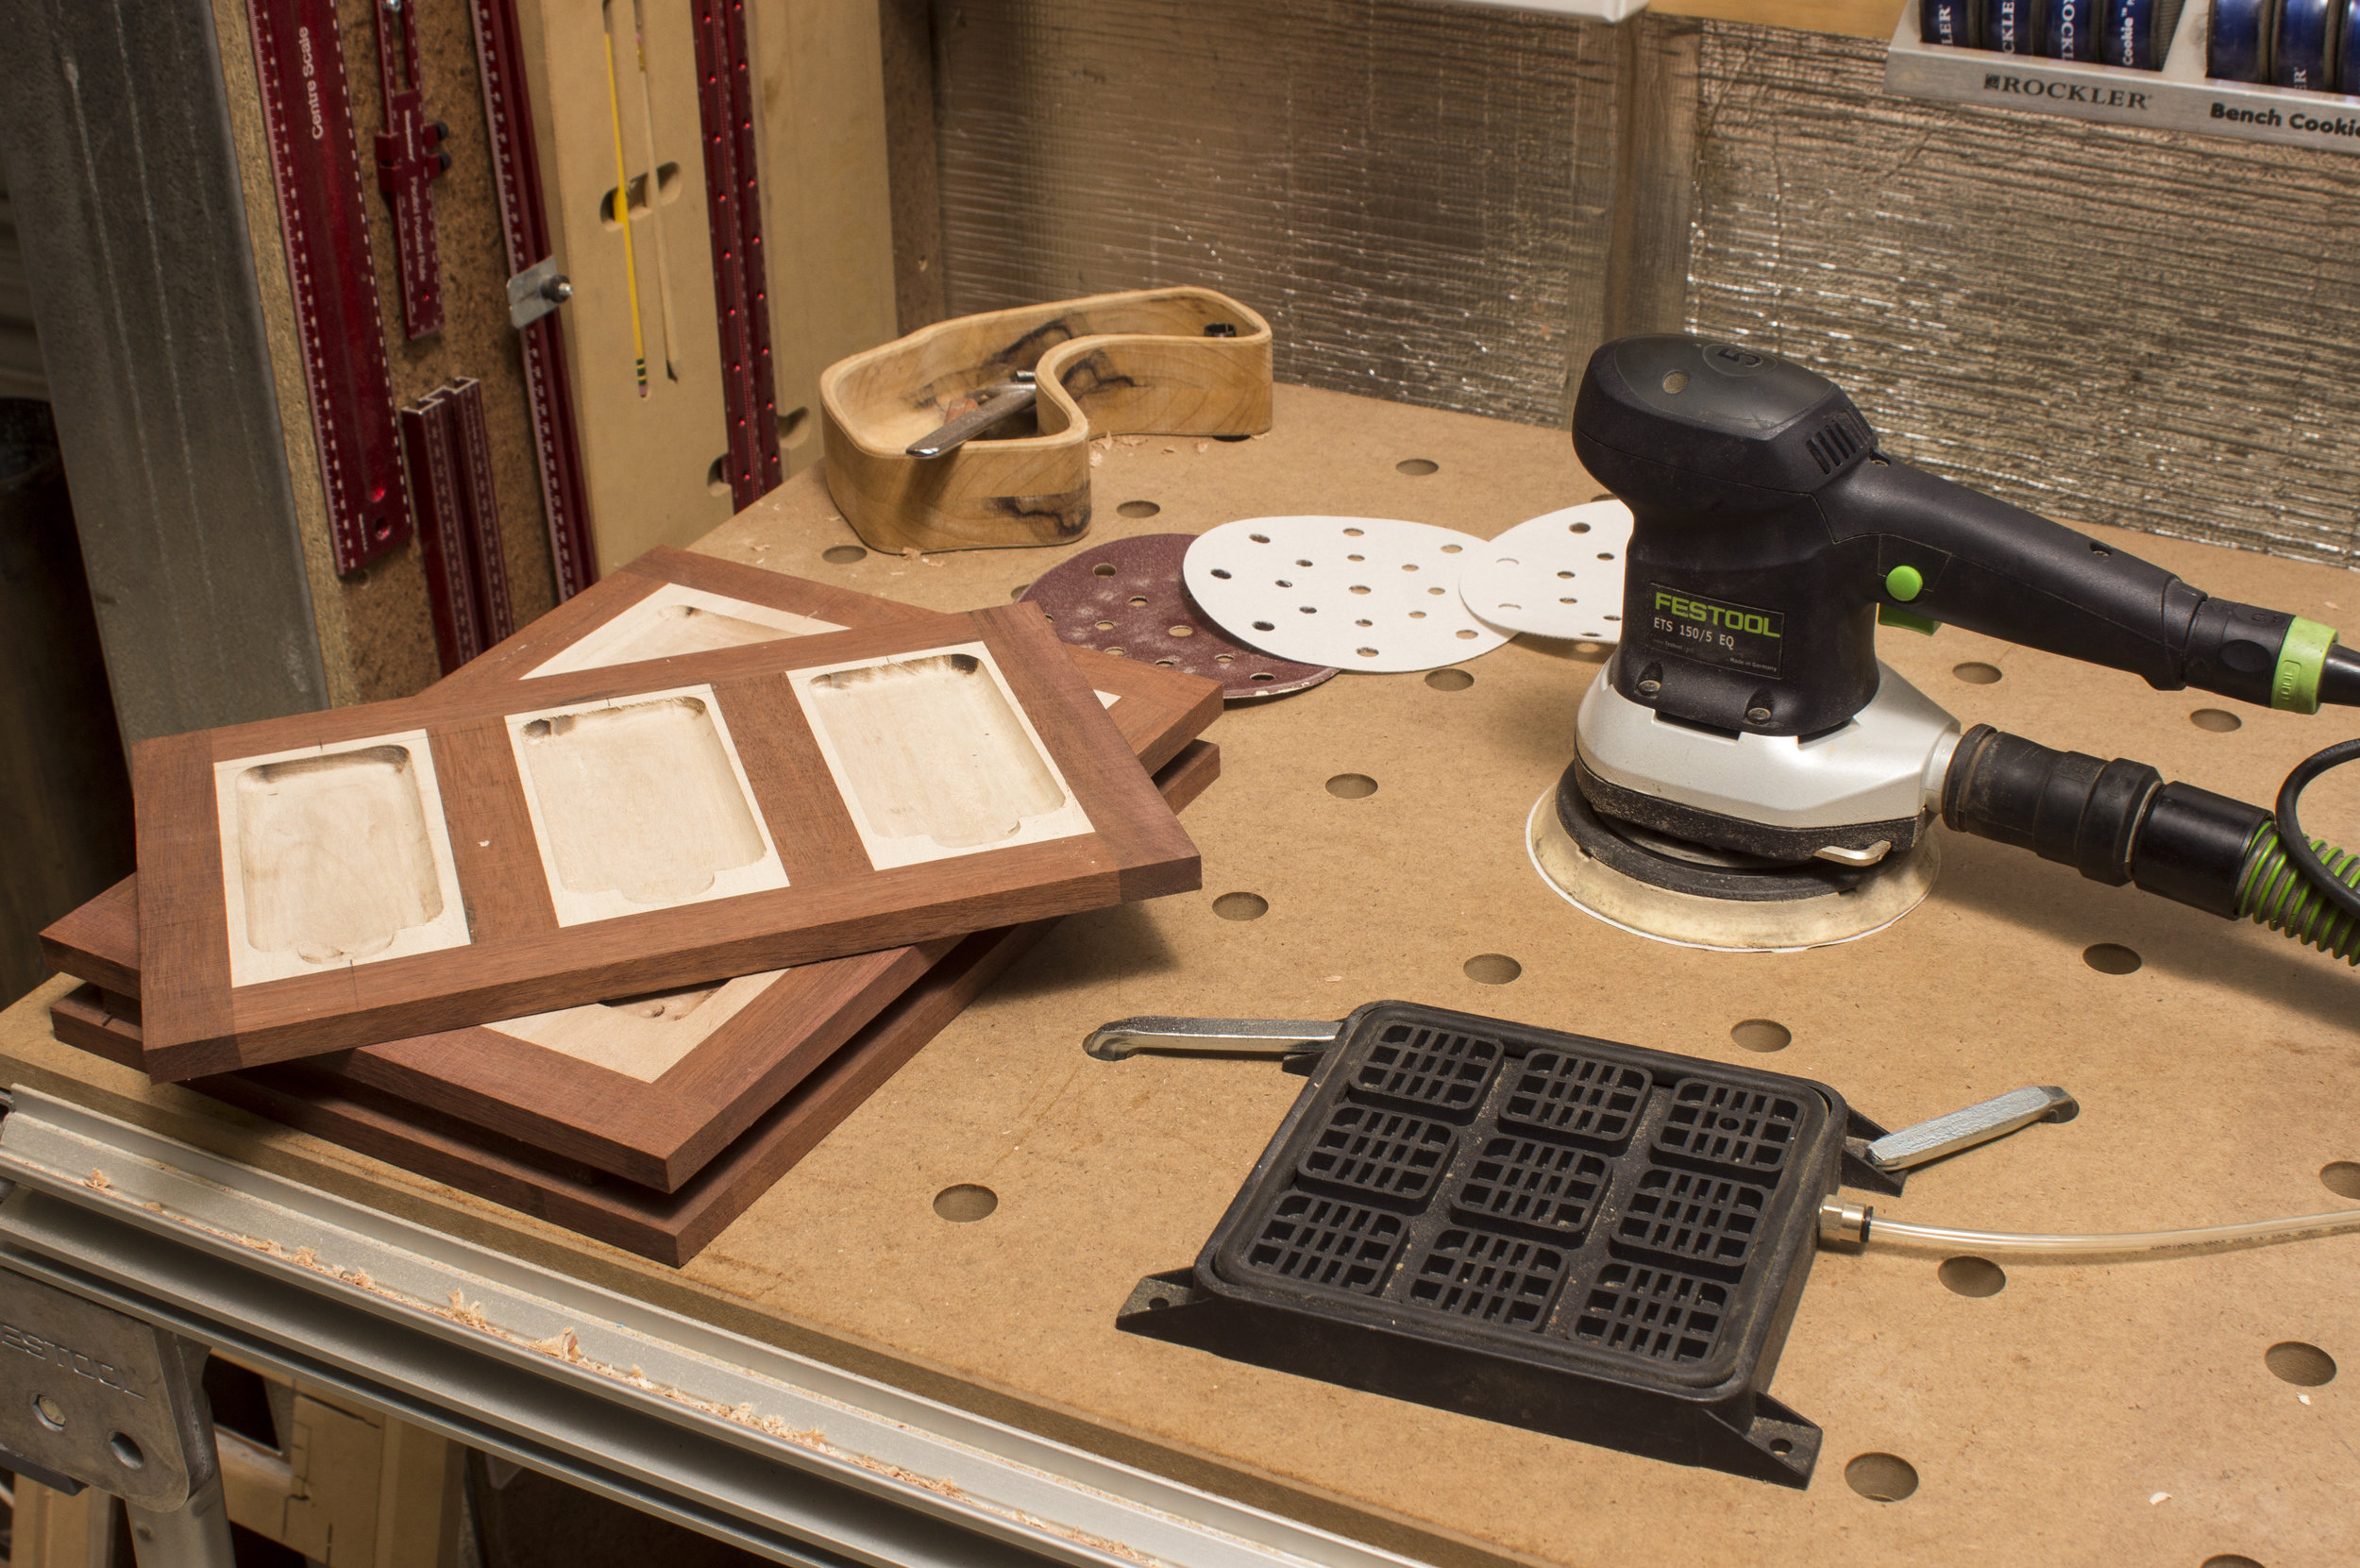
The next step revisits a technique that we discussed in the last issue—using an inverted router bit and a template to create a hollowed-out area for the phone or iPad to rest in while it is being charged. A template is needed for this job and, as previously mentioned, MDF is a good material for this, especially for oneoff jobs. As I am using a bowl-bit for this job, the diameter of the bit will produce the desired rounded corners. By comparing the radius of the bit to the radius of the corners of the iPad, I found a good fit. The outline of the iPad and iPhone are traced onto a piece of MDF. I extended the lines to create a basic rectangle. As I am using a router bit with the desired corner radius already, there is no need for the template to mimic the rounded corner shape, which makes cutting the template a lot easier. I could have used a number of different tools to cut out the template (scroll saw, bandsaw, jigsaw, coping saw, high speed oscillating tool etc.), but in this case, I decided that a rail-mounted circular saw will produce the straightest edges. Not having used it in this fashion before—it is only a recent addition to my workshop—I was very curious as to how well it would work in practice. As it turned out, extremely well indeed. The rail is set up on each line, about one millimetre away from the lines sketched, so that when the opening is cut, there is a little bit of room around each phone or tablet computer—no need for a friction-fit for this job. The circular saw is placed on the rail, plunged in at the first mark and cut through to the second. I repeated this for each side and an accurately sized template with perfectly straight sides was quickly produced.
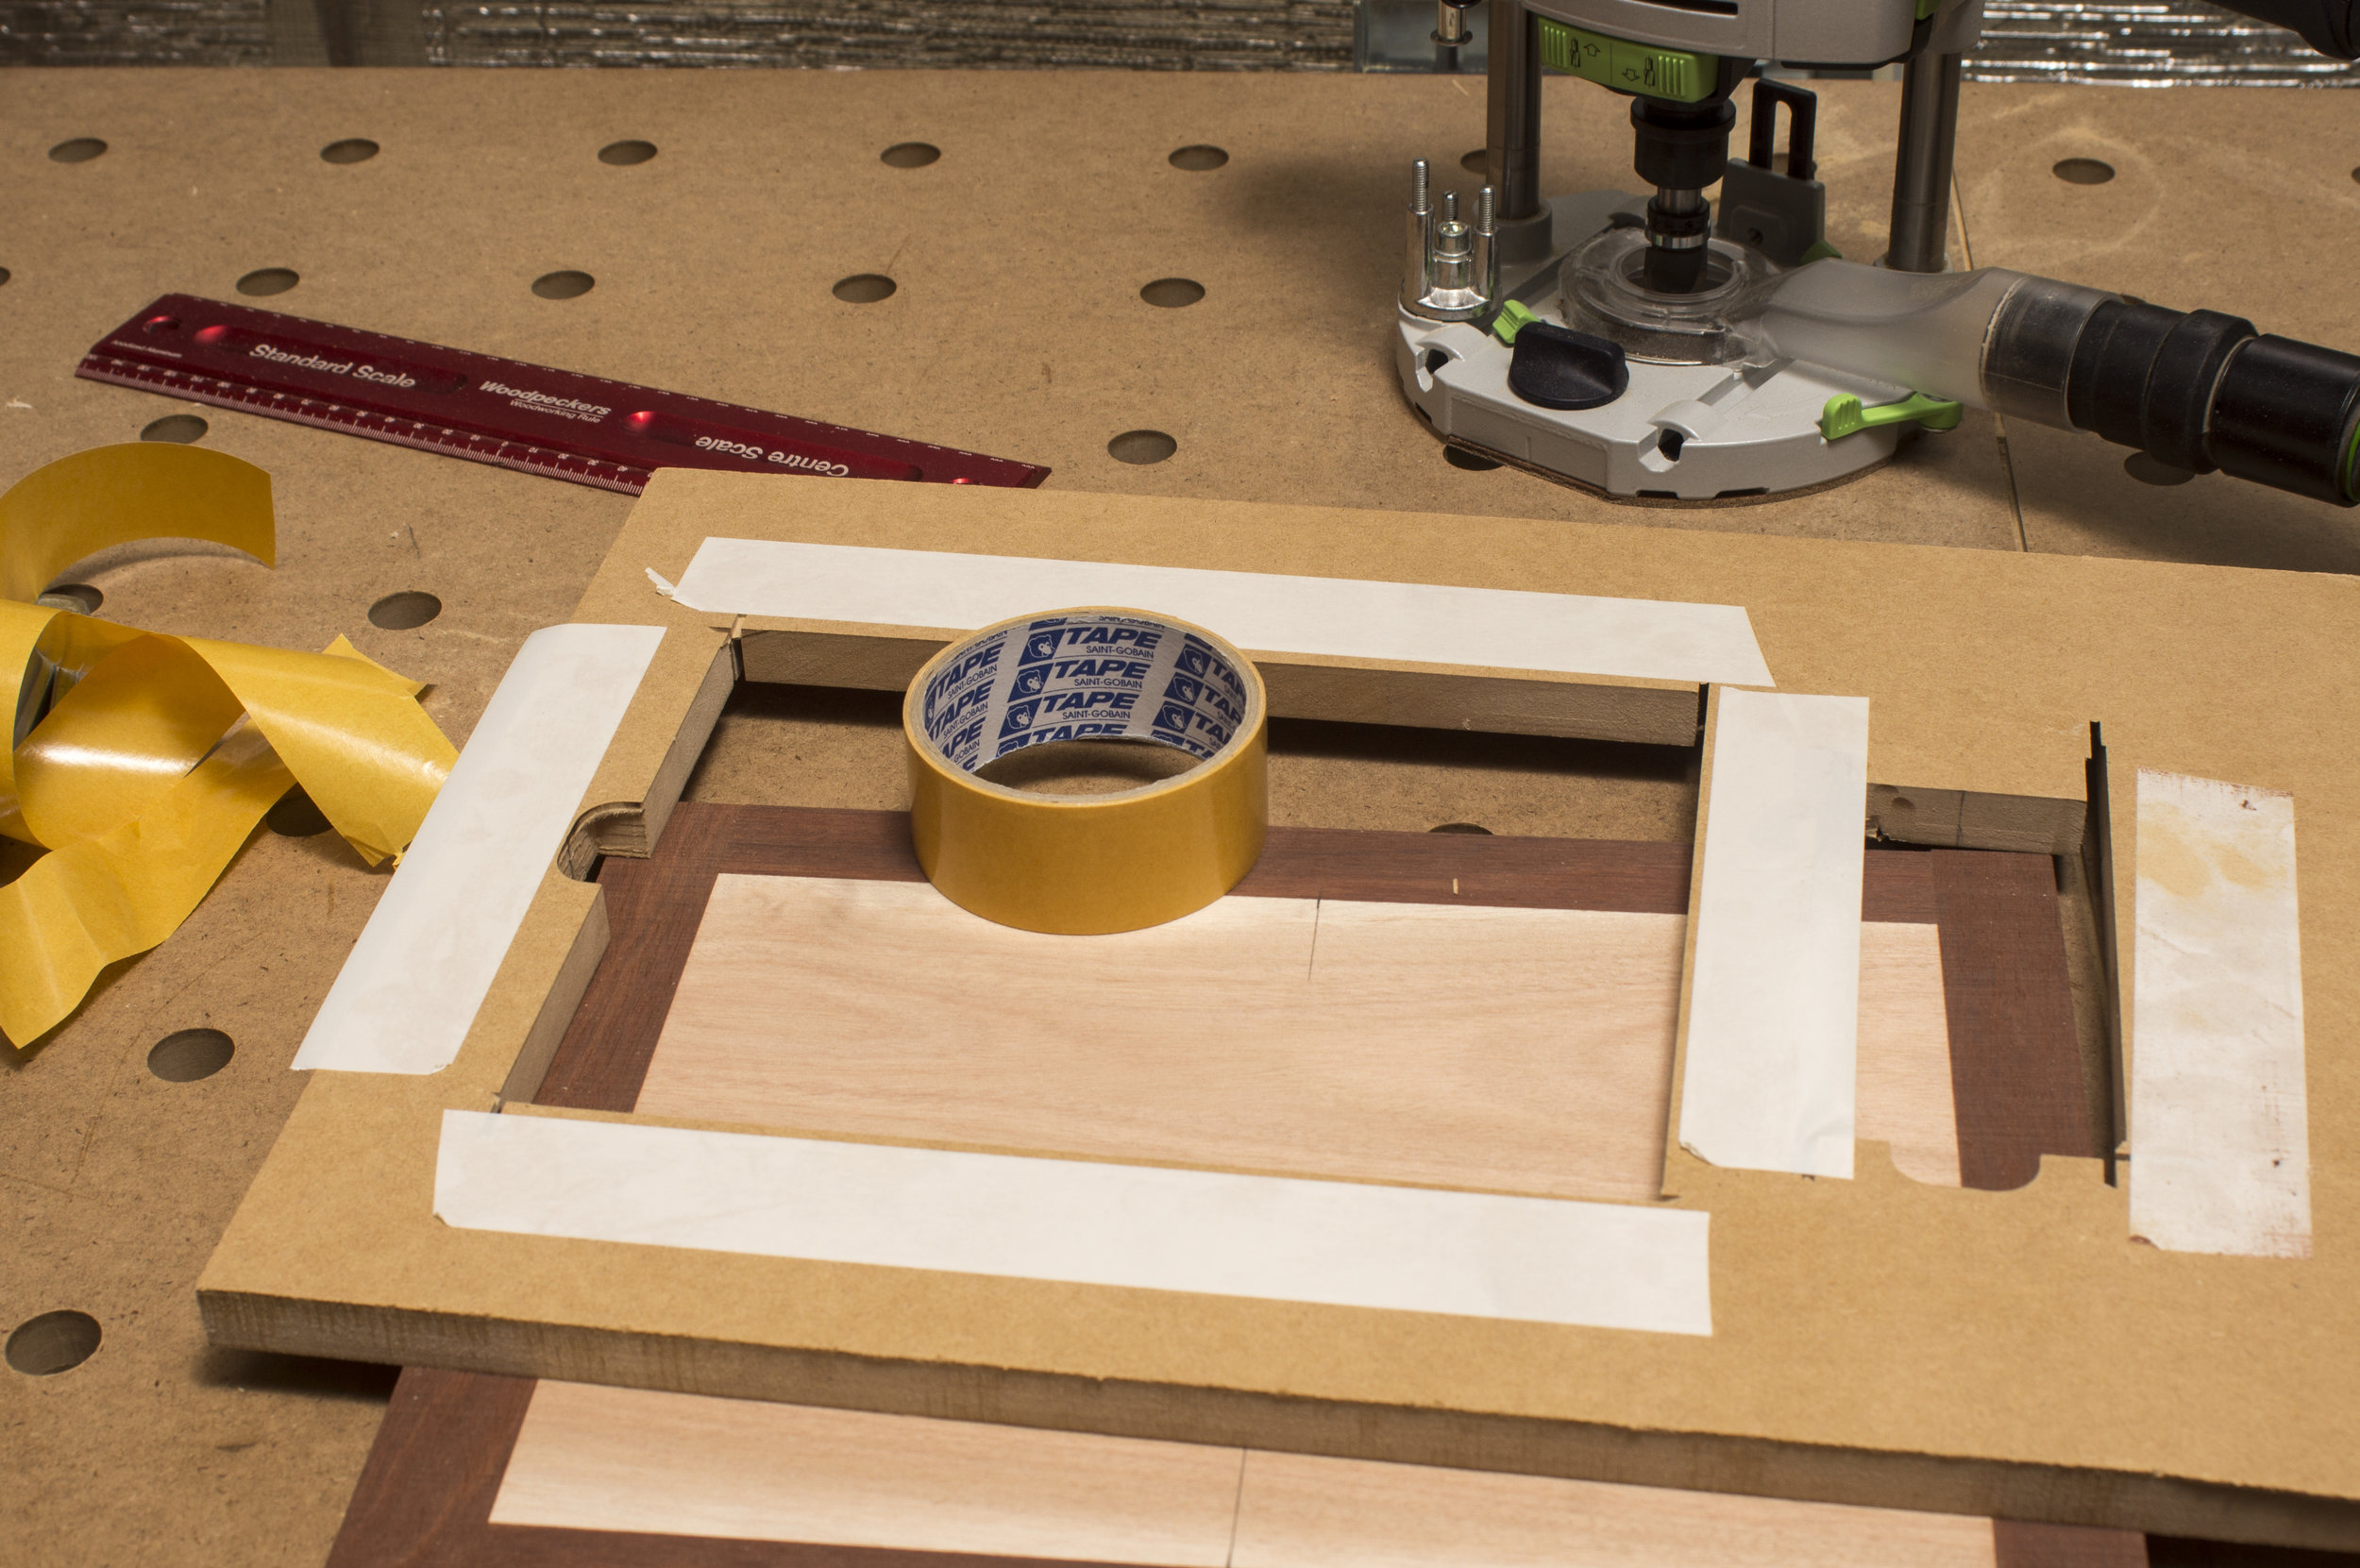
Opening
To create the opening for the charging cable, I resorted to a chisel and hammer. Sometimes, even I will admit the traditional ways are still the best method for getting a particular task done. The template is attached to the workpiece with double-sided carpet tape. I find this is particularly suited to this operation. The tape: • grips template and workpiece well; • is able to resist the horizontal force of routing against a template; • allows the template to be removed relatively easily; and • leaves no glue or adhesive residue. The template is accurately aligned by first marking the midpoint of each side on the template and drawing the centrelines of where the cutout is to be on the workpiece. I mounted the bowl-making bit in a handheld router, plunged the router carefully in near the template edge then guided it across until the bearing made contact with the side of the template. While being careful not to progress too slowly which results in a darkening or burning of the timber, I guided the router to travel in a clockwise direction to avoid which is which and that includes which hand to use. I don’t recommend getting all the different rules tattooed on, either— there isn’t enough space.) The rule of thumb in this case is: using your right hand, you make an L shape with your thumb and forefinger. With the thumb pointing from the router to the workpiece, the forefinger points the direction to rout in.
iPad cutout
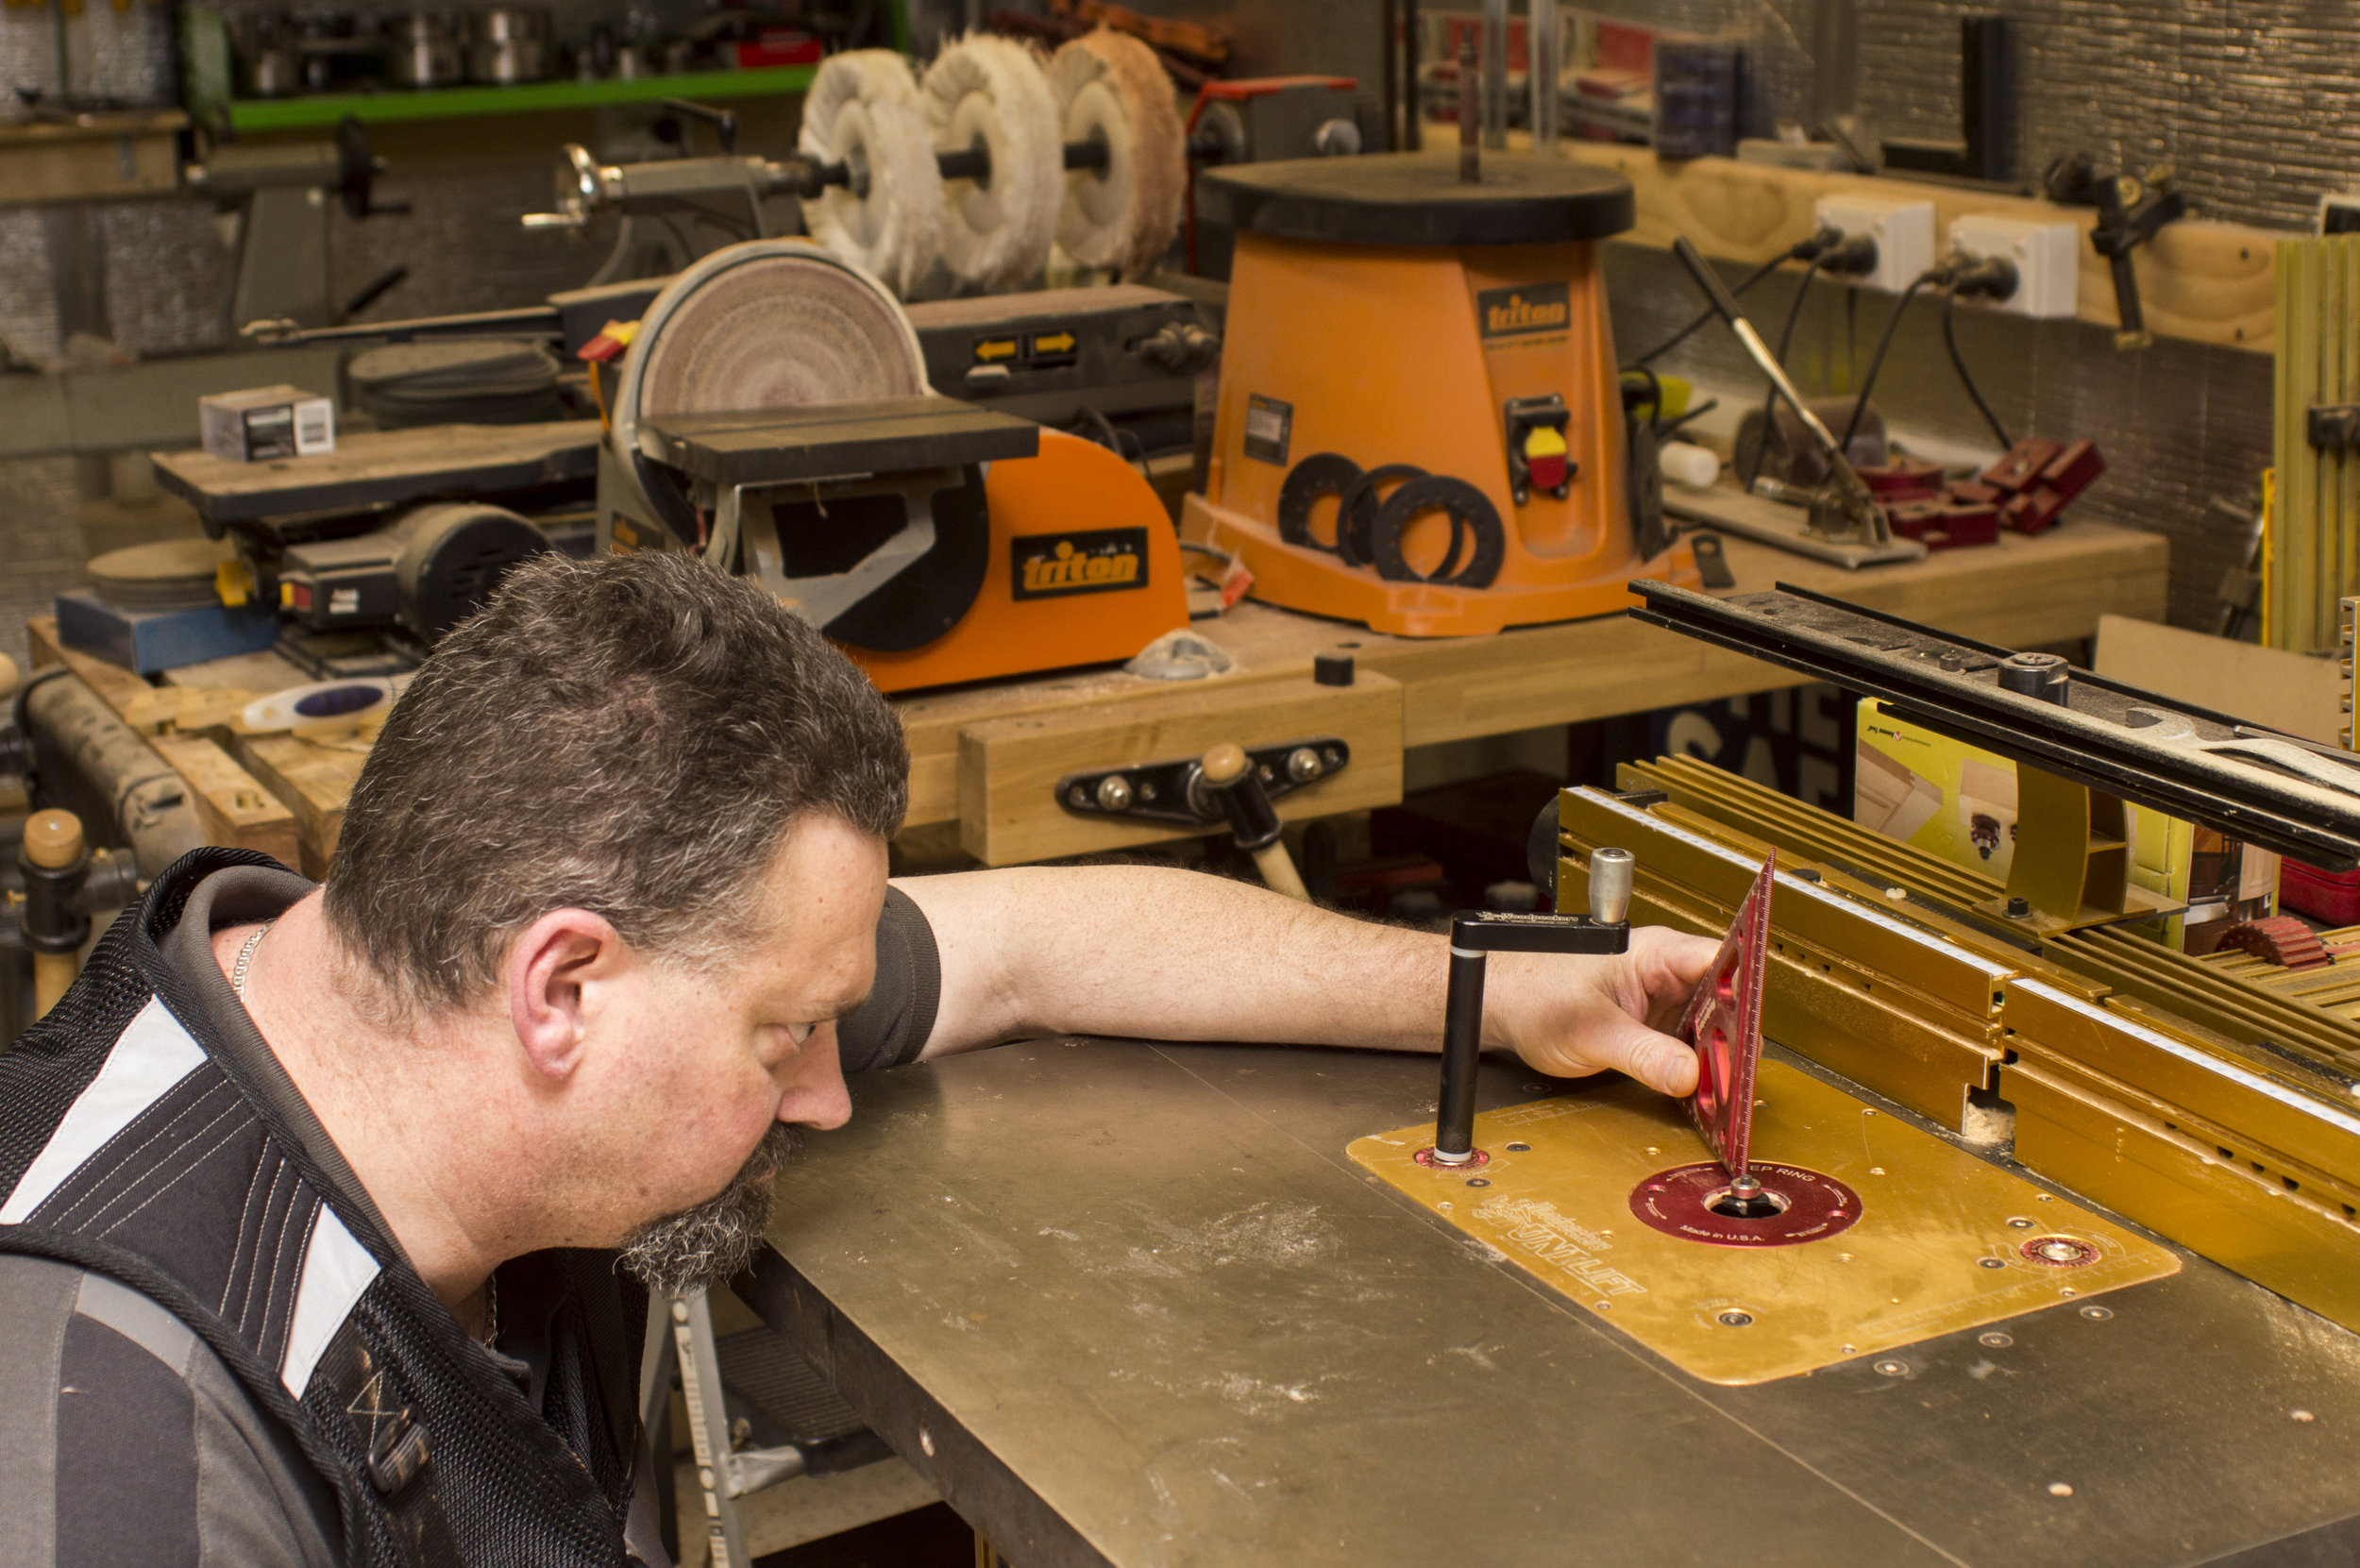
The cutout for the iPad takes a little more consideration. As the template sides are set wider than the router base, they will not provide sufficient support for a hand-held router on its own. One way around this is to make a large sub-base for the router along the sides, preferably the possibility of a climb cut and therefore a kickback. As with many woodworking operations, there is a rule of thumb to assist with this one. (Unfortunately, there are so many “rules of thumb”, it is hard to remember out of a transparent acrylic sheet such as perspex. It needs to be thick enough so that it doesn’t bend with the weight of the router and that may be a bit of a limitation. Alternatively, you could have some removable supports that are the same thickness as the original template—more scraps of MDF—temporarily stick them down to rout away the middle section of the iPad void, then remove them to rout away nearer the edges. If there are some limited areas still protruding, they can be wasted away with a sander to leave a flat base. As the boards are thinner than the smallest distance that my horizontal clamps will close to, I needed a different option for holding these boards while sanding them. I didn’t want them moving around, so vacuum clamping became the preferred option. The Vac Clamp I use is secured to the bench, then compressed air is provided to the clamp via a valve. When the valve is switched on, a small flow of air is passed into the clamp and through a nozzle. This creates a venturi effect that entrains some air from under the workpiece, which in turn results in a negative pressure. With the full weight of the atmosphere then pressing down, the workpiece is going nowhere. The parts are then sanded smooth, working through the sandpaper grits from 180 to 400, leaving the surface silky smooth.
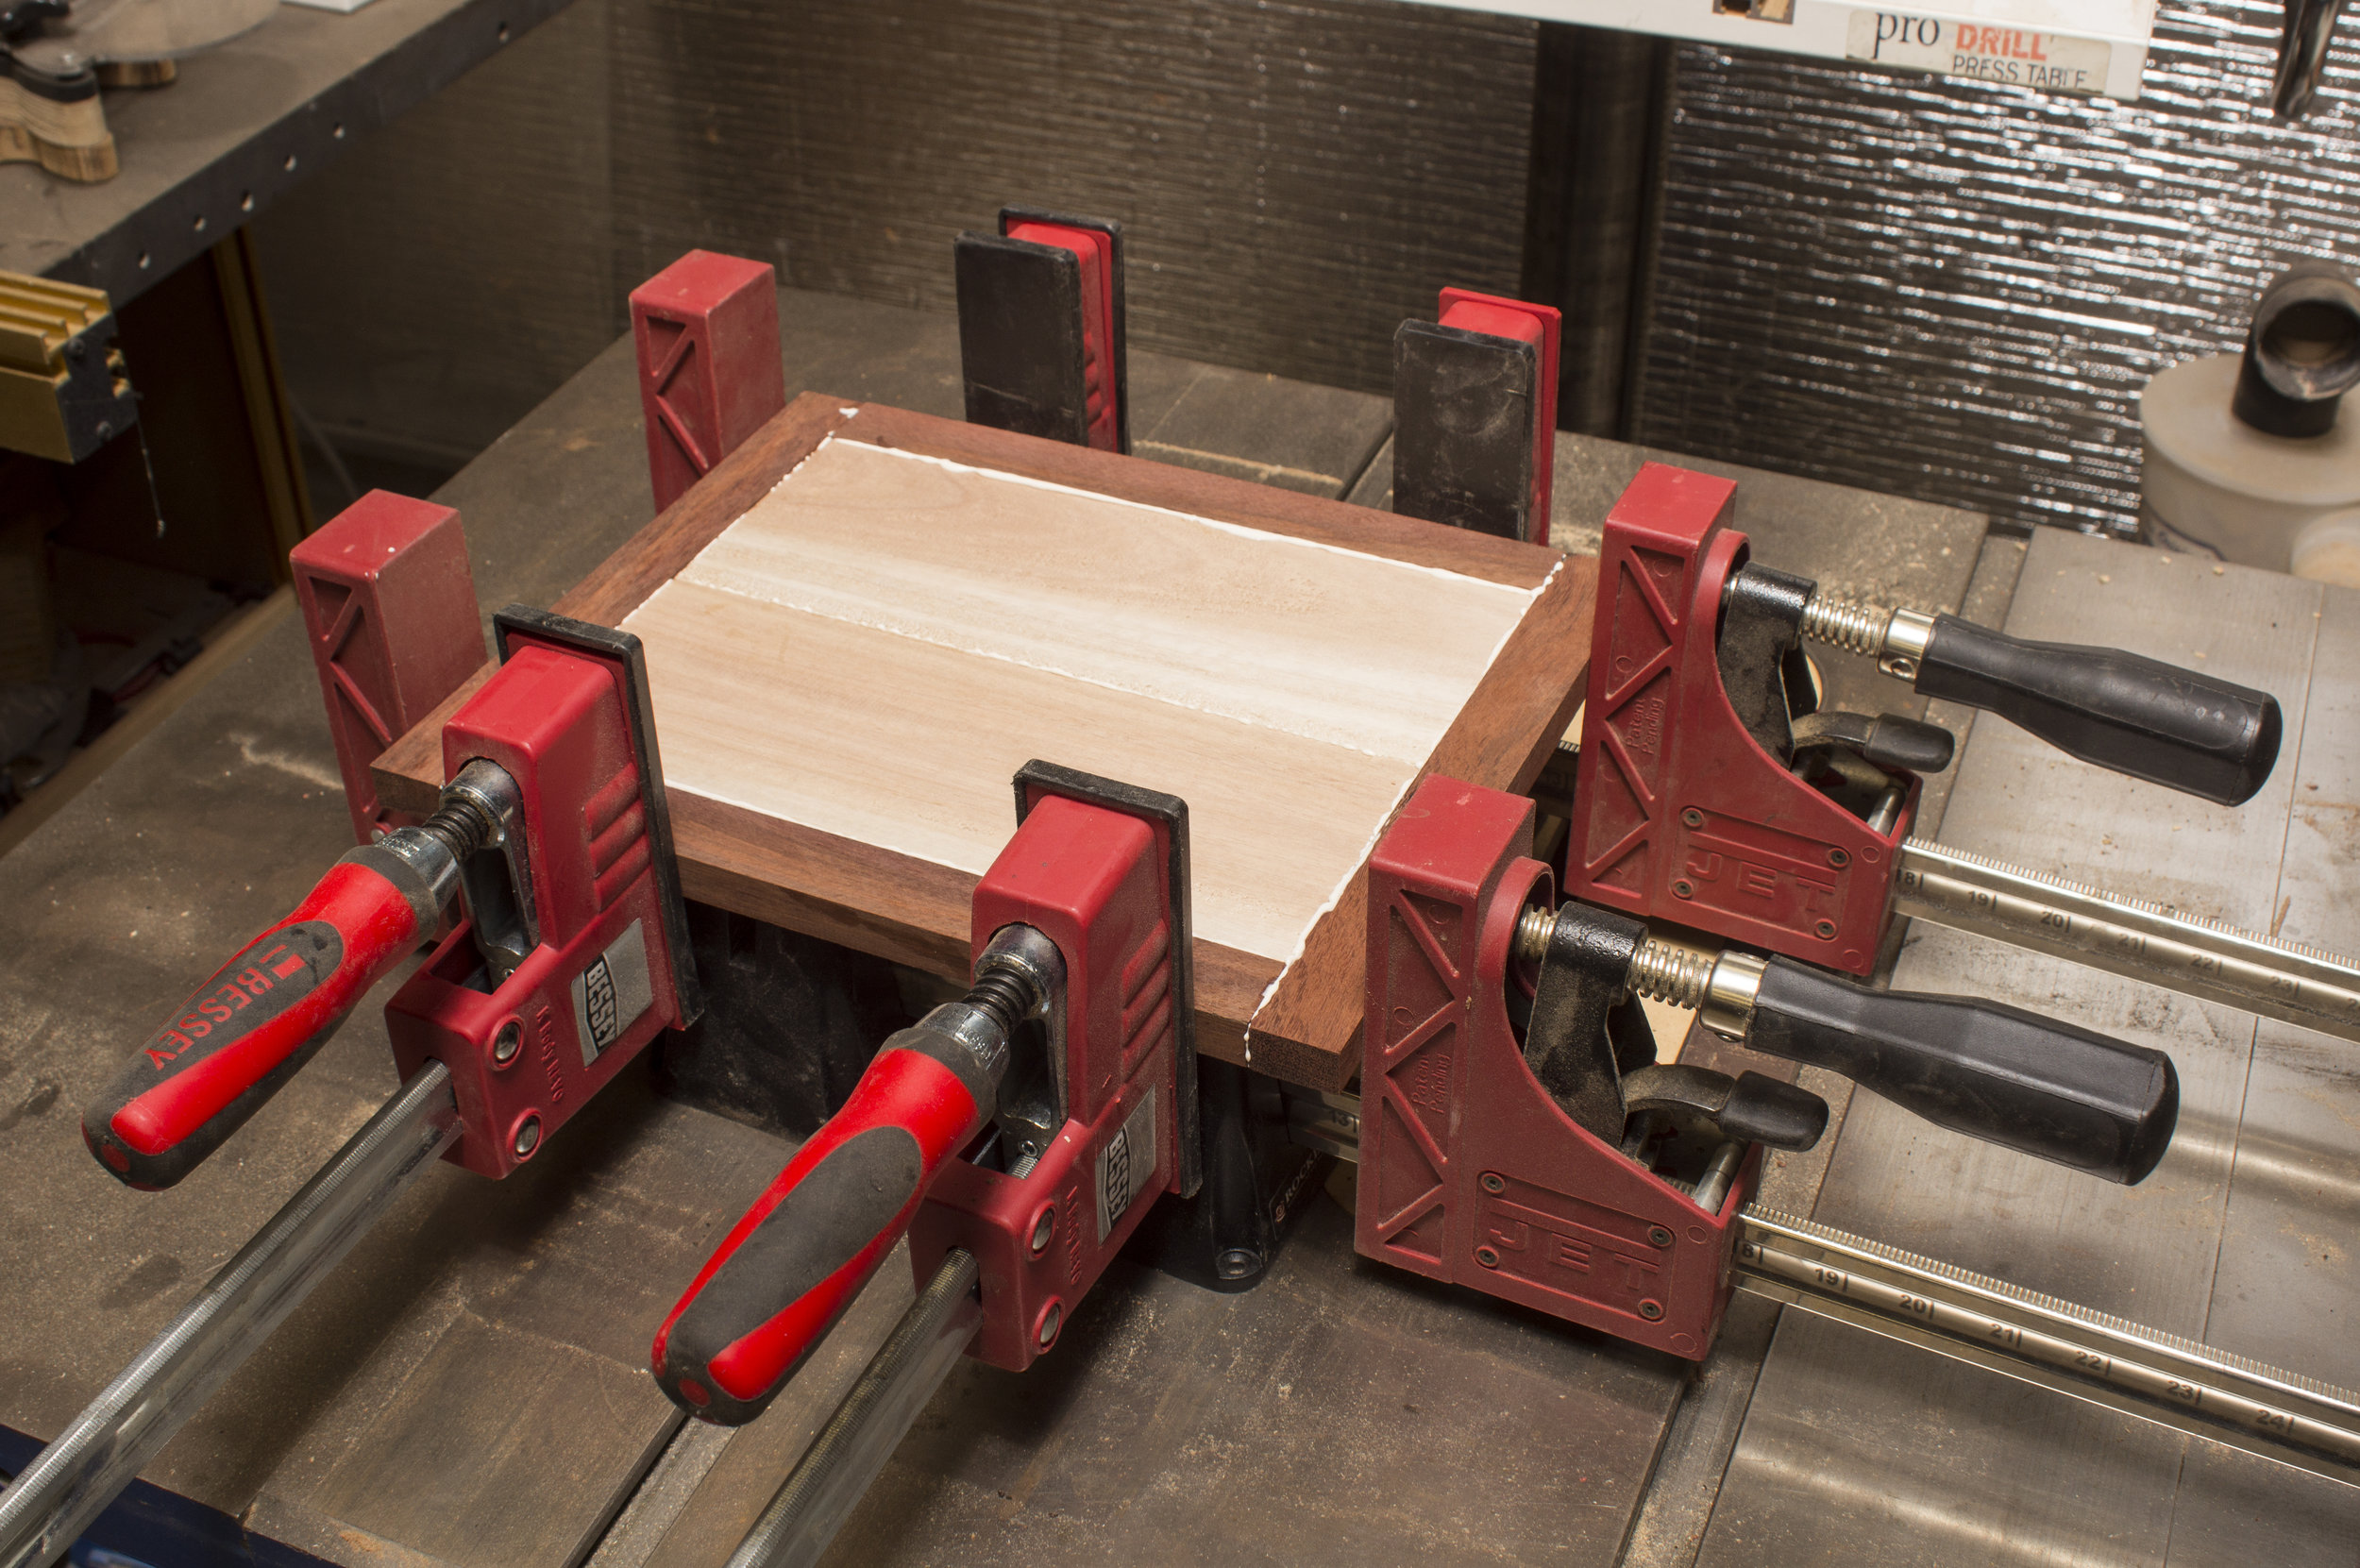
Base
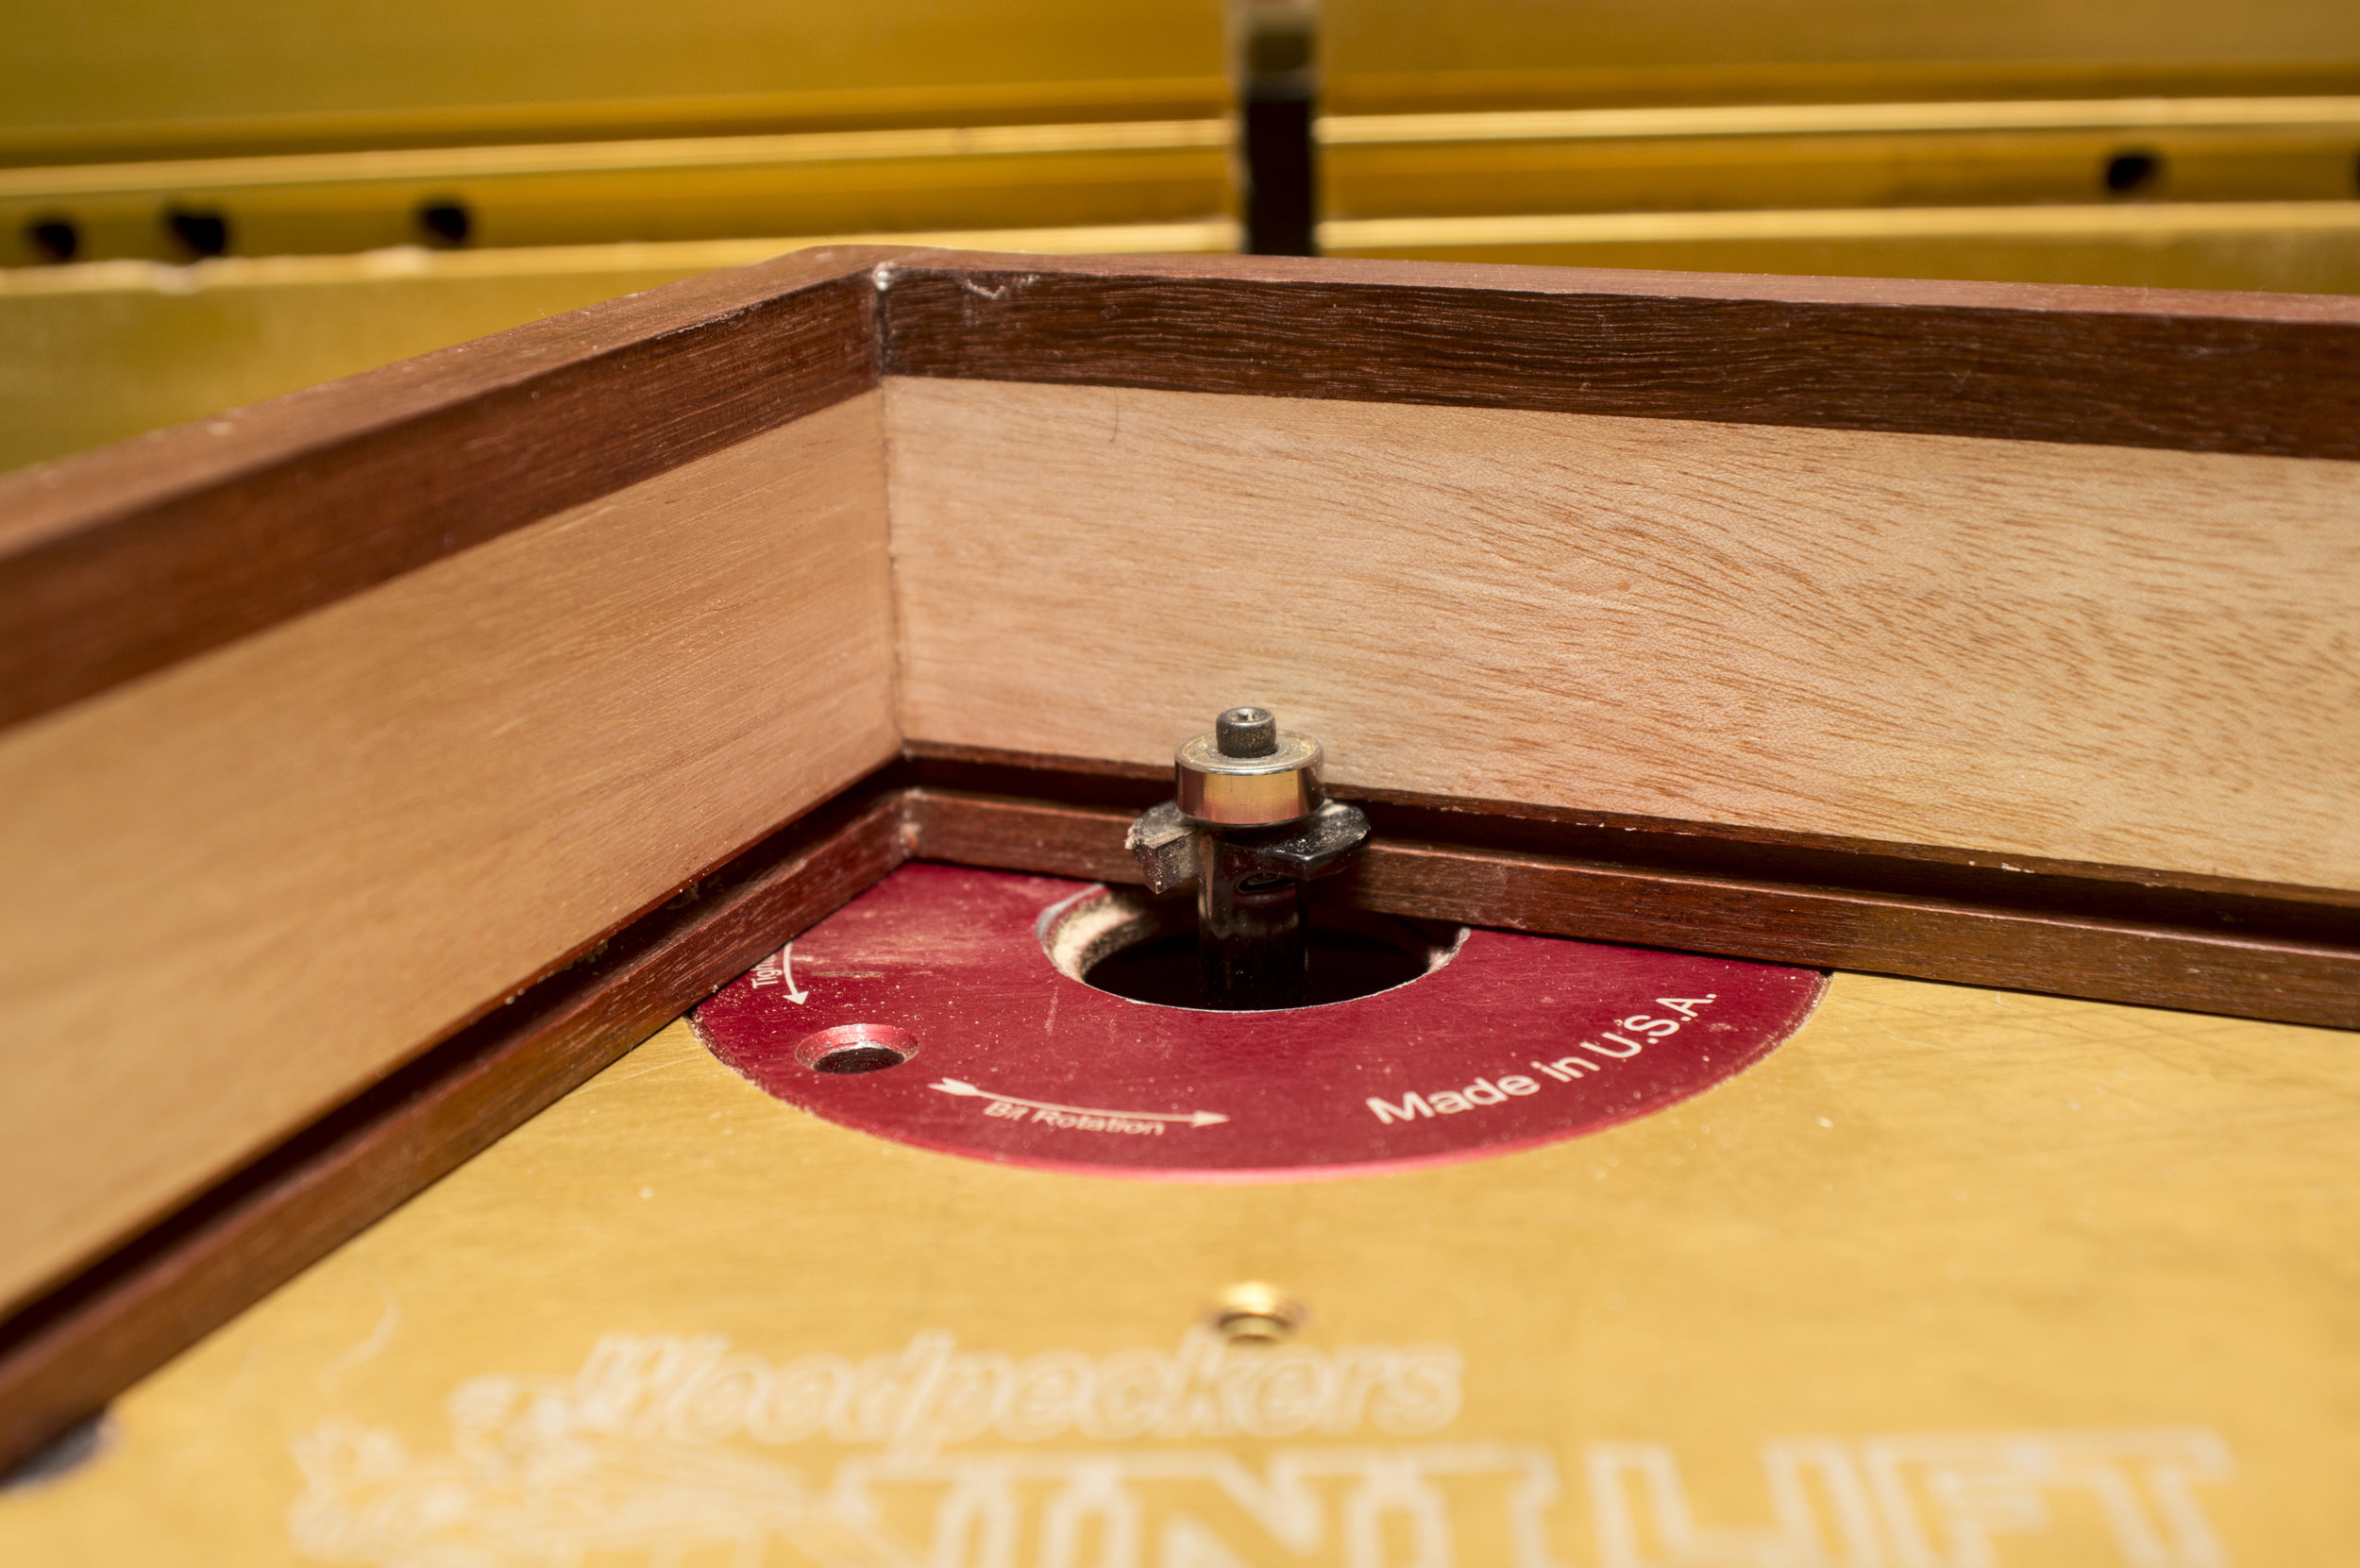
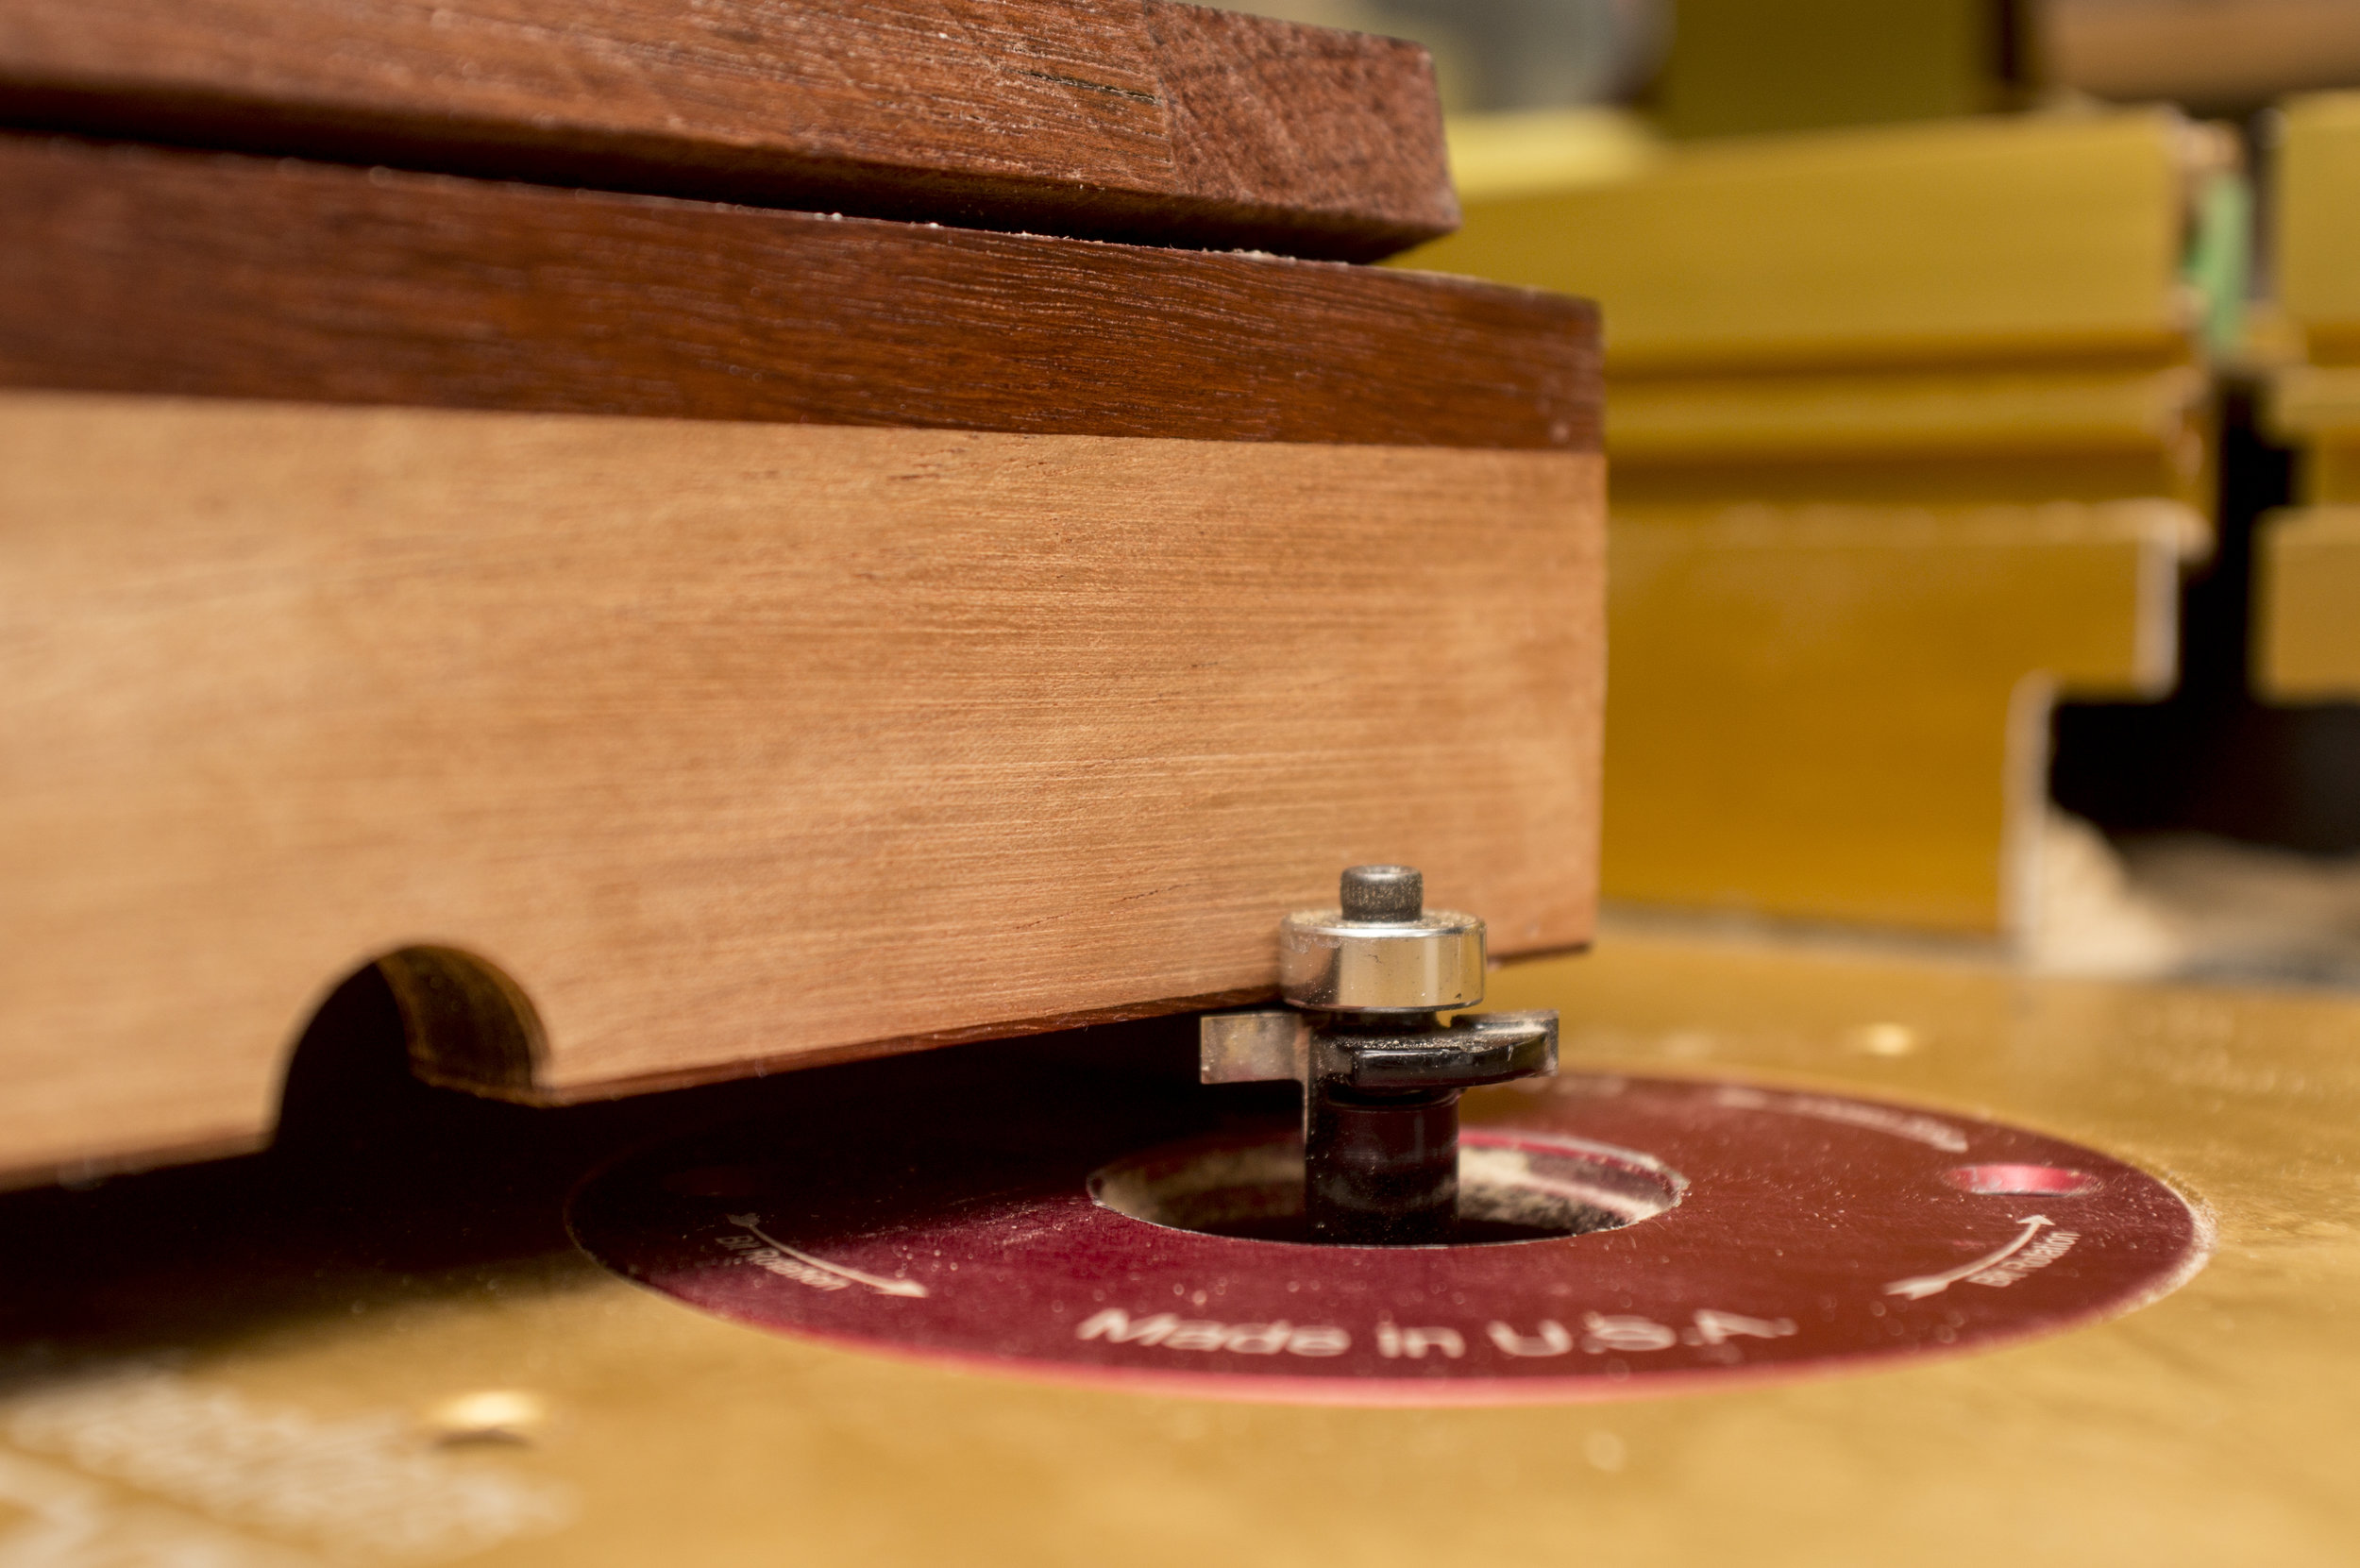
The next step is to make the box that not only supports the hollowed-out tops that hold the mobile devices but also hides the chargers and the associated cables. The box is a simple design with a removable bottom to be able to get the chargers and cables into position. The sides again pick up the contrasting timber effect, with a thinner strip of the heavierlooking dark timber top and bottom and the light-coloured timber in the middle. I prepared all the required lengths at the same time, making it is easy to glue and clamp up the whole lot. In my case, I am making two charging stations so it really makes it useful being able to clamp up the lot. You can use a standard sash clamp, but I really find the benefit of simultaneously clamping vertically and horizontally sets the Frontline clamps ahead of the rest. After releasing the sides from the clamps, I run them through the drum sander to clean them up and ensure they all have a consistent thickness. One of the benefits of the drum sander over a thicknesser is that it removes the possibility of tearout. Sandpaper is a lot more forgiving on varying grains than a thicknesser. Once you have glued an item up, some components are likely to have their grains perpendicular to the machining direction. A thicknesser would tear that component to shreds but the drum sander doesn’t. Now I mounted a slot-cutting router bit with bearing in the router. The bit was set sufficiently high to create a groove for the base to be inserted and still provide enough timber below the groove or slot to be strong enough to support the base sliding in.
Rear wall
Before you glue up the box, there is one additional step—cutting off the lower portion of the rear wall to provide sufficient clearance to be able to insert and remove the sliding base in the groove, once the box is glued. Mark the top of the slot-cutting bit onto the rear wall to know just how much to trim off. The effect is that the base of the box can be slid in under the rear wall and into the groove in the other three walls. This base can be removed and replaced as required to insert the power cable, chargers etc. The front, back and sides of the box are joined together using dominoes and glue (although again, you can choose your joinery method, including dovetails if so inclined). The glued-up box is then placed on the router table, and a slot cut on the inside along the base of the three sides (the fourth side sits just above the cutter, as discussed above).
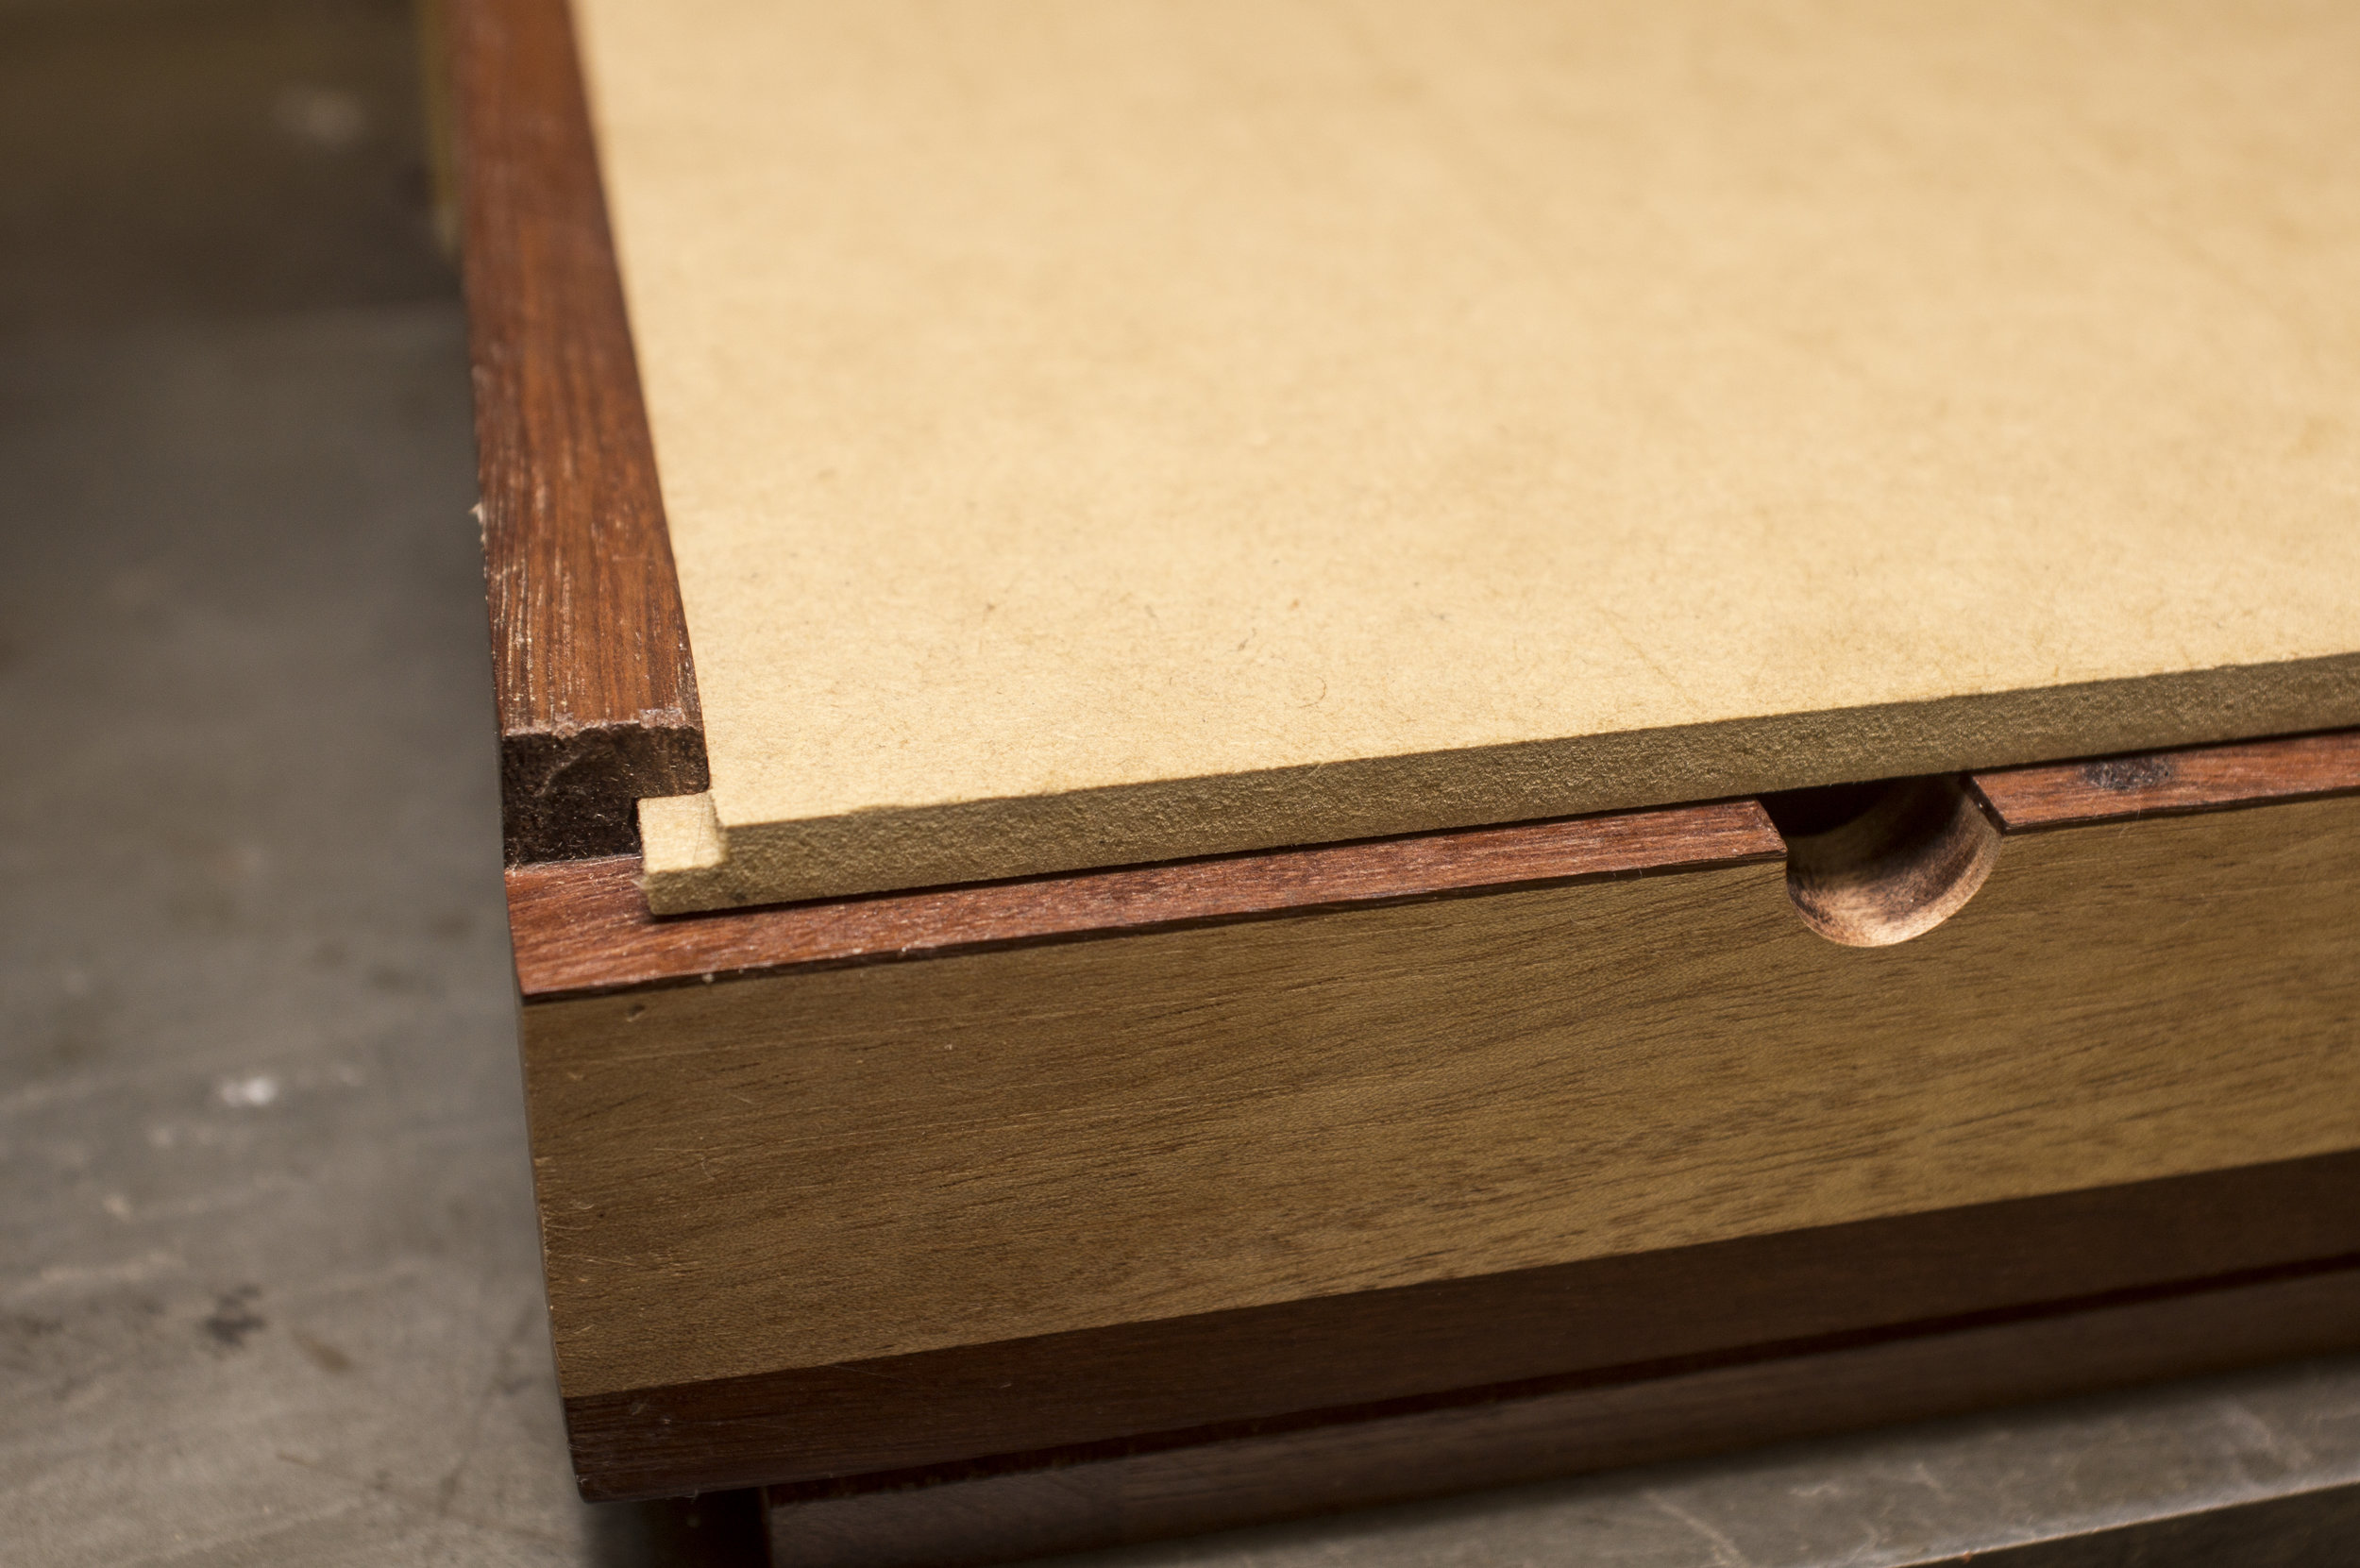
Base
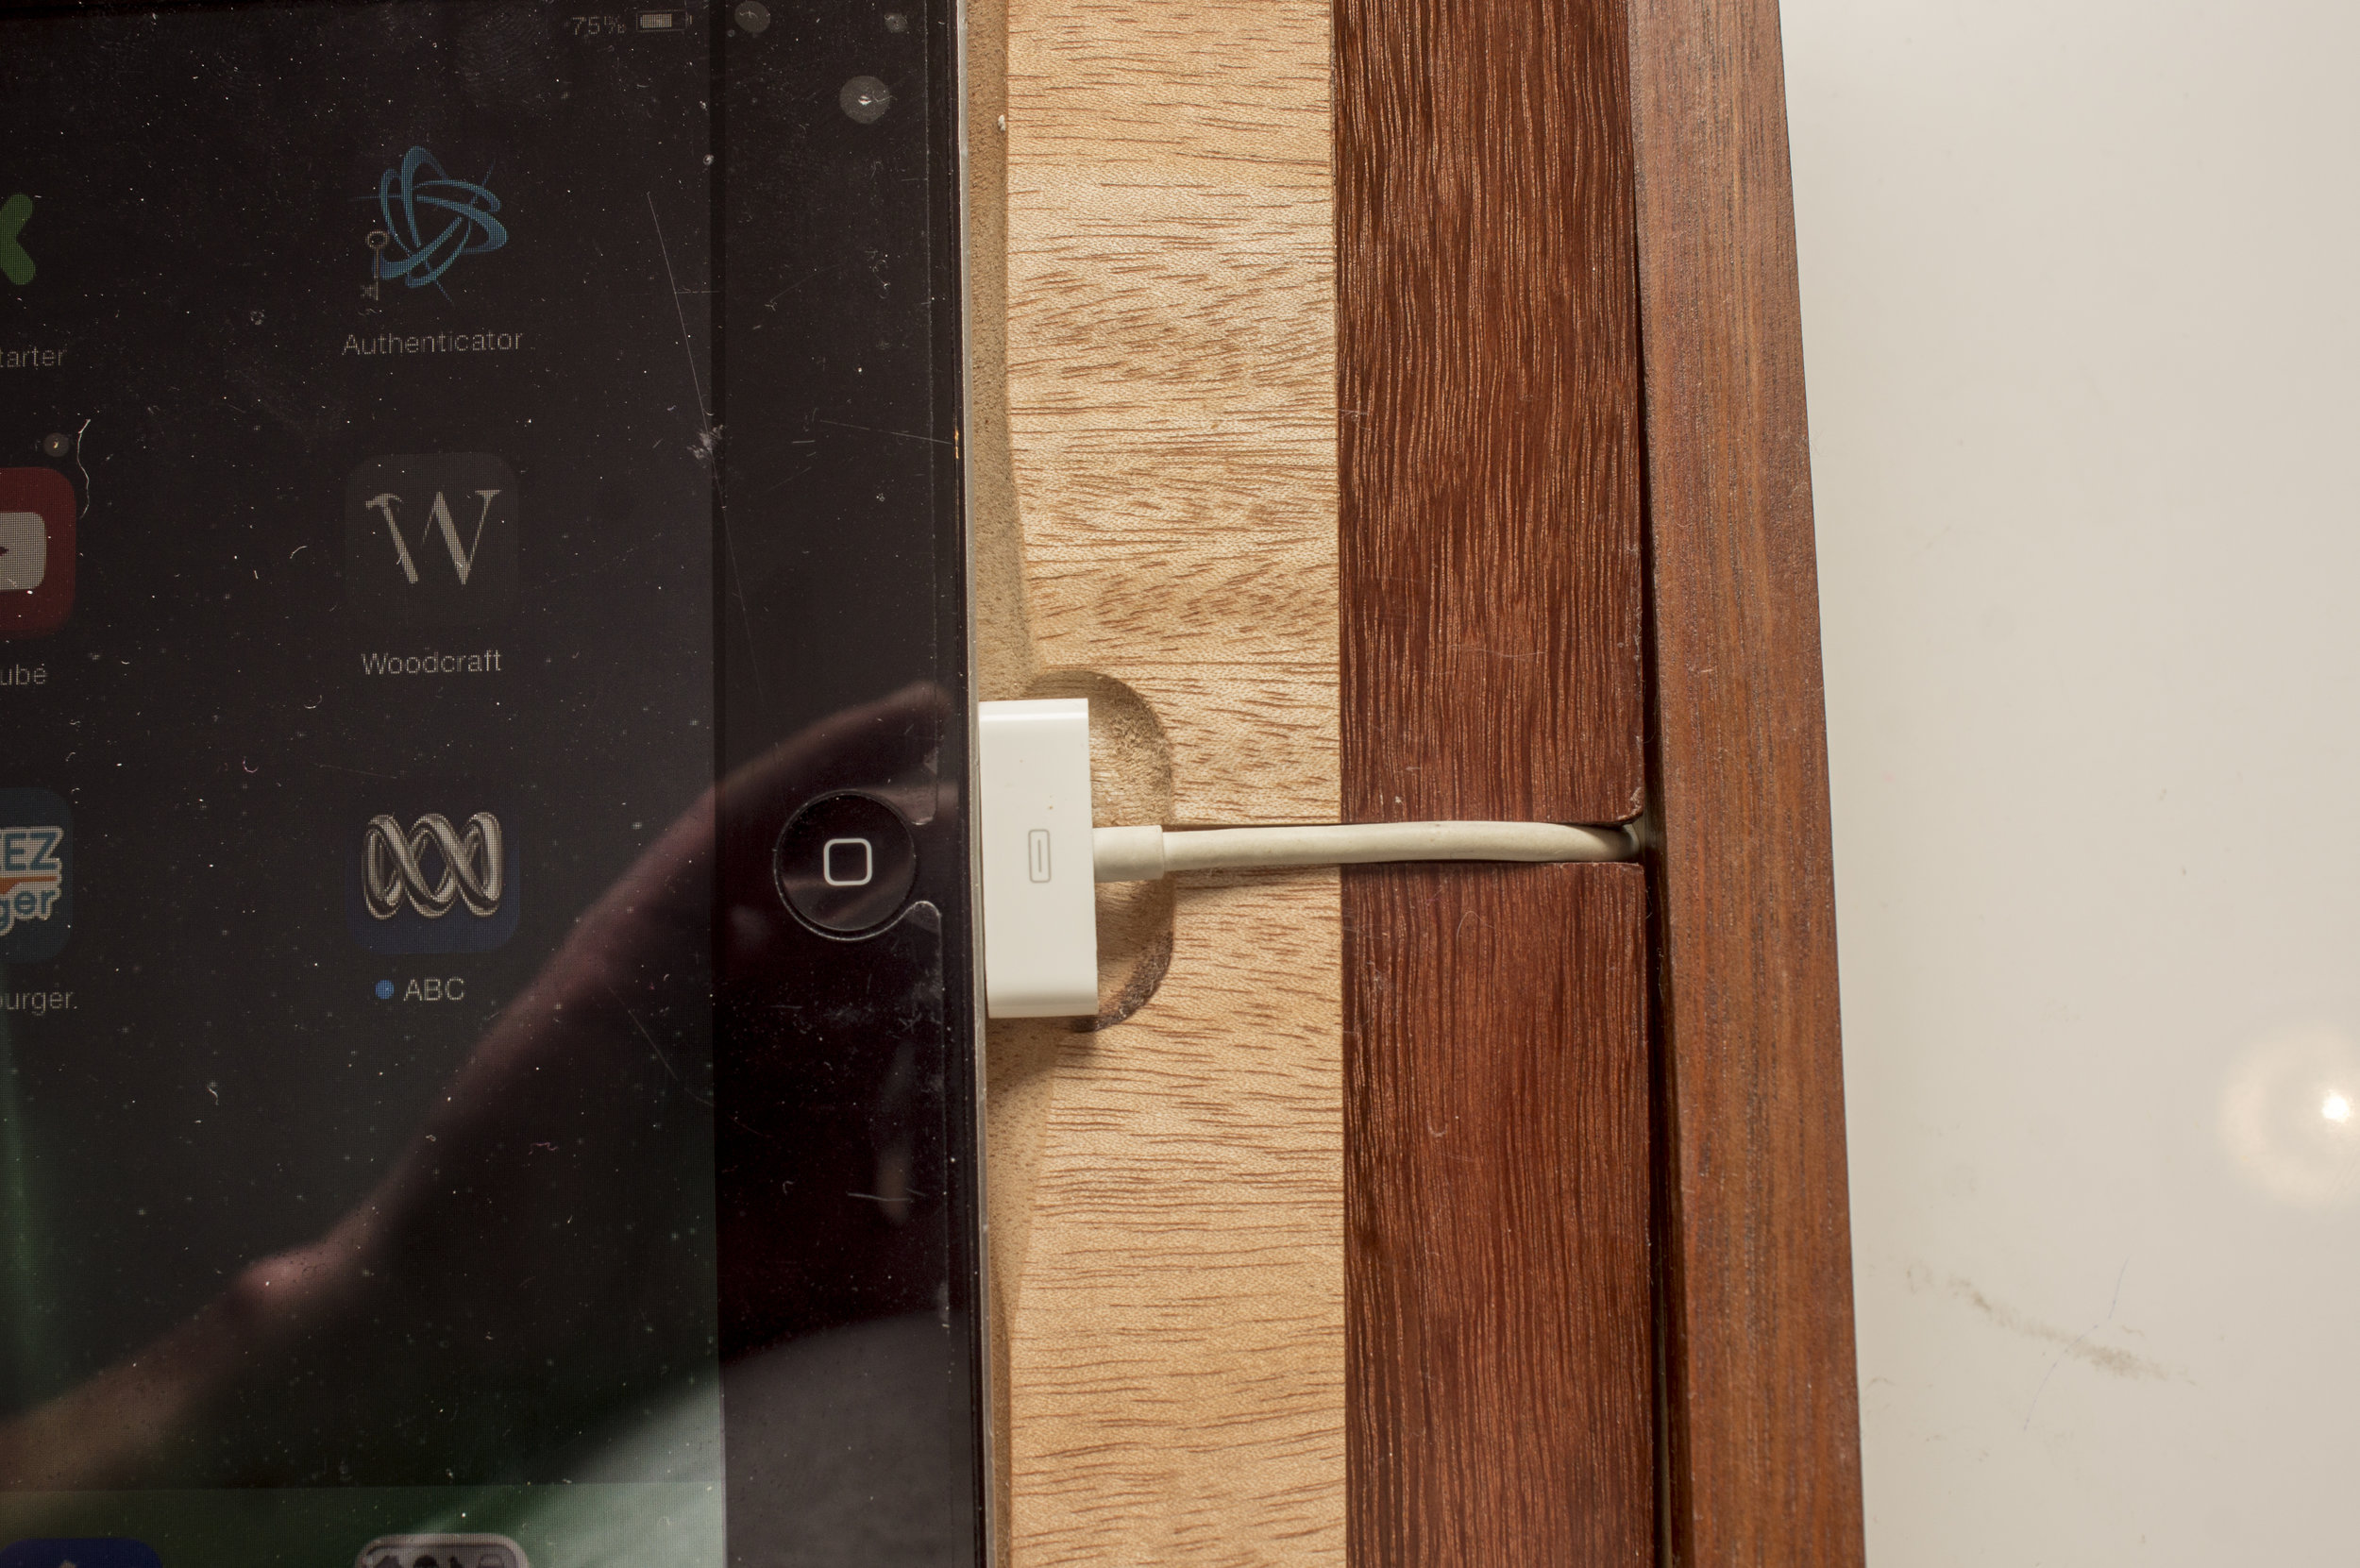
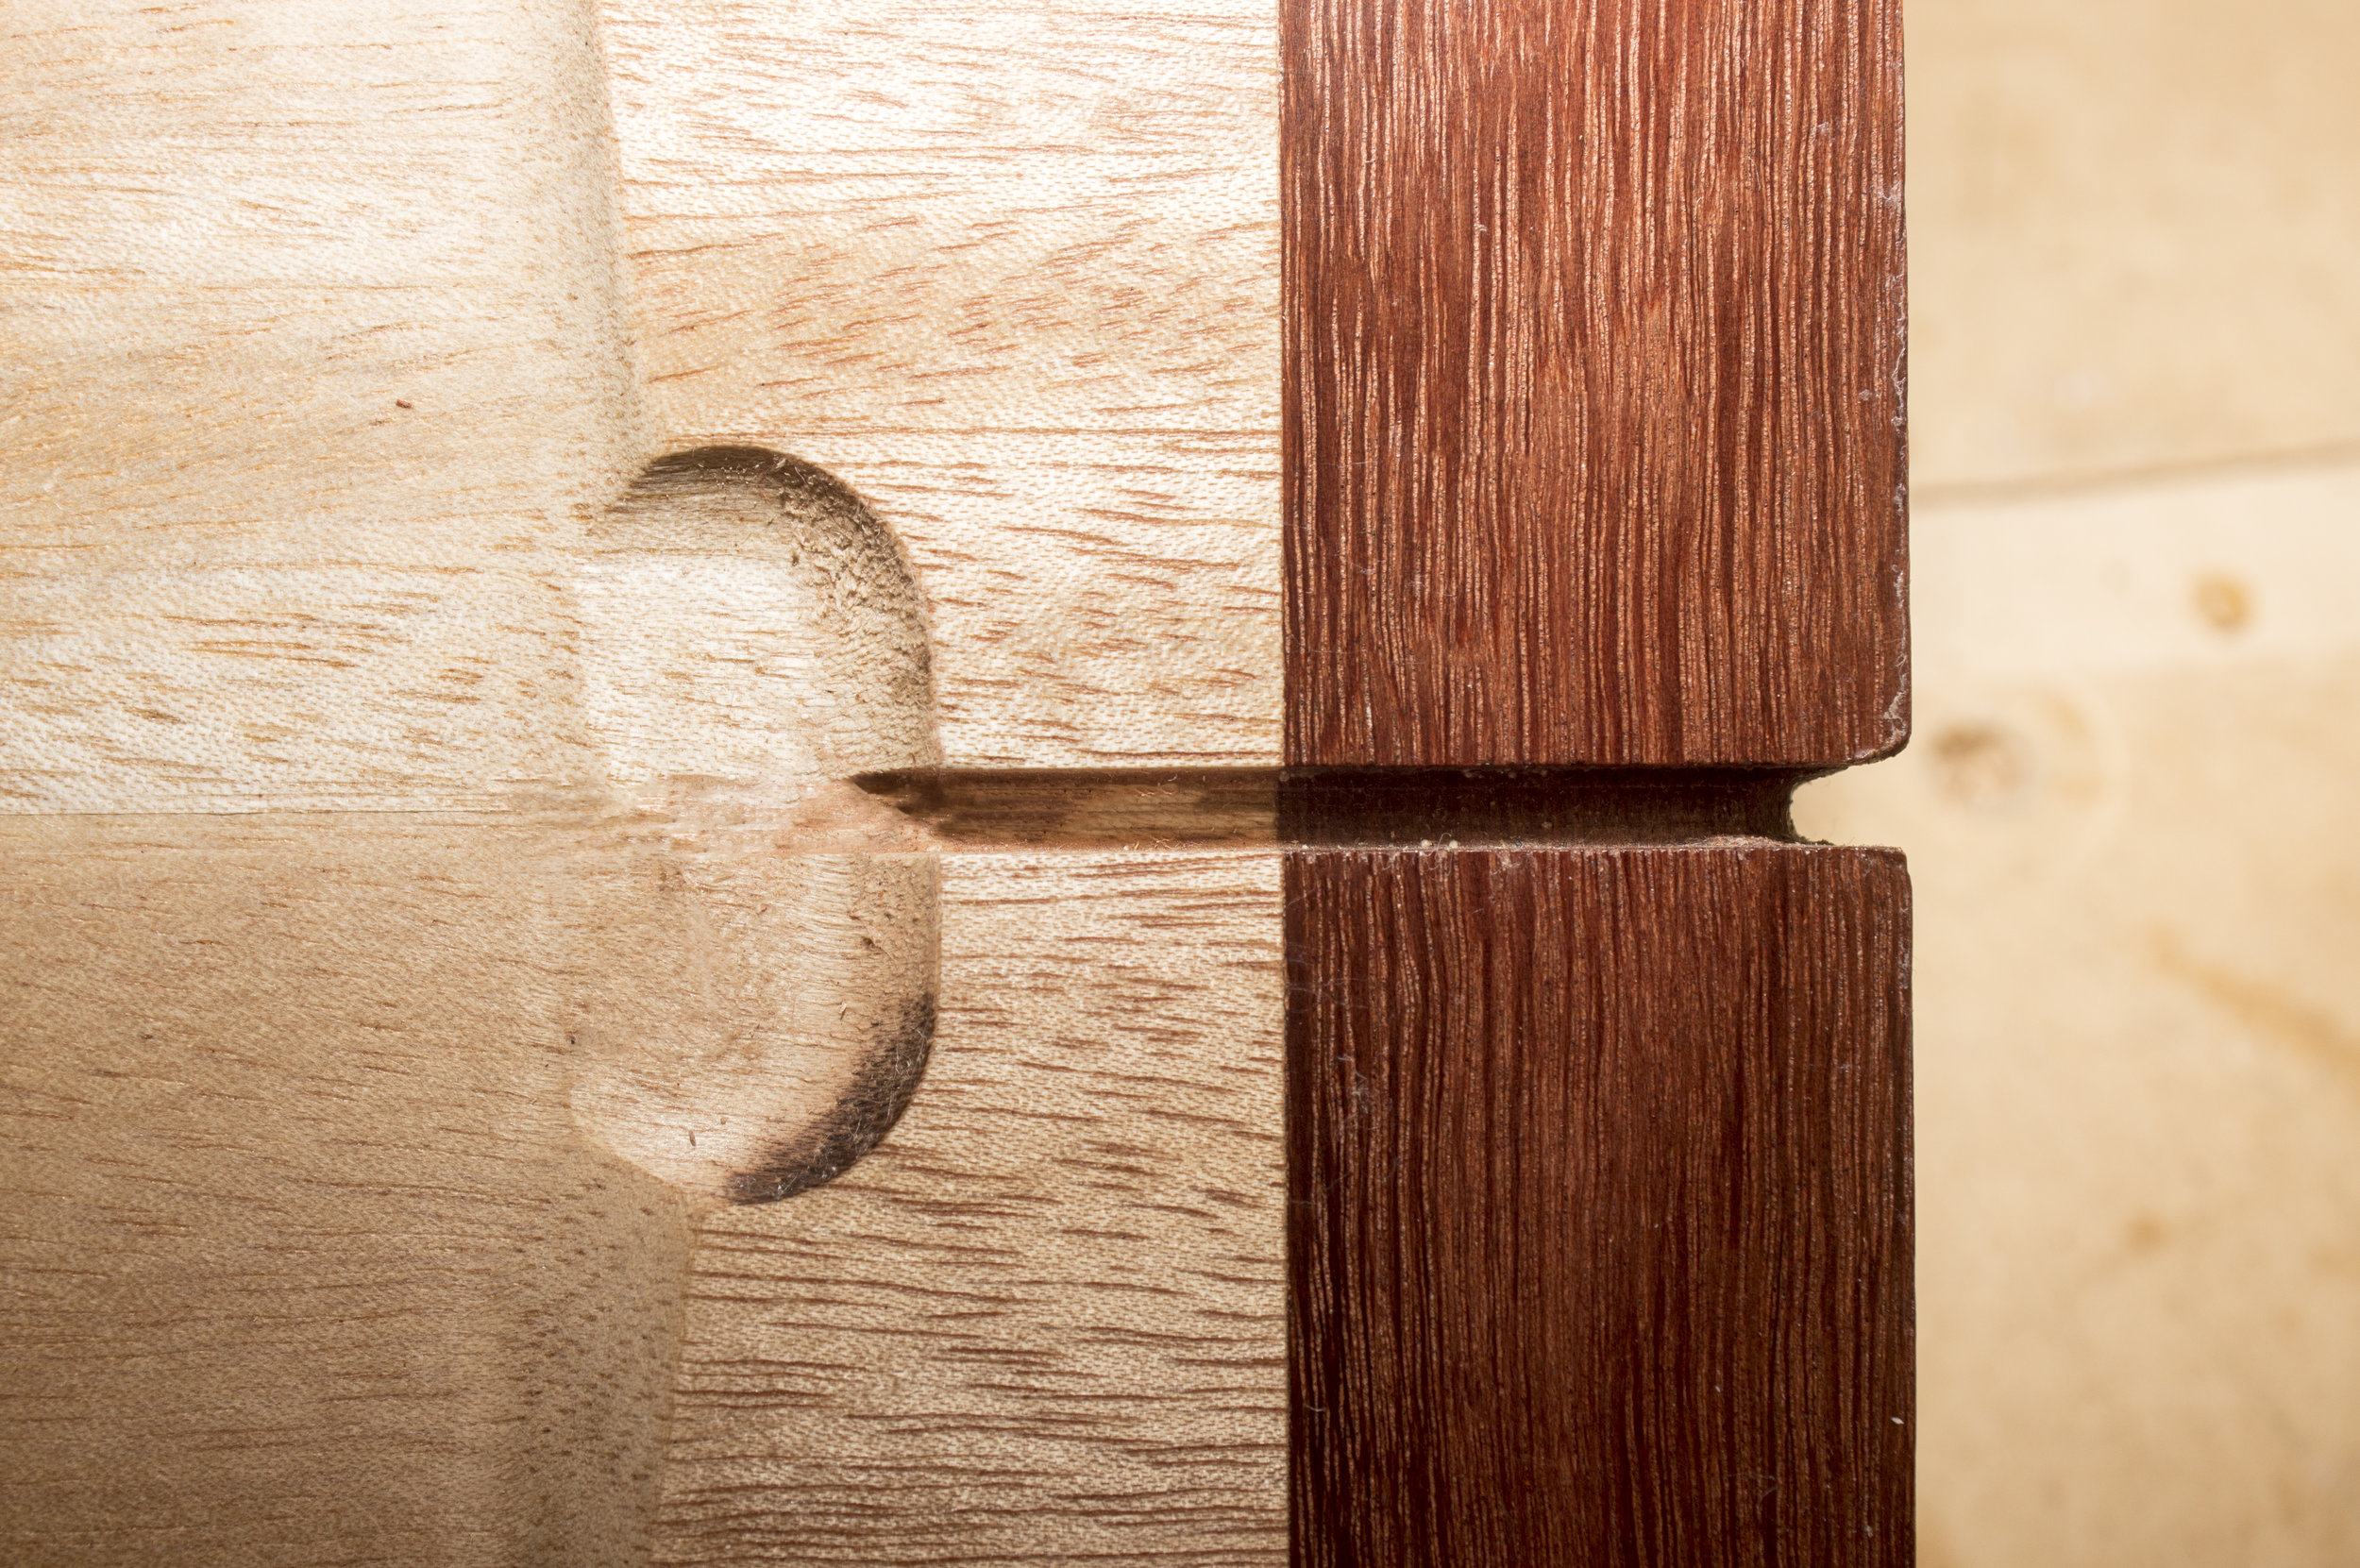
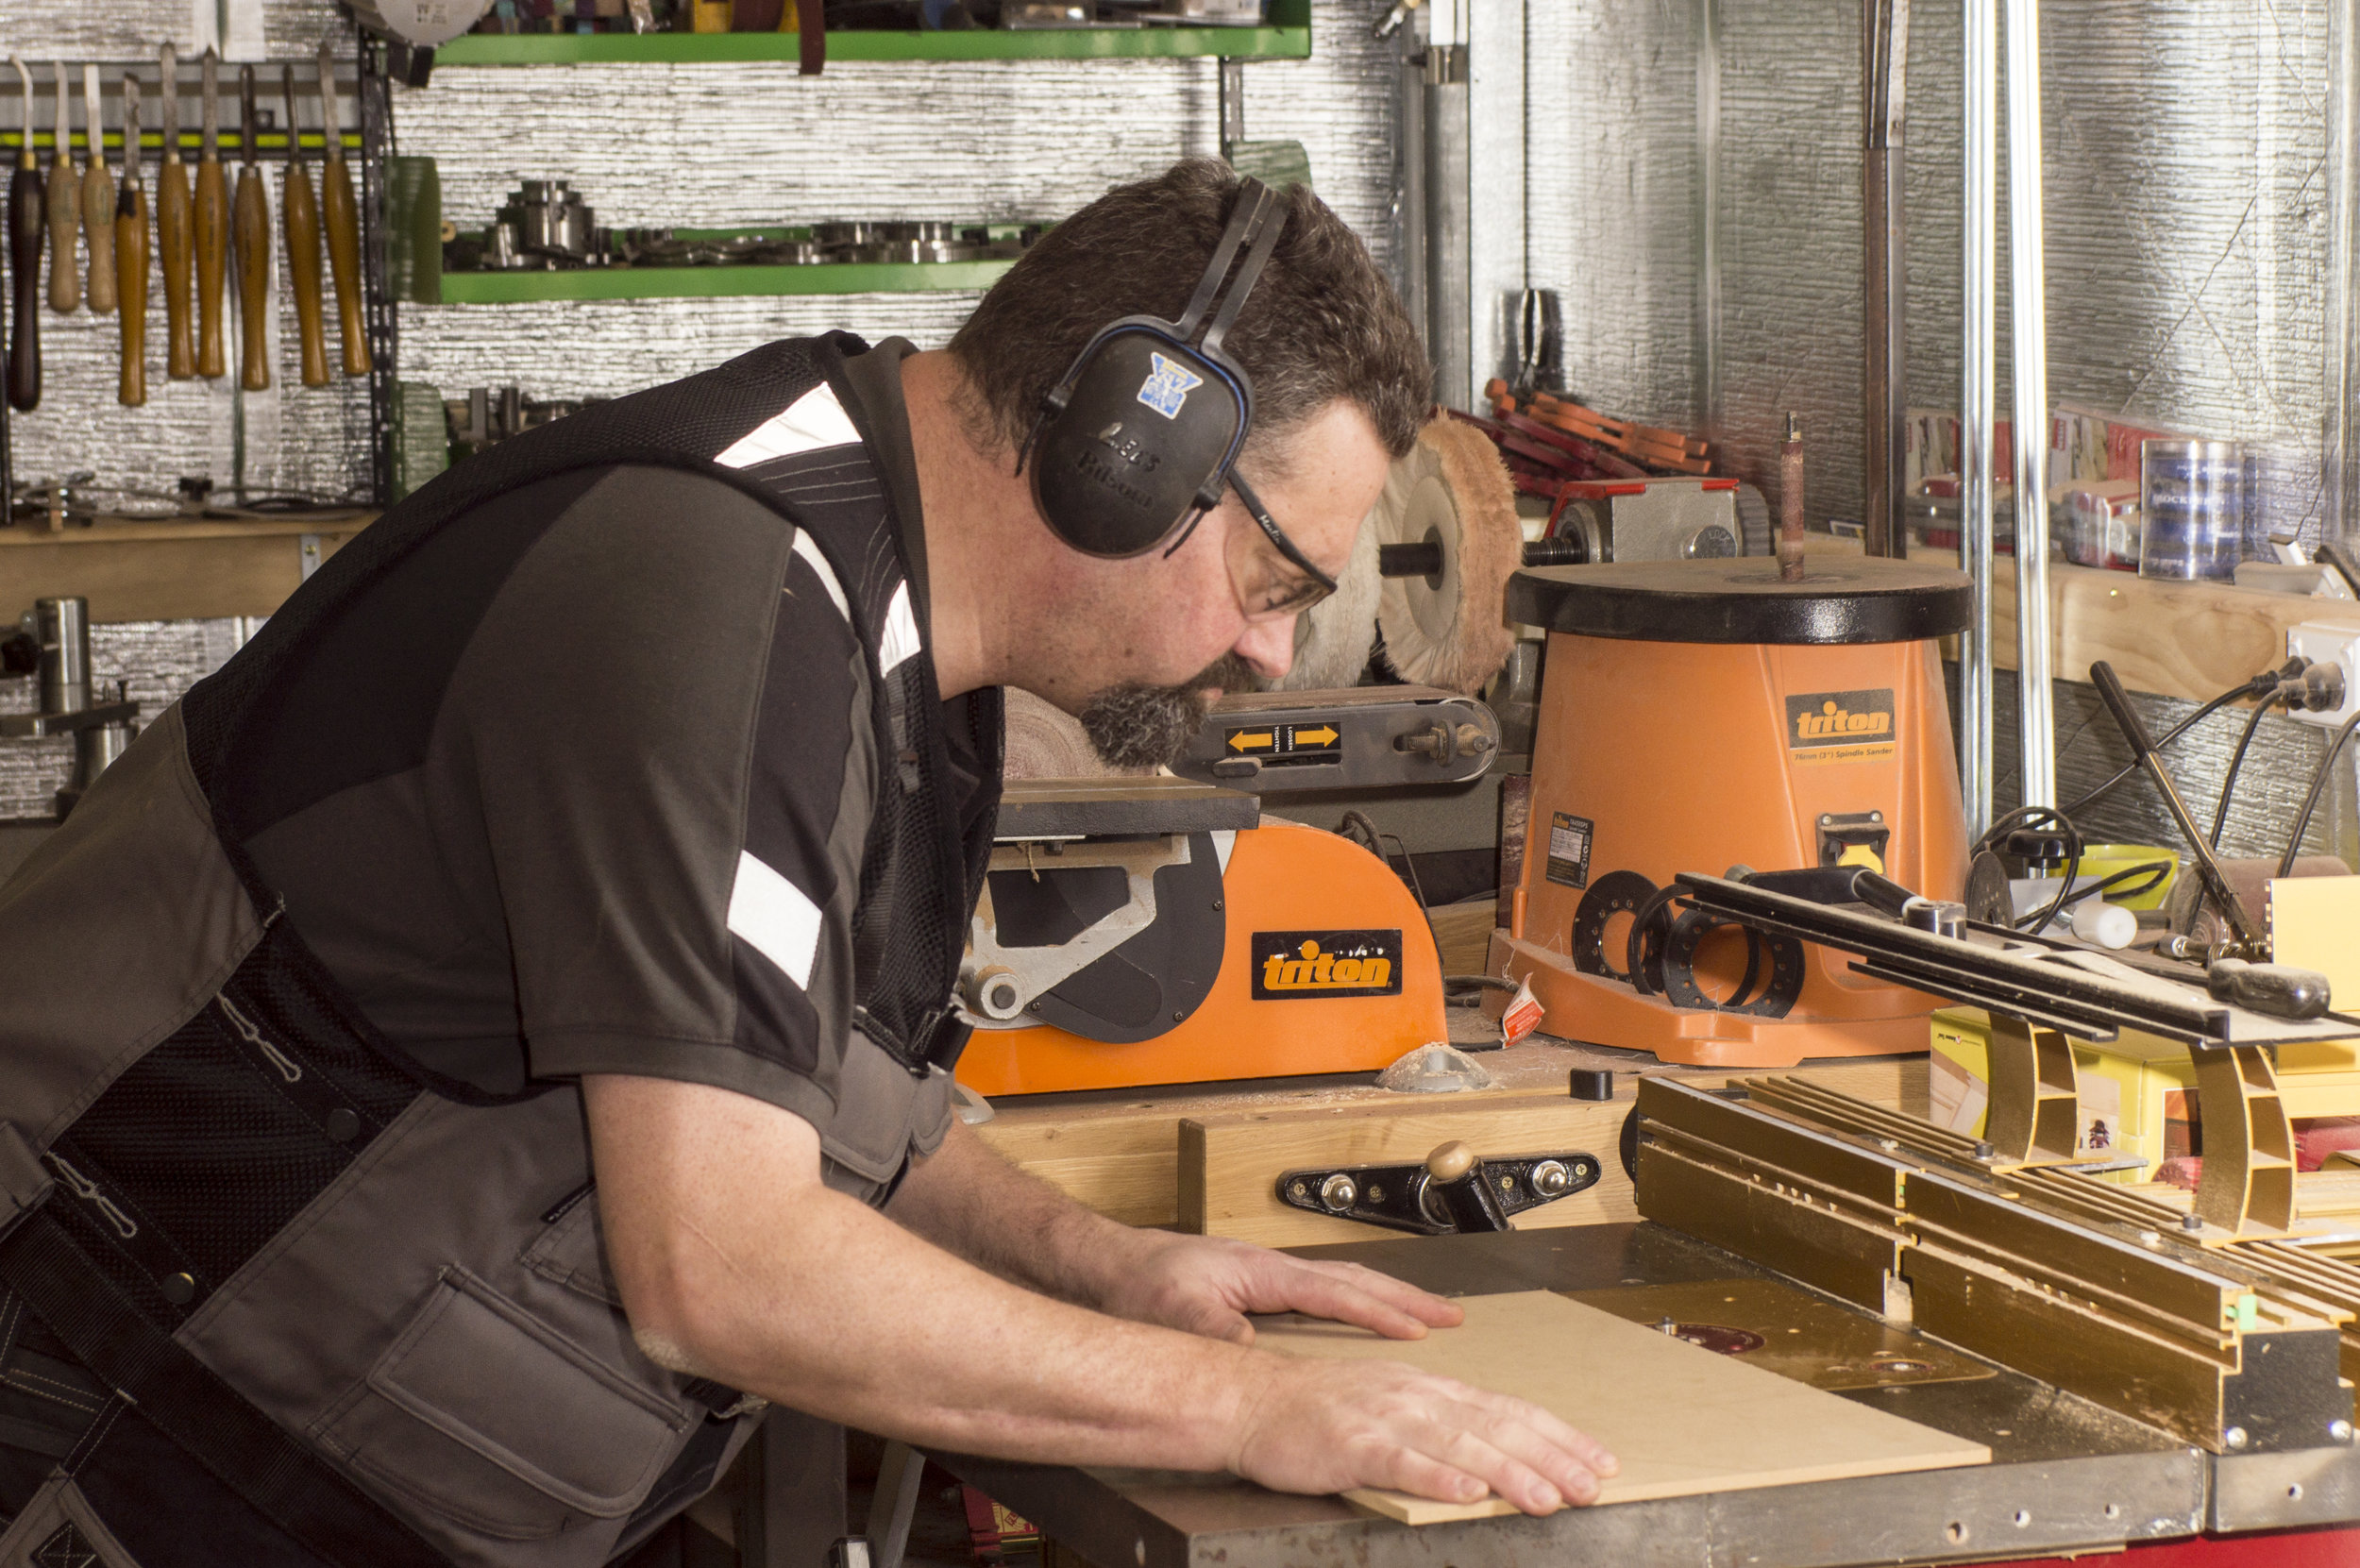
I cut a piece of MDF to be the base of the box. You can choose to make this from solid timber, but as the panel for the base is not normally seen, MDF is a viable option. As the MDF was thicker than the slot it slides into, I chose to cut a rebate around the edge of the MDF base so it would fit. To allow a power cable to pass in through the back, I formed a round slot in the rear panel. This can be potentially made with a drill bit but it is a lot easier if you have a spindle sander— the slot is created in under 60 seconds by abrading it against a narrow spindle. The same is done to the lower edge of the section on which the phones sit. This is abraded away at an angle from the rear, with care taken not to affect the top edge. When it is secured in the box, there is a hole underneath for the cable to pass through, but it is only apparent to those who know it is there. A narrow slot is cut in each top, leading to where the charging plug will reside. Again, the rail saw was used for this step, being very easy to line up for the position and depth required for the slot.
Rear station
With the box completed and the base slid into position, the rear phone station can be secured in place. This is angled, so the rear edge is flush with the rear of the box (with it protruding out, and above the box edge). The front of the holder is allowed to rest on the slid-in base. It is then secured to the sides of the box. You can do this a number of ways, including a pin nailer or glue for a semi-permanent solution, or by inserting shelf pins in either side of the box if a temporary placement is desired. The front station is not fixed in, allowing the cable to fit through the slot and to wrap around to the chargers, which hide underneath. This also means there is a large opening between the two stations. It cannot be with a swansdown mop mounted in a drill. For such a simple finish, the timber gains a beautiful lustre and is easy to maintain. I use a good-quality wax that doesn’t contain beeswax. Beeswax initially looks good but it has too low a melting point, so softens easily, picking up marks and losing the polish. I ended up making two of these at the same time. For one, I created a rectangular cavity to be a small camera’s charging station. I also added some adhesive felt under where the iPad sits. This can be purchased from a craft shop for only a few dollars and can really lift a project, especially when used as a base. If you prefer the natural timber look, you can apply some clear selfadhesive plastic dots if you want the iPad to rest on something other than the timber. We may not be able to completely escape cables yet, but being able to hide them out of sight, out of mind is the next best thing. seen from the front, but its presence is deliberate, as it allows plenty of ventilation for the chargers. Being transformers (even electronic ones), they do generate heat, so it is good to let that heat escape rather than build up in the unit. To finish the units, I rubbed a traditional wax over the surfaces, then buffed them