Here is an excerpt from the article on building power hammers from The Shed, October/November 2021, Issue 99.
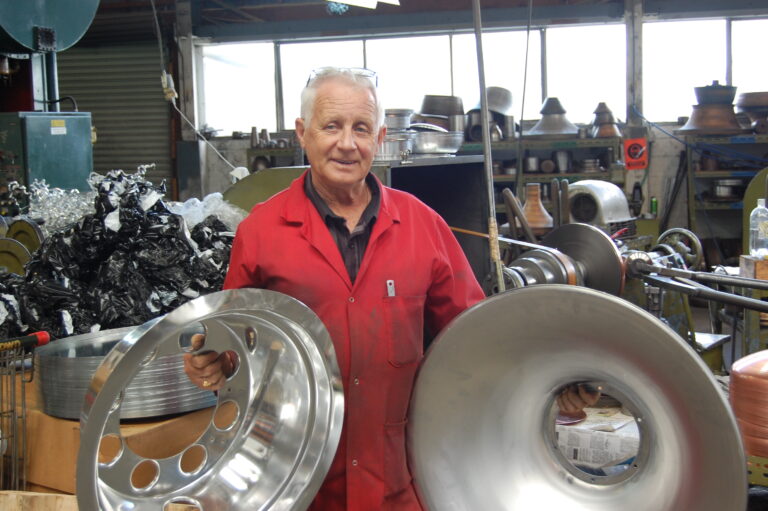
Mike MacMillan
Frankenhammer leaf spring power hammer build
When his first child was about to arrive, Invercargill-born Mike MacMillan looked around for a suitable place to raise a family. Having itchy feet, he had worked in engineering “all over” New Zealand, including a spell based in Blenheim while he built a back-packer’s lodge, and a couple of houses in the Marlborough Sounds. He even built an Elves’ Castle for a Lord of the Rings movie in Wellington’s Kaitoke Forest park.
He liked Karamea, near the top of the South Island’s West Coast, because it was green, and now works there as an automobile mechanic. He took time out from putting a new deck on a truck to talk to The Shed about a power hammer he is building.
He has made 10 or so knives from spring steel, but has ambitions to make Damascus steel ones. He thinks that making them by hand would be the last straw for his muscles and joints, which have been hard-worked for decades, and so bought plans for a Frankenhammer leaf-spring power hammer.
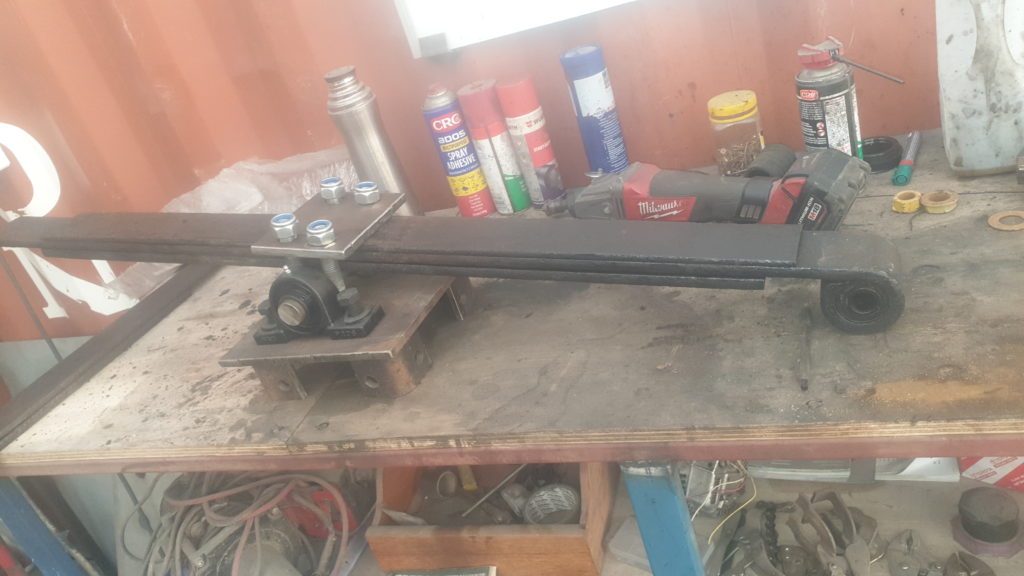
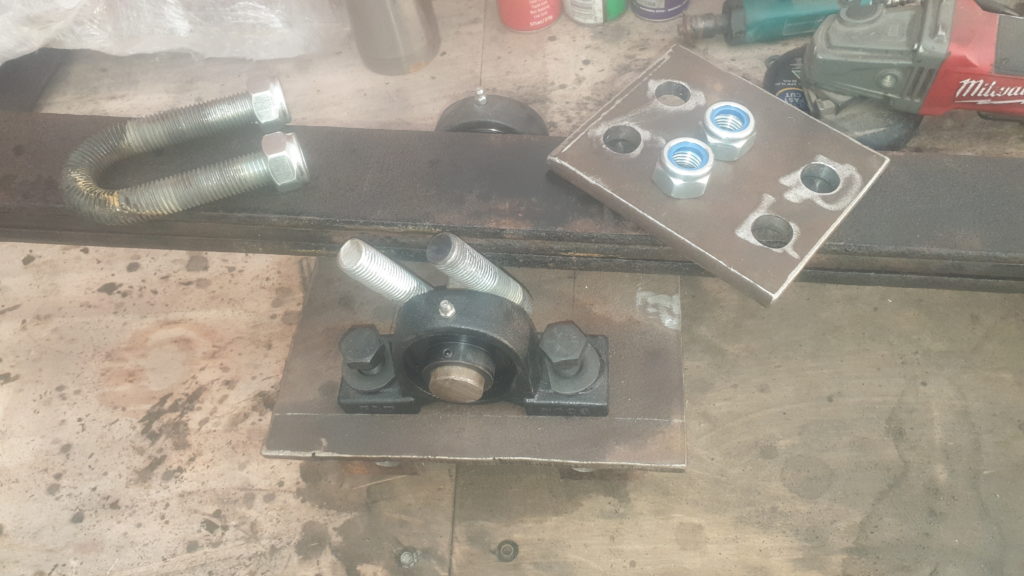
In a leaf-spring power hammer an electric motor drives a light fly-wheel mounted near the hammer’s base. As the fly-wheel turns a steel rod, attached near the wheel’s perimeter, moves up and down. The top of the rod is attached to one end of a straightened truck spring. The spring pivots around a bearing in the middle which is attached to the highest point of the machine’s frame. The up-and-down movement of the bar causes the spring to rock about the pivot. The other end of the spring is attached to a solid square bar which moves up and down in a guide as the spring rocks. The bottom end of the heavy bar is the hammer which, as the motor turns, strikes an anvil.
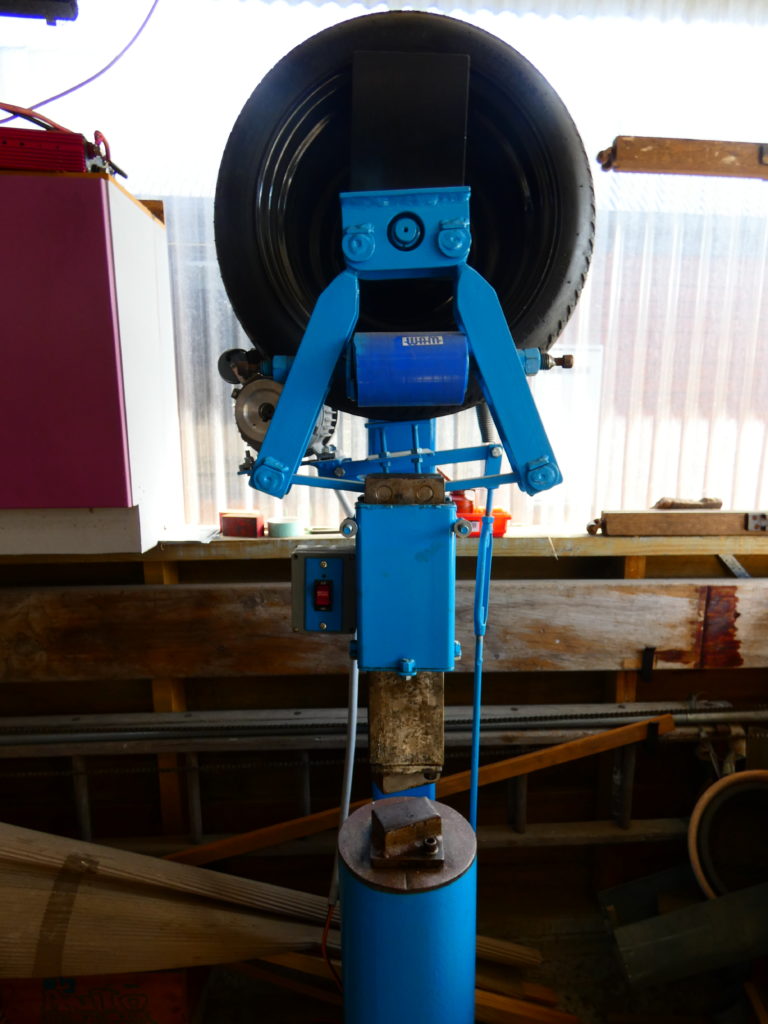
Ian Knight
Making a tyre power hammer
Ian emphasises that he used plans sourced from Clay Spencer in the US, which are protected by copyright. The plans were inexpensive and detailed, as well as giving a list of materials. Crucially, plans and instructions were included for making the jigs which ensure that the frame and DuPont linkage are accurately put together. If you attend one of Mr Spencer’s weekend communal builds (called ‘hammer ins’) in America he provides the jigs.
The base is a 600mmx600mmx20mm steel plate. It provides the datum from which measurements and angles are measured. It was supplied by a local merchant cut to size.
The 2m tall section of 125mmx6mm RHS provides the frame, and was welded vertically onto the base. The hammer guide and its attachment to the frame were also 125mm RHS.
The trailer stub-axle and hub, sourced from Ashburton firm CM Trailer Parts, was welded at right angles to the frame RHS. An unused space-saver spare wheel, which attaches to the trailer hub, was bought from a local car wrecker.
The support for the hammer guide was carefully welded to the frame at right angles, and the hammer guide welded to its other end, parallel to the frame.
A 25kg bar of mild steel, which forms the hammer, was milled flat on all four faces so that it just fitted the hammer guide. Slots to attach it to the DuPont linkage were cut near the hammer’s top.
For the complete article, see Issue 99. You can buy a copy from our online shop magstore