Getting the holiday spirit
by Allister van Mil
One step up from home brewing your own beer is distilling your own spirits, whether whisky, vodka or a liqueur.
It’s okay to do this by law in New Zealand at home and for personal use although there are restrictions in Australia and many other countries (see end of this article, What’s legal?).
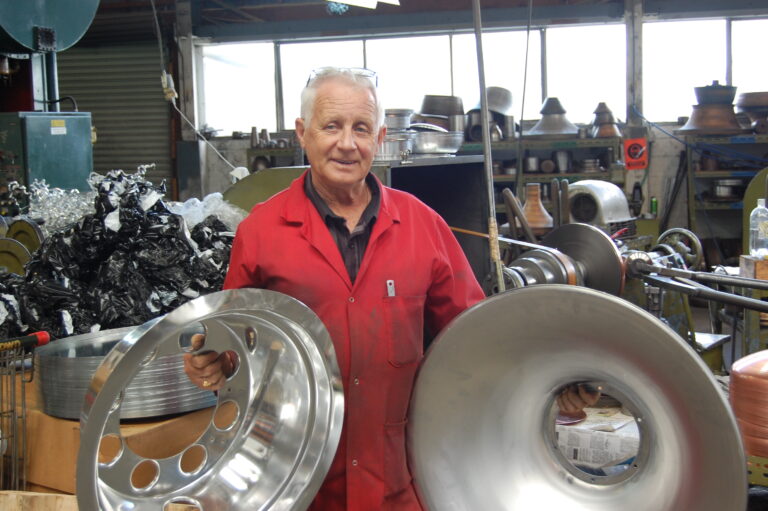
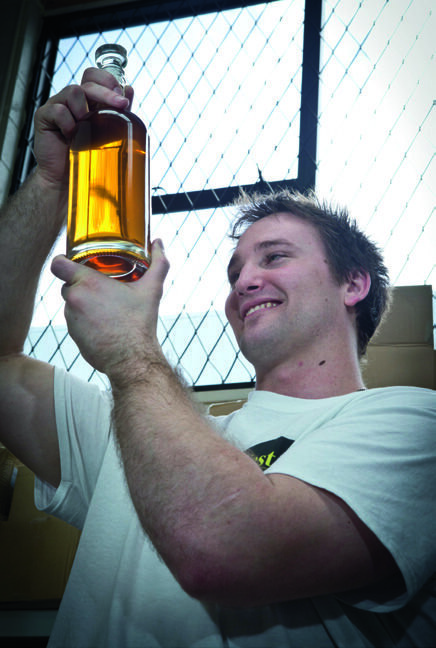
Local homebrew expert Allister van Mil of Home Brew West who has given Shed magazine readers expert guidance through the beer-brewing process now takes us through the process of distilling. “I am using a pre-packaged distilling kit because the correct amount of high-quality sugar is available with activated carbon pellets in it.
The pre-packaged yeasts have also been correctly calculated. This whole process takes about five days. The endpoint will be to make a whisky and a Japanese-style melon-flavoured liqueur.
You will see distilling spirits is a little bit more involved than just mixing flavours with spirit. First, you have to make what is called the wash. This is the mixture of sugar, water, and yeast which ferments over a period of days and then goes into the still for further refining to get the high alcohol percentage which makes spirits.
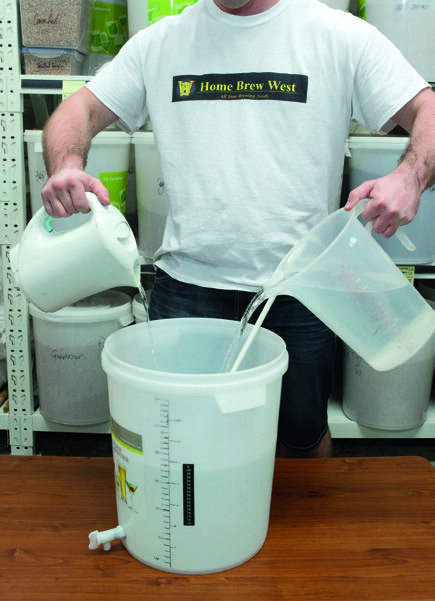
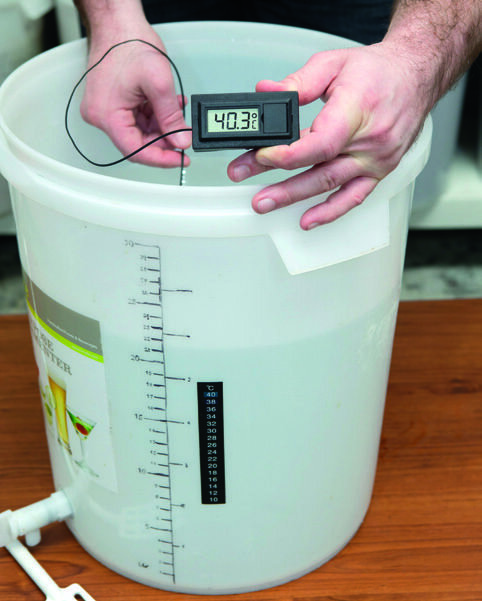
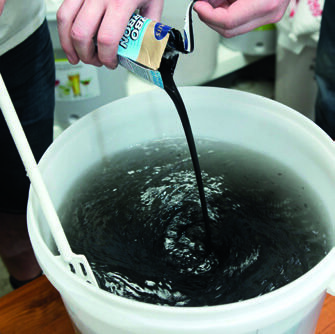
Into a barrel goes some water. Then we top this up with hot water—I did it from the kettle—to the level of 21 litres and to a temperature of 40 degrees C. Check this with the thermometer. When we add our sugar and other materials, the temperature will drop slightly and be at the optimum for fermentation, about 30 degrees C.
I take six kilograms of the prepared sugar—this is high-quality sugar and you will see it’s been prepared for the distilling kit with pieces of high-activated carbon. With the wash, if you are doing about six kgs of sugar, you will get a mixture after fermentation of about 16 percent alcohol. If you use eight kgs of sugar, you will get a mix of around 20 percent alcohol. Roughly every extra two kgs of sugar on top of the basic six kgs creates roughly 2-2.5 percent extra alcohol. The extra sugar will require extra days for fermenting.
The quality you get depends on the ingredients you use and proper A1 sugar will give you a better yield than, say, budget sugar which is bulked up with sweeteners, etc.
Sugar goes in
Sugar
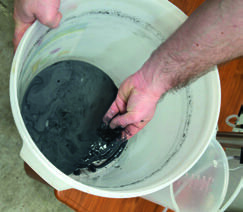
Pour the sugar in and give it a good stir up.
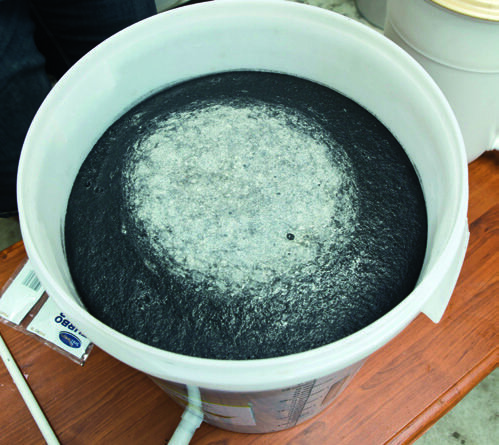
The water becomes a kind of a grey/black from the high-activated carbon pellets in the sugar. Activated carbon is described by Activated Carbon Technologies as carbon that has been treated by chemical activation or activation by high-temperature steam.
Activated carbon has an extensive network of pores and an extremely high surface area (typical range is 300 to 2000 square metres per gram of activated carbon) with these pores able to absorb chemical contaminants in gases or liquids. The more carbon you add to your spirit, the cleaner it is going to become.
High-activated carbon which goes into the barrel absorbs the impurities as they are made. A further sachet of activated carbon is also poured in. It makes it nice and black and inky so your final product basically is just a black liquid which will ferment, with bubbles coming out.
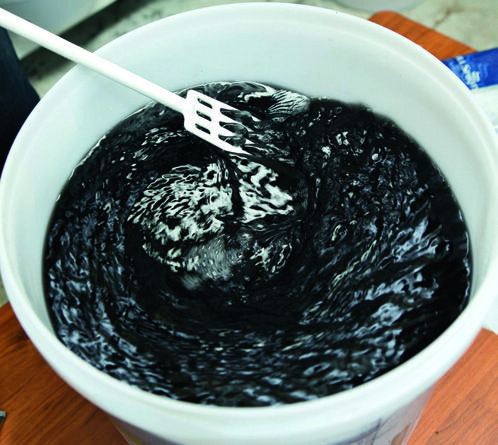
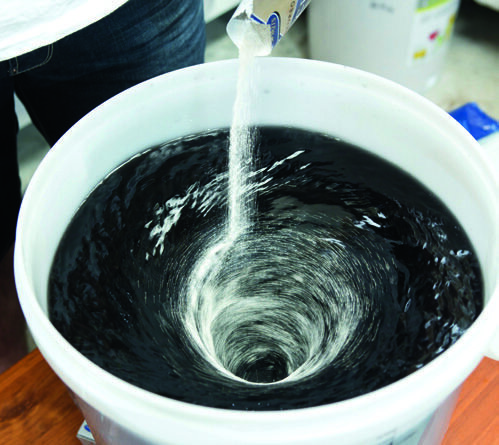
Stir the wash to create a whirlpool before pouring the liquid, activated carbon into the middle. Push it out to the edge of the barrel with a food-safe stirrer.
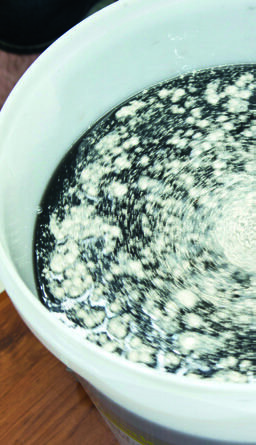
Next, we make another whirlpool for the yeast to be poured in. The sprinkled yeast creates a nice little star galaxy; it initially floats and will be all gunky on top. Now we just give it a good mix for good measure and you can see the bubbles as it already starts to work. In the beginning, all the carbons will surface to the top as a black foam head, called krausen, which you need to stir back in.
Store it with an air-lock on the lid to allow the carbon dioxide gases to escape. In around five days it should be finished fermenting. To check it has finished, you need to use a hydrometer—which should register around 990.
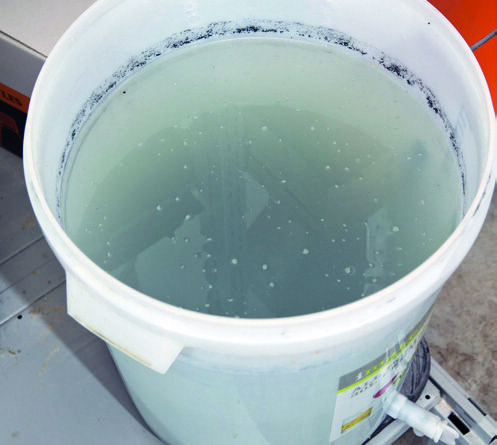
When people boil their wash before it’s actually finished fermenting it will caramelise—they think it’s ready or they haven’t used their hydrometer or they simply estimate it’s stopped bubbling by guesswork. Once the wash has stopped fermenting we use a clearing agent. In this kit there are two sachets, Part A and Part B. Any blackness left will start to clear; you will see it will start to drop down and settle on the bottom.
The reason we want that to happen is that if we have all those carbon particles in the still when the mixture boils, it will release all the impurities that it’s absorbed.
Part A will sit for an hour when an inch will clear from the top; once that inch has cleared after the hour, you pour part B in and dip your stick in that inch and stir very gently and lightly. Within about an hour it will start to clear rapidly, then within 24 hours, it will be a clear wash you can use. Check again with the hydrometer that it is a reading of 990.

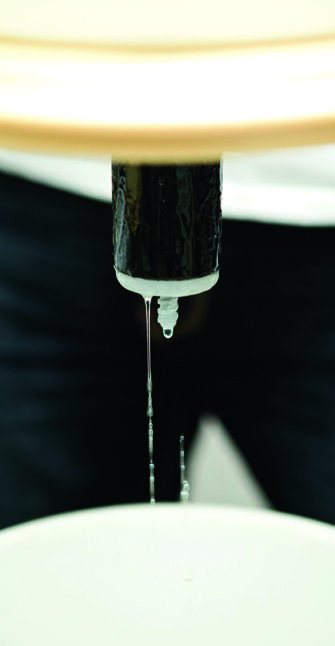
Ugh. Chemical smell of poisonous methanol, first out of the still
Siphon
Your pure wash is now basically a mixture of sugar and water that has fermented out, sitting at around 16 percent alcohol. We need make it into something with higher alcohol that is more drinkable and tastier, because right now it tastes something like a yeasty wine.
To get the wash out of the barrel, I siphon it into a container for transfer to the still so we don’t stir up the sediment. I take the first 500 mls or so off and discard them, because it will be an initial black squirt of carbon-coloured wash that comes up from the bottom.
Once the siphoning starts, the line clears quite quickly and this can be collected. You can see at the bottom of the barrel there is the black sediment left which incorporates carbon lumps and some residue of yeast which we want to drop out.
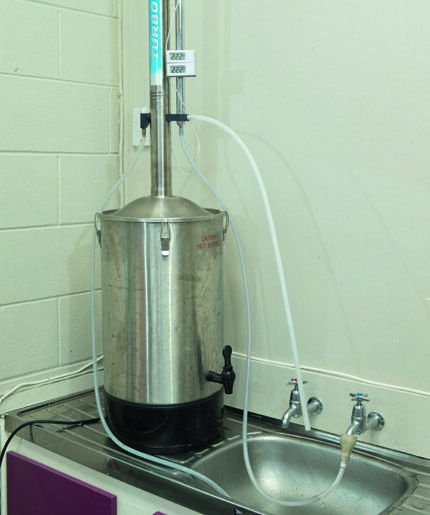
Still
Distilling works because alcohol has a lower boiling point than water (boiling point of ethanol or grain alcohol (C2H50H) at 1 bar atmospheric pressure is 78.37°C—chemistry.about. com)
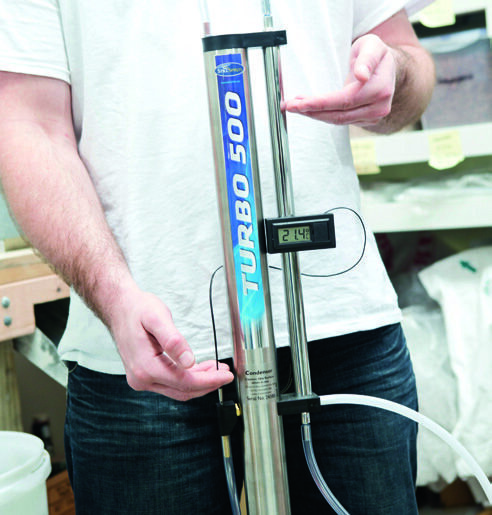
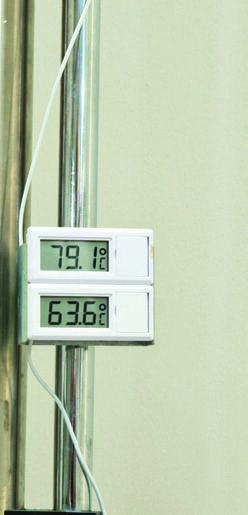
In this reflux still, the steam will come up through here and it will be sitting at 70-86 °C, then cool down as hits a series of ceramic saddles, drop back down, heat back up then goes progressively further up. The time taken to distil around 25 litres will be about five hours.
The still will warm up over basically an hour. With my older still, you will feel the heat rise up the entire column. The two thermometers tell the difference between the top and the bottom of the column. When the steam hits the top thermometer you will see it jump from 30 to 80 degrees C. Newer stills don’t have a top thermometer; it’s not a necessity as they get to a temperature and then sit at that for the duration.
Every time the steam goes up, it hits more and more ceramic particles which minutely cool the water molecules which are attached to the ethanol and drop them away. The process happens multiple times; it’s a reflux still and it is the most common form.
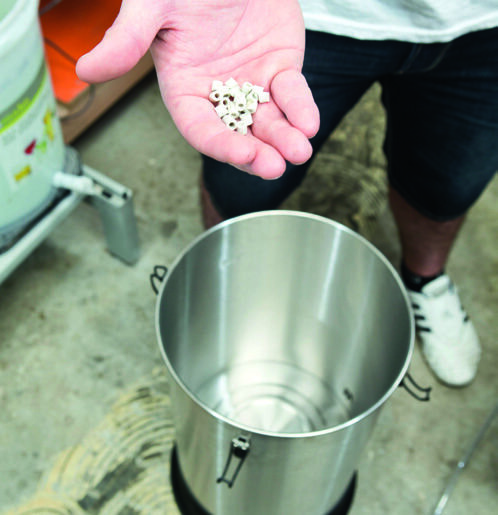
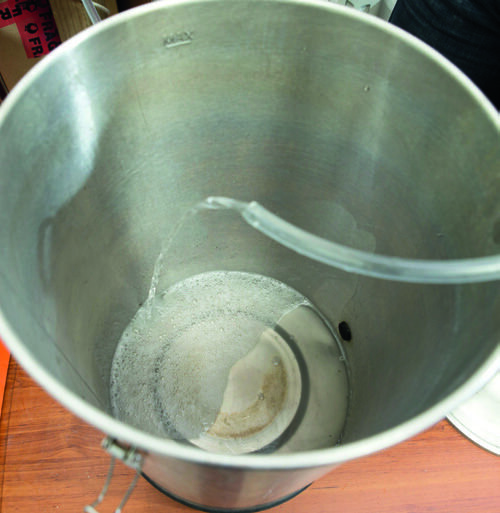
When the steam gets to the top, copper saddles help to remove sulphites, but they only do that at the colder temperatures, so 70 odd degrees rather than 86-ish. A water sleeve cools the steam which will then just condense into alcohol liquid. Before putting the wash in the still, we put small pellets or boil enhancers into the bottom.
Because the element is electric, the base of the still can get hot spots and these ceramic boil enhancers disperse the heat evenly around to stop surge boiling. You will see bubbles starting to come in the wash as it goes in the still. We put in something called distillers’ conditioner to disperse those bubbles which are caused by dextrins or unfermentable sugars. They create froth and can push up through the column, destroying your refluxing and creating a surge boil.
If that happens, you need to continue distilling up to your normal level of say 3-3.5 litres and then just basically put it back in the still and redistill it.
Methanol
The first 10 mls or so that comes out of the still will be methanol which is the wood alcohol which makes you go blind.
It is absolutely essential to take at least the first 50 to 100 mls or so off in a container to discard. It’s clear, it looks the same but it smells different. You’ll smell it’s like a dirty, chemical-like smell, whereas the ethanol that comes after is nice, clean and sweet which is the major difference.
Distilling is the shortest part, but it takes the most attention. Everything else you saw is a do-and-walk away, whereas the still you need to watch. Not constantly, but every 15-20 minutes or so, checking on temperatures you will see adjusting up and down, depending on the water flow.
The temperature is set by water flow through the cooling jacket which could use between 100-125 litres of water. Newer stills use about a third if not a quarter of the amount of water that was used in previous distilling practice. The result will be a spirit that is roughly 90-95 percent alcohol. You can’t physically go above 95.6 percent or if you do, as soon as it is exposed to the atmosphere again, it becomes unstable and absorbs water out of the atmosphere and levels itself back down to 95.6 per cent.
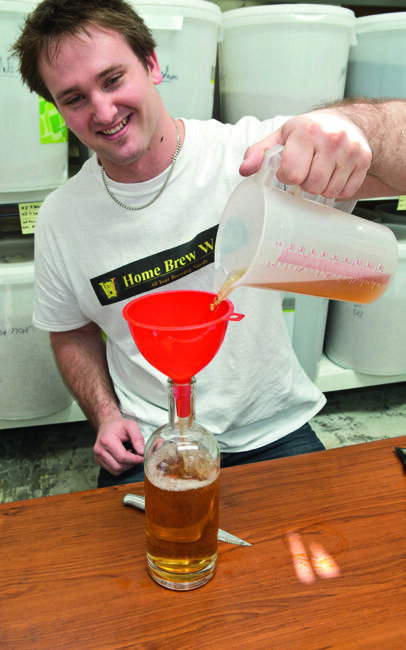
Over the five hours, from a 6 kg wash, we collect around 3.5 litres of pure alcohol. After watering it down to 40 percent, we then put this into another filter system which will again take a couple of days to filter through.
Brew watered down to 45% alcohol
Filter
I filter the whole brew to take away some of the bad-tasting alcohols because when you water it down you’ve got a broader surface area I suppose and anything that is unwanted you can pick up a lot easier.
So by putting the distilled liquor down to about 40 percent to 50 percent alcohol by volume, these filters can cope.
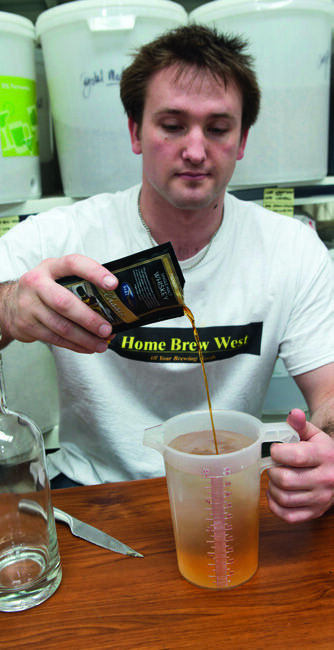
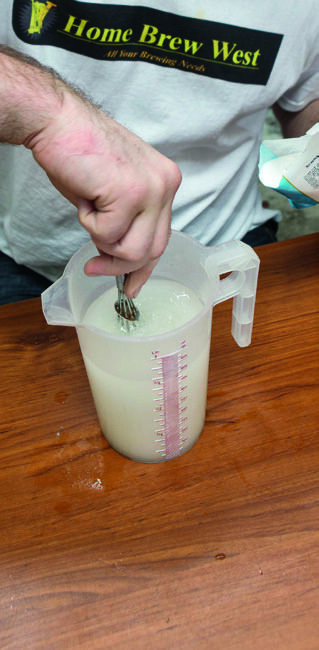
Above 50 percent the salts used to hold the carbon together start to dissolve and you get a carbon dust and a salt dust which starts to form on the bottom of your filter chamber. I use a new carbon cartridge filter on the bottom of a container and the spirits drip through by gravity. To 1000 mls of 40 percent ethanol I add flavouring to make whisky.
The whisky concentrate in a small sachet is, according to label, flavour, natural plant extracts, glucose syrup and stabiliser 422. From a sip, the taste is very close to that of a single malt whisky but much lighter, as if missing that ageing process in a wooden barrel, often flavoured by the sherry it held.
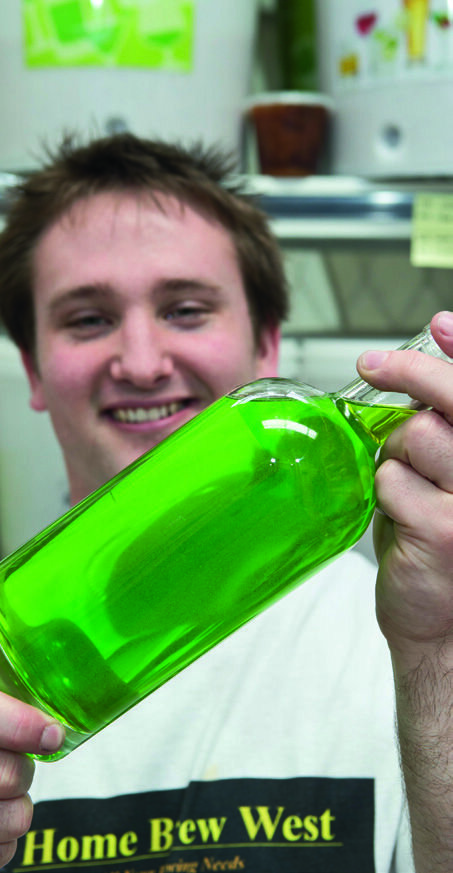
To make the green-coloured melon-flavoured liqueur, it takes 650 mls at 40 percent alcohol to make up a 40 oz or a 1.125 litre bottle.
You add 300 grams of liqueur base and stir which will give it the correct thickness, then you will mix your flavour in and top up with water. Once you have done that there you’ll have a 40 oz of a green, melon-flavoured, Japanese-style liqueur at around 20 odd percent alcohol. A simple process.
What’s legal
New Zealand’s Customs and Excise Act 1996 says goods subject to excise tax or excise-equivalent duties must be manufactured in a licensed area.
The goods broadly speaking relate to alcohol, food containing alcohol, tobacco goods, and motor spirit fuels. But section 68B, Exemption for alcohol manufactured for personal use, says this law does not apply to the manufacture of beer, wine, or spirits in an individual’s private house or dwelling place, but only if and as long as the beer, wine, or spirits are manufactured exclusively for the individual’s personal use and not for sale or other disposition to any other person.
The customs website reinforces this interpretation: (http://www.customs.govt.nz/manufacturing/licenses/exemptions/Pages/default.aspx).
In Australia, by contrast, in relation to the distilling of spirits, for example, a person commits an offence if they make a still, set one up, sell, dispose of or buy a still, have possession, custody or control of a still, if the still’s capacity exceeds five litres and the person is not a licensed manufacturer.