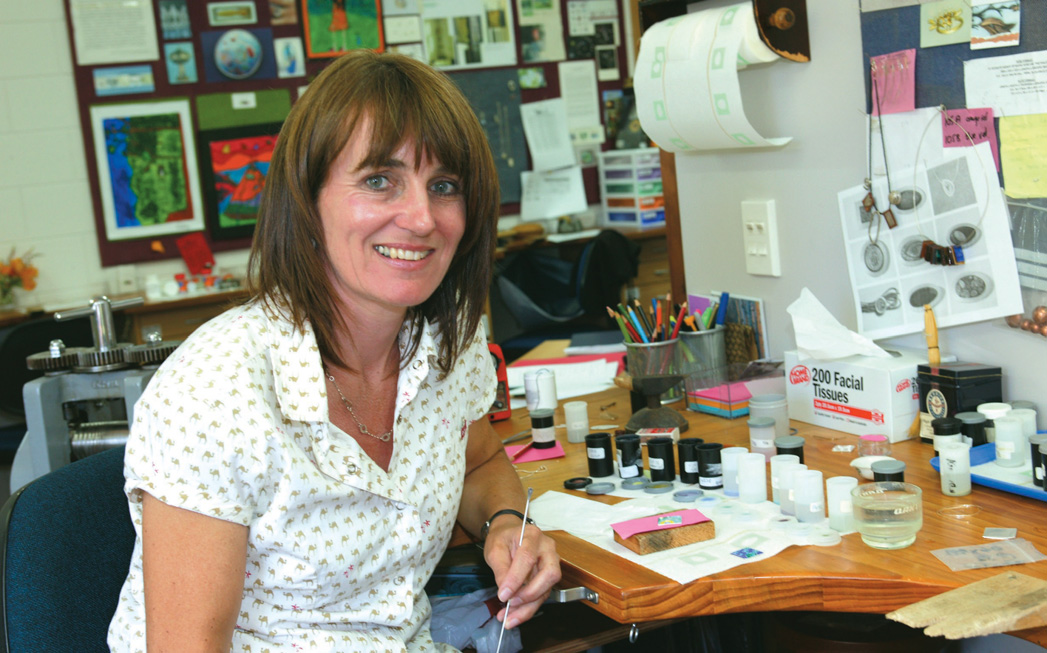
Sally Laing in her studio
Make a Simple Cloisonné Enamel Pendant
Enamelling is an ancient craft which offers contemporary interpretation. Layers of specially formulated, coloured ground glass are fused to metal in a kiln at high temperature. There is a lifetime of possibilities and techniques to explore. I will concentrate on how to make a simple cloisonné pendant in silver and enamel. Almost the same procedure can be followed if copper is used, and personalising the design will make the project special to you.
Cloisonné describes a technique of enamelling where the colours are separated and contained by fine wire shapes which are part of the design. On large scale work the wires may be soldered, but in this small scale piece, they are held in place by the enamel itself. Images are built up over many firings which take only minutes in the kiln, adding the excitement of seeing almost instant results after the quiet, time-consuming design and application process.

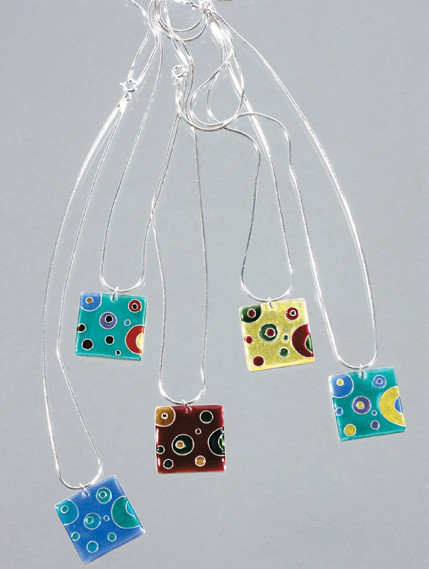
Finished enamelled pendants. Varied colours give different results even on a very simple design
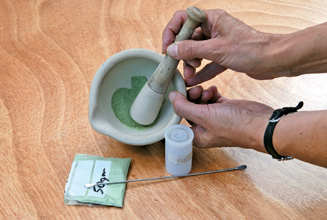
Dry enamel
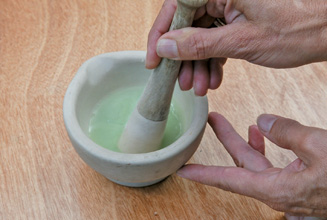
Grinding and washing – milky water will be poured off
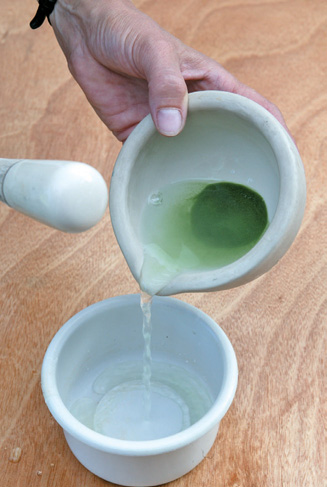
Pouring water off
Cloisonné design
Cloisonné enamelling is perfect for designs which have blocks of colour, so a simple, coloured-in pencil drawing can be used. In addition, the wires can be used as the linear component of a more in-depth design, involving other techniques such as colour blending. Some artists draw their designs exactly to scale, work the wires onto their paper and transfer them onto their metal. Personally, I prefer to work from drawings as ideas, but work the wires directly onto the metal – moving them around leaves room for artistic adjustments to be made when the scale of the wires to the piece are seen.
Choose wire to fit the piece you are working on. The wires are rectangular in section, usually between 0.5 – 1mm high. The thickness should correspond to the look you want. The same height wire must be used across your piece. Round wire can be rolled down in a rolling mill, or if one is not available it is possible to use round wire. Cloisonné wire is best made from fine through the process. It is important to be comfortable and relaxed, so ensure you are working in good light, at a clean bench on a comfortable chair. You should sit at table height, as if eating a meal rather than at jeweller’s bench height, so a high-low chair is useful. You will need frequent access to running water, so best have that near at hand. Your kiln should be running at approx 900° C. If you have no pyrometer, this is estimated by the colour of the interior, which should be an orange yellow red (not a blue-red, which is cooler).
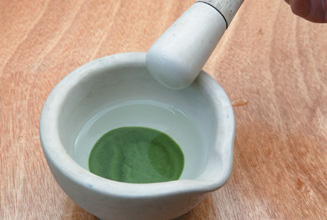
Clean enamel
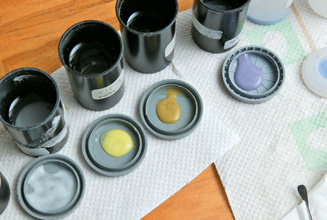
Enamels in lids, your palette
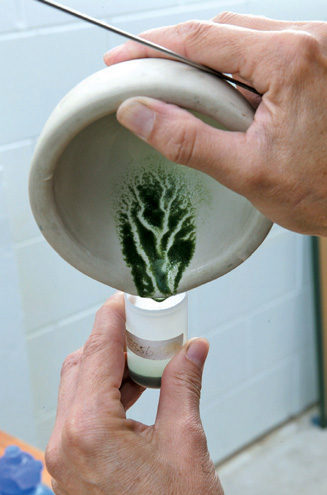
Transferring into labelled pot. Tip water back in and toss like a pancake to get last grains
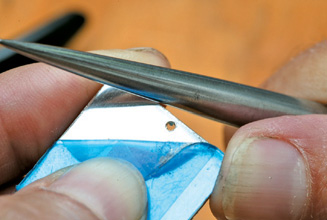
Burnish the silver edge upwards slightly to give and edge for enamel to adhere to
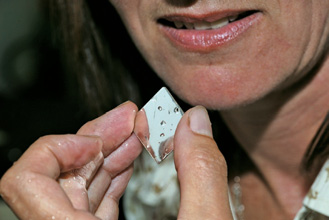
Water forms balls on a greasy surface
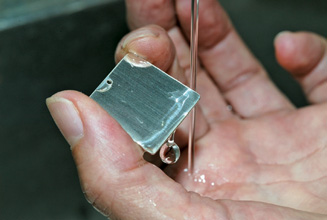
Water “sheets: over a clean surface
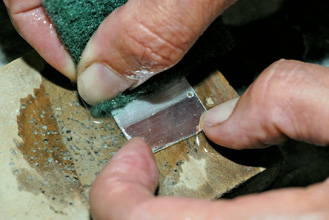
Scouring with scotchbrite – note texture
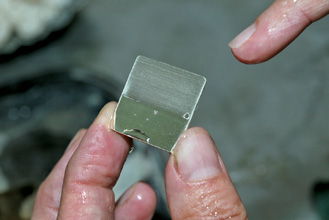
Water sheeting over clean scotchbrited surface, and balling on unclean surface
Preperation
Cleanliness of the workshop, tools and materials is vital for a good result, so it is worthwhile spending time setting up. New enamel should be washed and ground to an even consistency in a porcelain pestle and mortar. Dry enamel is put into a pestle and mortar and is rinsed several times in clean water at a sink. Tip cloudy water away and re-wash the enamel (as if washing rice) until the water is clear. It is then transferred into the labelled storage pot (colour name and code) ready to use. Tip silver (not sterling), so that there is no grey oxidation in firing.
I have chosen a simple design to demonstrate technique, but clearly, doing your own design will be more fun. Simple definite shapes are a good starting point – and varying the colours will give infinite possibilities to something even as simple as circles on a background, as can be seen by the five pendants demonstrated.
Setting up
Enamelling on the jewellery scale requires patience and perseverance. It is possible to get fine results working very directly, but unless some basic rules are understood, frustrating problems in your results may occur, which, unless understood, cannot be rectified. I will suggest some common problems and their solutions at the end, and highlight important points as I go a bit of water back and jiggle to get last grains into the pot, rather like tossing a pancake.
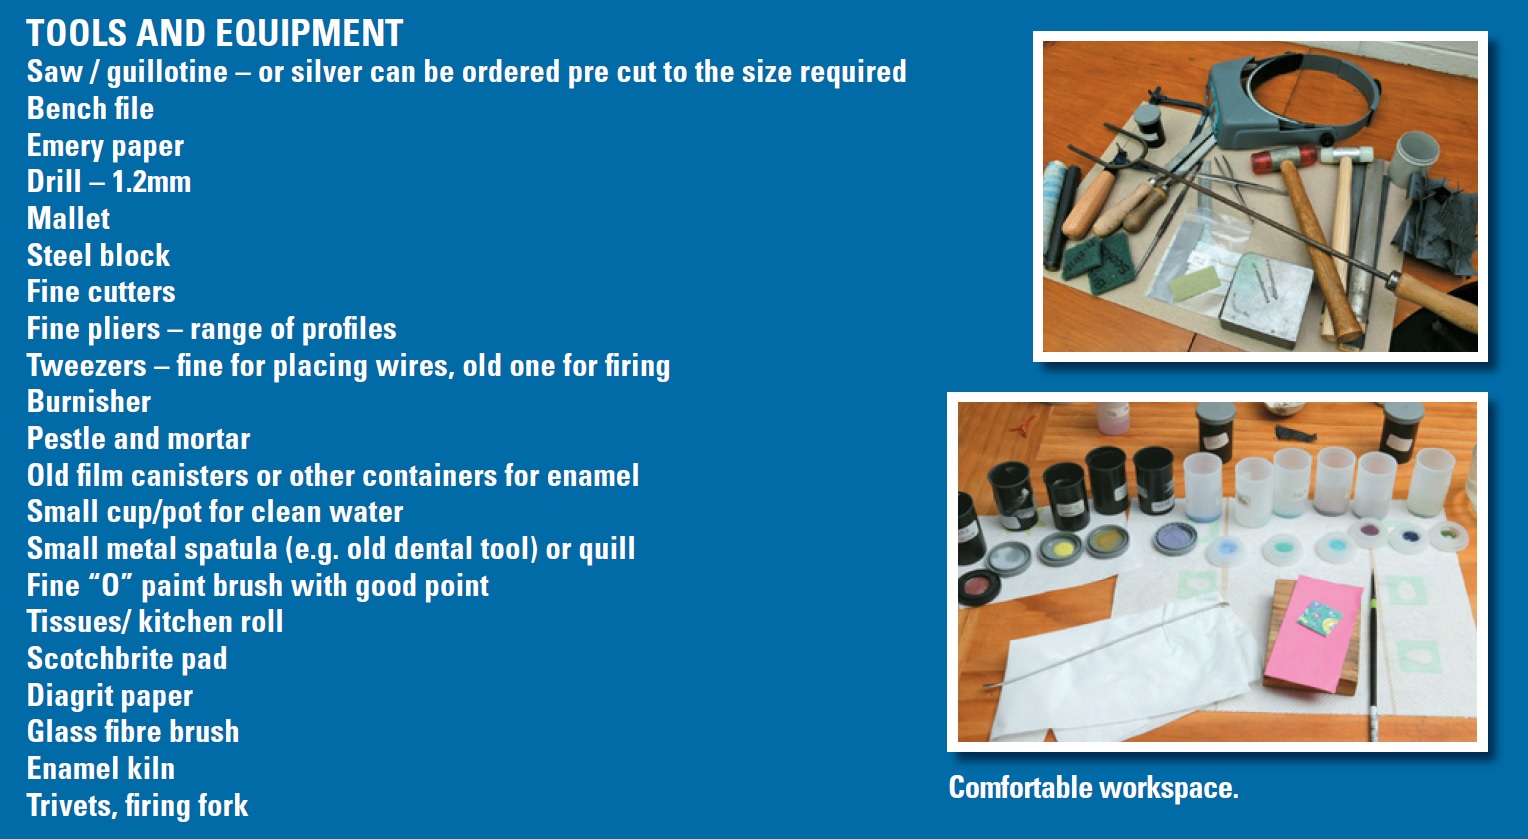
Get all your colours ready before proceeding. Set up your workspace – spoon a little of the colour into the lid and use these as your “palette”. I always have tissue or kitchen roll handy for blotting and sit the piece to be worked on a small piece of paper, raised slightly on a wooden block.
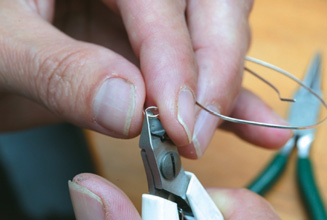
Cut out formed cloisonné shape with side-cutter
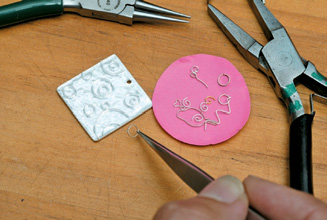
Place formed cloisonné wires on the top side. Note pendant has already been fired with clear enamel (flux). use a little gum to hold wires
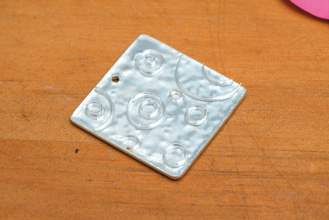
Fired cloisonné wires in place ready for colour to be applied
The metal
First decide on the size and shape your pendant will be, and cut it using either a jeweller’s piercing saw or a guillotine. Take care not to unnecessarily mark your very soft fine silver. Drill a hole along the top edge (1.2mm – 1.5mm) ensuring it is not too close to the edge.
The silver should now be flattened, using a soft mallet on a steel block. Enamel should have an edge too, so file the sides, rounding the pointed corners and keeping your file perpendicular to the piece. Sand the edge smooth, leaving the slight burr that occurs in the process. Then burnish both edges upwards slightly to give a definite, though tiny edge for the enamel to adhere to. The protective plastic covering on the metal can be left on to this stage.
It is vital that the metal is clean and grease-free, which you can see when water “sheets” over the whole surface without forming balls. “Degreasing” can be done in a number of ways, bearing in mind that any material will alter the reflective nature of the silver.
1. If the silver is new and unmarked, spitting /licking on the piece is a great way to degrease (don’t cut your tongue). Run it under water afterwards to check that the water “sheets”.
2. Use clean, Scotchbrite pad under water – this will mark the silver, but the texture can be used as a design element.
3. Use a glass brush under water, as above.
With all these methods, do not touch the surface after rinsing any debris off. Hygiene is really important if you want to get clear colours. I dab it on kitchen roll first and sit it on a small piece of paper that I can move without touching the piece.
If you wish to polish the silver before enamelling using a polishing motor this is fine. But you must make extra sure the piece is thoroughly clean with no polish residue otherwise the enamel will be cloudy.
Put your silver onto your working block and you are ready to get going.
Applying enamel, wires
It is important that there is enamel of equal thickness on both sides of the pendant. This is because when the piece is fired, the metal becomes annealed (softened) and the enamel is brittle (as it is glass). Counter-enamelling, or putting enamel on the back, stabilises the piece. If you treat it as you would any ceramic or vitreous object, it will last forever. The enamel colours will never fade so you will be making a potential heirloom. Building the layers up on the top side prevents air bubbles getting trapped, gives control of colour and tone. The piece demonstrated will be fired 6-7 times.
First apply a thin, even layer of clear enamel (this is known as “flux” in enamelling but is an enamel) to the entire surface of the top side of your pendant. Take a small amount of the wet, clear enamel in the spatula, and dab a little, but not all the water from it. Hold this in your left hand (if you are right-handed).
With the slightly damp paint brush, pick up a small amount of this clear enamel and put it onto the silver. Do not “paint” with it – you need to maintain the point of the brush. Gently push the grains into place, and repeat until the whole surface is covered.
Control of water is everything – too much, and the enamel will “splodge”, too little, and it will be difficult to spread. Use a tissue to blot or add a tiny bit of water from your brush as necessary. Tap the piece slightly so the grains settle, and blot as much water as possible from the side. Put the piece onto a trivet to dry on top of the kiln. NB Support it from the sides so the piece does not stick to the trivet.
Solving Problems
1. Enamel won’t adhere to silver? It could be a greasy surface or the enamel applied too dry.
2. Grey discoloration of metal? Sterling silver may have been used in error and firestain will have built up, discolouring the enamel as well as the silver.
3. Bubbles in enamel once fired? i) Enamel is not packed tightly enough (tap before drying to settle the grains). ii) Dirty or old enamel. Regrind and wash it and if problem persists start with new enamel. iii) Dirty metal.
4. Grey spots or holes in enamel? i) Dirty enamel or metal (as above). ii) It has been over-fired. iii) The enamel was wet when put into the kiln. iv) Inadequate glass-brushing after sanding.
5. Sugar-like surface? Underfired – re-fire for longer.
6. Cloisonné wires will not all grind down evenly? They may not have been perpendicular to the base, or there was uneven pressure when sanding.
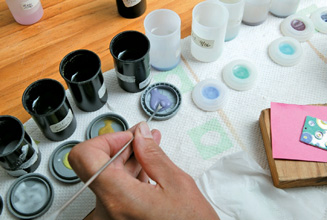
Pick up enamel onto a spatula. Dab a little water off, leaving enamel only damp
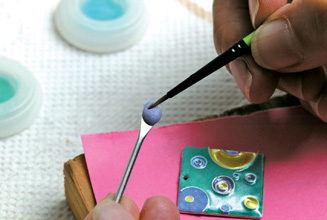
Pick up a small amount of enamel on the brush
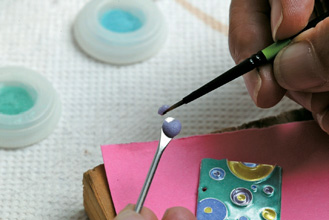
Maintain the point of the brush
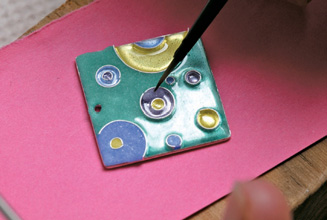
Apply colour. Images are built up over many firings which take only minutes
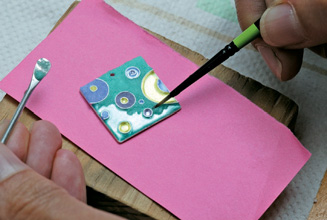
On the pendant, spread grains, working them against the cloisonné
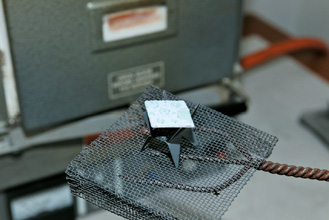
Dry enamel piece ready for firing
Firing
Fire the piece in the kiln until it is smooth – about 45 seconds at 850° C. This will depend on your kiln, the trivet mass, and the size of the work. The enamel goes through an “orange peel” stage just before it fuses. It should be taken out of the kiln as soon as the surface is smooth. Leave on the side until it is cool.
If there is no kiln available, you can fire your piece with your torch using a large flame. It is important that the whole piece heats up at an even rate, which can be assisted by making yourself a “cave” for the pendant with fire bricks to contain the heat. Be confident with your firing – the piece will appear to crack, but if you continue, it will fuse again. Stop as soon as you have a glass finish, and allow to cool slowly.
The second layer is the back. For this, repeat the process as before, but use a thick layer of enamel, which can be either flux, which is clear enamel (to leave the silver colour) or a colour.
Wires
You are now ready to form your cloisonné wires. Using fine pliers – round for curves, flat for straight lines and corners – form your wire shapes. Hold the blades perpendicular to the wire so that the shape sits flat (this is vital).
Get all your wires ready and roughly placed onto the fluxed, silver-coloured, clear top side of your piece, then glue with gum trigacanth (Klye-fire).
When the piece is dry, fire the piece until the wires have just sunk into the thin top layer of clear enamel. The wires are now secured in place, making the next stage much easier.
Colour
Now carefully place the coloured enamels inside the wires. Pick up some enamel onto your spatula, dab a little water off, leaving the enamel only slightly damp. Maintain the point of the brush. About half fill the cells. Take care to pack the grains well, and for them to be in close contact with the wires.
Dry, and fire as before. The process of filling is repeated until the enamel reaches the top of the wires. Colours can be laid on top of each other to blend if you want subtle shades.
The enamel and wires need to be ground down at this stage. This exposes the widest point of the wire and gives a good quality of line, with no enamel over the wire. Use diamond paper for this, then wash the whole piece under running water, with a glass fibre brush to remove micro-dust from the surface, taking care not to get the fibres in your fingers.
Shine
A final firing to bring back the shine completes the enamelling. The colours develop as it cools and the surface should be glass-like.
To finish, carefully polish or burnish the edges (keeping clear of the enamel), and attach to a snake chain using a silver jump ring. The finished pendants show how varying the colours will give different results even on a very simple design such as this.
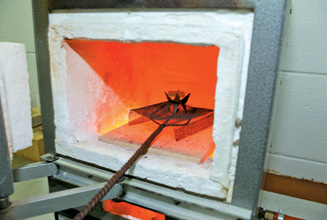
Place the piece in the kiln
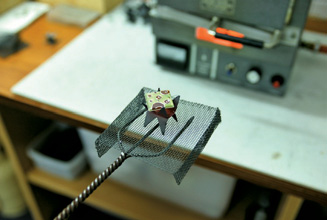
Fired. The colours develop as it cools and the surface should be glass-like
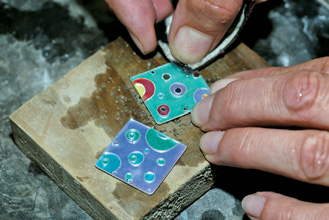
Grind with diagrit paper under water to expose the wires
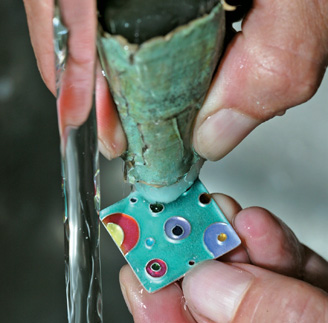
Wash well under running water with a glass-fibre brush

